Creating different workspaces of documentation enables you to tailor the content based on your knowledge base to specific Readers. Similar to providing documentation in different languages for readers in specific regions, using Workspace allows you to create separate documentation for separate versions and iterations of your product.
This segregation helps to ensure that readers have access to the most relevant and up-to-date information.
The project workspace is different from the article versions. The project workspace is an entirely separate entity containing categories, articles, languages, access settings, roles, navigations, feedback manager, and more.
Example
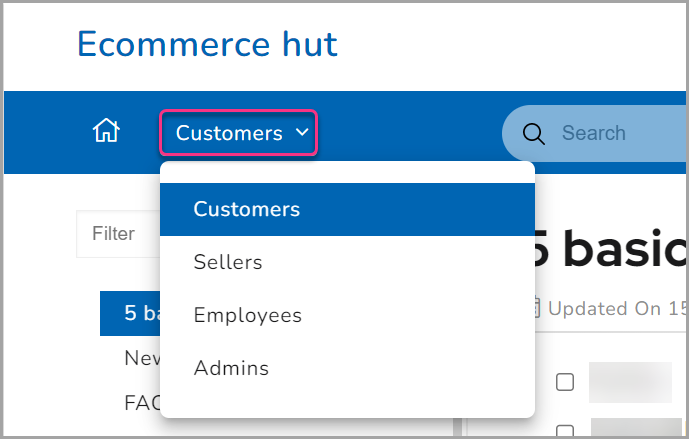
If you have a Document360 project to serve self-service documentation for an e-commerce platform, you would need separate documentation for customers, sellers, employees, and admins. Instead of buying separate projects in Document360 for each documentation, you can utilize the project workspaces to accommodate and distinguish your content as versions in a single project.
Purchasing Workspace addons
You can view the purchasing workspace addons information.
- Go to Settings -> Knowledge base portal -> Billing for viewing all purchasing details
| Standard | Professional | Business | Enterprise |
|---|---|---|---|
| ⨯ | ✓ | ✓ | ✓ |
Note:
Additional workspaces require purchasing them as add-ons. For further details, visit our pricing plans.
Why should I use workspaces?
Using different workspaces in your documentation ensures that the readers have access to the most relevant information, improves the reader experience, aids in better organization, makes maintenance straightforward, and allows for better resource management.
Relevant information: Separate documentation workspaces for specific readers allow them to access their desired information.
Better organization: Team accounts can use workspaces for better content organization and management.
Team collaboration: It will be easier for team accounts to work together when you have different workspaces for each reader base. This includes assigning peer reviews, providing feedback, and updating the amendments.
How do I update the workspace slug?
-
Go to Settings -> Knowledge base portal -> Localization & Workspace -> Localization & Workspace
-
You can find the list of workspaces available in the project
-
Click Edit (🖉) on the right, and the Edit version blade appears
-
Update the slug, in the Slug URL field
-
Once done, click Update
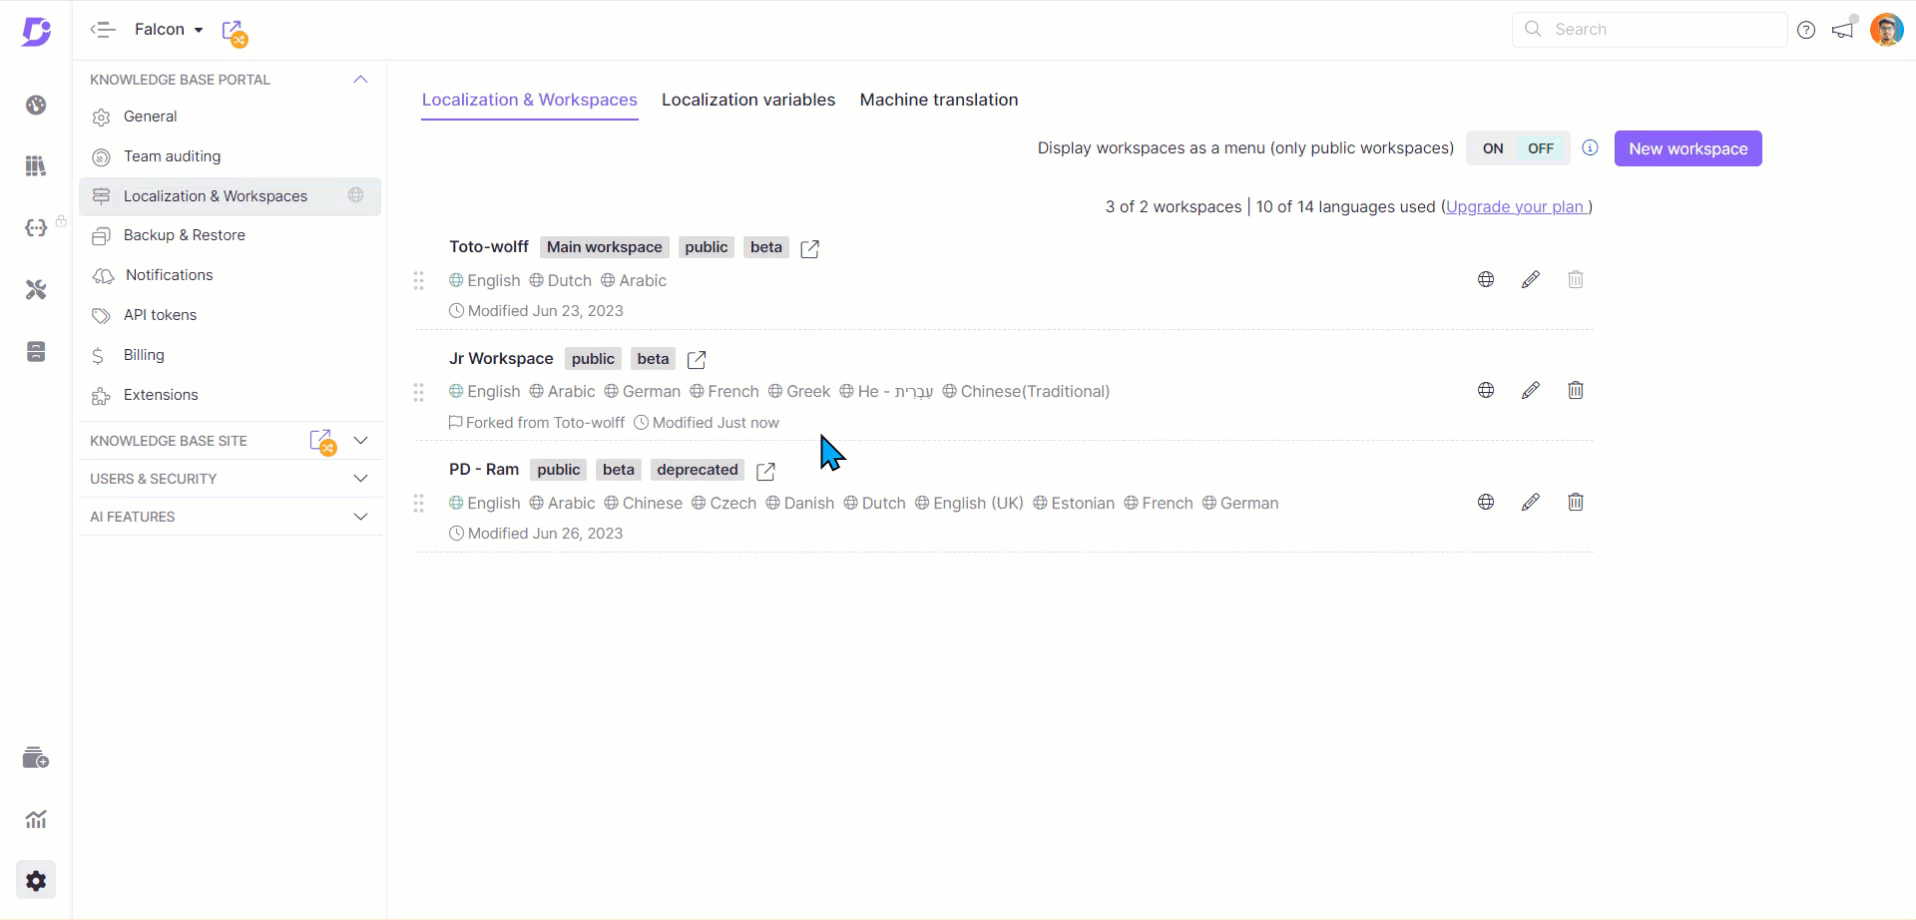
- A confirmation popup appears
- If you want to set up a redirection rule for the slug change, select the Set redirect rule for the updated slug checkbox
- If you do not want to set up a redirection rule for the slug change, uncheck the Set redirect rule for the updated slug checkbox
By default, this checkbox is unchecked.
- Click Yes, and the workspace slug will be updated