Importing article content directly from PDF files helps streamline the process of building your knowledge base. Document360 supports importing text-based PDF files, including PDFs that contain images, allowing you to bring pre-written content into your knowledge base.
Document360 does not support scanned PDFs, password-protected or restricted files, or PDFs with multi-column layouts. When certain fonts or styles are not supported, default editor formatting is applied to maintain readability.
Plans, credits, and limits
Import articles from PDF is available for New Business and New Enterprise plans. Each plan includes a monthly allocation of import credits:
Business: 200 credits/month
Enterprise: 300 credits/month
For trial plans, the Import Article from PDF feature includes 25 credits, valid for the 14-day trial period.
Credits reset monthly with no rollover - unused credits expire at the end of each month.
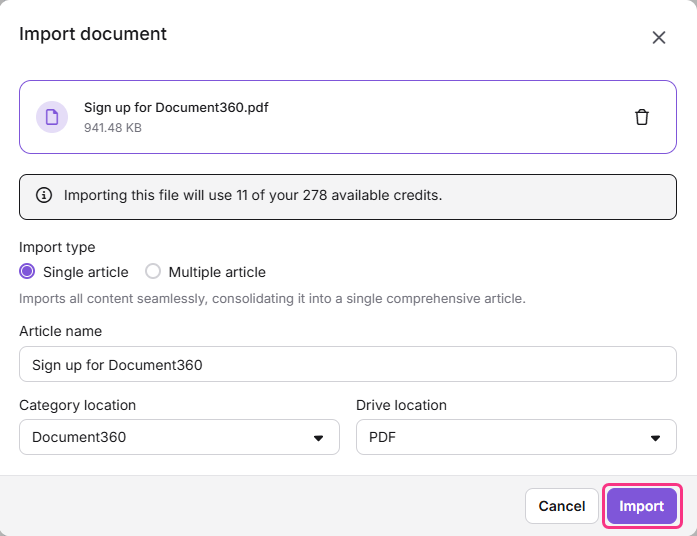
Your available credits and required credits are displayed in the import modal before starting any import.
Ensure the size of your PDF file is under 30 MB/300 pages.
If you don't have enough credits, the import action will be disabled until you purchase additional credits or wait for the monthly reset.
Document360 also supports the creation of articles from Word (
.docx) files.The import articles from PDF feature is not available if you are on our Legacy plans.
Importing PDF files
Importing a PDF file in the Advanced WYSIWYG editor
Add your pre-written content into Document360 by importing PDF documents directly into the Advanced WYSIWYG editor:
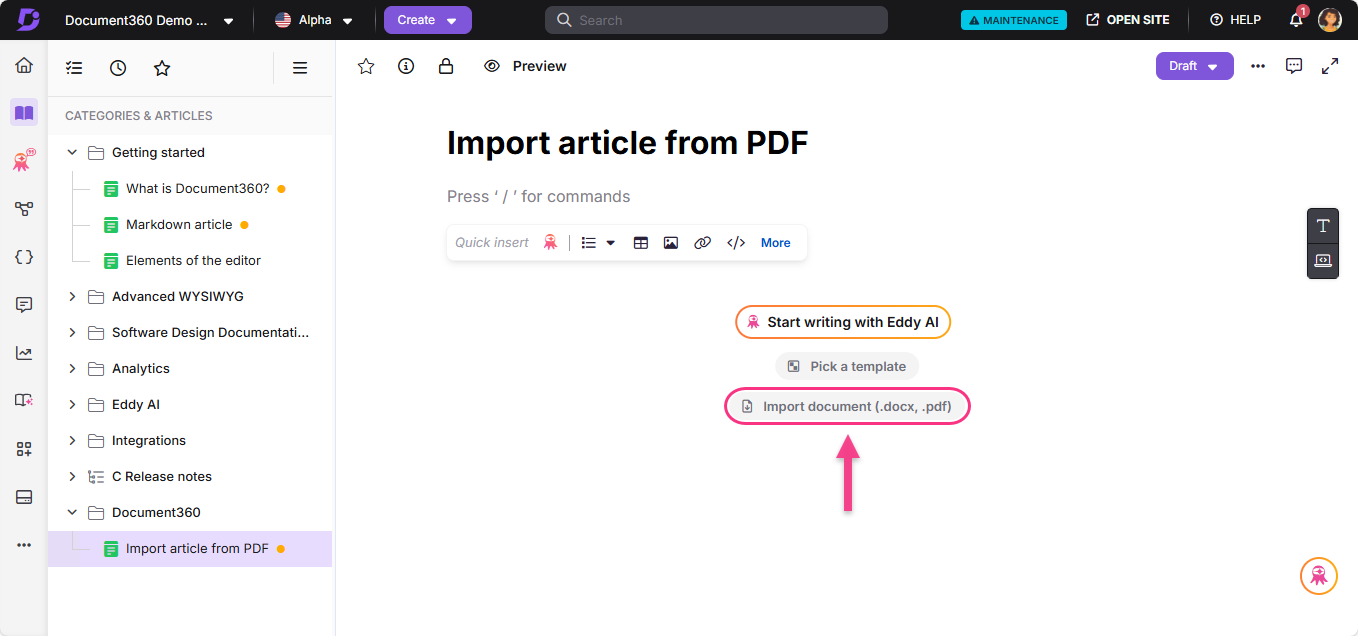
Open an empty article in the Advanced WYSIWYG editor.
If the article is empty, the Import document option will appear.
Click Import document.
The Import document dialog will appear.
Upload a PDF file using drag-and-drop or the Upload a File option.
Click Delete icon to delete the uploaded file if needed.
Click Import to start the process. You’ll see a toast message confirming that the import is in progress.
The article name and slug will be auto generated based on the uploaded file's name.
NOTE
The Import document (PDF, DOCX) option is available only when the Advanced WYSIWYG editor is selected as the default editor in your workspace settings.
Importing a PDF file as a single article
To import a .pdf file as a Document360 article:
Log in to the Knowledge base portal and select your desired project.
Navigate to Documentation () in the left navigation bar.
Navigate to the desired category in the Categories & Articles pane.
To start the process of Import document, follow any of the given options:
Click the More () icon next to the category name and select Article > () Import document (.docx, .pdf).
Click Create in the top navigation bar and select Article > () Import document (.docx, .pdf).
Click the Create article dropdown in the top-right corner and select Article > () Import document (.docx, .pdf).
Click Upload file from my device to import the PDF from your local storage or drag and drop the PDF source document. By default, the Single article option will be selected in the Import document dialog. If the PDF contains more than 300 pages, the import option automatically switches to Multiple article.
NOTE
Only one PDF import can run per project at a time. If any user in the project is importing a PDF, other users cannot start a new import until the current import completes. If another user attempts to import a PDF during this time, an error message is displayed indicating that an import is already in progress.
Document360 automatically populates the Article name and Category fields based on the filename of the source document and the category you selected in step 3. You can edit both fields if needed.
NOTE
If the article name is manually updated during the PDF import process, the change will not be captured in the Team auditing.
Select the location where your media files should be saved from the Drive location dropdown menu.
Click Import to start the process. You’ll see a toast message confirming that the import is in progress.
Once the import is complete, a success message confirms the process. Click Go to article to navigate directly to the article that has been created.
NOTE
Images from the PDF document will be uploaded as individual files in the selected Drive folder.
Importing a PDF file as multiple articles
You can split a single PDF document into multiple articles based on heading levels detected in the file.
Log in to the Knowledge base portal and select your desired project.
Navigate to Documentation () in the left navigation bar.
Navigate to the desired category in the Categories & Articles pane.
To start the process of Import document, follow any of the given options:
Click the More () icon next to the category name and select Article > () Import document (.docx, .pdf).
Click Create in the top navigation bar and select Article > () Import document (.docx, .pdf).
Click the Create article dropdown in the top-right corner and select Article > () Import document (.docx, .pdf).
Click Upload file from my device to import to import the PDF from your local storage or drag and drop the PDF source document.
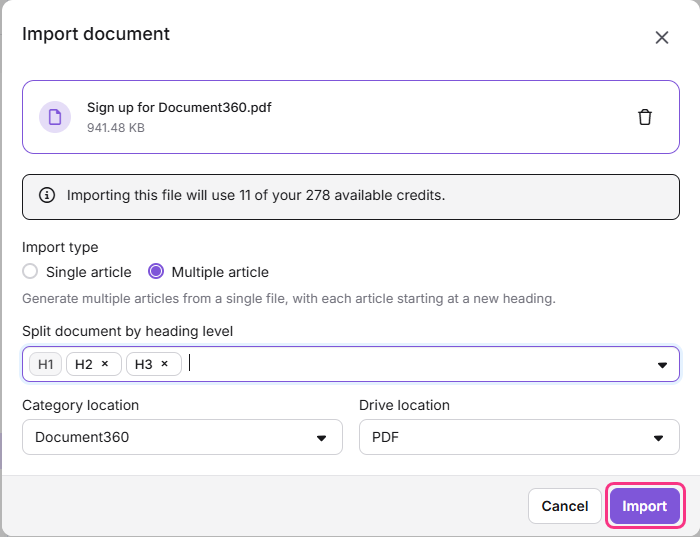
Select the Multiple article tab in the Import document dialog.
Select the location where your media files should be saved from the Drive location dropdown menu.
Select the heading levels (for example, H1, H2…) in the Split document by heading level field to control how the PDF is divided into articles. By default, H1 is selected and cannot be removed. For example:
If only H1 is selected, a new article is created for each H1 heading.
If both H1 and H2 are selected, a new article is created for each H1 heading, and each H2 section within an H1 is also created as a separate article. This is helpful when your document has multiple subsections that you want to organize as individual articles for better clarity and navigation.
Click Import to start the process. You’ll see a toast message confirming that the import is in progress.
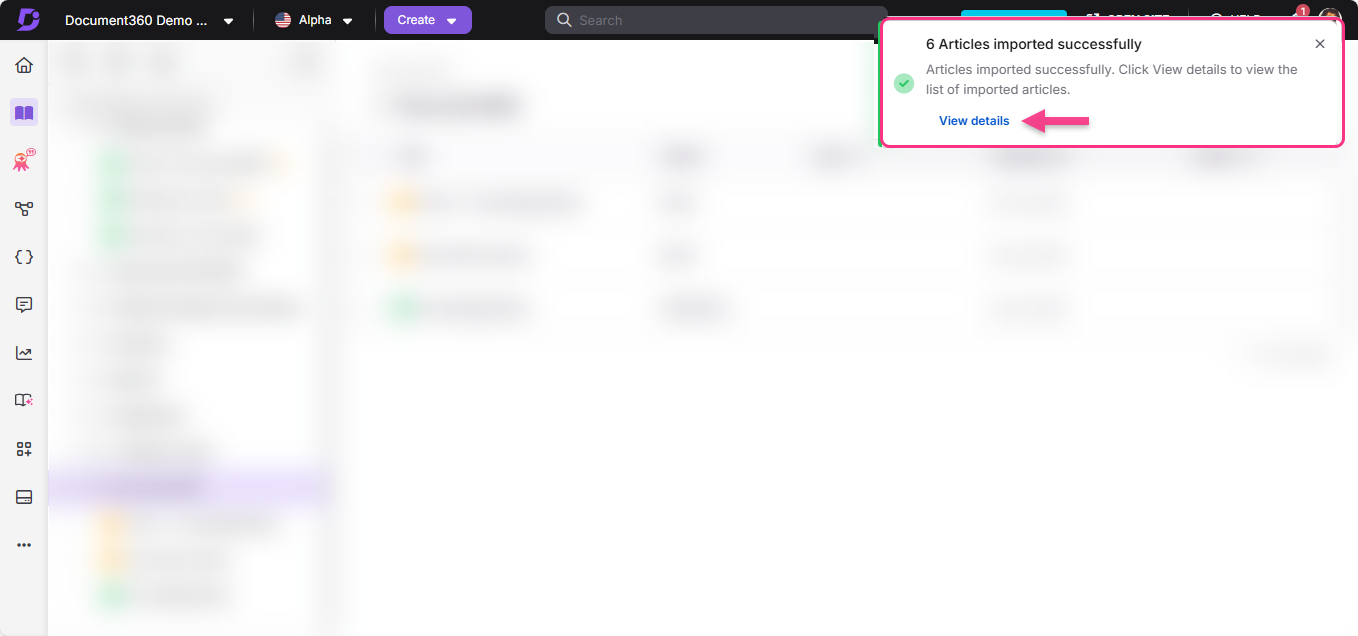
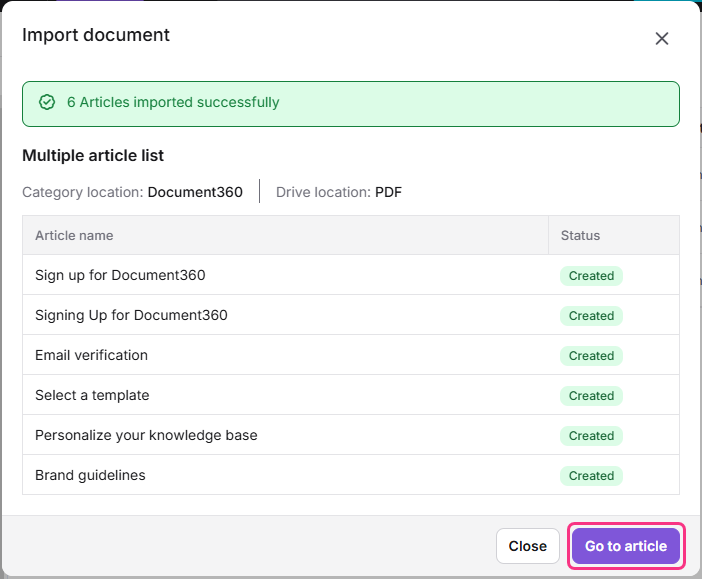
Once the import is complete, a success message confirms the process and displays the total number of articles imported. Click View details to see the list of articles along with their import status.
Click Go to article to navigate directly to the first successful article created during the import.
NOTE
Images from the PDF document will be uploaded as individual files in the selected Drive folder.
Feature availability and current scope
Importing articles from PDF is now available as part of the standard product experience. The feature is designed to help teams quickly convert PDF content into editable articles while preserving core structure and readability.
The import process prioritizes common content elements such as headings, paragraphs, lists, tables, images, and links. In some cases, PDF-specific formatting or complex visual elements may be simplified during import to ensure consistency and editability within the editor.
The following behaviors may be observed when importing content from PDF files:
Emojis and LaTeX-based expressions may be imported as plain text or omitted.
Checklist-style formatting may be converted into standard lists.
Charts, shapes, and other decorative graphical elements are not imported.
Glossary terms, Snippets, and Variables are imported as regular text.
Tables and lists that span multiple pages may be split into separate blocks.
Hyperlinks where the visible text differs from the actual URL may be replaced with a placeholder.
Nested list elements, such as images within lists, may not always render inline.
Images are imported at full width and, in some cases, may appear more than once.
These behaviors are expected when working with PDFs that rely heavily on visual layout or advanced formatting. The imported content remains fully editable, allowing teams to refine formatting and structure as needed after import.
Support for additional PDF elements and layout scenarios may be enhanced over time.
FAQ
What is the maximum file size for PDF files that can be imported?
The maximum supported file size is 30 MB or the first 300 pages, whichever comes first. Each imported page consumes one credit. If your file exceeds this limit, split it into smaller parts before importing again.
What is the best practice for managing large PDF documents?
As a best practice, split large PDF files into multiple articles for better performance and easier content management. You can use the Import as multiple articles option and select the appropriate heading levels.
Is it possible to import PDF files using the Markdown/WYSIWYG editors?
No. Importing PDF files is not supported in the Markdown/WYSIWYG editors.
Why am I facing an error while importing a PDF document into Document360?
Errors can occur if:
The PDF is scanned, password-protected, or restricted.
The PDF is not text-based and does not include clearly identifiable headings.
The PDF contains complex layouts or unsupported elements (for example, comments or multi-column pages).
Fonts or embedded resources cannot be matched.
Can I import HTML files?
No. Currently, only Word (.docx) and PDF (.pdf) files are supported for import.
Can I import multiple PDF files at once?
No. Only one PDF import can run per project at a time.
If any user in the project is already importing a PDF, other users cannot start a new import until the current one completes.
If another user attempts to import a PDF while an import is in progress, an error message is displayed indicating that an import is already in progress and to wait until it completes.
Are PDF import credits separate from other credits?
Yes. PDF import credits are allocated specifically for the PDF import feature and do not impact other credit allocations in your plan. Each eligible plan includes a defined number of monthly PDF import credits, which reset every month. If you exceed your monthly allocation, additional credits can be purchased, or you can wait for the monthly reset.