Editar un grupo de usuarios en Document360 te permite actualizar el nombre del grupo, la descripción, el rol del proyecto, el rol de contenido y el acceso, así como los usuarios asociados. Los cambios en los roles de un grupo se aplican inmediatamente a todos los usuarios asociados a ese grupo, por lo que puedes actualizar los permisos de todo un equipo en una sola operación.
Cuándo editar un grupo de usuarios
- Las responsabilidades de un equipo han cambiado y su rol en el proyecto o acceso al contenido debe actualizarse.
- Necesitas añadir nuevos miembros al grupo existente.
- El nombre o la descripción del grupo ya no reflejan su propósito.
- Necesitas ajustar a qué espacios de trabajo, idiomas o categorías puede acceder el grupo.
Antes de que empieces
- Debes tener el rol de Propietario o Administrador del Proyecto en el portal de la base de conocimiento.
- Ten en cuenta que los cambios en el rol de proyecto o de contenido de un grupo se aplican inmediatamente a todos los usuarios asociados a ese grupo.
Cómo abrir el grupo de usuarios para editar
-
Navega a Configuración () > Usuarios y seguridad en la barra de navegación izquierda del portal de la base de conocimientos.
-
En el panel de navegación izquierdo, navega a cuentas y grupos de equipo.
Por defecto, la pestaña de Usuario estará seleccionada.
-
Navega a la pestaña de grupos de usuarios .
Aparecerá una lista de los grupos de usuarios existentes.
-
Pasa el cursor sobre el grupo de usuarios deseado y haz clic en el icono Editar ().
Aparecerá la página del grupo de usuarios.
NOTA
Haz clic en el icono de vista previa () para ver el rol del portal y el rol de contenido.
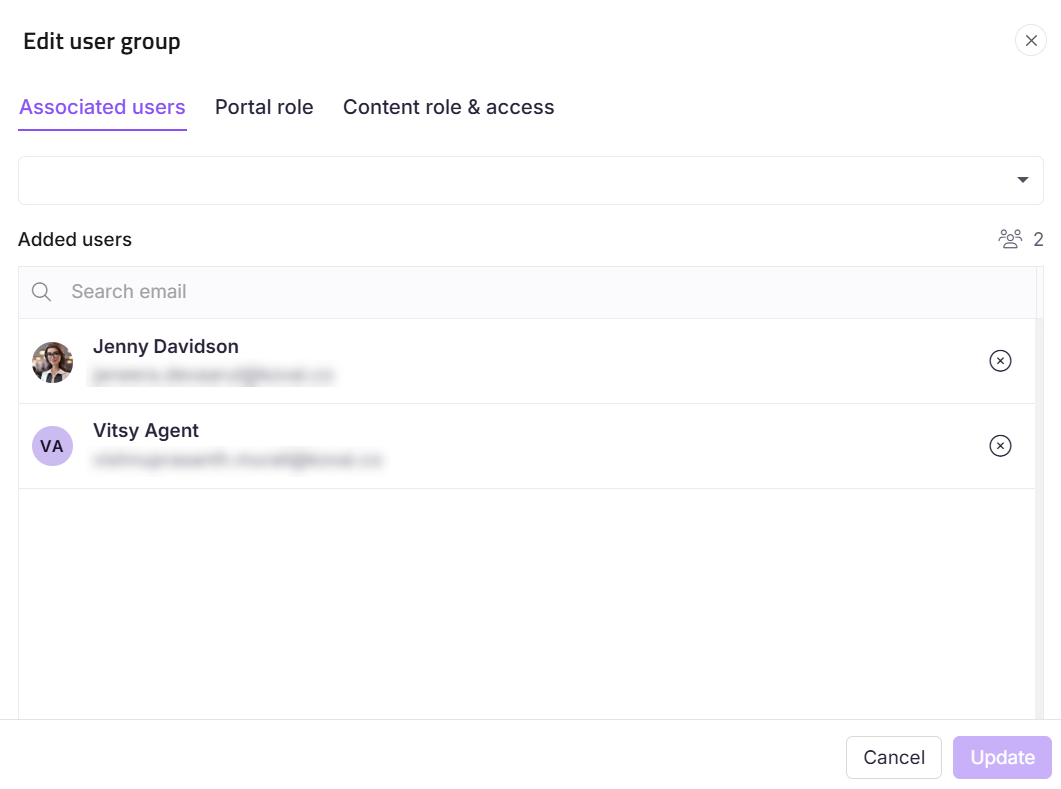
Añadir un usuario asociado
- En el panel de Usuarios asociados , haz clic en Ver todo si es necesario para asociar a otro usuario.
- En el panel Editar grupo de usuarios , aparecerá la sección de Usuarios asociados .
- En el menú desplegable de Usuario, busca al usuario deseado y selecciona la casilla.
- Haz clic en Actualizar.
Actualizar el rol del proyecto
- En la sección de rol de proyecto , asigna el rol de portal deseado para el grupo.
- Haz clic en Actualizar.
Actualizar el rol de contenido y acceso
- En la sección de rol de contenido y acceso , asigna el rol de contenido deseado y el acceso al contenido para el grupo.
NOTA
En la sección de acceso a contenido, si has seleccionado Espacio de trabajo/Lenguaje o Categoría, especifica a qué espacio de trabajo/idioma o a qué categoría tiene acceso el grupo.
- Haz clic en Actualizar.
Renombrar un grupo de usuarios
- Navega a Configuración () > Usuarios y seguridad en la barra de navegación izquierda del portal de la base de conocimientos.
- En el panel de navegación izquierdo, navega a cuentas y grupos de equipo.
- En la pestaña de grupos de usuarios , pasa el cursor sobre el grupo deseado y haz clic en el icono Editar ().
- Pasa el cursor sobre el nombre del grupo de usuarios y haz clic en el icono Editar ().
- Actualiza los campos de Nombre y Descripción .
- Haz clic en Actualizar.
Límites y limitaciones
| Límite | Detalle |
|---|---|
| Efecto inmediato | Los cambios en el rol de proyecto o de contenido de un grupo se aplican inmediatamente a todos los usuarios asociados. |
| Acceso a Espacio de Trabajo/Lenguaje y Categoría | Al utilizar acceso a Espacio de Trabajo/Lenguaje o Categoría , debes especificar qué espacio de trabajo, lenguaje o categoría se aplica. |
Mejores prácticas
- Revisa la lista completa de usuarios asociados antes de cambiar el rol de proyecto o de contenido de un grupo. El cambio se aplica a todos los usuarios del grupo de inmediato: verifica que todos los miembros reciban los permisos actualizados.
- Usa Añadir otro rol de contenido si el grupo necesita diferentes niveles de acceso para distintas categorías en lugar de reestructurarse en varios grupos.
- Mantén actualizados los nombres y descripciones de los grupos. Un grupo llamado "Q1 Writers" que sigue activo en el Q3 causará confusión durante las auditorías de acceso.
- Haz un tipo de cambio a la vez (puesto, acceso o membresía) y confírmalo antes de hacer el siguiente. Esto facilita identificar si algo no queda bien después de guardar.