Eliminar una configuración de SSO de OpenID Connect de Document360 la elimina permanentemente junto con todas las cuentas de usuario asociadas. Esta acción no puede deshacerse.
PRECAUCIÓN
Cuando eliminas una configuración SSO, todos los usuarios asociados a esa configuración también serán eliminados. Asegúrate de haber revisado el impacto en tu equipo antes de continuar.
Cuando quizá necesites eliminar una configuración SSO de OpenID Connect
- Estás cambiando a otro proveedor de identidad.
- Estás reemplazando una configuración SSO mal configurada.
- Estás desmantelando SSO por un proyecto.
Antes de que lo retires
- Notifique a los usuarios afectados con antelación. Una vez eliminados, perderán el acceso inmediatamente.
- Si planeas reconfigurar SSO con un nuevo proveedor, ten la nueva configuración lista antes de eliminar la existente para minimizar interrupciones.
- Si la configuración es un padre con proyectos hijos heredando sus configuraciones SCIM, eliminarlo afectará a esos proyectos hijos. Revisa la configuración de tu herencia antes de continuar.
Cómo eliminar una configuración de SSO de OpenID Connect
- Navega a Configuración () > Usuarios y permisos > Configuración SSO.
- Pasa el cursor sobre la configuración SSO que quieres eliminar y haz clic en el icono Borrar ().
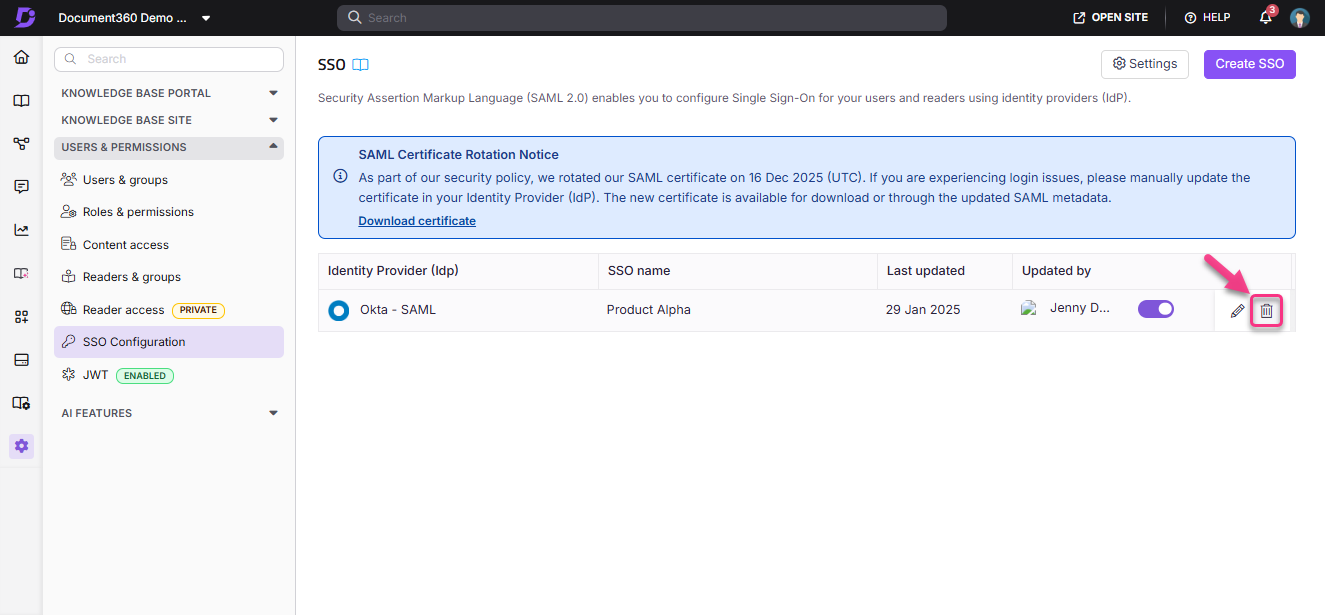
- Aparecerá un cuadro de confirmación de Eliminar SSO .
- Haz clic en Proceder para eliminar permanentemente la configuración SSO.
La configuración del SSO y todas las cuentas de usuario asociadas ahora han sido eliminadas.
¿Qué ocurre después de retirar
- Todos los usuarios que se autenticaron mediante la configuración SSO eliminada son eliminados de Document360.
- Los usuarios ya no podrán iniciar sesión usando sus credenciales SSO para esa configuración.
- La página de inicio de sesión de Document360 se restaurará como método de inicio de sesión predeterminado si no hay ninguna otra configuración SSO activa.
- Si tenías la página de inicio de sesión de Document360 desactivada, vuelve a activarla antes de eliminar SSO para evitar bloquear a todos los usuarios.
NOTA
Para reconfigurar SSO tras la eliminación, consulta la guía de configuración de proveedores correspondiente: Okta, Auth0, ADFS u otros proveedores.