The "Article feedback" in the Feedback manager helps you effectively address your readers' feedback.
In general, feedback management involves the following five generic steps:
1. Receiving feedback
Once a reader provides an article feedback in your Knowledge base site or Knowledge base widget, the feedback appears in the Feedback manager section.
How do readers provide feedback for an article?
When the feedback feature is activated, readers can provide input on articles and category pages. You'll find the feedback form located at the bottom of these pages.
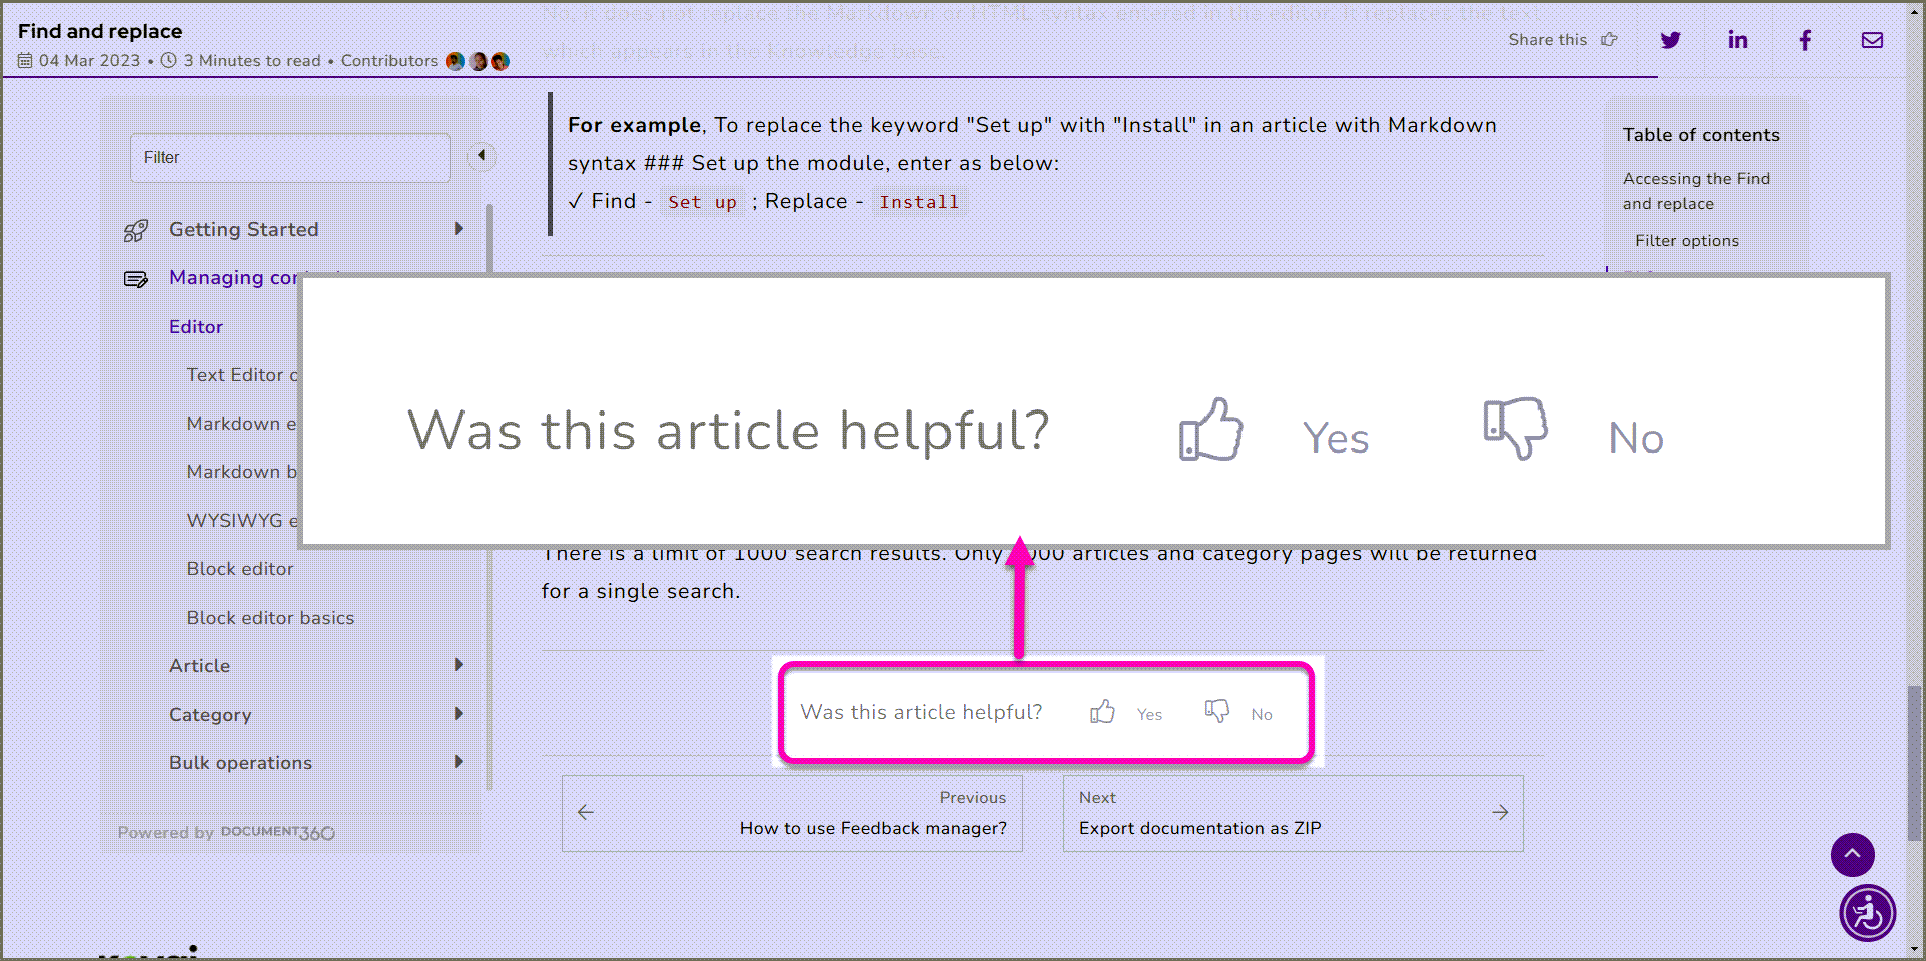
- Positive response
Was this article helpful? Yes (or) No
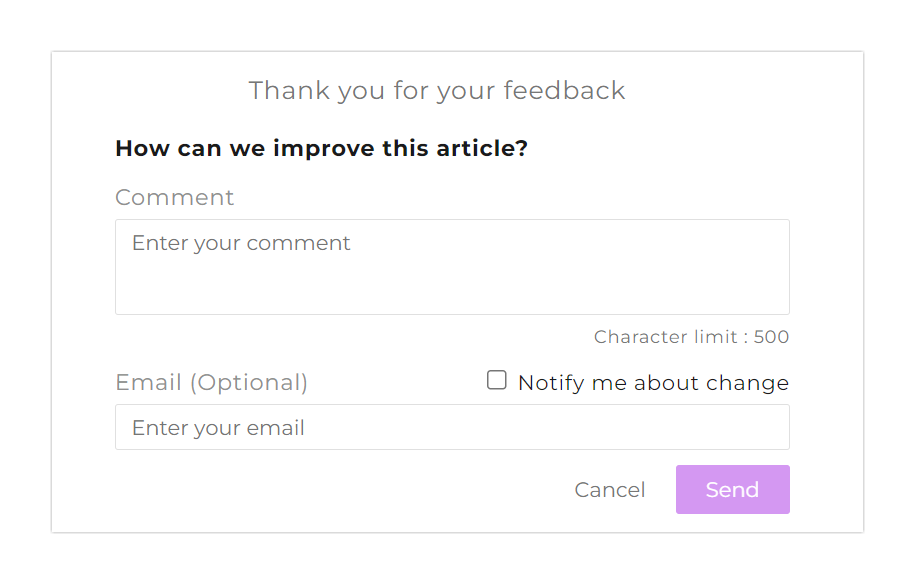
When a reader clicks the "Yes" (Like) button, a Comment section appears with the option to provide a comment and Email (Optional). If a response is required for the provided feedback, the reader must select the Notify me about change checkbox, provide a valid email, and click Send.
- Negative response
Was this article helpful? Yes (or) No
When a reader clicks the Dislike button, a set of common feedback reasons appear:
* Need more information
* Difficult to understand
* Inaccurate or irrelevant content
* Missing/broken link
* Others
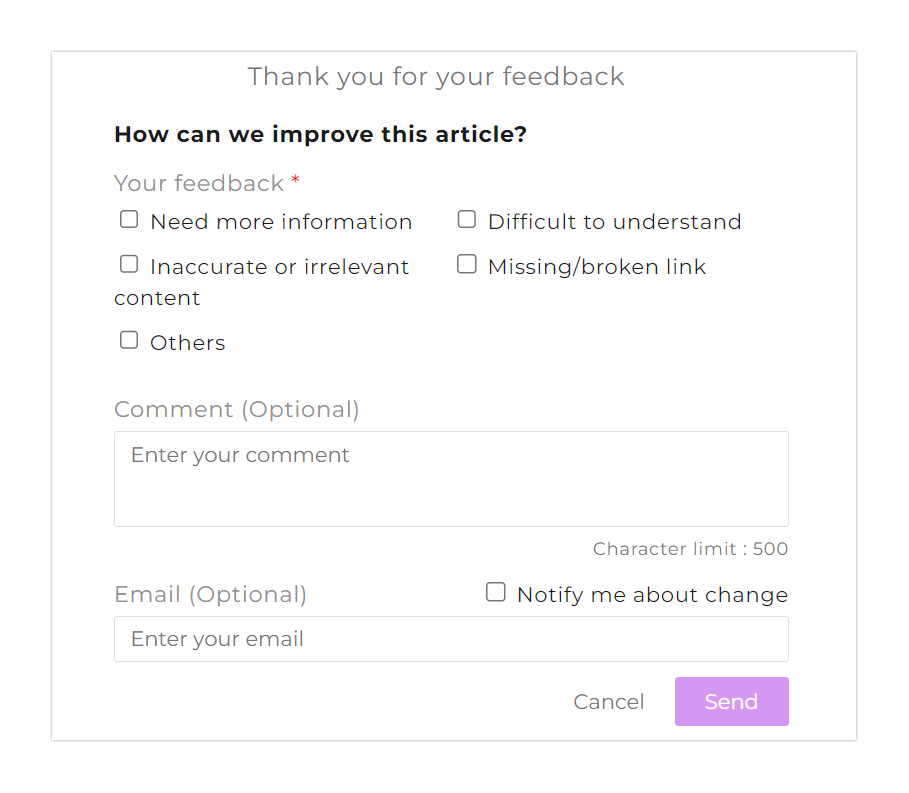
- Readers can select one or more reasons and enter a comment (optional).
- If the desired reason is unavailable in the list, readers can choose Others and provide feedback in the Comment field (turns to a mandatory field).
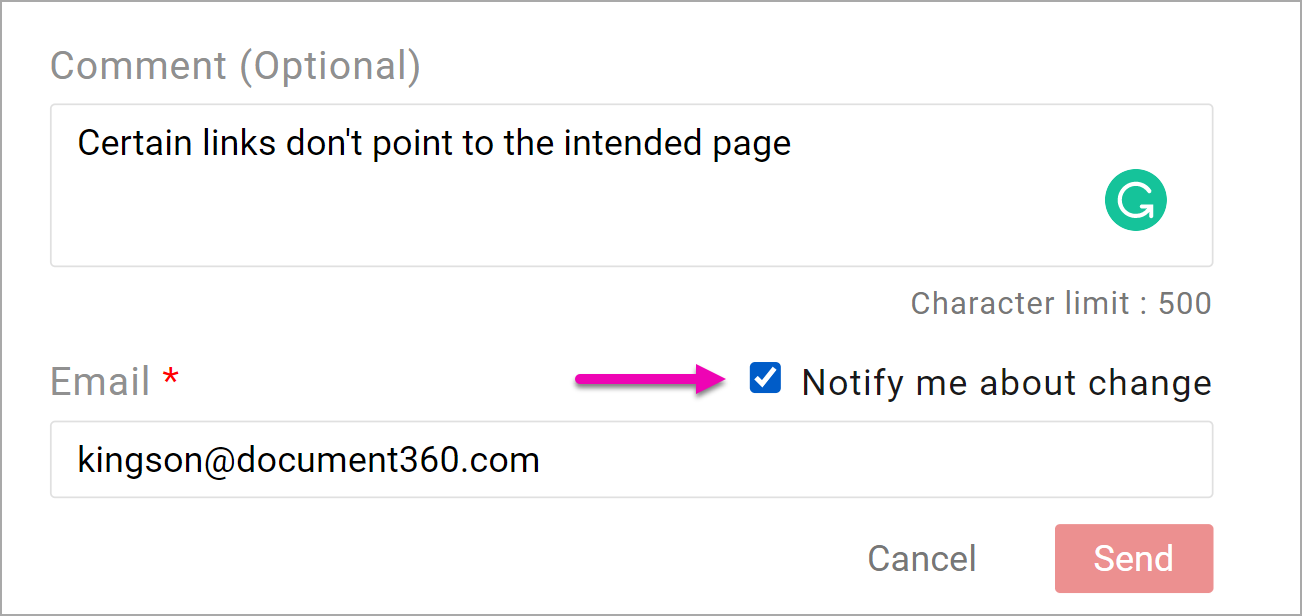
- If a response is required for the provided feedback, the reader must select the Notify me about change checkbox, provide a valid email, and click Send.
2. Assessing feedback
Once a reader provides feedback, the comment is compiled in the "Article feedback" section in the Feedback manager. Team accounts with access to the "Feedback manager" can access and assess the feedback.
How do you access the reader feedback?
- Go to Content tools → Documentation → Feedback manager -> Article feedback
- You can find the list of reader feedback
- Use the available filter options at the top to narrow down the list
- Click on the desired feedback in the list, and a detailed view of the feedback appears
Details available for each feedback
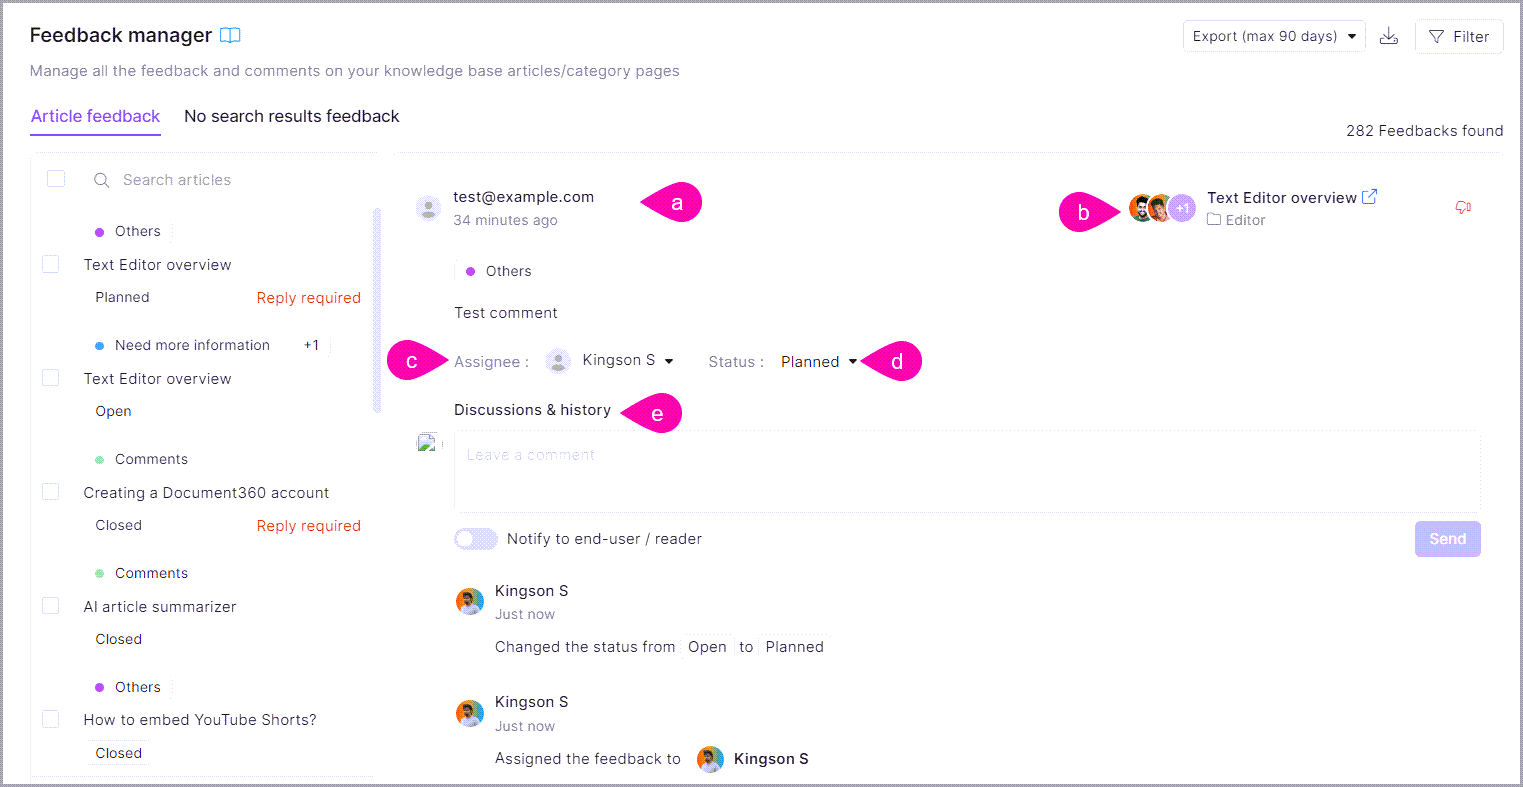
a. In-depth feedback information
- Feedback provided by the reader
- Feedback type
- Reader email
- Date/time of the feedback
- Reply requirement
- Show history: Expand this section to view the list of actions performed within the feedback
b. Article/Category details
- Article/Category name
- Open in editor
- Article/Category location breadcrumb
- Article/Category contributors
c. Assignee
d. Feedback status
e. Discussion & history
Assess whether the feedback is valid or invalid
- If valid, assign the feedback to the respective team account
- If invalid, perform a readthrough of the article. If any fix is required, assign the feedback to the respective team account to rework the article
- Perform a basic grammatical check manually or with a third-party tool to enhance the document quality
3. Assigning feedback
Once you find that an update is required in documentation, you can assign it to the respective team account. You can also self-assign the feedback. The assigned team account would access the feedback and improve the document accordingly.
How to assign the feedback?
- Go to Content tools → Documentation → Feedback manager -> Article feedback
- You can find the list of reader feedback
- Use the available filter options at the top to narrow down the list
- Click on the desired feedback in the list, and a detailed view of the feedback appears
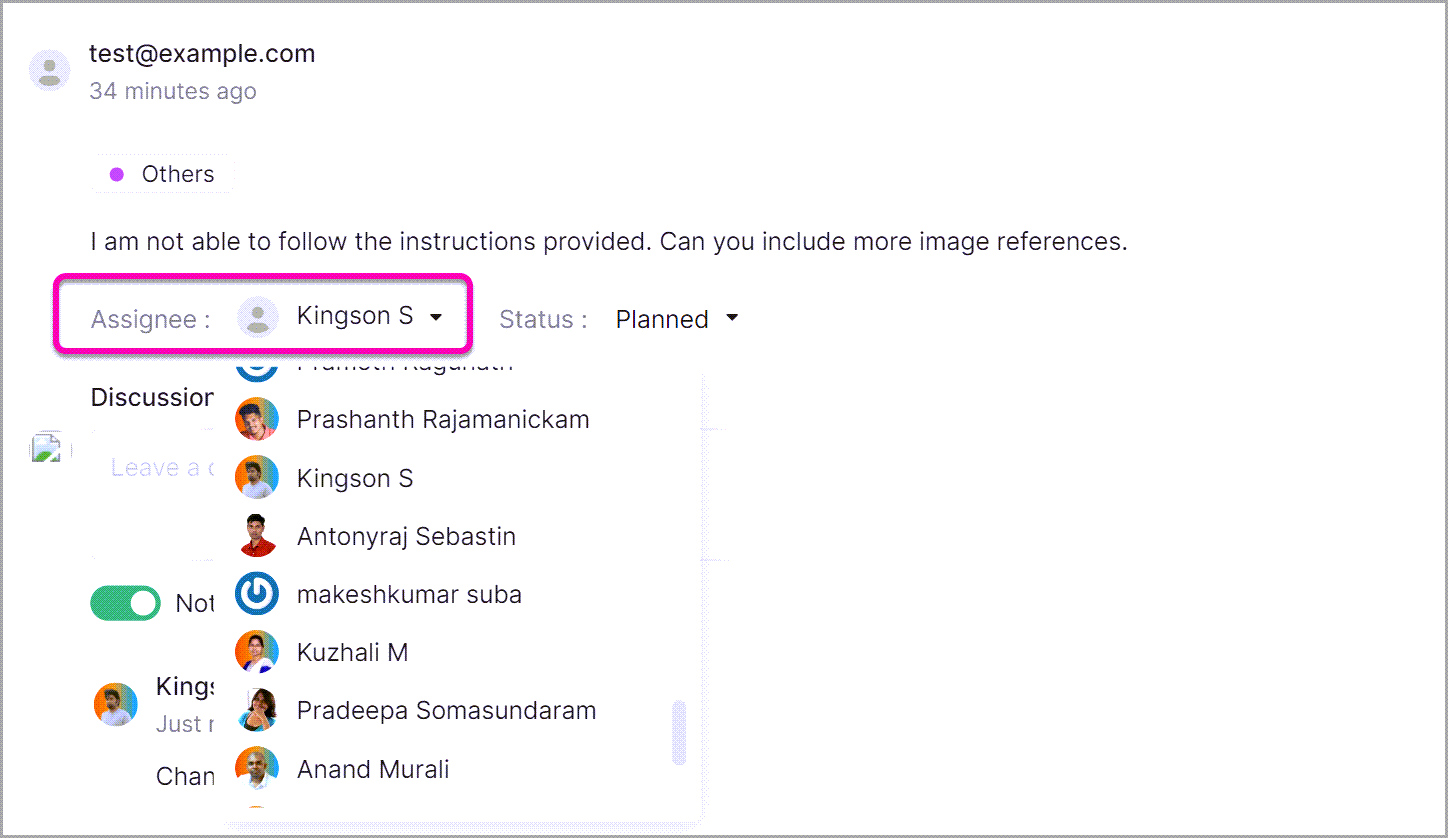
- The Assignee dropdown and select the team account you want to assign the feedback
- The team account will get an email notification for the assigned feedback
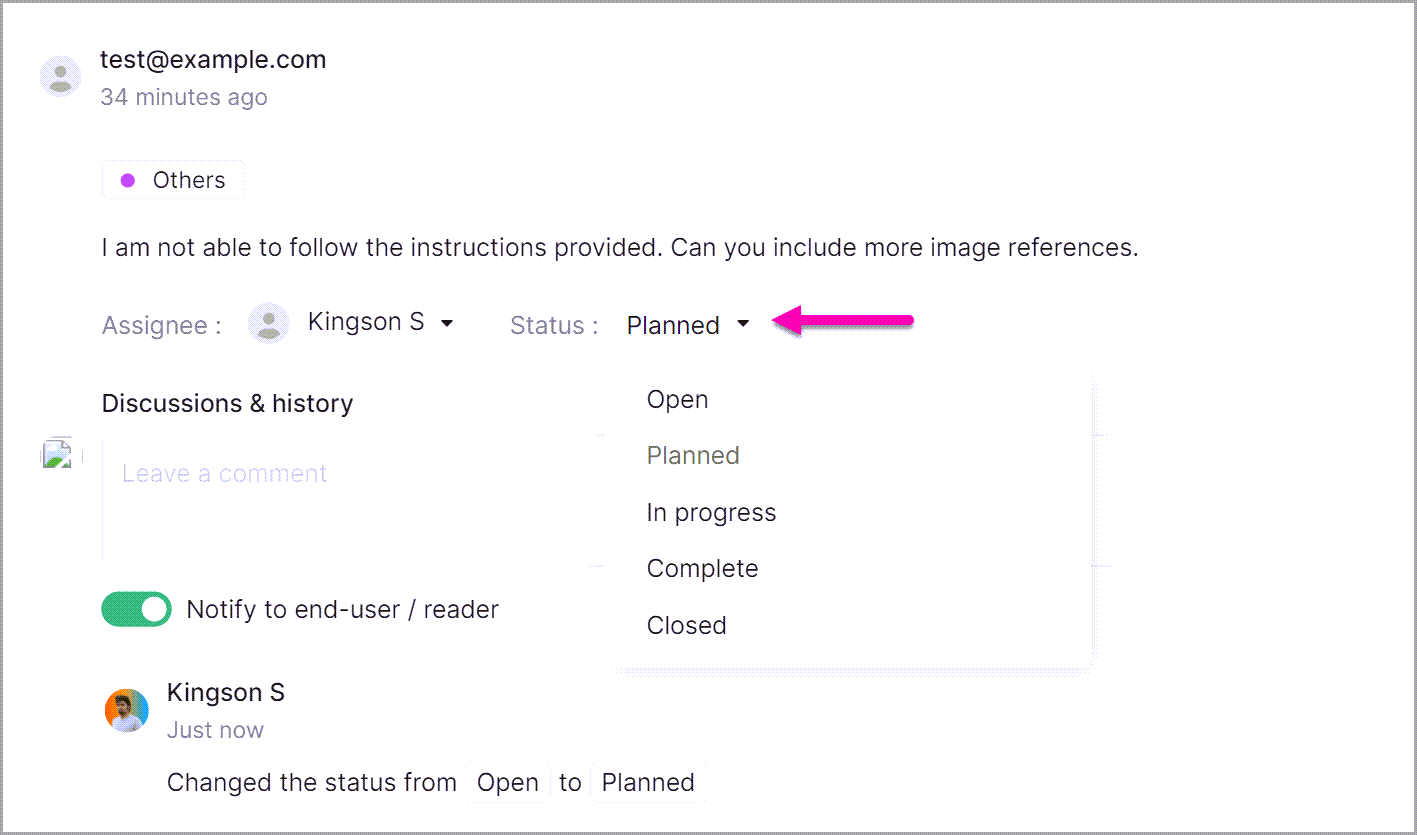
- Click the Status dropdown and select the status as Planned or In progress as per your requirement
4. Addressing feedback
Once a team account is assigned feedback, they access it and update the article accordingly.
- Go to Content tools → Documentation → Feedback manager -> Article feedback
- You can find the list of reader feedback
- Use the Assigned to filter option to view the list of feedback assigned to the team account
- Click on the desired feedback in the list, and a detailed view of the feedback appears
- Click the Open in editor icon next to the article name, and the article editor appears in the new tab
- Update the article content
- Once done, navigate back to Feedback manager and change the status to Complete
When you select the Closed status, you can no longer update (assign, change status, or reply) the feedback. You can only view the feedback details.
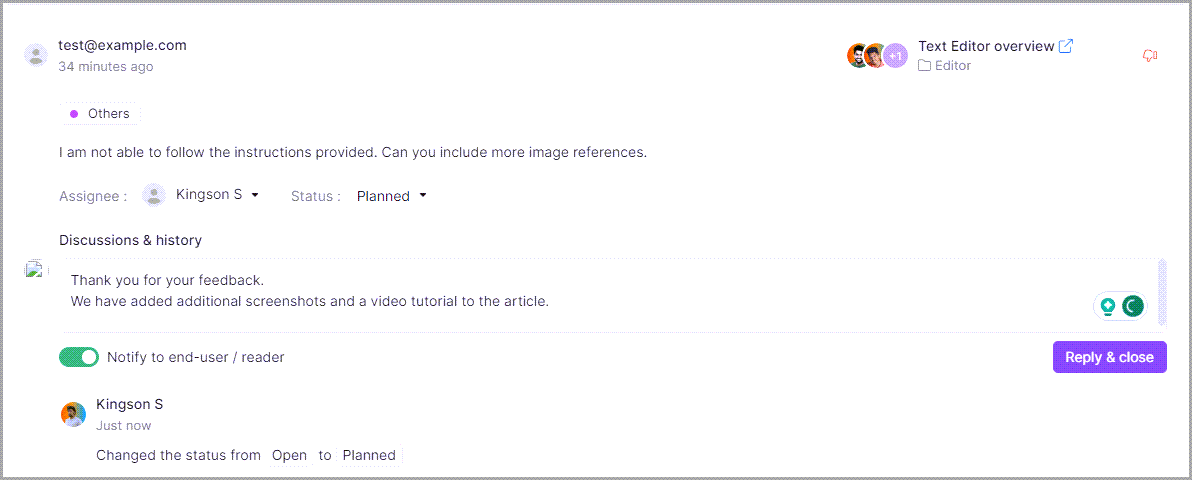
5. Notify the feedback provider
The option to reply to the feedback is applicable only when the feedback provider types in their email and checks the 'Notify me about change' above the email field.
From the Knowledge base portal, once the article content is updated, you can inform the feedback provider about the content update through email.
The toggle "Notify to end-user/reader" is the key differentiator.
- Toggle off: The response is visible only in the Knowledge base portal for other team accounts
- Toggle on: The response is sent to the feedback provider
- Go to Content tools → Documentation → Feedback manager -> Article feedback
- You can find the list of reader feedback
- Use the available filter options at the top to narrow down the list
- Click on the desired feedback in the list, and a detailed view of the feedback appears
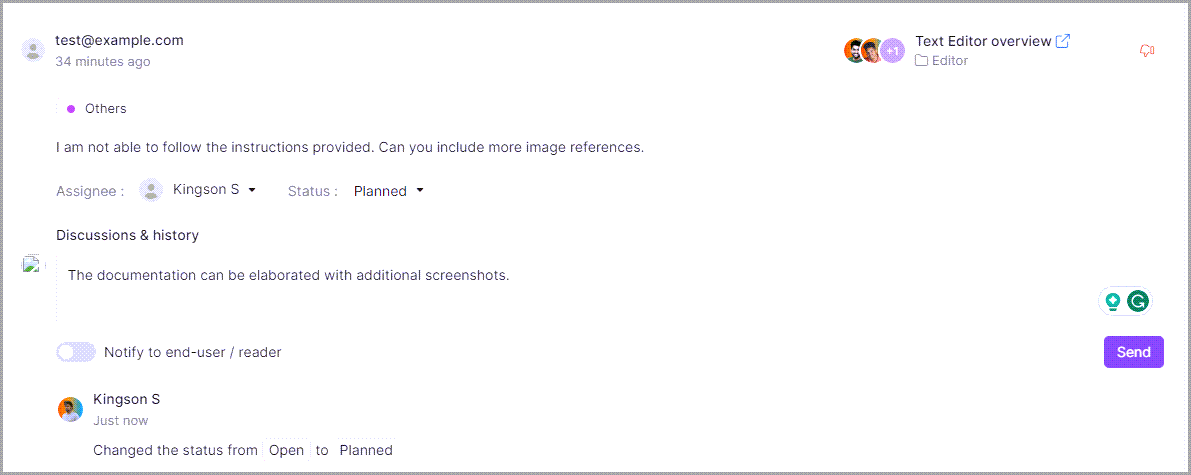
- Type in the response you want to convey to the feedback provider under the "Discussions & History" field
- Switch on the "Notify to end-user/reader" toggle
- Click the Reply and close button
- The feedback provider receives the update in an email
When you map a custom email in the notifications, the reply email will be sent from the custom email. If no custom email is configured, the email will be sent from the logged-in team account email.
6. Bulk actions
You can perform the following bulk actions for the "Article feedback."
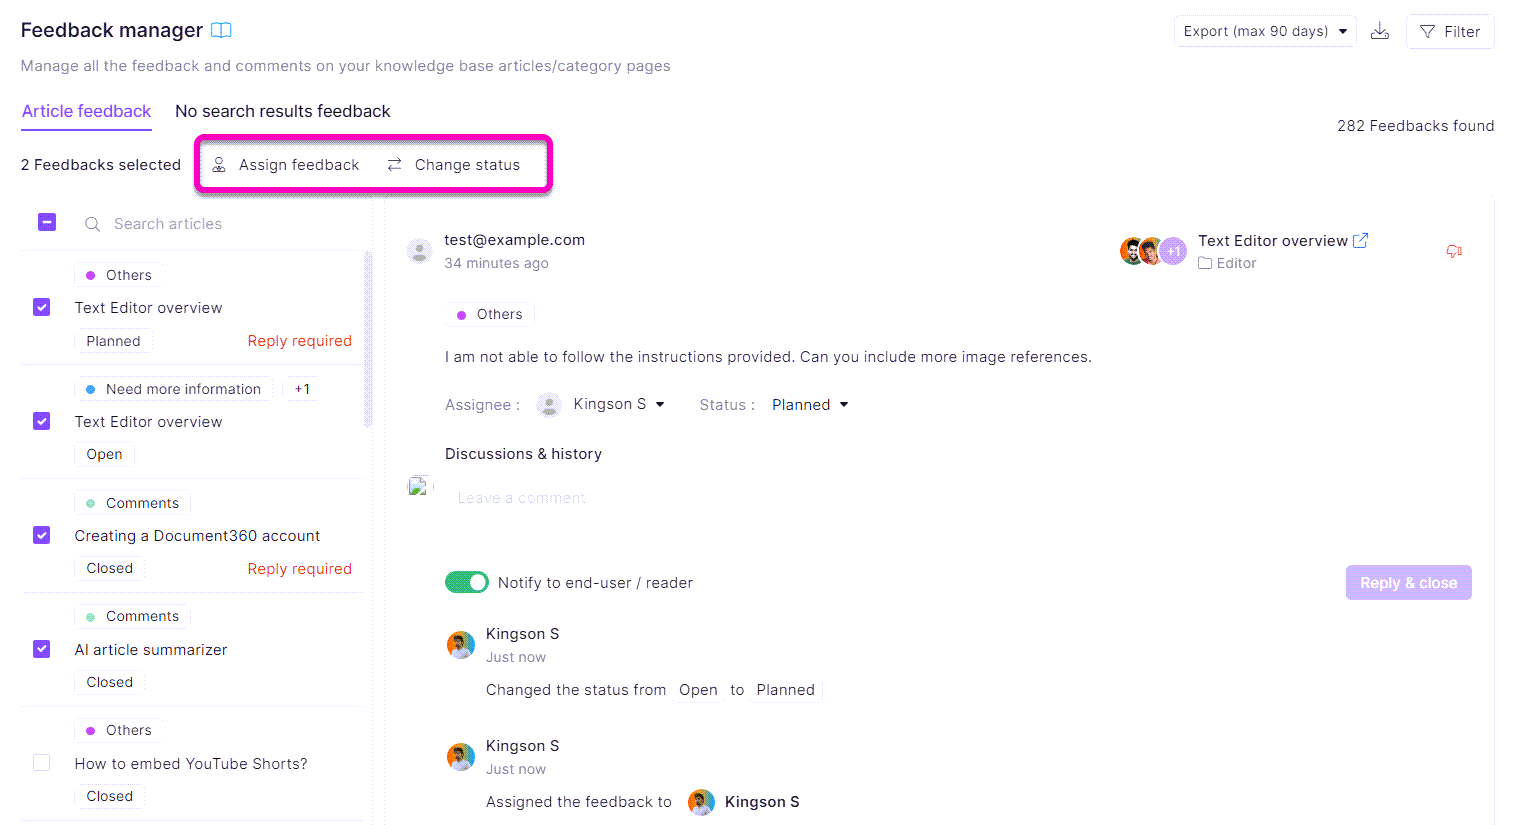
- Navigate to Content tools → Documentation → Feedback manager → Article feedback
- You can find the feedback list on the left frame
- Click and select the feedback tiles from the list (Check box)
- The number of feedback selected appears at the top
- Two other options appear (Only after at least one feedback is selected)
- Assign feedback - Bulk assign feedback to any one team account
- Change status - Change the status of the feedback
- The "Manage feedback" popup appears with the "Assign feedback" and "Change status" options
- Click on "Save" once the desired bulk action is selected
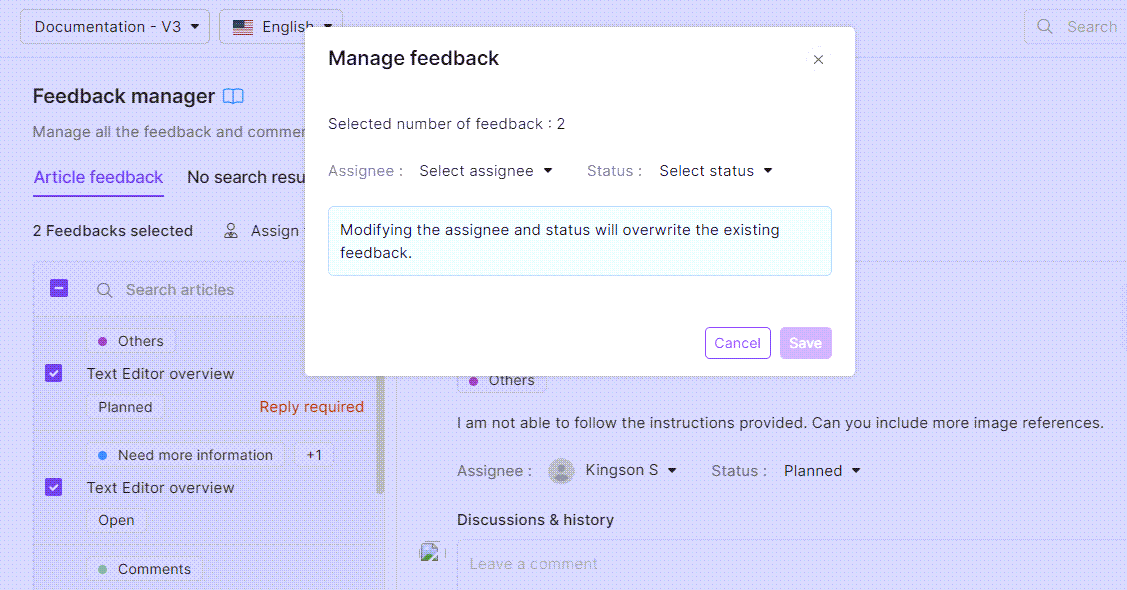
When you select the feedback tiles with "Closed" status, the bulk actions do not appear at the top.