Document360 proporciona una lista de fuentes estándar utilizadas en la documentación. Sin embargo, puede configurar la fuente que desee en la base de conocimientos. Obtenga los detalles de la fuente y agregue el enlace de la fuente a la sección del encabezado en HTML personalizado. A continuación, añade los detalles de la familia de fuentes en el CSS personalizado.
Como caso de uso, consulte la siguiente solución para configurar una fuente de Google en Document360.
Solución
Los tres pasos siguientes están involucrados en la configuración de la fuente de Google deseada en Document360:
Paso 1: Obtener los detalles del código de fuente de Google
Paso 2: Anexar el código en HTML personalizado
Paso 3: Anexar el código en CSS personalizado
NOTA
También puede configurar fuentes personalizadas que no sean Google Fonts utilizando el código HTML y CSS adecuado.
Obtener los detalles del código de fuente de Google
Ve a la página web de Google Fonts .

Seleccione la fuente deseada y aparecerá la página de la fuente con los estilos disponibles.
En la esquina superior derecha, haz clic en Obtener fuente y selecciona Obtener código de inserción.
En la sección Web , encontrarás el código de inserción específico de la fuente elegida.
Copie el código y vuelva a Document360.
Anexar el código en HTML personalizado
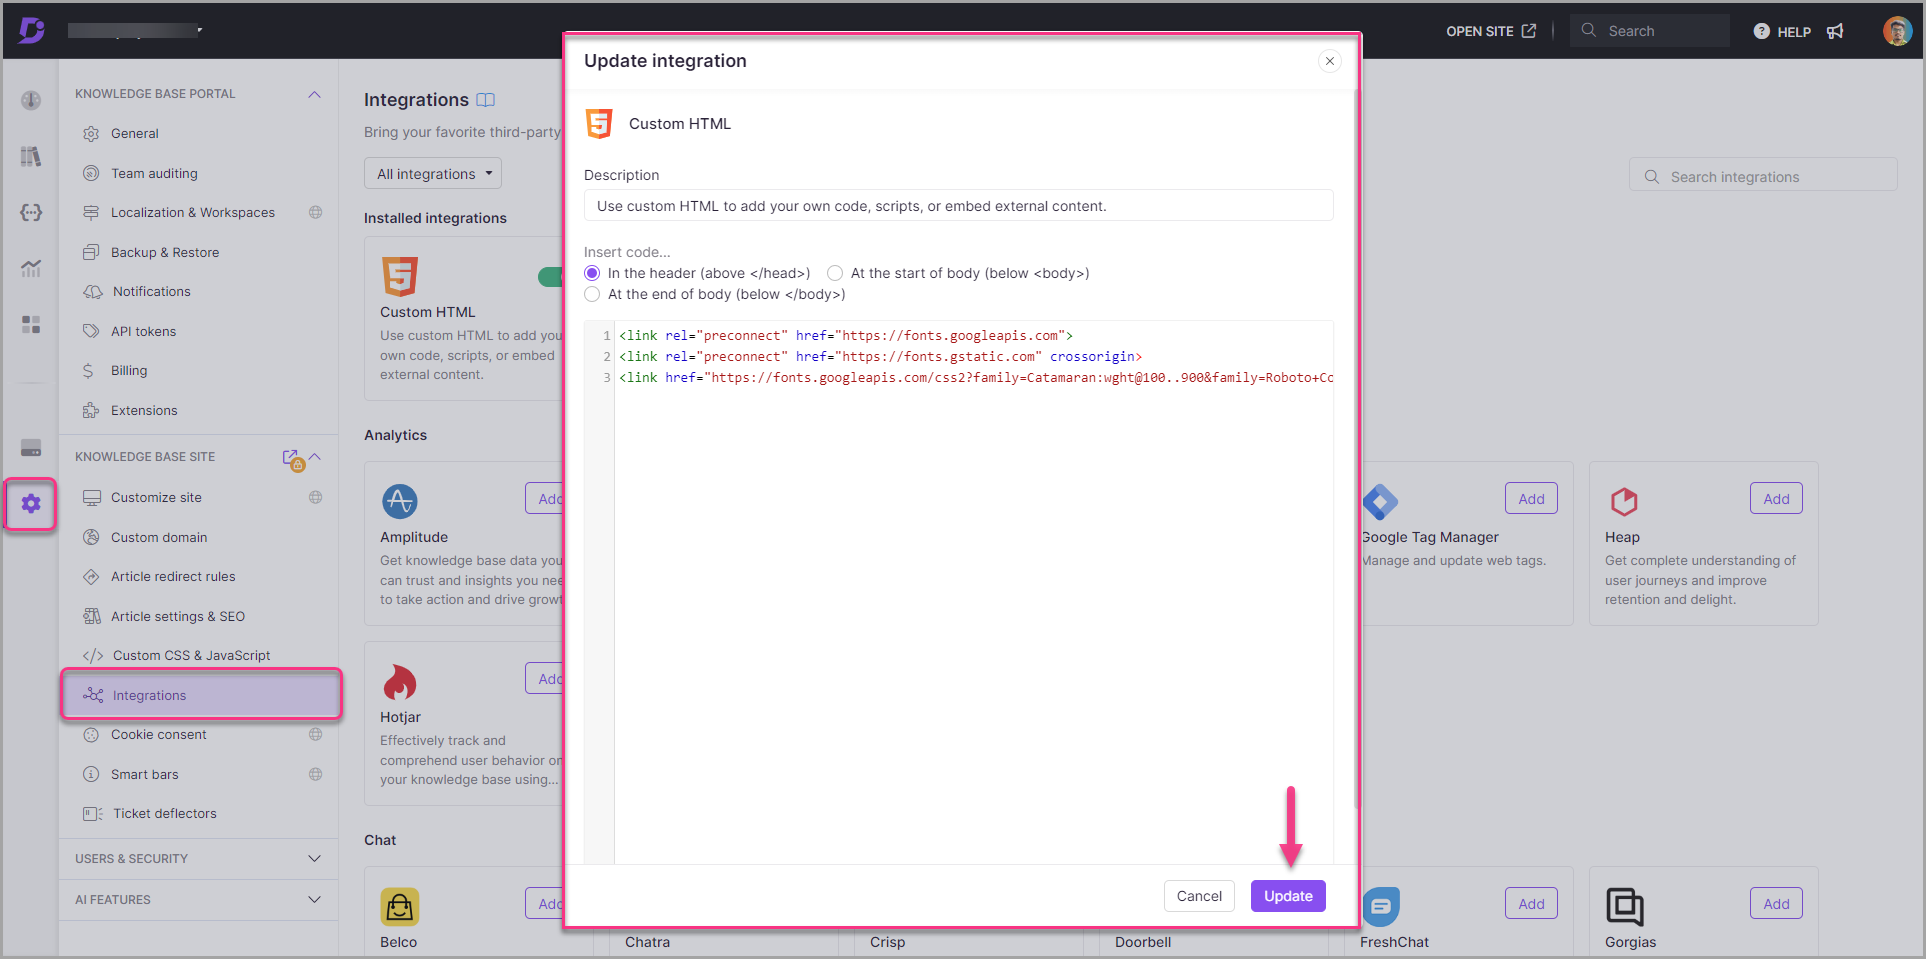
En el portal de Document360, vaya a Configuración > sitio de la base de conocimientos > Integraciones.
Vaya a HTML personalizado y haga clic en Agregar.
Seleccione la
Header (above </head>)opción que será la selección predeterminada.Pegue el enlace en la sección Encabezado copiado en el paso 5.
Una vez hecho esto, haga clic en Agregar.
Anexar el código en CSS personalizado
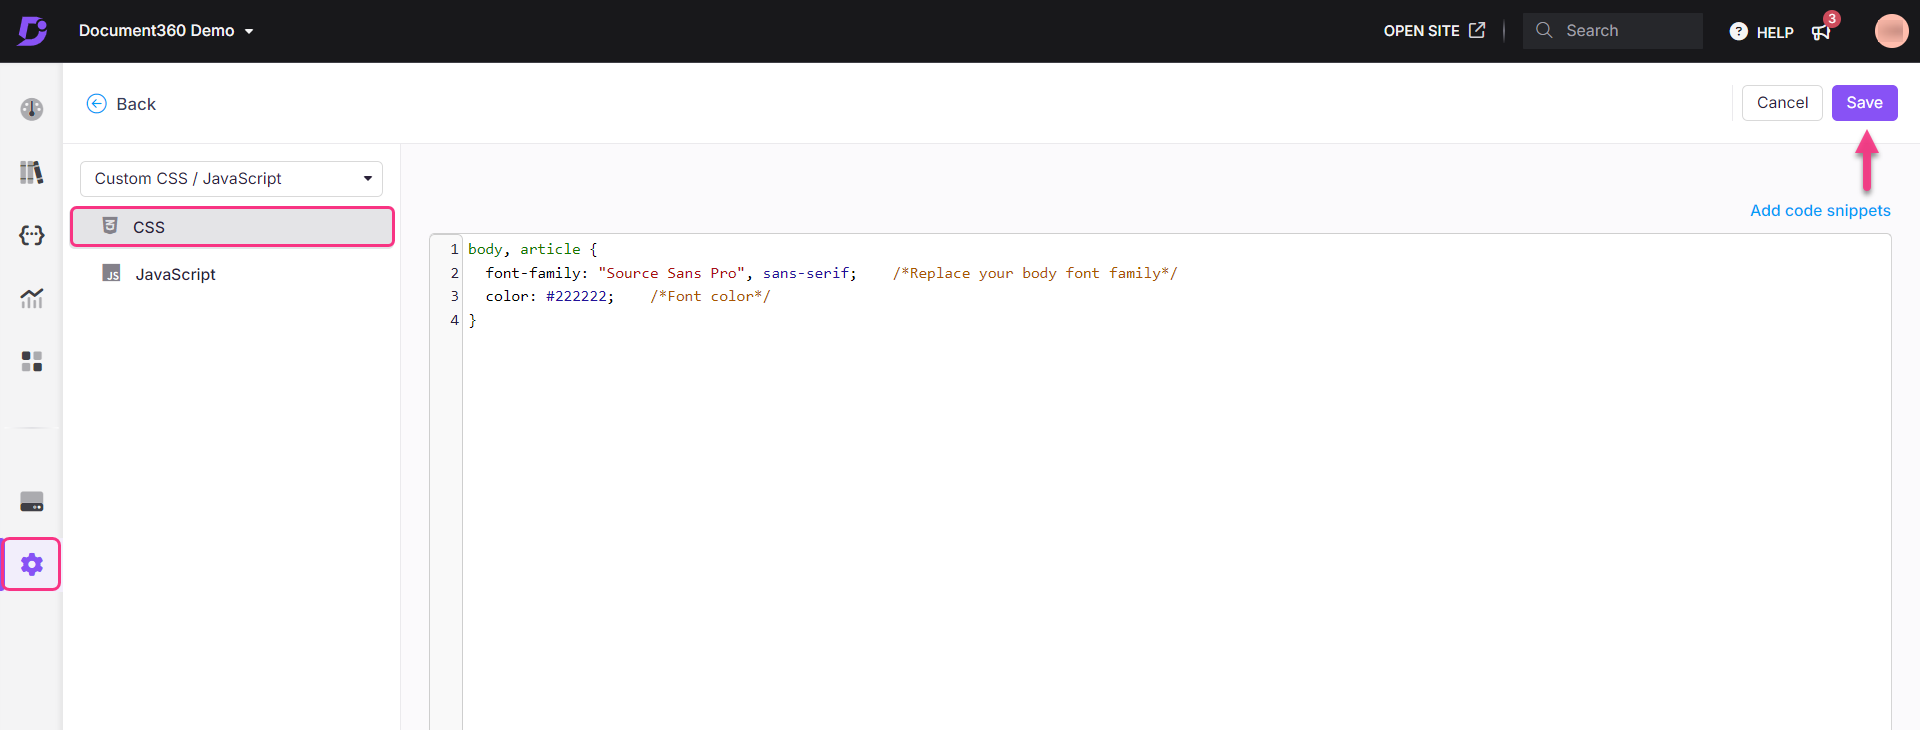
Vaya a Configuración () > sitio de la base de conocimientos > Personalizar sitio > CSS y JavaScript personalizados en el portal de la base de conocimientos.
En el panel de navegación izquierdo, haga clic en la pestaña CSS.
Haga clic en Agregar fragmentos de código en la parte superior derecha del espacio de código.
Seleccione la opción Cambiar fuente de texto del cuerpo y aparecerá el código a continuación.
body, article {
  font-family: "Source Sans Pro", sans-serif;    /*Replace your body font family*/
  color: #222222;    /*Font color*/
}
Además del selector de cuerpo , incluya el selector de artículos en el fragmento de código proporcionado.
Reemplace el
font-family: "Source Sans Pro", sans-serif;con los detalles de la fuente copiados en el paso 5. (Reglas CSS para especificar familias).Agregue el color de fuente deseado.
Haga clic en Guardar en la parte superior derecha.
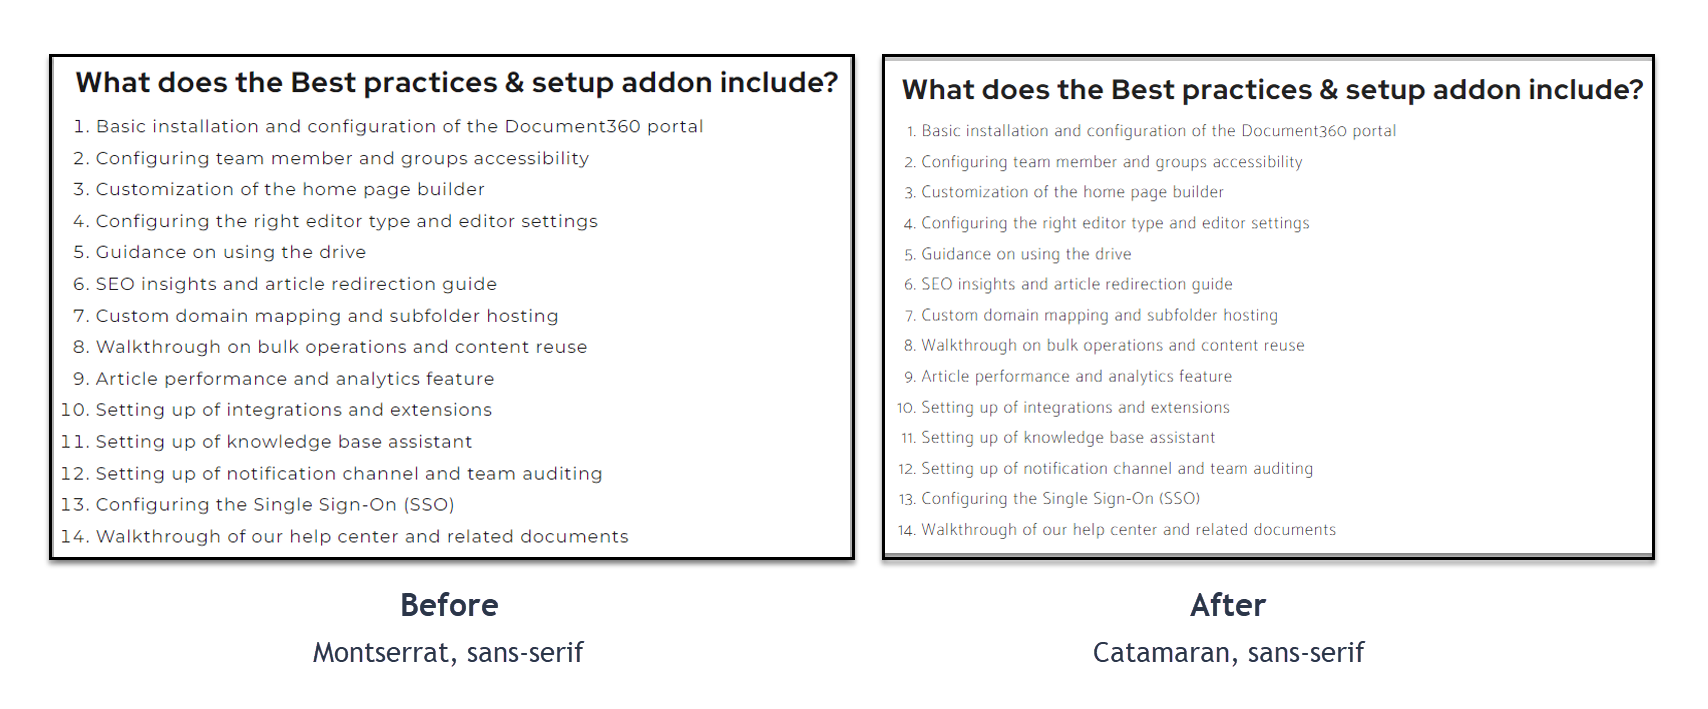
Resultado