Jira is a service desk and project tracking platform from Atlassian that provides extensive functionality for issue management, request queues, analytics, and team collaboration. When your development or support team logs issues in Jira, there's often a need to create corresponding knowledge base articles in Document360 — for example, documenting a known issue, a workaround, or a resolved bug. By connecting Jira and Document360 through Make, you can automate this: whenever a new issue is created or updated in a Jira project, Make automatically creates a corresponding article in Document360.
When to use this integration
- Your engineering team logs bugs or issues in Jira and you want each new issue to automatically generate a draft article in Document360 so your documentation team can write up a workaround or resolution.
- You maintain a known issues section in your knowledge base and want Jira issue events to drive article creation automatically rather than requiring a manual step between the two platforms.
- You want to keep your Jira project activity and Document360 content creation in sync, reducing the overhead of switching between tools to move issue information into documentation.
Before you begin
- You must have an active Make account.
- You must have a Jira Cloud account with access to the project you want to monitor.
- You must have your Jira API token. To generate one, go to your Atlassian account settings and create a token under Security > API tokens.
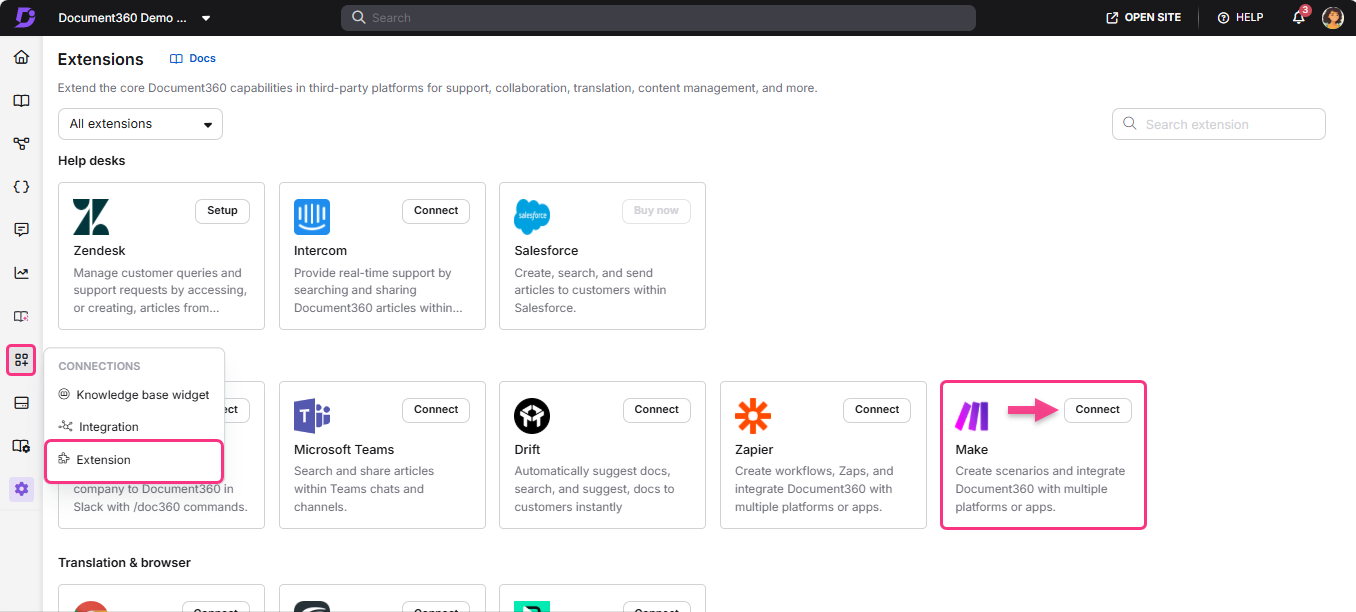
- You must have your Document360 API token ready. To generate one, navigate to Connections > Extensions , locate the Make tile, and click Connect to copy the token.
How to set up the Scenario
Step 1 — Sign in and create a new Scenario
- Log in to your Make account. The Make dashboard appears.
- Click Create a new scenario at the top right.
- Click the add (+) icon — a list of available applications appears.
- In the Search field, type Jira Cloud Platform.
- Select Jira Cloud Platform and choose the trigger you want to use. For example, select Watch Issues to trigger the Scenario when a new issue is created or updated.
Step 2 — Configure the Jira module
Jira connects to Make using a webhook, a connection, and your Jira credentials.
- Click Create a webhook and enter a Webhook name.
- Click Create a connection and enter a Connection name.
- Enter the Service URL — this is the base URL of your Jira Cloud instance (for example,
https://yourcompany.atlassian.net). - Enter your Jira Username and API Token.
- Click Save.
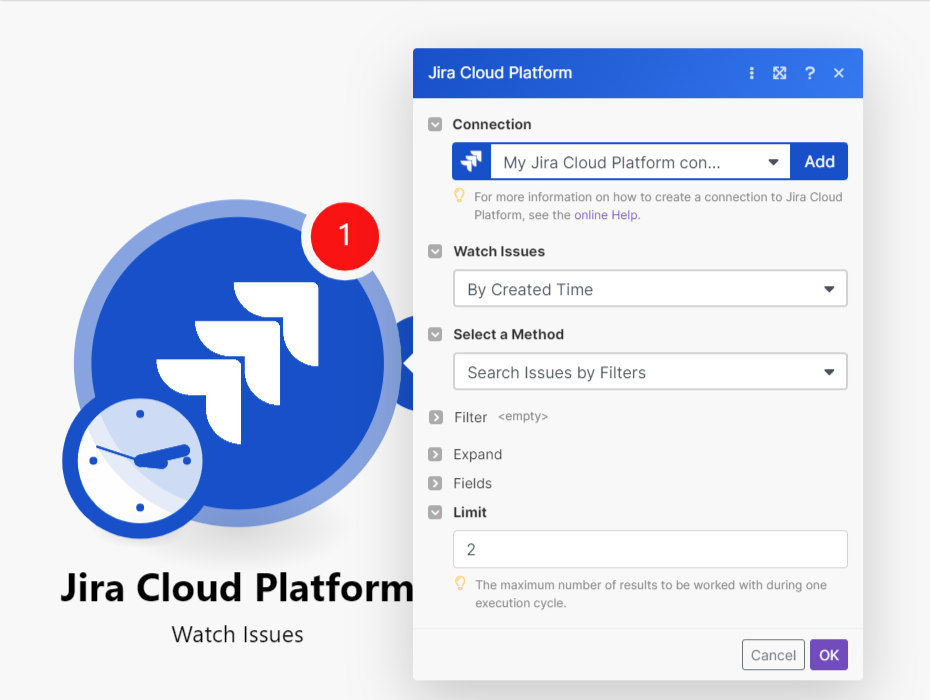
- From the Watch Issues dropdown, select the option you want to track.
- From the Select a Method dropdown, select how you want Make to search for issues.
- If needed, apply optional Filter, Expand, and Fields settings to narrow down which issues trigger the Scenario.
- In the Limit field, enter the maximum number of issues Make will return per execution cycle.
- Click OK.
- In the Choose where to start popup, select the date and time from which you want to start watching for new issues.
- Click OK.
Your Jira project is now connected with Make.
Step 3 — Connect Document360 as the action
Once Jira is connected, add Document360 as the next module in the Scenario.
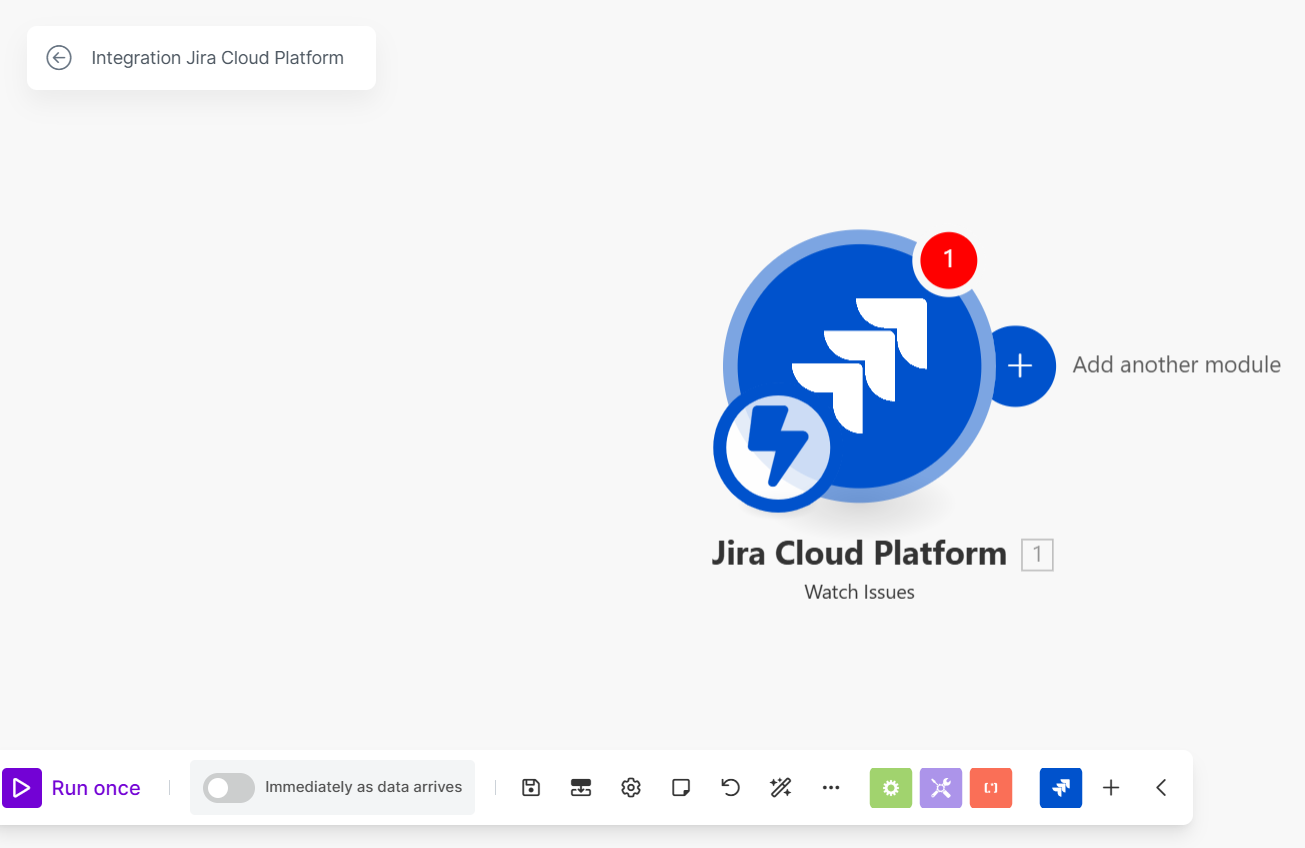
- On the Scenario editor page, click the Add another module (+) option.
- In the Search field, enter Document360.
- Select Document360 and choose the action you want to perform. For example, select Create an article to create a draft article.
- In the Document360 panel, select an existing connection. To create a new connection:
- Click Create a connection and enter a Connection name.
- Enter your Document360 API token and click Save.
To generate the API token from Document360:
- Navigate to Connections > Extensions in the left navigation bar of the Knowledge base portal.
- On the Make extension tile, click Connect.
- Click the Copy icon to copy the token.
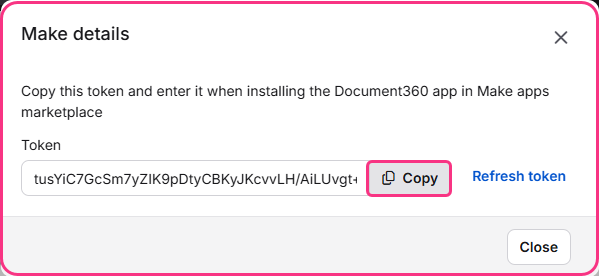
- Head back to the Make panel and paste the API token into the field.
- In the Article Title field, select the Jira parameters you want to use as the article title. For example, select the Task name parameter to use the Jira issue name as the title.
- In the Article Content field, select the parameters you want as the article content. For example, select Assignee Name, Resource Type, and Due On.
- From the Project Category ID dropdown, select the category where the new article should be created.
- Click OK.
Step 4 — Test the Scenario
- Click the Run once button at the bottom left to test the Scenario. Test details appear at the bottom of the page.
- To trigger the test, create a new issue in the associated Jira project.
- Once the issue is created, a new article is created in the associated Document360 category. You can verify this in the test details panel or by navigating directly to your Document360 project.
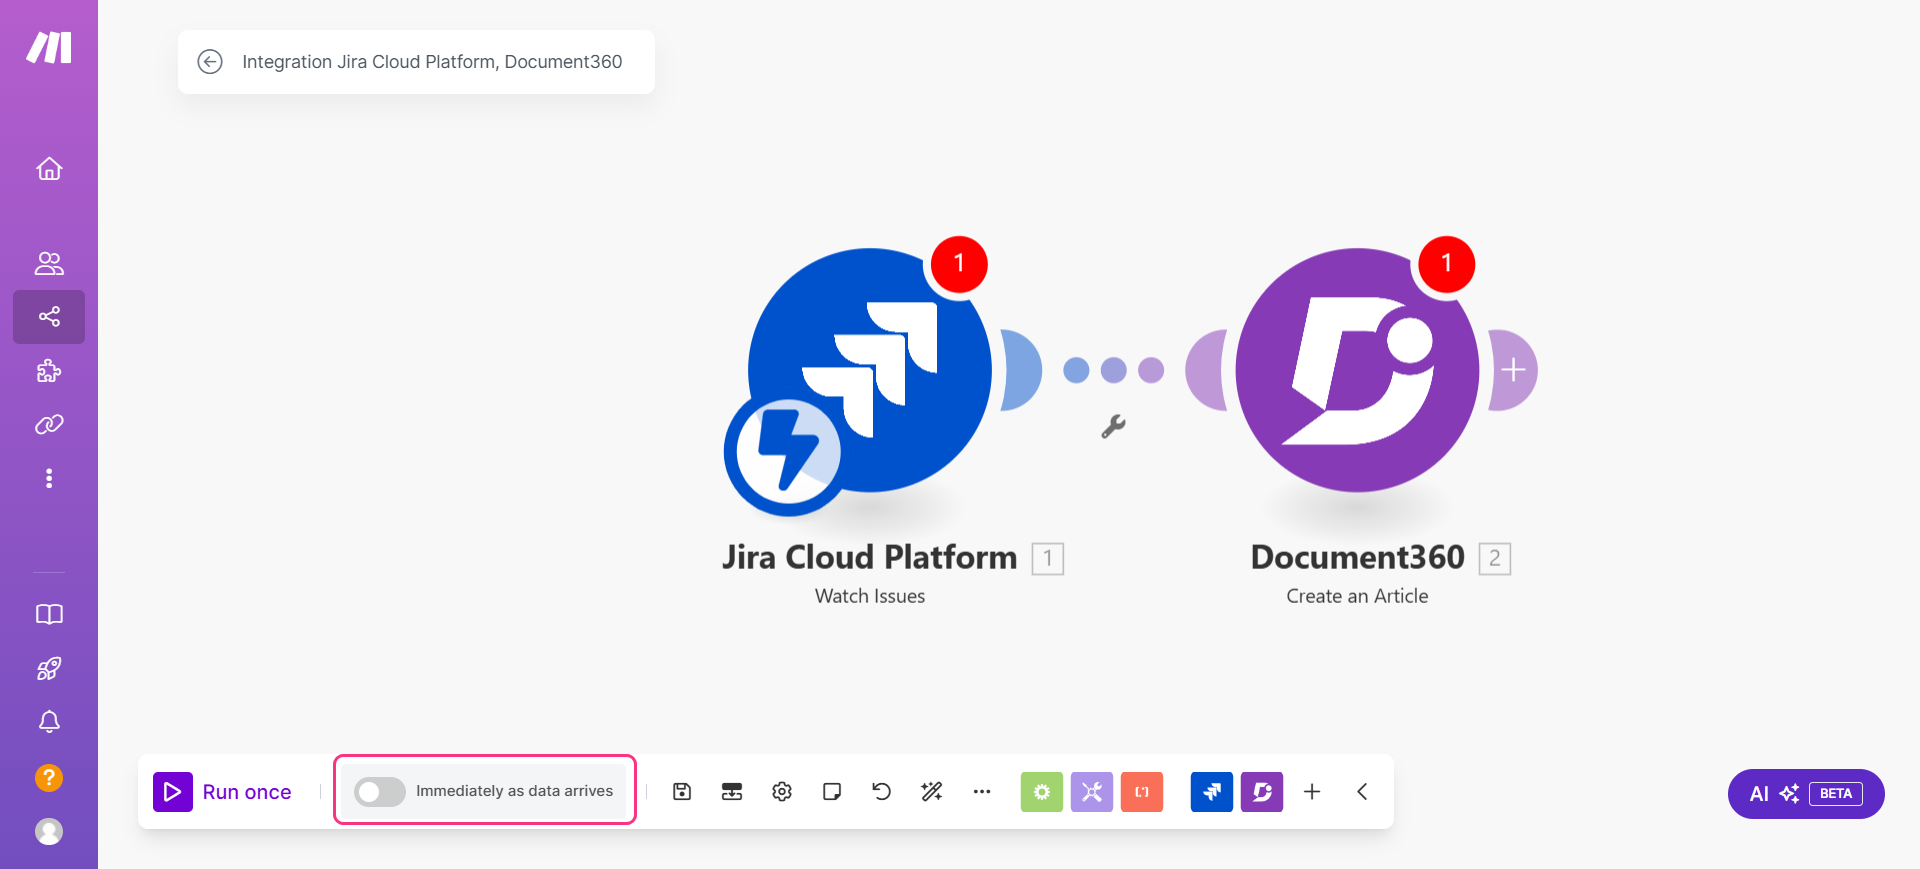
Step 5 — Schedule the Scenario
- Enable the toggle at the bottom left to schedule the Scenario. Because Jira uses a webhook-based trigger, enabling this toggle runs the Scenario immediately as new issue data arrives.
- Click OK to save.
Step 6 — Activate the Scenario
- Click the Exit editing () icon at the top. The integration dashboard appears.
- Turn on the ON/OFF toggle near the Edit option to activate the Scenario.
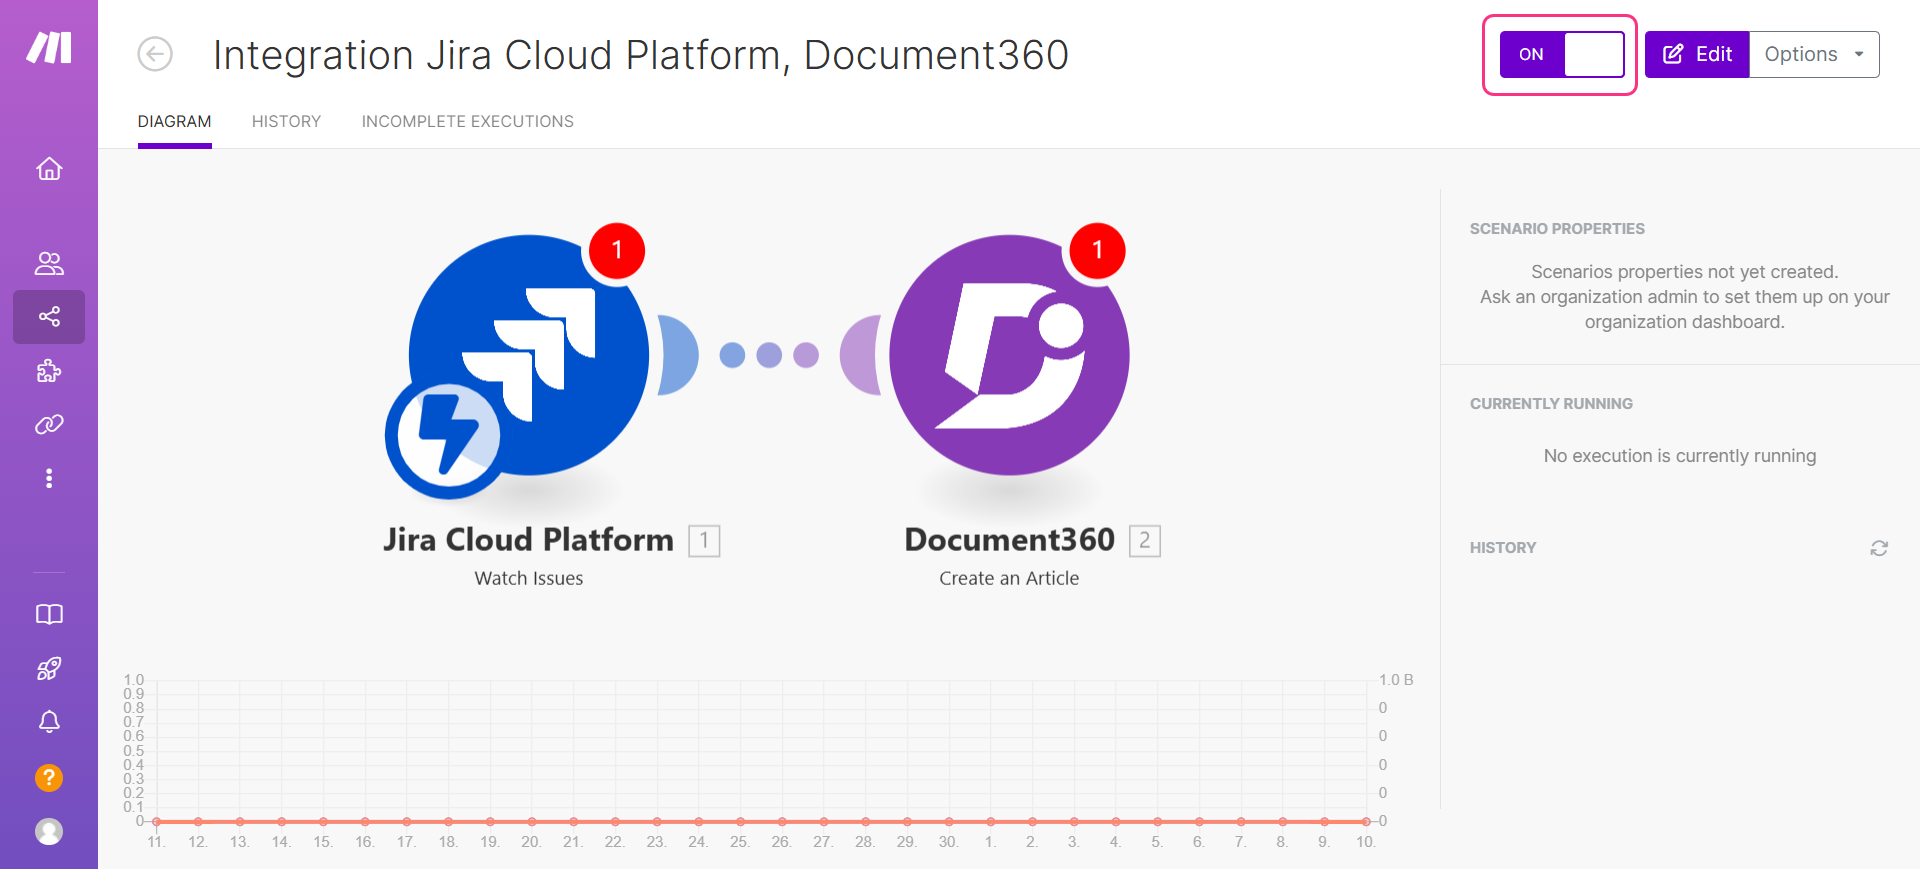
Once activated, the Scenario runs in real time as Jira issues are created or updated.
Best practices
- Use the Filter and Select a Method options to scope the Scenario to specific issue types or projects rather than watching your entire Jira instance. For example, watch only bug reports in a specific project to avoid generating articles for every routine task or sub-task.
- Map the Jira issue summary to the Article Title for clean, descriptive article names that reflect the issue being documented. Avoid using internal IDs or codes as titles — your readers will find summary-based titles far more useful.
- Store your Jira API token securely. Unlike OAuth connections, the Jira API token is a long-lived credential. If your token is regenerated in Atlassian, update it in Make's connection settings immediately to prevent the Scenario from failing silently.