Pläne, die diese Funktion unterstützen: Professional Business Enterprise
Unterstützende Dateien können den Inhalt des Artikels verdeutlichen und erweitern, wodurch komplexe Themen leichter verständlich werden. In Document360 gibt es zwei Möglichkeiten, Dateien zu den Artikel- und Kategorieseiten hinzuzufügen:
Hinzufügen von Dateien
Anhängen von Dateien
Hinzufügen von Dateien zu Artikeln
Das Hinzufügen einer Datei zu einem Artikel bedeutet, dass sie direkt in den Hauptteil des Artikels eingebettet wird und nicht als Anhang zum Herunterladen. Dazu muss die Datei zunächst auf das Laufwerk hochgeladen werden.
Hinzufügen von Dateien im Markdown-Editor
So fügen Sie Dateien im Markdown-Editor hinzu:
Navigieren Sie im Markdown-Editor zum gewünschten Artikel.
Wählen Sie das Symbol Datei einfügen () aus.
Wählen Sie die Datei aus dem Laufwerk aus, die Sie hinzufügen möchten.
Klicken Sie auf Einfügen.
ANMERKUNG
In Drive können Sie Dateien nach folgenden Kriterien filtern:
Hochgeladen: Filtern Sie nach Alle, 7 Tagen, 30 Tagen, 3 Monaten, 1 Jahr oder sogar einem benutzerdefinierten Datum.
Hochgeladen von: Wählen Sie die gewünschten Mitwirkenden aus der Liste aus.
Art: Wählen Sie den Dateityp aus, z. B. PDF, JPEG usw.
Schilder: Sortieren Sie Dateien basierend auf den Tags.
Hinzufügen von Dateien im erweiterten WYSIWYG-Editor
Navigieren Sie im erweiterten WYSIWYG-Editor zum gewünschten Artikel.
Um eine Datei einzufügen, verwenden Sie den Schrägstrich-Befehl
/file.Das Bedienfeld "Datei einfügen" wird im Editor angezeigt.
Sie können die Datei auf drei Arten einfügen:
Ziehen Sie die Datei per Drag & Drop in das Bedienfeld.
Klicken Sie auf den Text Klicken Sie hier, um den Text hochzuladen und wählen Sie die gewünschte Datei aus Ihrem lokalen Speicher aus.
Klicken Sie auf Dateiauswahl öffnen und wählen Sie eine Datei aus dem Laufwerk aus.
Verwenden Sie das Symbol für den beweglichen Block (), um das Fenster zum Einfügen von Dateien neu anzuordnen und zu löschen.
ANMERKUNG
Nachdem Sie die Datei im Artikel hinzugefügt haben, klicken Sie auf Herunterladen (), um die Datei auf der Wissensdatenbank-Website herunterzuladen.

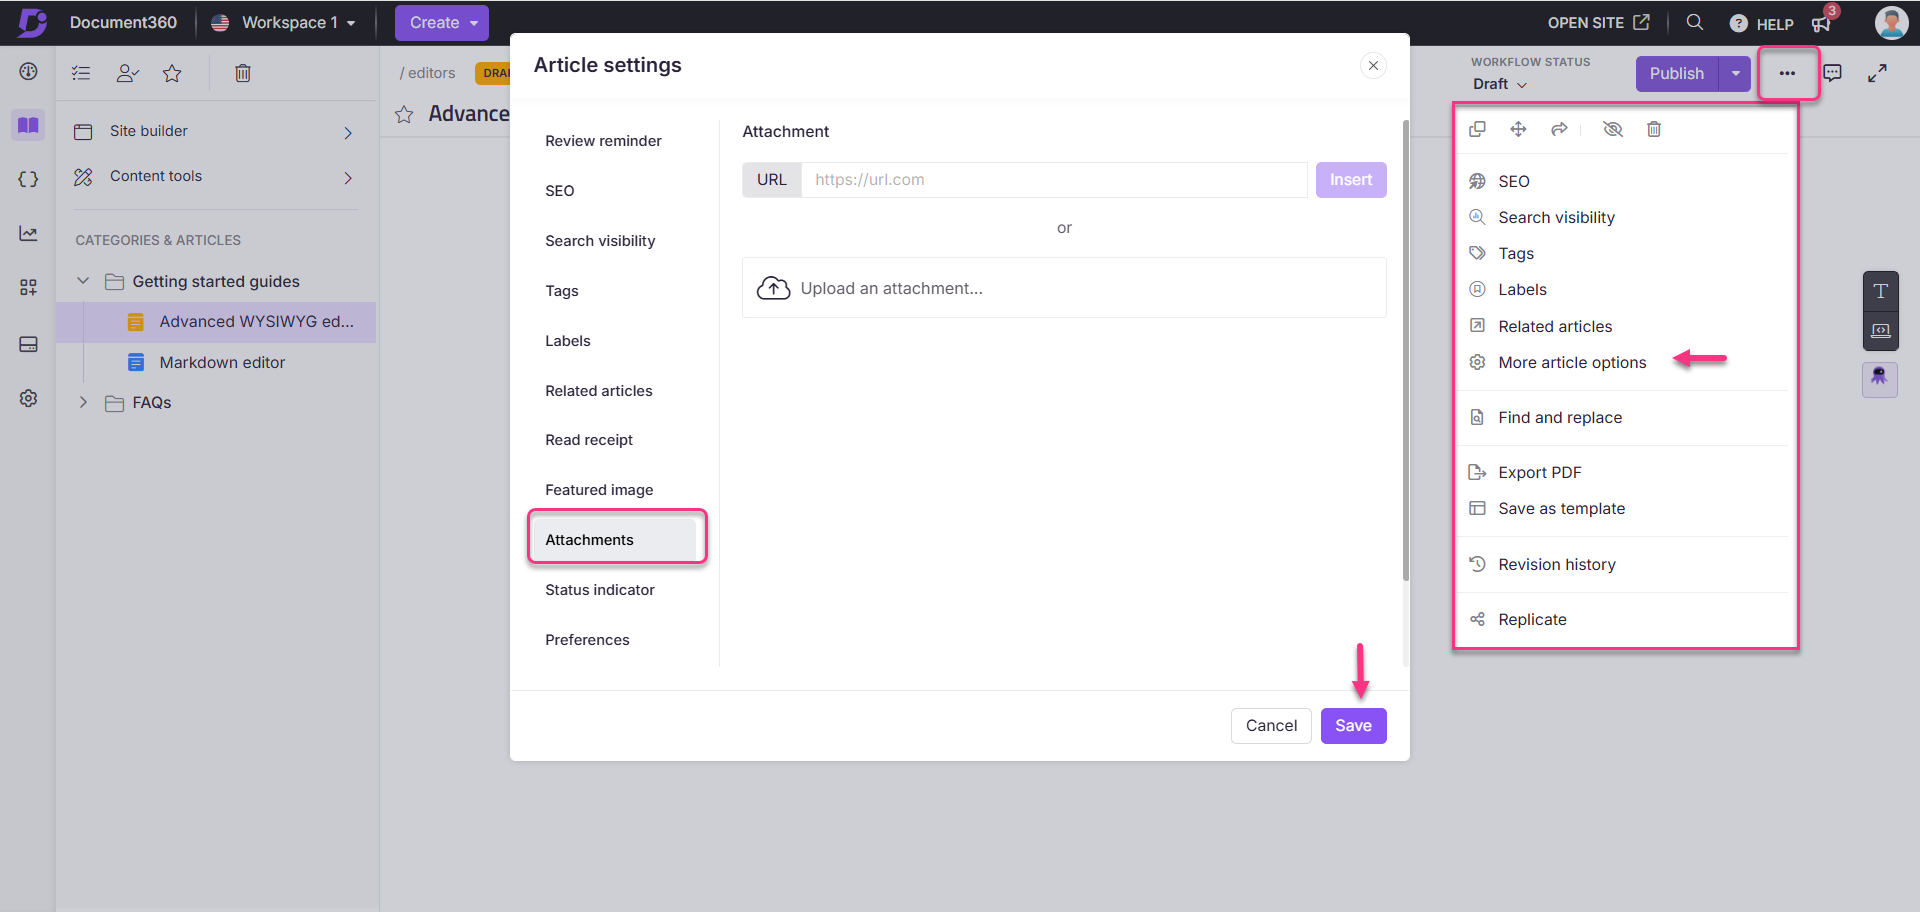
Anhängen von Dateien an Artikel
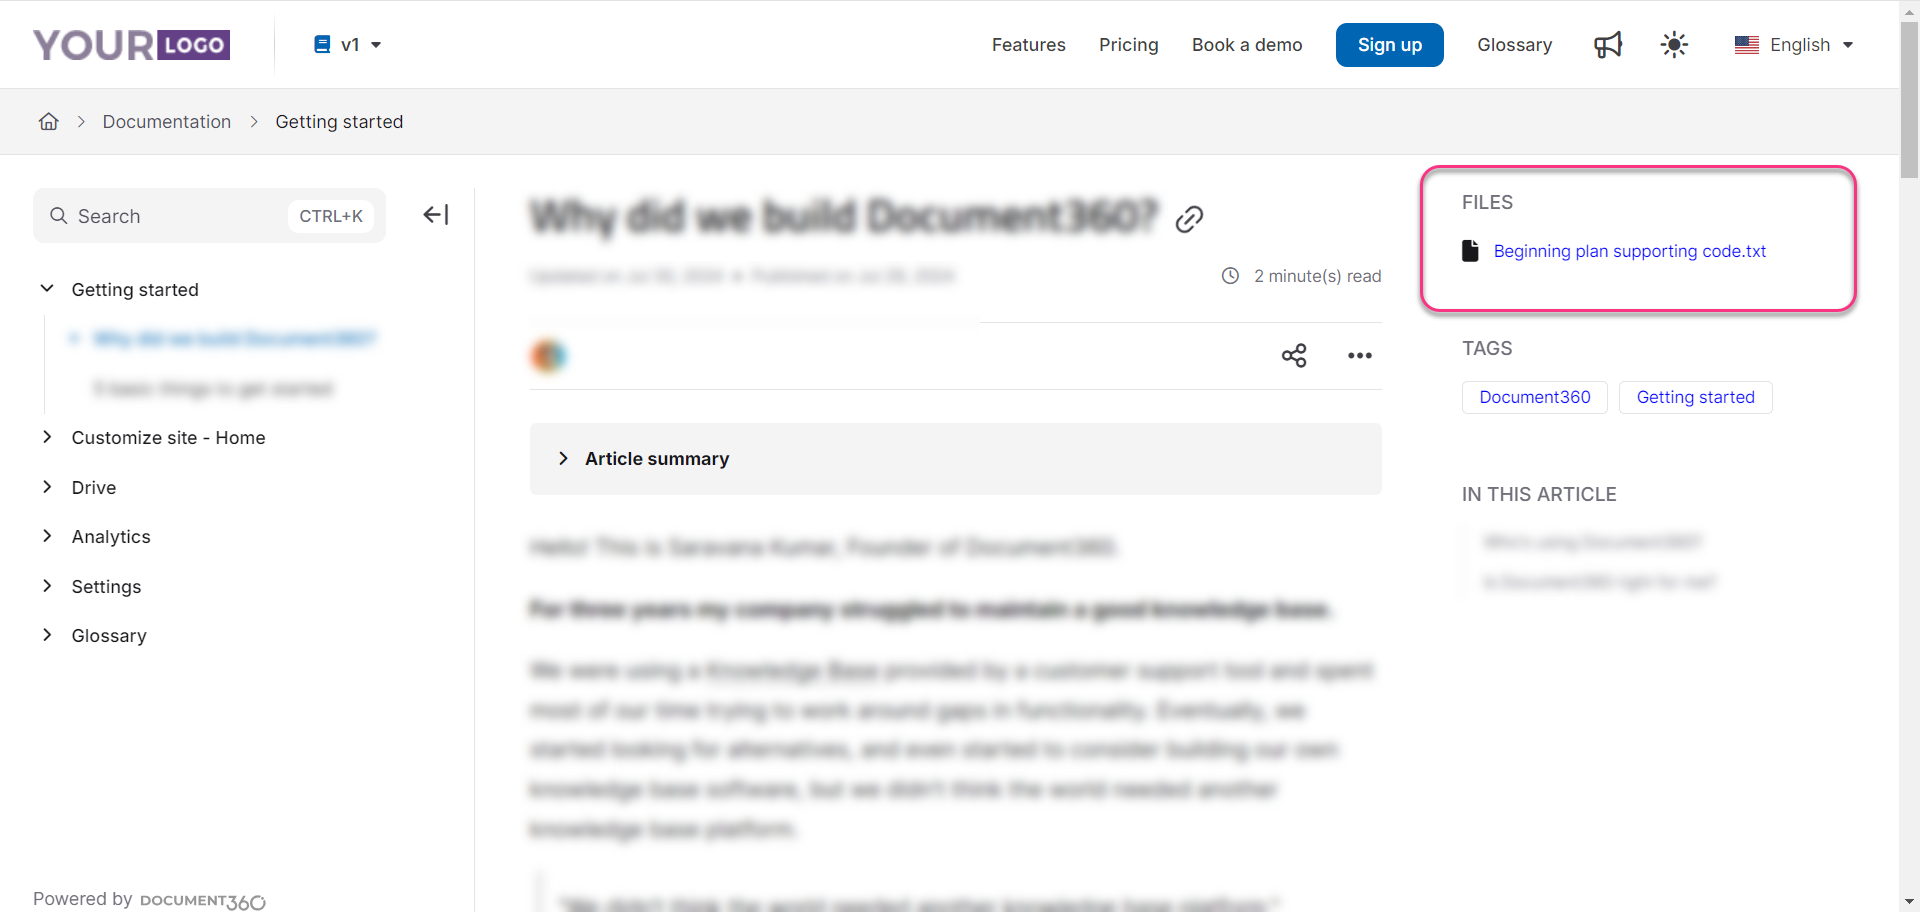
Wenn Sie eine Datei an einen Artikel anhängen, kann sie als herunterladbarer Link angezeigt werden, anstatt sie direkt in den Artikeltext einzubetten. Auf der Wissensdatenbank-Website werden die angehängten Dateien über den Tags und dem Inhaltsverzeichnis auf der rechten Seite der Seite ausgerichtet.
Klicken Sie im gewünschten Artikel auf das Symbol Mehr () oben rechts.
Klicken Sie auf die Optionen für weitere Artikel.
Hängen Sie auf der Registerkarte Anhänge die Datei auf zwei Arten an:
URL: Geben Sie die URL ein und klicken Sie auf Einfügen.
Laden Sie einen Anhang hoch: Wählen Sie die gewünschte Datei aus und klicken Sie auf Hochladen.
Wenn Sie fertig sind, klicken Sie auf Speichern.
ANMERKUNG
Wenn Sie mehr als eine Datei an einen Artikel anhängen, können Sie die Anzeigereihenfolge anordnen, indem Sie die Dateinamen per Drag & Drop in das Menü ziehen.
Ansicht der Wissensdatenbank-Site
Häufig gestellte Fragen
Was ist der Unterschied zwischen dem Hinzufügen und Anhängen von Dateien?
Durch das Hinzufügen von Dateien werden diese direkt in den Artikeltext eingebettet, während angehängte Dateien über den Tags und dem Inhaltsverzeichnis auf der rechten Seite der Seite ausgerichtet werden.
Kann ich Dateien in Drive filtern, wenn ich sie zu einem Artikel hinzufüge?
Ja, Sie können Dateien nach Upload-Datum, Mitwirkenden, Dateityp und Tags filtern.
Was soll ich tun, wenn meine angehängte Datei nicht auf der Wissensdatenbank-Website angezeigt wird?
Wenn die angehängte Datei im gewünschten Artikel nicht sichtbar ist, führen Sie die folgenden Schritte aus, um Artikeldateien auf der Wissensdatenbank-Website zu aktivieren:
Navigieren Sie in der linken Navigationsleiste des Knowledge base portalzu Einstellungen ().
Navigieren Sie im linken Navigationsbereich zu Knowledge base site > Article settings & SEO.
Erweitern Sie auf der Registerkarte Artikeleinstellungen das Akkordeon Artikelrecht .
Aktivieren Sie den Schalter Artikeldateien anzeigen , wenn er deaktiviert ist.