Plans supporting this feature: Enterprise (add-on)
In Salesforce, a Case refers to a customer query, feedback, or concern. Support agents use Cases as reference points to enhance service delivery. Customers may reach out through various channels such as phone, email, web, or social media platforms.
Integrating Document360 with the Cases home page on Salesforce streamlines access to knowledge base articles directly within the Salesforce console. This integration facilitates quicker resolution of customer issues by providing agents with relevant information at their fingertips.
Integrating Document360 and Cases home page
To set up a connection between Document360 and Cases in Salesforce, follow the below steps:
From the Salesforce home page, navigate to Service, then select Cases.
The recently added Cases are displayed on the Cases home page. If you don't have any active Cases, you can create a new one.
To add a new case, click New at the top right.
In the panel, you can provide details about your new case, such as its nature, customer information, case origin, priority, and more.
Click Save.
Once the desired case is selected, its overview page will appear.
Click the Quick settings icon at the top right and select Edit Page.
In the Quick Find search bar, type Lightning App Builder to access the Lightning App Builder page, where you can customize your Cases page with drag-and-drop components.
Search for Visualforce in the Lightning App Builder and drag the Visualforce component onto the design page. Adjust the component's height in pixels as required in the right section.
NOTE
Make sure to utilize the exact or larger height pixel size specified during the creation of the Document360 Visualforce page. For more information, refer to the article on Salesforce.
The Document360 app is added to the page. You can add, delete, or reposition the different components on the page.
Once done, click Save.
An activate component prompt appears. Click the Activate button.
Now navigate back to the Cases page, and the knowledge base section is added.
Create Knowledge base articles in Salesforce
After integration, without leaving the Salesforce environment, you can directly create an article for your knowledge base.
Click the Create article tab.
Enter the title of the article.
Select the desired category where you want the new article to be placed.
Provide the article content in the Content section. You can utilize markdown syntax in this section.
Once you've finished, click the Create article button at the bottom.
NOTE
The newly created article will be in draft state. An admin, owner, or editor can then access the Document360 portal to review and publish the new article.
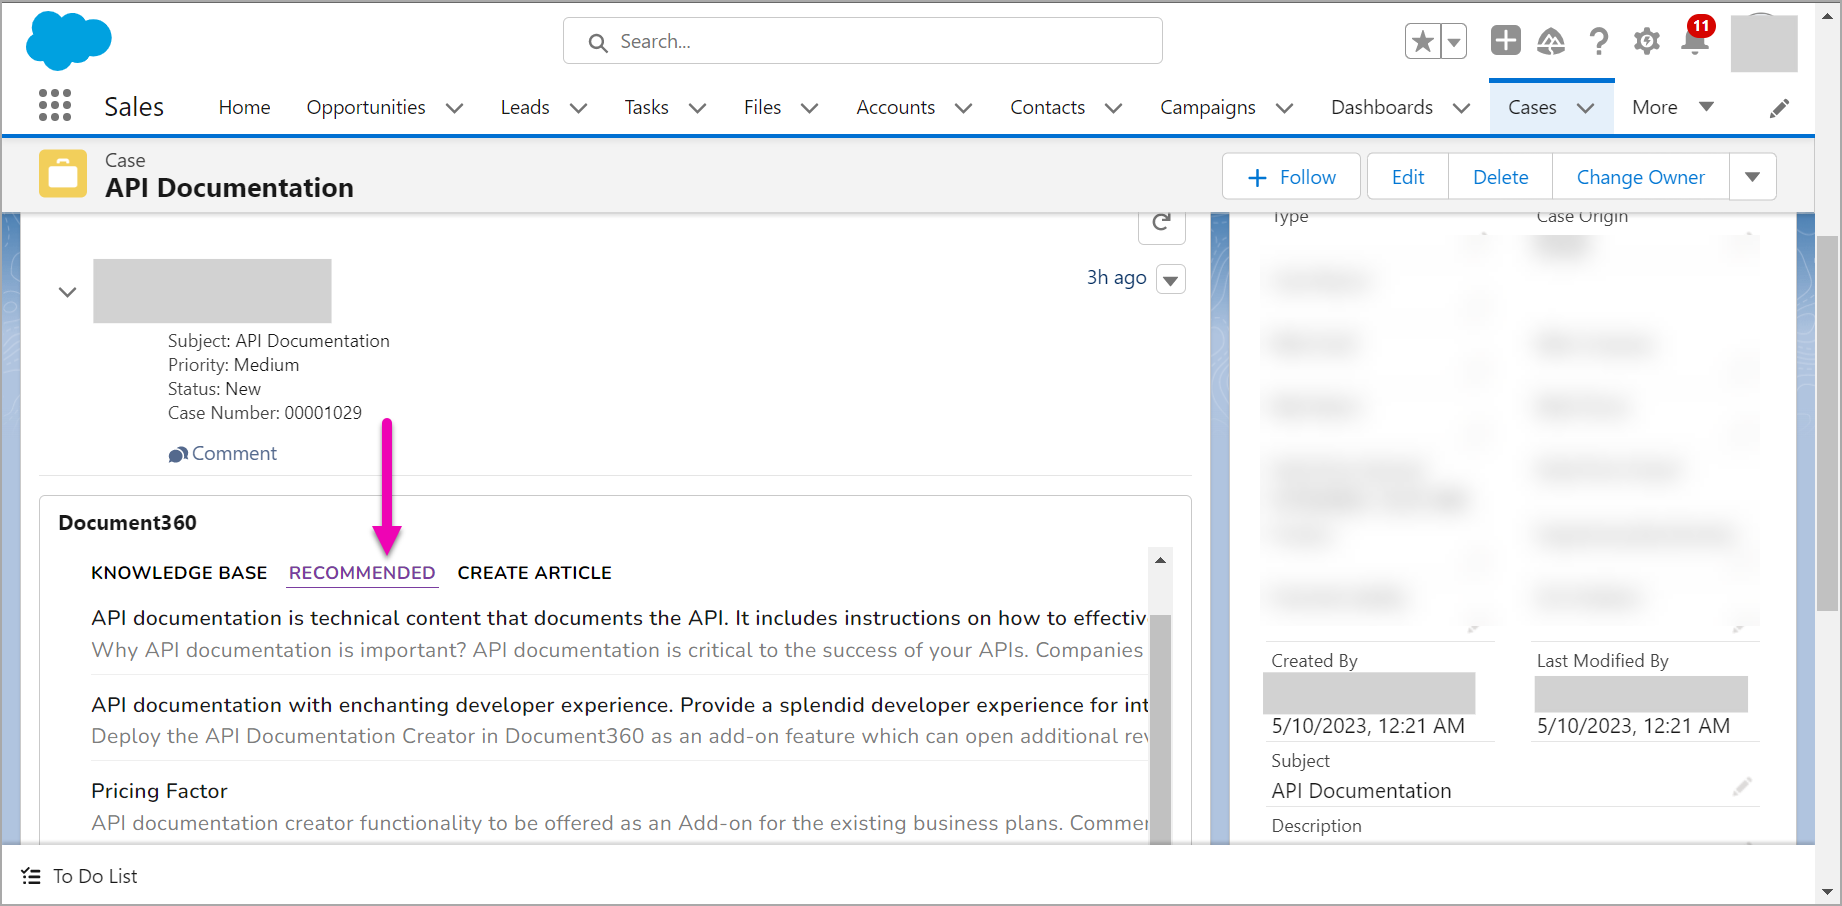
Recommendations
Document360 automatically retrieves articles relevant to your case and presents them in this tab. These articles are sourced based on keywords found in the Subject field of the case.
By default, articles from the main workspace and default language are showcased as recommendations. However, you have the flexibility to adjust the workspace and language preferences using the dropdown menu located at the top widget.
This section displays up to five articles. Each article is accompanied by its title, a brief content excerpt, options to copy the content, and the ability to open the article in a new tab.