Setting up the Salesforce integration connects your Document360 knowledge base to your Salesforce console. Once set up, support agents can search for articles, get recommendations, and create knowledge base content directly from within Salesforce. This article walks you through every step of the setup process, from installing the Document360 app on Salesforce to authorizing the connection from your Document360 portal.
Before you begin
- You need a Salesforce Lightning platform account. If you don't have one, sign up for a free trial on the Salesforce sign-up page. If you already have an account, skip to Install the Document360 app on Salesforce.
- You must be an admin in both your Salesforce org and your Document360 project.
- The Salesforce integration is an add-on purchase. Go to Settings > Extensions in your Document360 portal and click Buy now under the Salesforce tile before starting.
How to set up the Salesforce integration
Setting up the integration involves five stages. Complete them in order:
- Create a Salesforce account (skip if you already have one)
- Install the Document360 app on Salesforce
- Configure App Manager settings
- Add a Visualforce page
- Grant app access to user profiles
- Authorize the integration from Document360
Create a Salesforce account
If you already have a Salesforce Lightning platform account, skip this section.
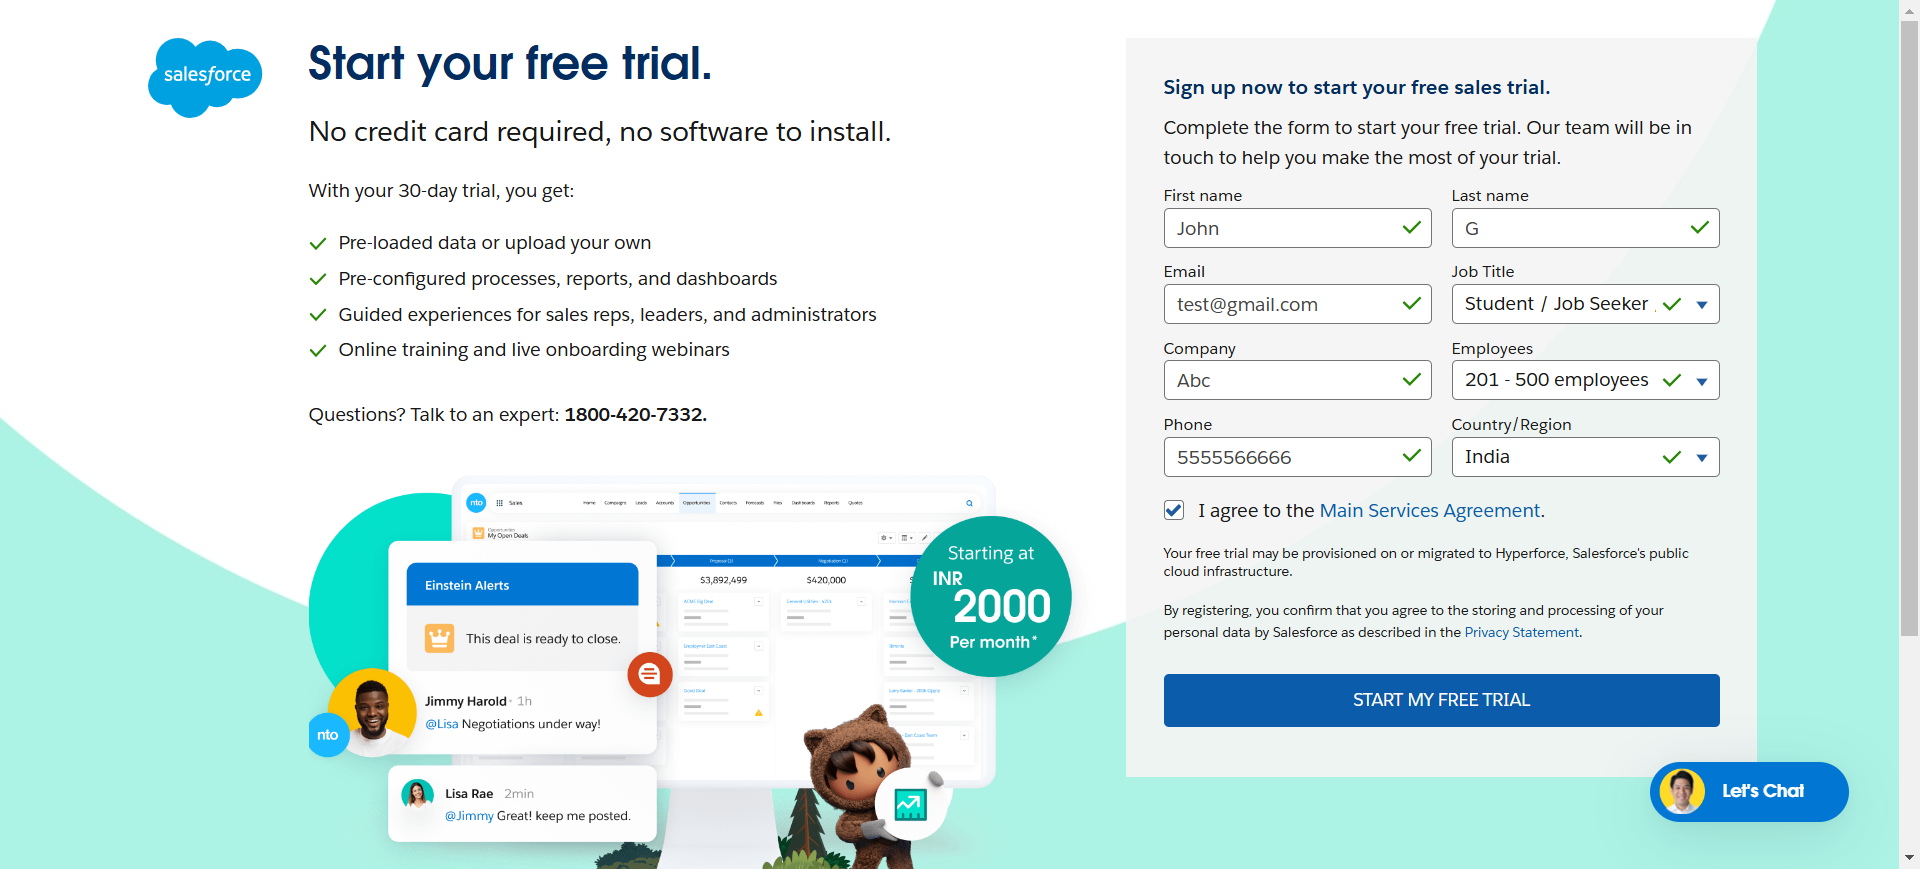
- Go to the Salesforce sign-up page.
- Enter the required details and click Start my free trial.
- Visit the Salesforce pricing page to choose and purchase a plan that suits your needs.
- Check your registered email for a message containing your verification link, account URL, and username. Click Verify Account in the email.
- Enter the verification code from the follow-up email and click Verify.
The verification code arrives in a separate email from the initial verification link email.
You are redirected to the Salesforce home page.
Install the Document360 app on Salesforce
- Go to the Document360 listing on AppExchange.
- Click Try It.
- Log in with your Trailblazer account.
- Select the environment where you want to install the app:
- Install in Production — installs Document360 in the production environment of your Salesforce project.
- Install in Sandbox — installs Document360 in the sandbox environment of your Salesforce project.
- Review the installation details and click Confirm and Install.
- Enter your Salesforce credentials and click Log In.
- Select who should have access to the Document360 app:
- Install for admins only — restricts access to admins only.
- Install for all users — gives all users in your org access.
- Install for specific profiles — limits access to selected user profiles.
This selection determines which users in your Salesforce org can access the Document360 app. You can adjust access later by updating user profiles.
- Click Install.
- Wait for the installation to complete, then click Done.
Configure App Manager settings and policies
After installing the Document360 app, configure its OAuth policies in Salesforce to control who can authorize the integration.
- In your Salesforce setup, navigate to Platform Tools > Apps > App Manager in the left navigation pane. This step ensures secure authorization and appropriate access control for users interacting with the Document360 integration.
- On the Lightning Experience App Manager page, find Document360 in the apps list.
- Click the downward arrow at the end of the Document360 app row and select Manage.
- On the Document360 connected app details page, click Edit Policies.
- In the Permitted Users dropdown, select who can authorize the app to access data on their behalf. There are two options:
- All users may self-authorize — any user in your organization can individually authorize the app when needed. This works well for organizations with different roles or departments that need to use the integration independently.
- Admin approved users are pre-authorized — admin users are automatically authorized without going through the authentication process each time. This is useful when the admin is the primary user of the integration.
Selecting Admin approved users are pre-authorized is a one-time action. Once set, the admin will not need to manually authenticate again.
Add a Visualforce page in the Salesforce developer console
You need to create a Visualforce page in your Salesforce developer console to embed the Document360 app into your Salesforce environment.
- In the Quick Find field at the top left of your Salesforce setup, search for Visualforce Pages and select it from the results.
- Click New.
- Enter a label, name, and description for the page.
- Select the Available for Lightning Experience, Experience Builder sites, and the mobile app checkbox.
- Paste the following code into the Visualforce Markup section:
<apex:page standardController="Case"> <apex:canvasApp applicationName="Document360" namespacePrefix="Document360" height="800" width="750px"/> </apex:page>
You can edit the height and width values in the markup to suit your layout. For example: height="800px" width="750px". Make a note of the height value you set here — you will need it when adding the Visualforce component to your Cases page.
- Click Save.
Grant app access to user profiles
The organization admin must grant Document360 app access to the relevant user profiles. Without this step, users will see an Insufficient Privileges error when accessing the Knowledge tab.
- Navigate to the Setup page in your Salesforce environment.
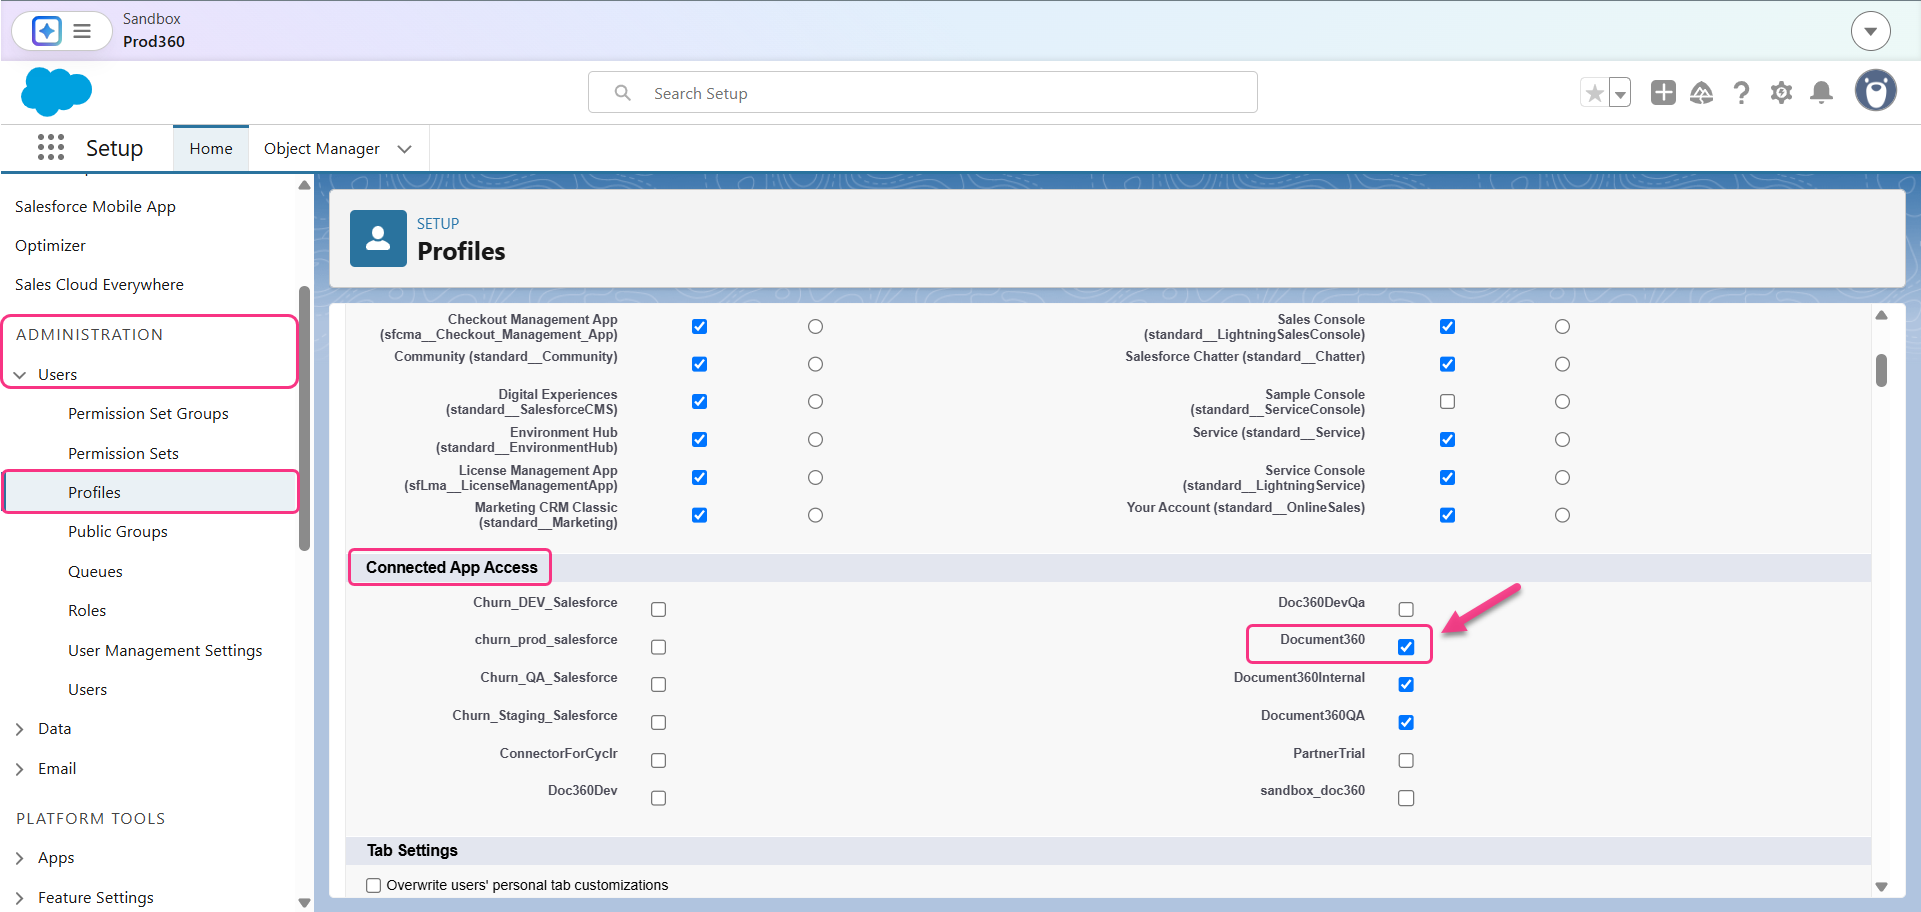
- In the left navigation pane, go to Administration > Users > Profiles.
- From the profiles list, click the profile assigned to the team or individual who manages the case page and integration settings.
- On the profile page, click Edit.
- Scroll down to the Connected App Access section.
- Select the Document360 checkbox.
- Click Save.
Repeat this for every profile that needs access to the Document360 app in Salesforce.
Authorize the Salesforce integration from your Document360 portal
The final step is to authorize the connection from your Document360 portal.
- Go to your Document360 portal.
- Navigate to Settings in the left navigation bar.
- Go to Extensions in the left navigation pane.
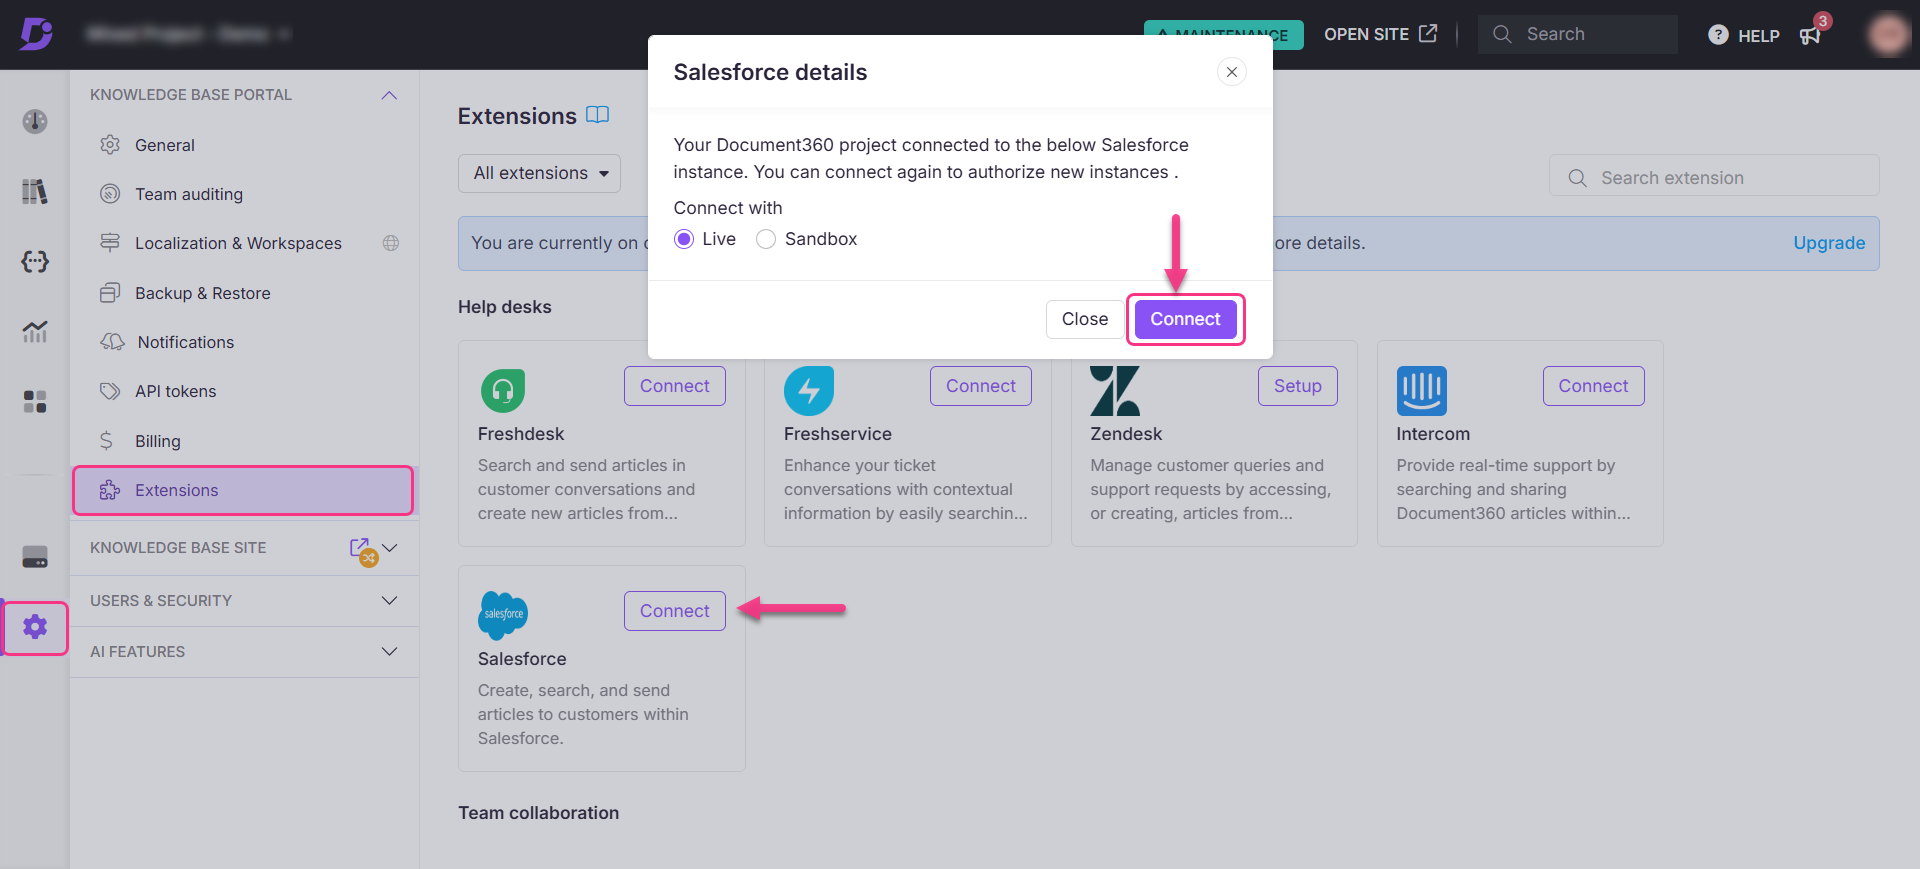
- Click Salesforce under the Helpdesk section.
Salesforce is an add-on purchase. If you haven't purchased it yet, click Buy now on the Salesforce tile.
- Click Connect.
- Select your authorization type:
- Live — authorizes your production Salesforce project.
- Sandbox — authorizes your sandbox Salesforce project.
- In the Allow access panel, click Allow and wait a few seconds.
- The Salesforce tile now shows the status as Project connected to Salesforce along with the Salesforce account URL associated with your project.
- Click Detail on the Salesforce tile to view your full configuration information.
To remove the integration, click the Delete icon on the Salesforce tile.
The Salesforce integration is now set up. Your agents can now search your knowledge base, get article recommendations, and create articles directly from the Salesforce console. Next, learn how to use Document360 in Salesforce.
Best practices
- Complete all five stages in order. Each stage depends on the one before it. Skipping the App Manager configuration, for example, can lead to authorization errors later.
- Test in Sandbox before going live. Use the Sandbox environment to verify the integration works as expected before connecting your production Salesforce project.
- Set profile access before authorizing. Grant Document360 app access to all relevant user profiles before agents try to use the integration, to avoid Insufficient Privileges errors.
- Note your Visualforce page height. When you add Document360 to your Cases page, the height must match or exceed the value set in your Visualforce page markup.
- Use Admin approved users are pre-authorized for a smoother experience. If your admin is the primary user of the integration, this setting removes the need for repeated authentication prompts.
- When upgrading the integration, review the Document360 and Salesforce release notes for any API or feature changes, test in a staging environment, then confirm compatibility before deploying to production.
FAQ
What is the technical architecture of the Document360 and Salesforce integration?
The integration uses APIs from both platforms to enable data transfer and synchronization between Document360 and Salesforce.
How is document versioning handled during synchronization?
The integration tracks changes in Document360 and updates corresponding records in Salesforce to maintain data accuracy and consistency.
What steps are involved in upgrading the integration when new versions are released?
Review the release notes for any changes to APIs or features, test the update in a staging environment, then confirm compatibility before deploying to production.