Many organizations use spreadsheets as their go-to tool for collecting and organizing data, which is among the simplest of its uses. Google Sheets is a free, web-based spreadsheet platform from Google that allows users to organize, collaborate, analyze, and edit distinct types of information. Multiple users can format and edit files in real time, and any changes made to the spreadsheet can be tracked by a revision history.
Integrating Google Sheets with Document360
Using Document360 as your Knowledge base platform, you can maintain a Google Sheets log of all articles in the Knowledge base. Each time a new article is added, an entry must also be made in Google Sheets. While Google Sheets makes tracking straightforward, manually updating every addition in Document360 can be time-consuming and effort-intensive.
By connecting Document360 and Google Sheets on Zapier, you can easily facilitate the content flow between Google Sheets and Document360. To establish a connection between Google Sheets and Document360, follow the below steps:
Ensure that you have logged into your Zapier account.
From the left navigation menu, click Create and then click Zaps from the options available.
Zap will be created with Trigger and Action flow.

Connecting Google Sheets and Document360 in Zapier
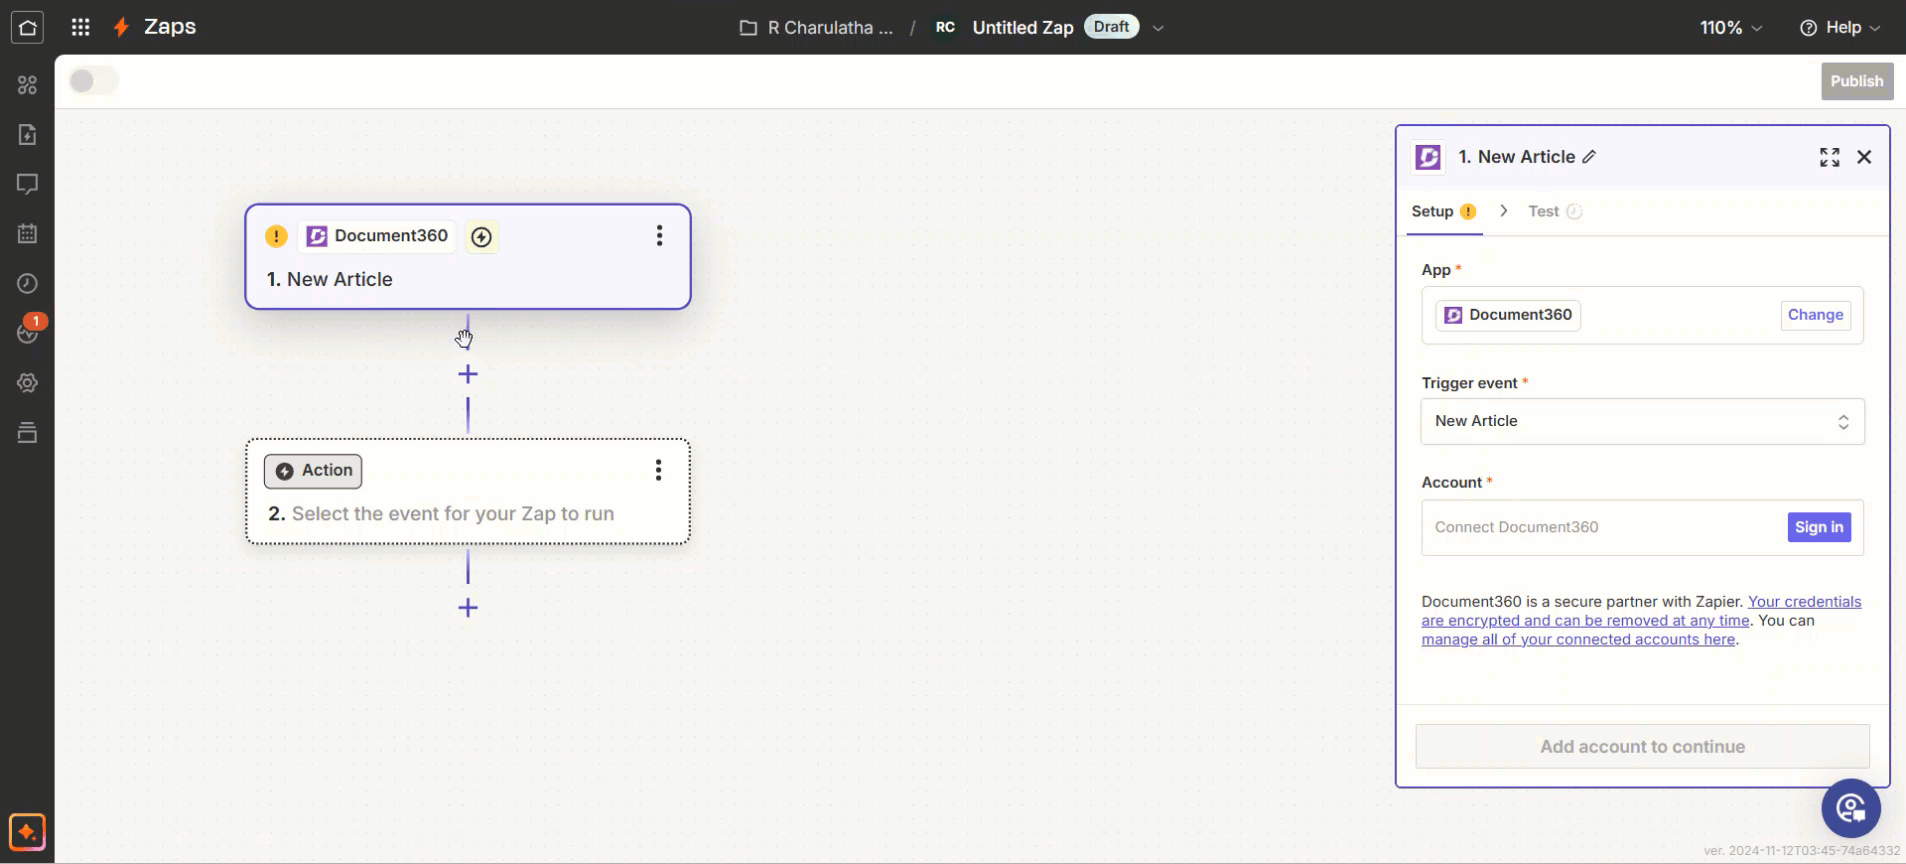
1. Setting up the trigger: Connecting Document360
In the Trigger field, choose Document360.
On the Setup panel that appears on the right, select a desired event in the Event field.
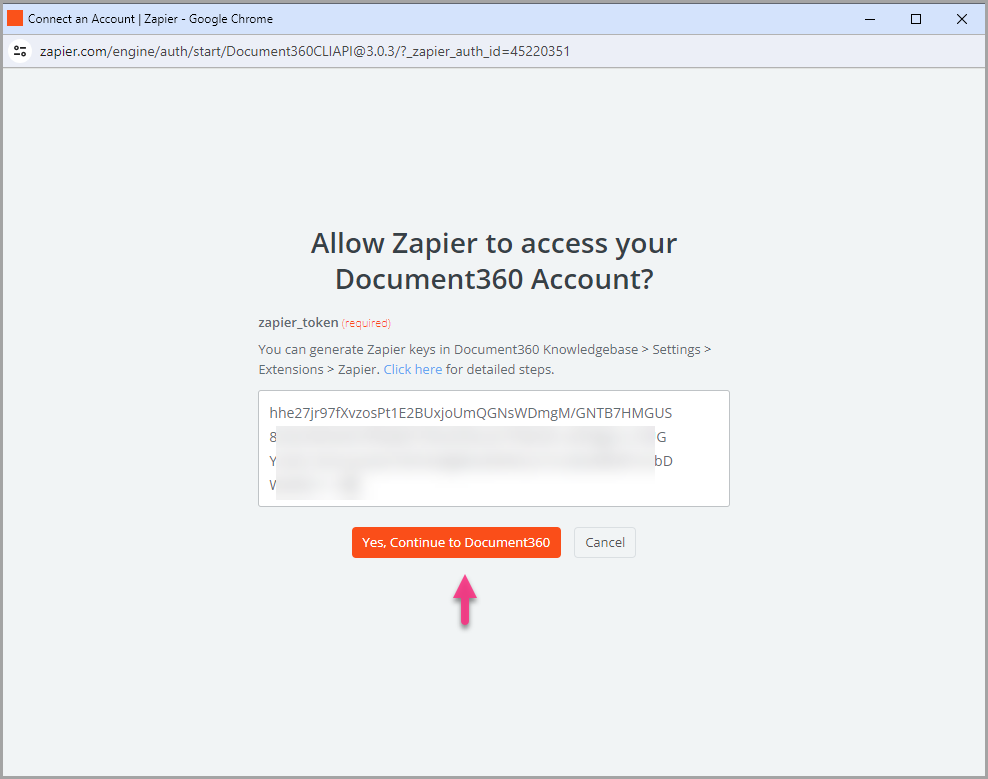
Click the Account field, and a Sign-in panel will appear.
Enter your sign-in credentials and click Allow.
To generate the API token from the Document360 portal,
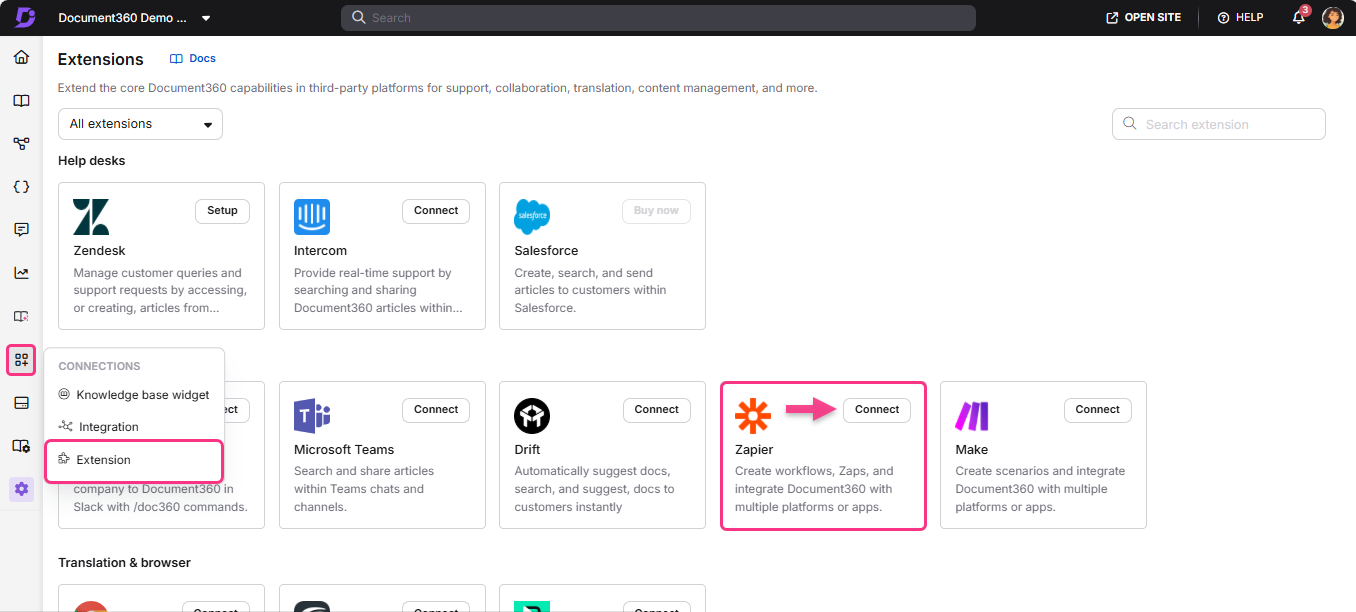
Navigate to Connections () > Extensions in the left navigation bar in the Knowledge base portal.
On the Zapier extension tile, click Connect.
Click the Copy () icon to copy the token.
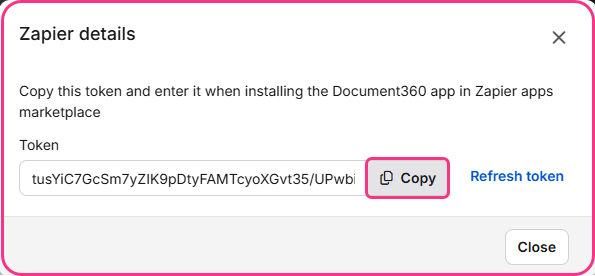
Head back to the Zapier panel and paste the API token in the field.
Click Yes, Continue to Document360.
You can find the connected Document360 project on the Connect Document360 account page.
If you wish to configure a different account later, you can do that by clicking on Change.
Click Continue.
2. Setting up the action: Connecting Google Sheets
In the Action field, choose Google Sheets.
On the Setup panel that appears on the right, select Create Spreadsheet Row in the Event field.
Click the Account field and a Sign-in panel appears.
Enter your sign-in credentials and click Allow.
Click Continue.
In the Configure panel, update the following fields:
Drive - The default option is My Google Drive or choose the drive from the list.
Spreadsheet - Select the desired Spreadsheet file from your Google Drive.
Worksheet - Choose the desired worksheet in the selected spreadsheet file above.
As soon as you select the worksheet, you can find the column headings listed. Select the Document360 article attribute you want to map with the respective field. Click Continue.
NOTE
Zaps are intended to only add rows to the end of the spreadsheet and not any other row in between.
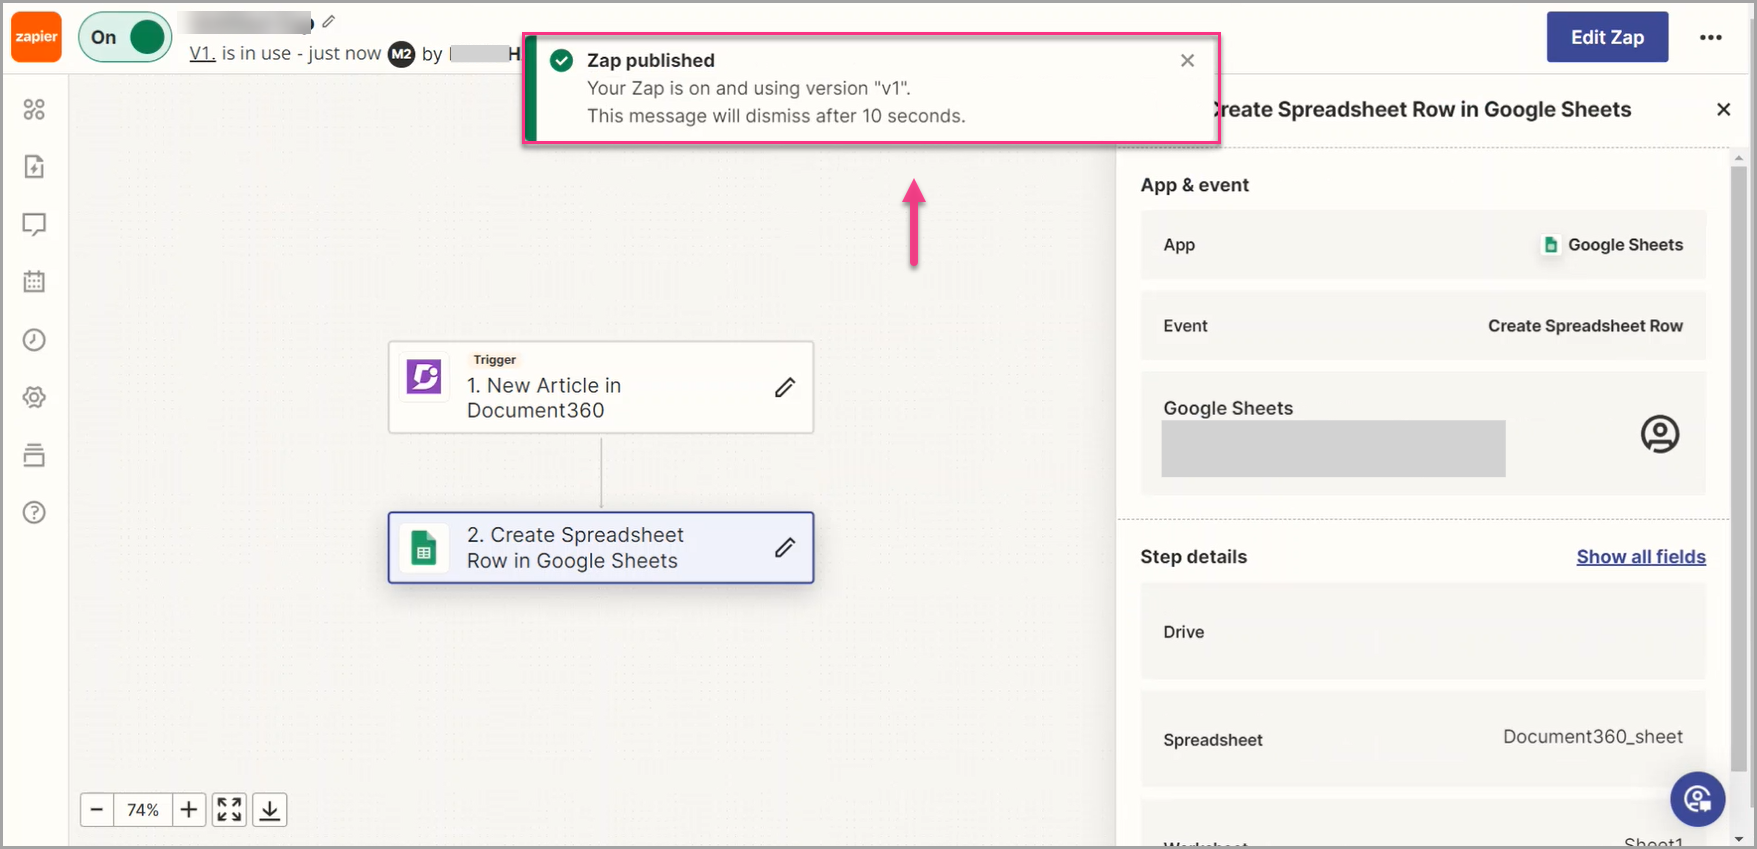
Once done, move ahead to the Test section and click Publish.
You will get a Zap published popup to confirm that the Zap is on.
NOTE
If you rename your sheet or worksheet(s) within the Sheet, you'll need to reselect them in the Zap Editor to update to the new names.
Zap overview
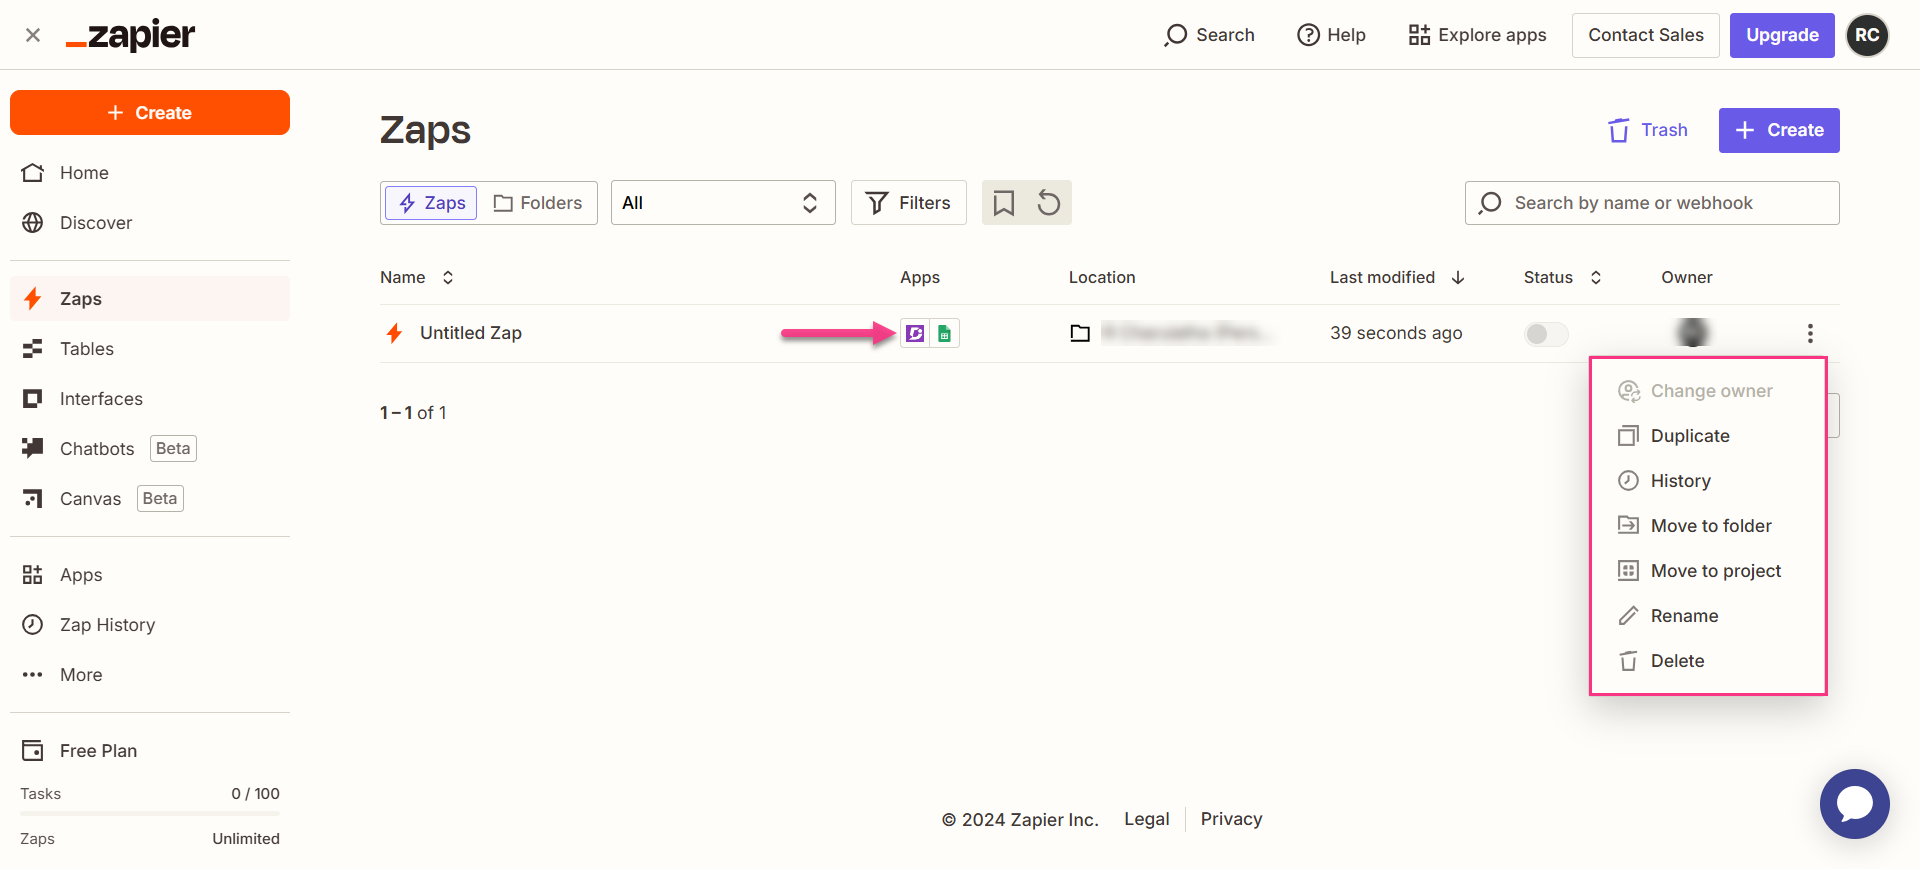
Deleting a Zap
Navigate to the Zapier dashboard. On the overview page, a list of all existing Zaps will be displayed.
Click the arrow (>) icon to the right of the desired Zaps and click Turn off and delete Zap.
The selected Zap will be deleted.
NOTE
Since you’re building a Zap that uses Google Sheets to add data, there are a few things you will need to do to get that sheet ready to work with Zapier. Refer Work with Google Sheets in Zaps for more information on how to interact with your sheet effectively.
FAQ
How is a spreadsheet different from a worksheet?
A Spreadsheet is the overall file you select from Google Drive, while a Worksheet is the specific tab within that file where the data is located.