The Recent page in Document360 gives you instant access to articles you've viewed or updated in the past 30 days. Instead of navigating through category trees to find something you worked on earlier, the Recent page surfaces it automatically — sorted by the most recent activity. You can search, filter, and take bulk actions directly from this page without opening each article individually.
When to use the Recent page
Use the Recent page when you need to:
- Return quickly to an article you were editing earlier in the day or week
- Review edits made by other team members on articles you've recently accessed
- Perform bulk actions (publish, move, delete, add tags) across a set of recently active articles
- Locate an article you accessed recently but can't remember the exact title or category path
Access the Recent page
You can open the Recent page from three places in Document360.
- [From the left navigation bar](/help/docs/recent-page#access-recent-page-rom-the-left-navigation-bar)
- [From the Overview page](/help/docs/recent-page#access-recent-page-from-the-overview-page)
- [From the documentation module](/help/docs/recent-page#access-recent-page-from-the-documentation-module)
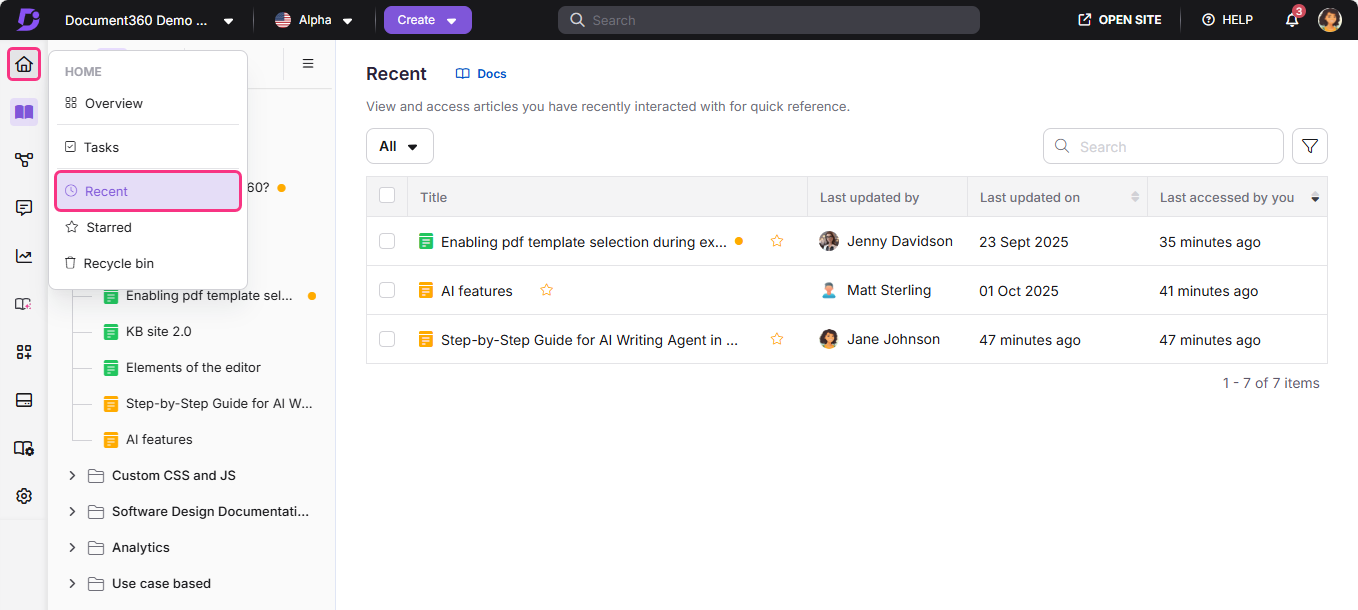
Access Recent page rom the left navigation bar
Hover over the Home () icon and click Recent.
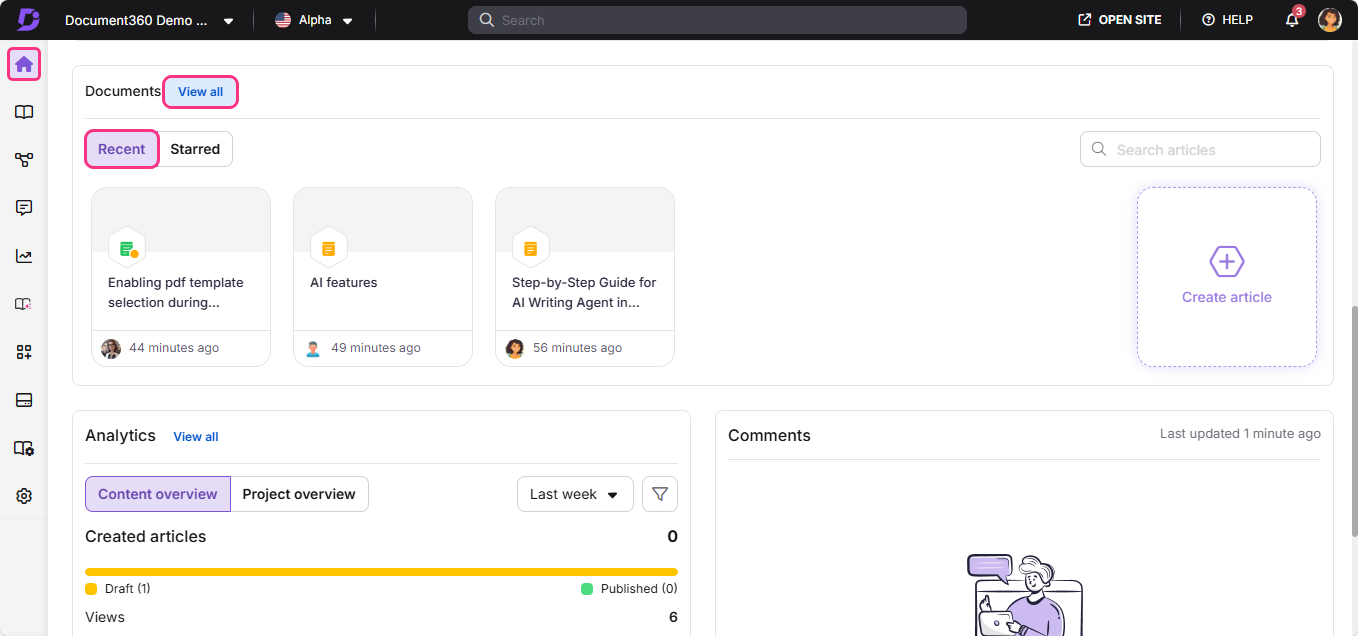
Access Recent page from the Overview page
- Hover over the Home () icon and click Overview.
- In the Documents card, select the Recent tab.
- Click View all.
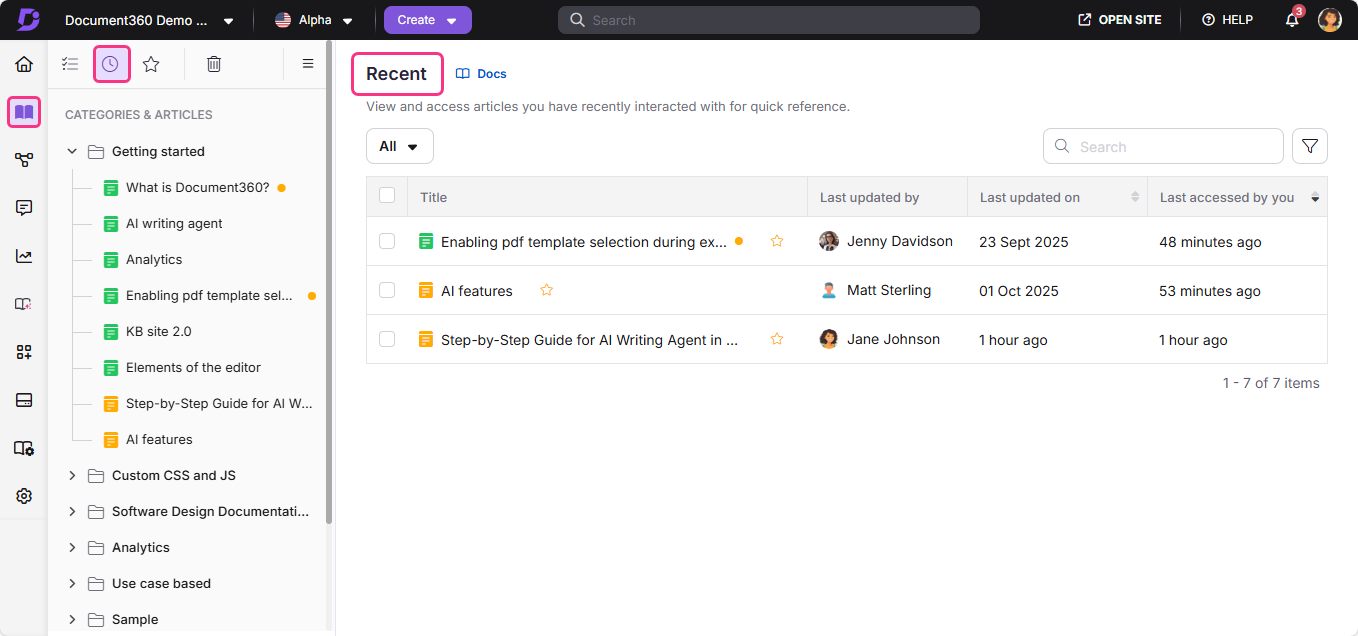
Access Recent page from the Documentation module
- Navigate to the Documentation () module.
- In the secondary left navigation menu at the top left, click the Recent icon ().
Actions available on the Recent page
The Recent page supports both individual and bulk actions. Available options depend on the article's current status (draft, published, or unpublished).
Individual article actions
These actions are available per article, either inline or through the More () menu:
- Click the article title to open it directly.
- Click the star icon next to an article title to add it to your Starred list.
- Publish (): Publish the article (draft or unpublished only).
- Publish later (): Schedule the article for publication (draft or unpublished only).
- Unpublish (): Unpublish the article (published only).
- Download as PDF (): Download the article in PDF format (published only).
- Remove from starred (): Remove the article from the Starred list.
- Add tags (): Add tags to the article.
- Add labels (): Add labels to the article.
- Clone (): Create a copy of the article.
- Move (): Move the article to a different workspace or category.
- Hide (): Hide the article from the knowledge base site.
- Delete (): Delete the article.
- Save as template (): Save the article as a reusable template.
- Replicate (): Add the article as a reference to a different workspace or category.
- Copy link (): Copy the portal link for the article. Available when a single article is selected via the More () menu or by selecting its checkbox.
- Security (): Manage access settings for the article in the knowledge base portal and site.
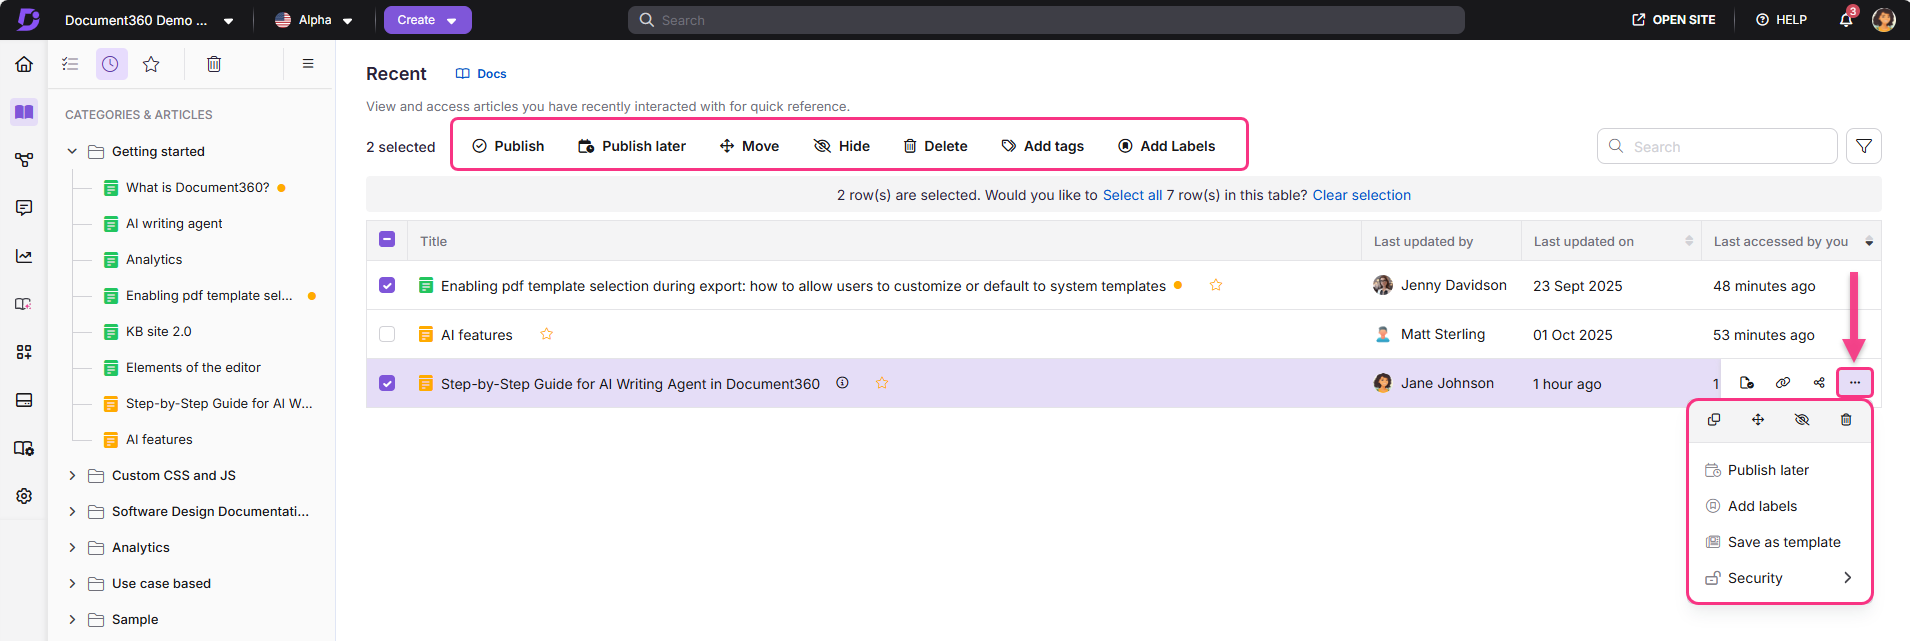
Bulk actions
Select multiple articles to apply these actions across all selected items at once:
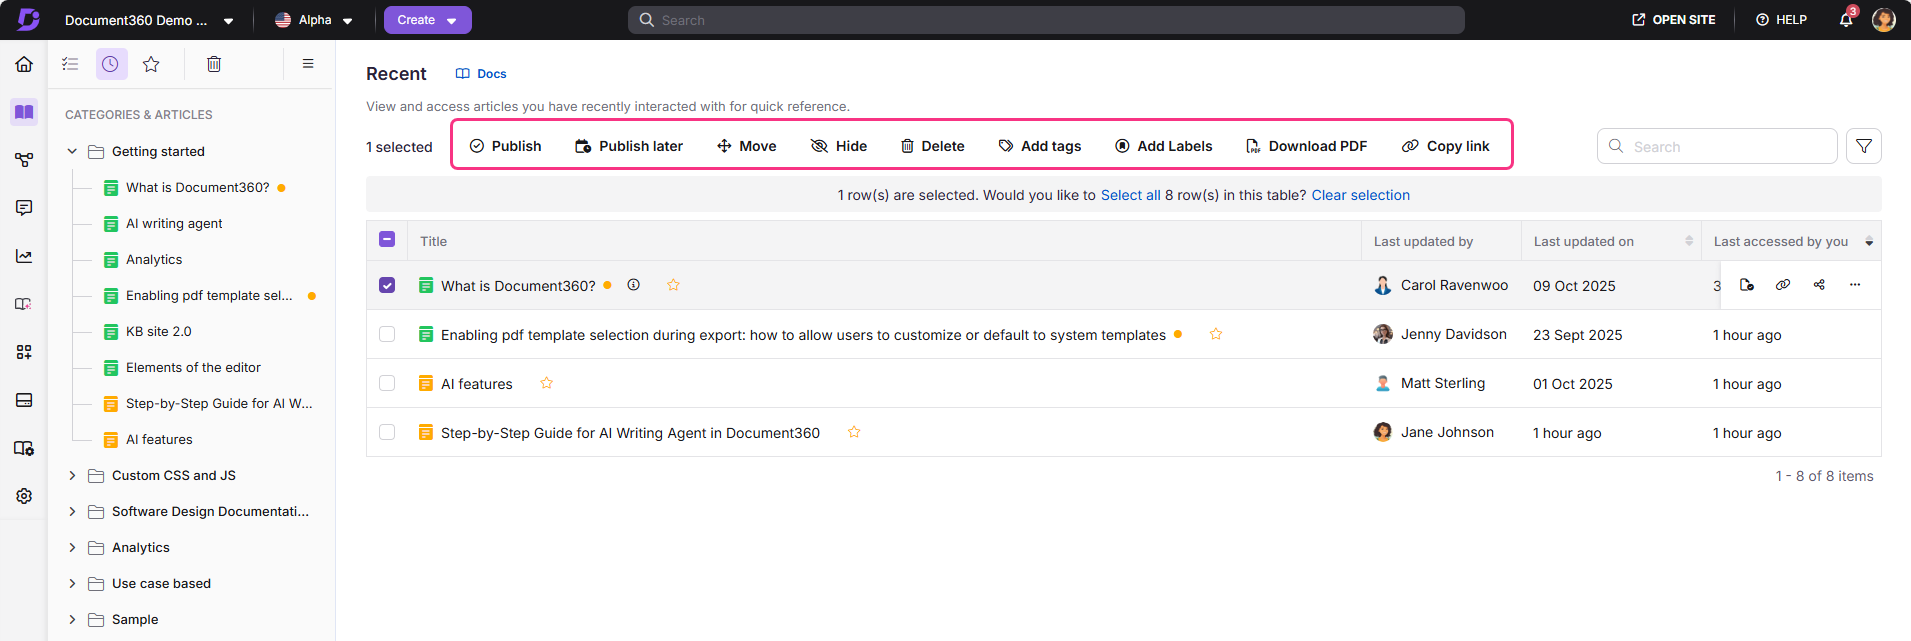
- Publish (): Publish the selected articles (draft or unpublished only).
- Publish later (): Schedule the selected articles for publication (draft or unpublished only).
- Unpublish (): Unpublish the selected articles (published only).
- Download as PDF (): Download the selected articles in PDF format (published only).
- Remove from starred (): Remove the selected articles from the Starred list.
- Move (): Move the selected articles to a different workspace or category (all articles).
- Hide (): Hide the selected articles from the knowledge base site (all articles).
- Delete (): Delete the selected articles (all articles).
- Add tags (): Add tags to the selected articles (all articles).
- Add labels (): Add labels to the selected articles (all articles).
Actions vary based on both article state and type. For example, Unpublish is available only for published articles, Publish for drafts, and Move, Hide, or Delete for page categories. These actions will not appear if your selection includes items where they are not valid.
Filters and other features
The Recent page includes several tools to help you find and manage content efficiently.
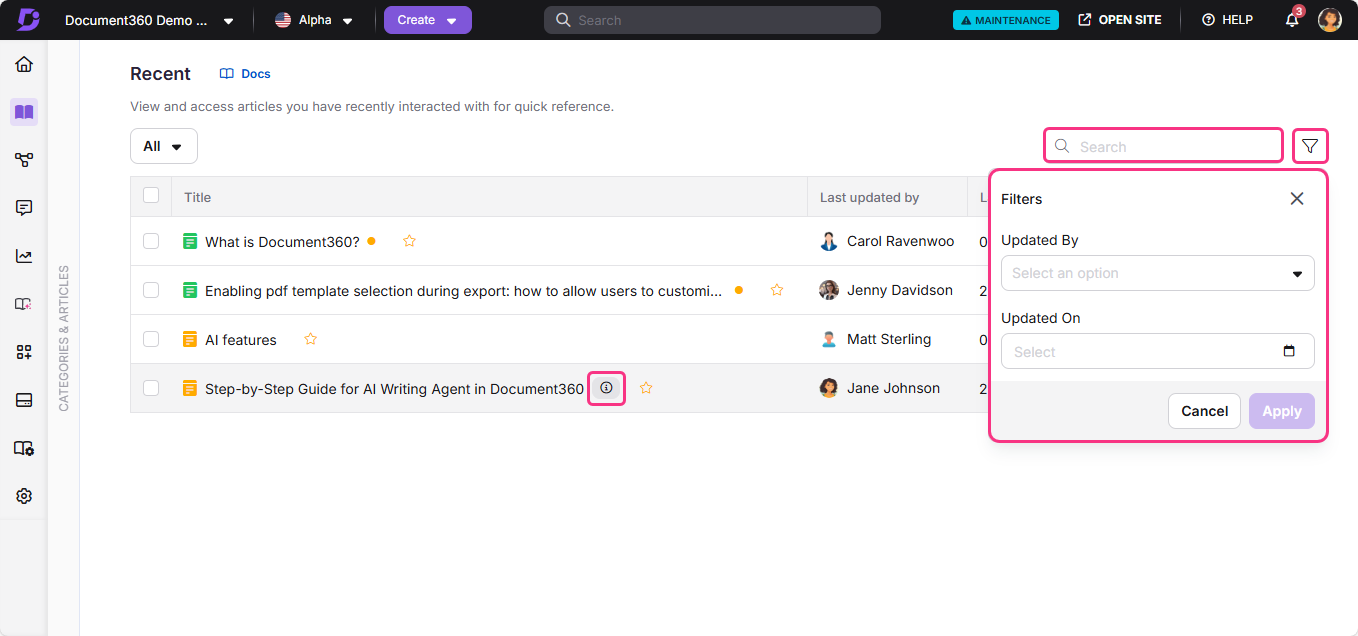
- Search bar — locate articles quickly by title.
- Pagination controls — navigate through the full list of recent items.
- Sort order — the list is automatically sorted by most recent activity.
- Information icon — click the icon next to any article title to view its details.
- Article metadata — each article shows the user who last accessed it, the last updated date, and the last time you accessed it.
- Filters — narrow down the list using:
- Date range (All, Today, Last 7 days, Last 30 days, Custom date)
- Updated by (filter by user)
- Updated on (filter by date)
Best practices
- Use filters with a date range to narrow the list when you're looking for something from a specific period rather than scrolling through all 30 days of activity.
- Star articles you return to often directly from the Recent page so they appear in your Starred list for faster access next time.
- Use bulk actions for routine maintenance — select multiple draft articles from the Recent page and publish or tag them in a single action rather than opening each one.
- Check the "Updated by" filter when reviewing team activity — it helps you quickly see what a specific team member has been working on recently.
FAQ
How far back does the Recent page track activity?
The Recent page automatically tracks articles you've viewed or updated within the past 30 days. Items older than 30 days are no longer shown.
Can I see articles that other team members have accessed recently?
The Recent page shows articles you personally have viewed or edited. Use the Updated by filter to see articles that were last modified by a specific team member across the workspace.
Is the Recent page shared across all users?
No. The Recent page is personal — it reflects only the articles you have viewed or updated. Each team member sees their own Recent list.