A workflow in Document360 is a structured process for creating, editing, reviewing, and publishing articles or category pages. It enables teams to establish clear stages in the documentation cycle and ensures that content moves through a consistent, accountable process before it is published.
The Workflow designer is where admins and project owners define the stages in this process, adding custom statuses, configuring assignees, setting read-only restrictions, and reordering the workflow to match their team's requirements.
When to use the Workflow designer
Use the Workflow designer when:
- Your team needs a multi-stage review process before articles are published, for example Draft > Peer Review > SME Review > Published.
- You want to automatically assign articles to specific users or user groups when they enter a particular workflow stage.
- You need to restrict editing on articles at certain stages to maintain content integrity during review.
- You are setting up a new project and want to define a documentation workflow that fits your team's structure.
Access the Workflow designer
- Navigate to Settings () in the left navigation bar.
- Select Knowledge base portal > Workflow designer in the left navigation pane.
The Workflow designer page displays the existing workflow, including the built-in system statuses Draft and Published, and any custom statuses you have created.
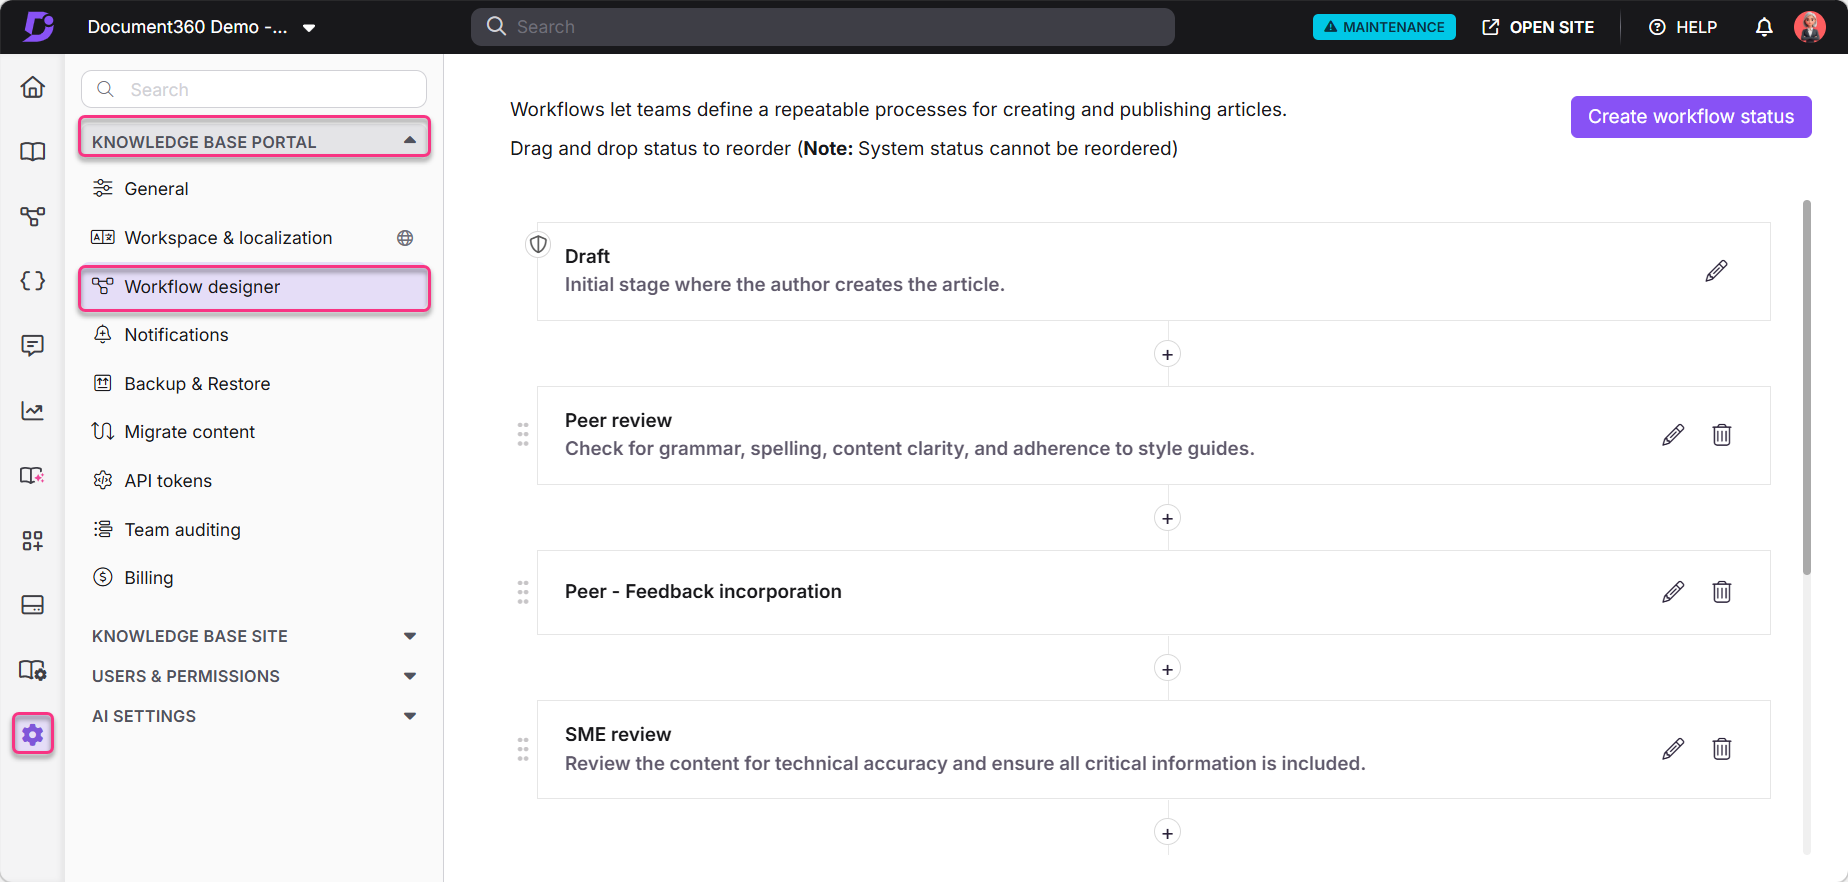
Workflow status types
| Type | Description |
|---|---|
| System status | Predefined statuses: Draft (start) and Published (end). Cannot be deleted or reordered. |
| Custom status | User-defined statuses you create between Draft and Published to match your team's review process, for example Peer review, SME review, or Legal review. Can be created, edited, reordered, and deleted at any time. |
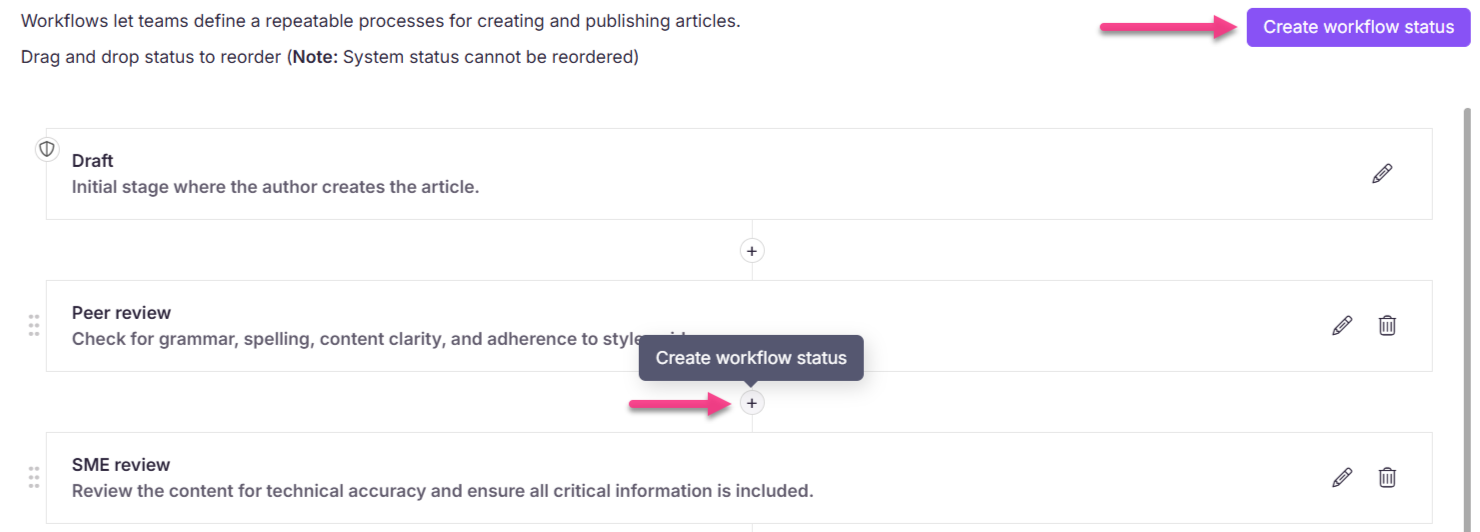
Add a workflow status
- On the Workflow designer page, click Create workflow status in the top-right corner. Alternatively, click the (+) button between existing statuses to insert a status at a specific position.
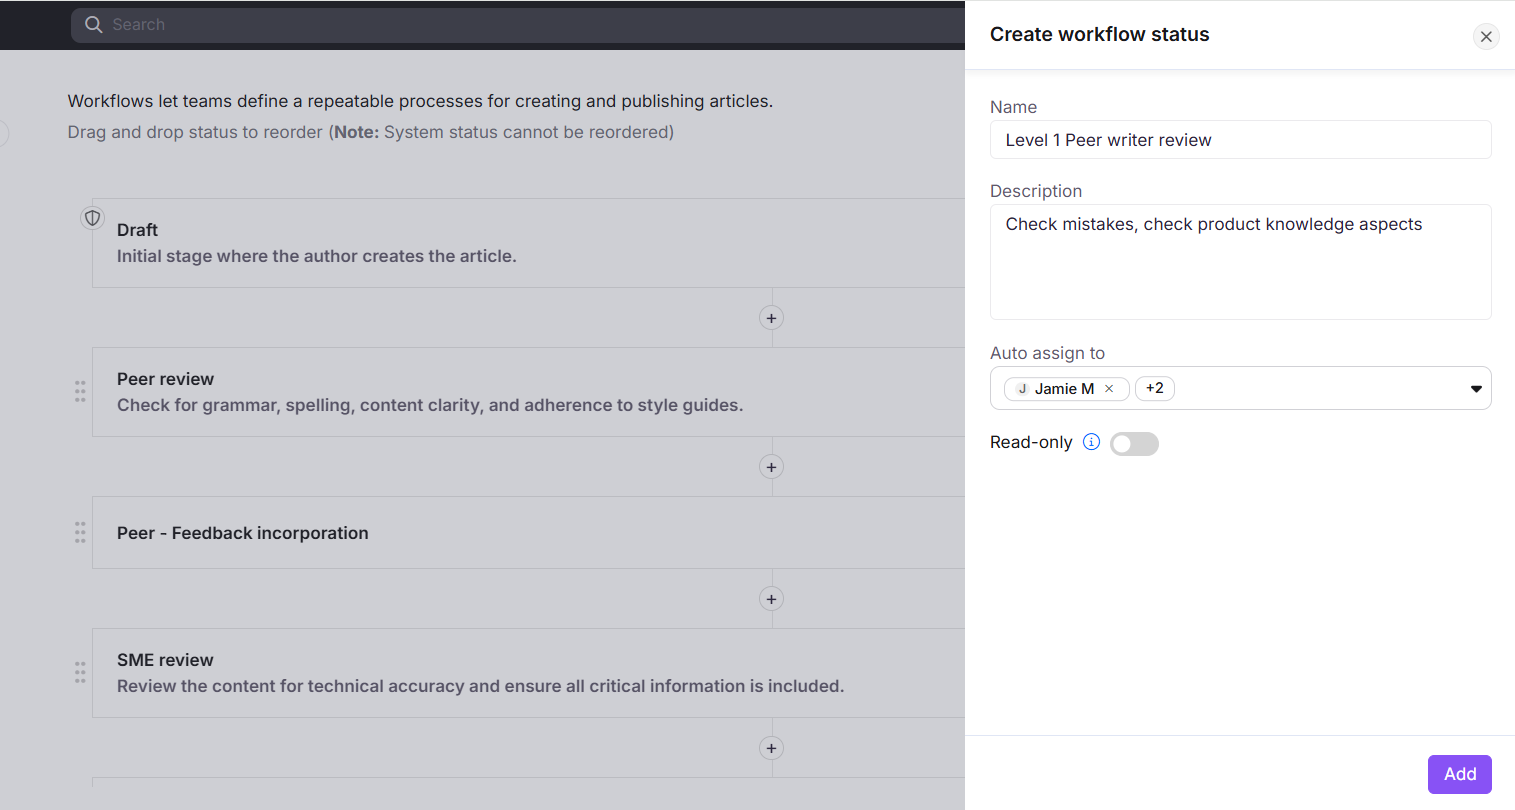
- Enter a Name (required) and Description (optional) for the status.
- Optionally, use Auto assign to to automatically assign users or user groups when an article enters this status. You can configure up to 20 assignees per status, as a combined total of individual users and user groups.
When an article transitions to this status, the configured auto assignees are applied automatically. Additional assignees can be added or removed at the article level without affecting the Workflow designer configuration. Assigned users see the article on their Tasks page.
- Turn on the Read-only toggle if you want to prevent team members from editing or publishing articles while they are in this status.
When Read-only is enabled, team members cannot edit the article content or publish it while it is in this workflow status.
- Turn on the Make comment mandatory toggle if you want to require users to enter a comment whenever an article is moved to this workflow status or published through it.
- When Make comment mandatory is enabled, users cannot publish an article or move it to this status without entering a comment. The comment is stored as part of the version metadata and is available in the version history on the Knowledge base site and in PDF exports. This setting cannot be overridden at the article level.
- For the Draft status, the mandatory comment check is applied only when an article is moved from another workflow status to Draft. It does not apply when a new article or a new version is created.
- Click Add.
Manage workflow statuses
Once a custom status is created, you can edit, reorder, or delete it from the Workflow designer page.

- Edit: Hover over the status and click the Edit () icon. Update the Name, Description, Auto assign to, Read-only, or Make comment mandatory setting as needed, then click Update.
- Reorder: Drag a status to a new position using the Reorder () handle on the left. System statuses (Draft and Published) cannot be reordered.
- Delete: Hover over the status and click the Delete () icon, then click Yes to confirm.
A deleted workflow status cannot be recovered. All due dates and assignee data associated with that status will also be lost.
Troubleshooting
Cannot edit article — read-only workflow status
Error: You can't edit this article as the current workflow status is marked as read-only.
This error appears when an article is in a custom workflow status with the Read-only toggle enabled.
To resolve:
- Navigate to Settings () > Knowledge base portal > Workflow designer.
- Locate the status with the lock icon. This indicates Read-only is enabled.
- Click the Edit () icon and turn off the Read-only toggle.
- Click Update.
If you do not have the appropriate permissions, contact your project admin.
Best practices
- Design your workflow before you start publishing. Map out your team's review stages before creating custom statuses. Changing the workflow mid-project can disrupt articles already in progress.
- Use Auto assign for predictable review stages. If the same person always handles SME review, configure them as the auto assignee for that status. This reduces manual handoff steps and ensures no article gets stuck.
- Keep the workflow lean. A shorter workflow with fewer stages is easier for the team to follow. Add stages only when they represent a meaningful checkpoint with a distinct owner or action.
- Use Read-only for approval stages. Enable Read-only on statuses such as "SME Review" or "Final Approval" to prevent accidental edits while the article is being reviewed.
- Communicate status changes to your team. When you add, rename, or delete a workflow status, inform your team so they understand what each stage means and what action is expected from them.
FAQ
Can I delete a system status like Draft or Published?
No. System statuses, Draft and Published, are predefined and cannot be deleted or reordered. Only custom statuses can be deleted.
What happens to articles currently in a workflow status if I delete that status?
The status is removed from the workflow entirely. All due dates and assignee data associated with that status are lost and cannot be recovered. Articles that were in the deleted status will need their workflow status updated manually.
If I update the Auto assign to configuration, does it apply to articles already in that status?
No. Changes to the Auto assign to setting in the Workflow designer only apply when an article transitions into that status. Articles already in that status are not retroactively updated.
How many assignees can I configure per workflow status?
You can configure up to 20 assignees per workflow status. This limit applies to the combined total of individual users and user groups. At the article level, you can manually add any number of assignees.
Can I reorder system workflow statuses?
No. System statuses, Draft (start) and Published (end), are fixed in position and cannot be reordered. Only custom statuses can be reordered.