Plans supporting this feature: Business Enterprise
Document360 provides a list of standard fonts used in documentation. However, you can configure your desired font in the knowledge base. Get the font details and add the font link to the header section in Custom HTML. Then, add the font family details in the Custom CSS.
Steps to configure a custom Google font in Document360
The below three steps are involved in configuring the desired Google font in Document360:
Step 1: Get the Google font code details
Step 2: Append the code in custom HTML
Step 3: Append the code in custom CSS
NOTE
You can also configure custom fonts other than the Google Fonts by utilizing the appropriate HTML and CSS code.
Get the Google font code details
To begin using a custom font in your knowledge base, you first need to retrieve the embed code from Google Fonts.
Go to Google fonts webpage.
Select the desired font, and the font page appears with the available styles.
At the top right corner, click Get font and select Get embed code.
In the Web section, you'll find the embed code specific to your chosen font.
Copy the code and head back to Document360.
Append the code in custom HTML
Once you’ve copied the embed code, the next step is to insert it into your Document360 project’s custom HTML settings. To do so,
Navigate to Connections > Integrations in the left navigation bar in the Knowledge base portal.
Navigate to Custom HTML section and click Add.
The
Header (above </head>)option which will be the default selection.Paste the link in the Header section copied previously.
Once done, click Add.

Append the code in custom CSS
After adding the embed code to your HTML, you’ll need to apply the font style by adding a CSS code to update the text appearance across your site. To do so,
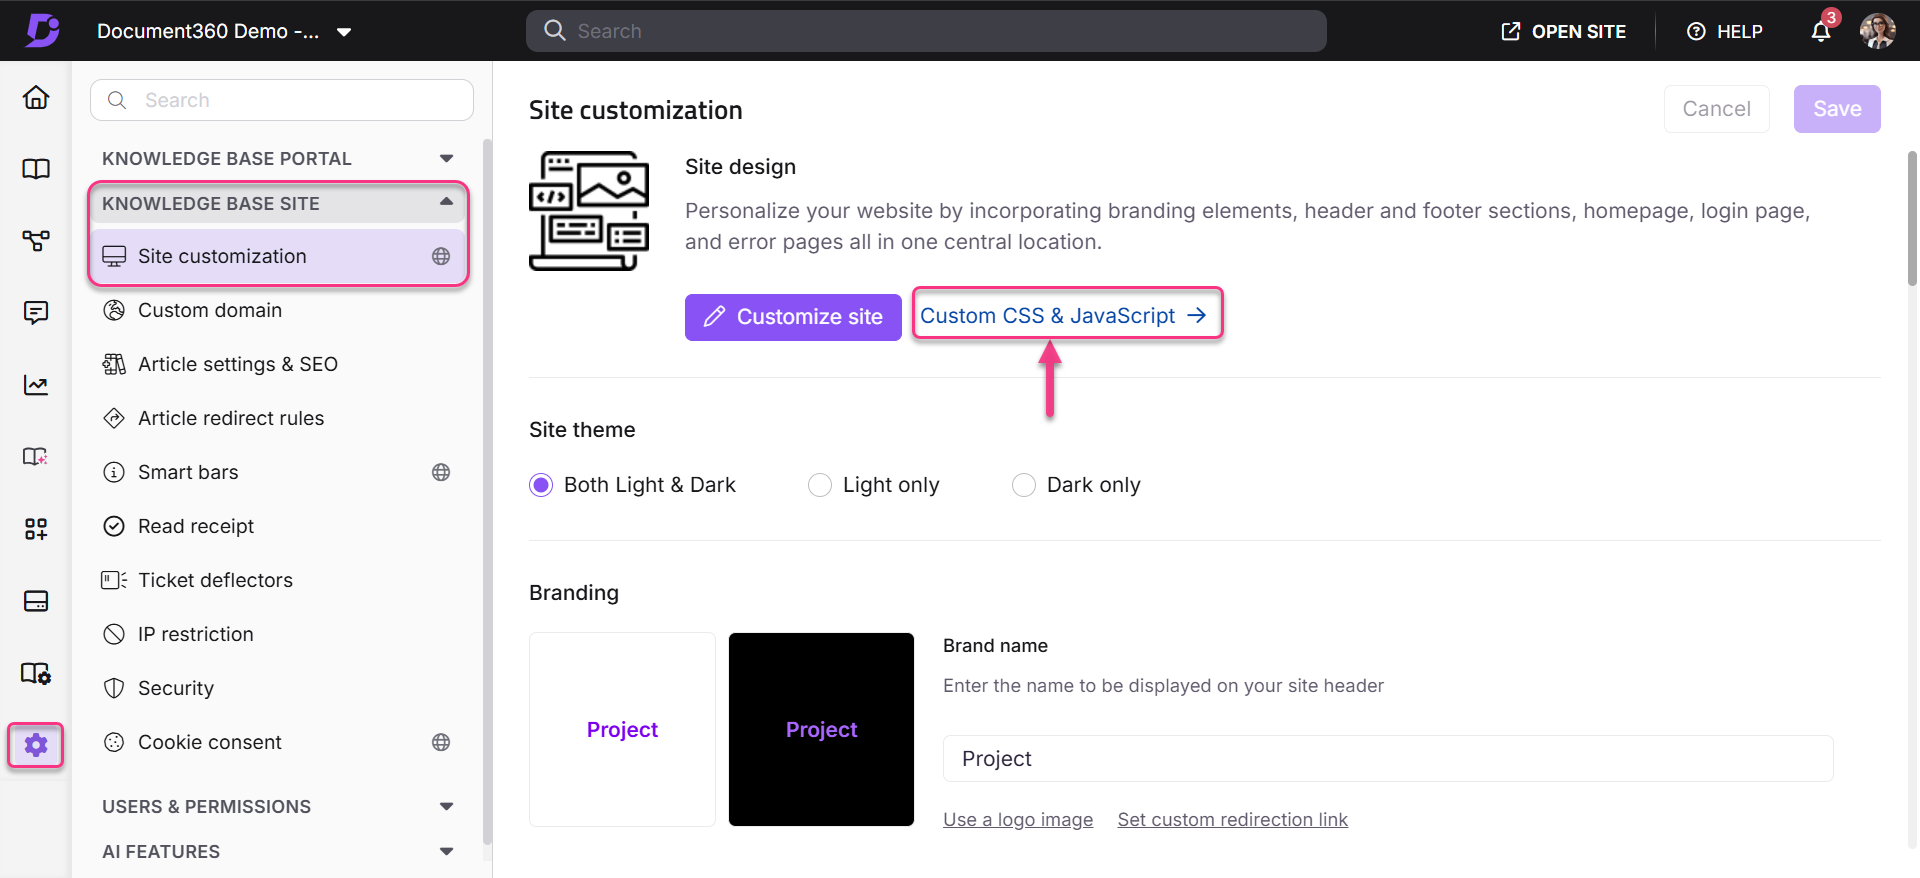
Navigate to Settings () > Knowledge base site in the left navigation bar in the Knowledge base portal.
In the left navigation pane, navigate to Site customization > Custom CSS & JavaScript .

From the left navigation pane, click on the CSS tab.
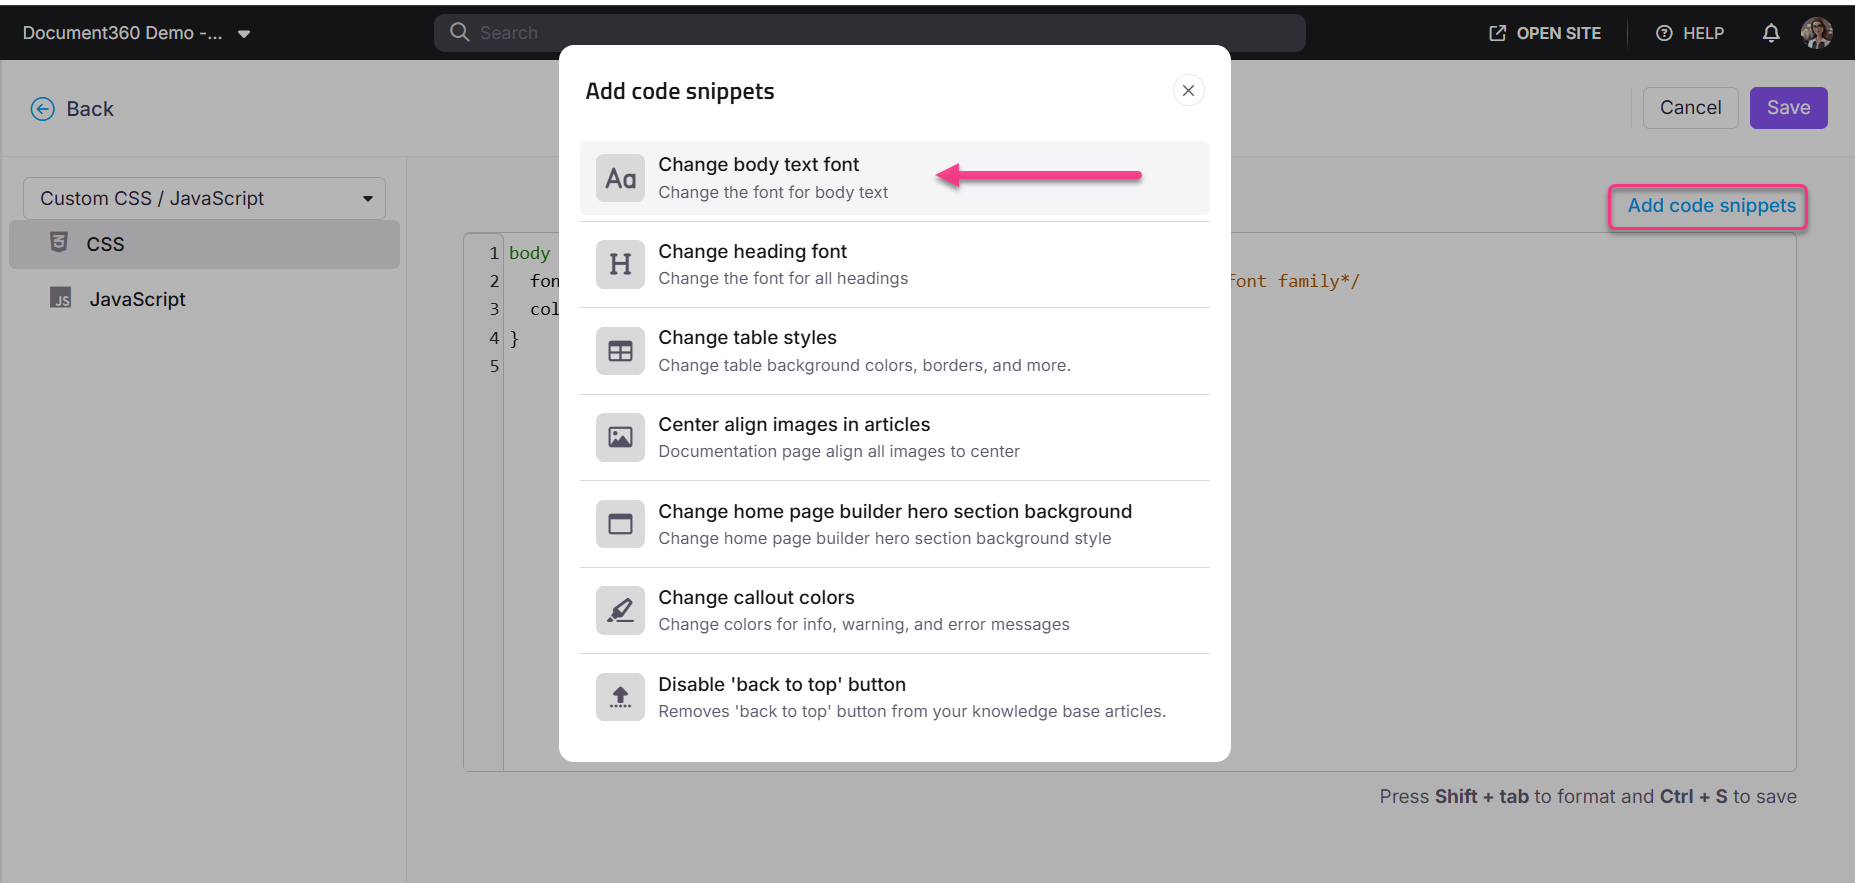
Click Add code snippets on the top right of the code space.
Select the Change body text font option, and the below code appears.
body, article {
  font-family: "Source Sans Pro", sans-serif;    /*Replace your body font family*/
  color: #222222;    /*Font color*/
}
In addition to the body selector, include the article selector in the provided code snippet.
Replace the
font-family: "Source Sans Pro", sans-serif;with the font details copied in step 5. (CSS rules to specify families).Add the desired font color.
Click Save on the top right.
The selected font will now be applied to your Knowledge base content. Visit the Knowledge base site to preview the changes in effect.