You can add glossary terms to your knowledge base manually one at a time, or import multiple terms at once from a CSV file. All glossary management is done from Content tools () > Content resources > Glossary.
You must have Content reuse permissions to create and manage glossary terms. To translate glossary terms after creation, the term must be created with a specific language scope. Global terms cannot be translated.
Add a glossary term
- Navigate to Content tools () > Content resources > Glossary in the left navigation bar.
- Click Create.
- Fill in the following fields:
| Field | Description | Character limit |
|---|---|---|
| Name | A unique internal identifier for the glossary entry. The Name remains the same across all languages and is never visible to readers. For example, if the term is "Account", the Name could be account. It stays fixed even when the term is translated. |
100 characters |
| Language | The language scope for the term. Select Global to use the same term across all languages without translation. Select a specific language to enable translation for that term. | |
| Term | The actual word or phrase readers see on the knowledge base site. This can vary by language, for example "Account" in English, "Compte" in French, or "खाता" in Hindi, while the Name stays as account. Accepts letters, numbers, spaces, and special characters such as () - _ & : ; ? / . , [ ] @ # ! *. |
100 characters including spaces |
| Definition | A detailed definition or explanation of the term. Displayed as a tooltip when readers hover over the term on the knowledge base site. | 1000 characters |
- Click Create.
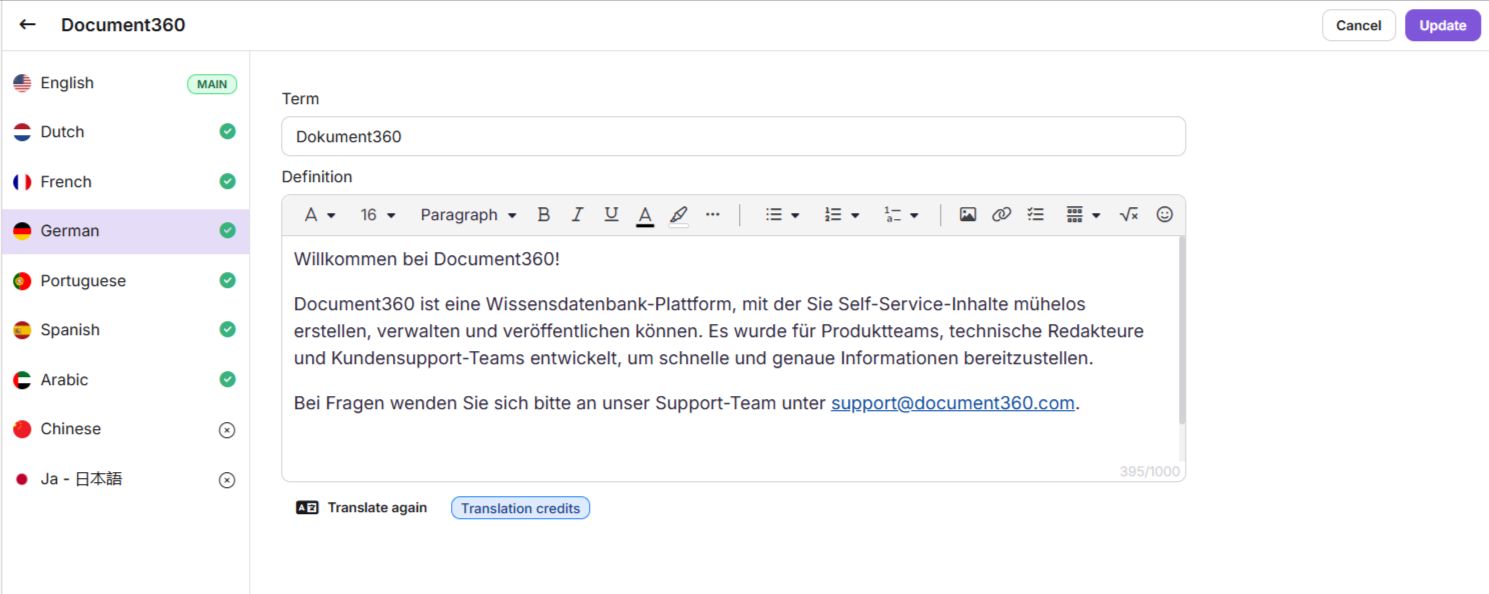
Formatting options
You can style glossary term definitions using the toolbar.

| Option | Description |
|---|---|
| Font family | Change the font family of the text. |
| Font size | Adjust text size between 8 and 96. |
| Headings | Define headings: Paragraph, Heading 3, or Heading 4. |
| Bold | Emphasise important words or phrases. |
| Italic | Highlight text or indicate terms. |
| Underline | Add a line below the text for emphasis. |
| Text color | Change the text color using a color picker or HEX code. |
| Background color | Change the background color behind the text. |
| Unordered list | Create a bulleted list: Default, Disc, Square, or Circle. |
| Ordered list | Create a numbered list with formats including Numeric, Lowercase alphabetic, Lowercase Roman, Uppercase Roman, and Greek lowercase. |
| Multi-level numbering list | Create a hierarchical numbered list with styles such as Numeric, Alphabetic, Roman, and parenthesis variants. |
| Insert image | Upload images from a URL, local storage, or Drive. |
| Insert link | Add a hyperlink to an internal article or external URL. |
| Checklist | Add a checklist to the definition content. |
| Divider | Add a divider to the content. |
| LaTeX | Add LaTeX expressions for mathematical content. |
| Emoji | Insert emojis into the content. |
| More | Access additional options: Inline code, Strikethrough, Superscript, Subscript, and Remove formatting. |
You can use the / slash menu in the Glossary editor to access formatting tools such as Heading 3, Heading 4, Numbered list, Bullet list, and Checklist, and insert elements such as Image, Link, Divider, LaTeX, and Emoji. If a glossary term is added under Global, it cannot also be added at the language-specific level. To define a term across multiple languages, create it in your main language and use the translation feature to add other language versions.
Import glossary terms
You can import multiple glossary terms at once using a CSV file.
Prepare the CSV file
Use the following format for your CSV file:
| Term | Definition |
|---|---|
| First term | First term definition |
| Second term | Second term definition |
| Third term | Third term definition |
Download a sample template:
- Import glossary with data → (includes sample terms and definitions)
- Import glossary without data → (contains only row headers)
Use software such as Microsoft Excel, OpenOffice Calc, or Google Sheets to open and edit the CSV file.
Import the CSV file
- Navigate to Content tools () > Content resources > Glossary.
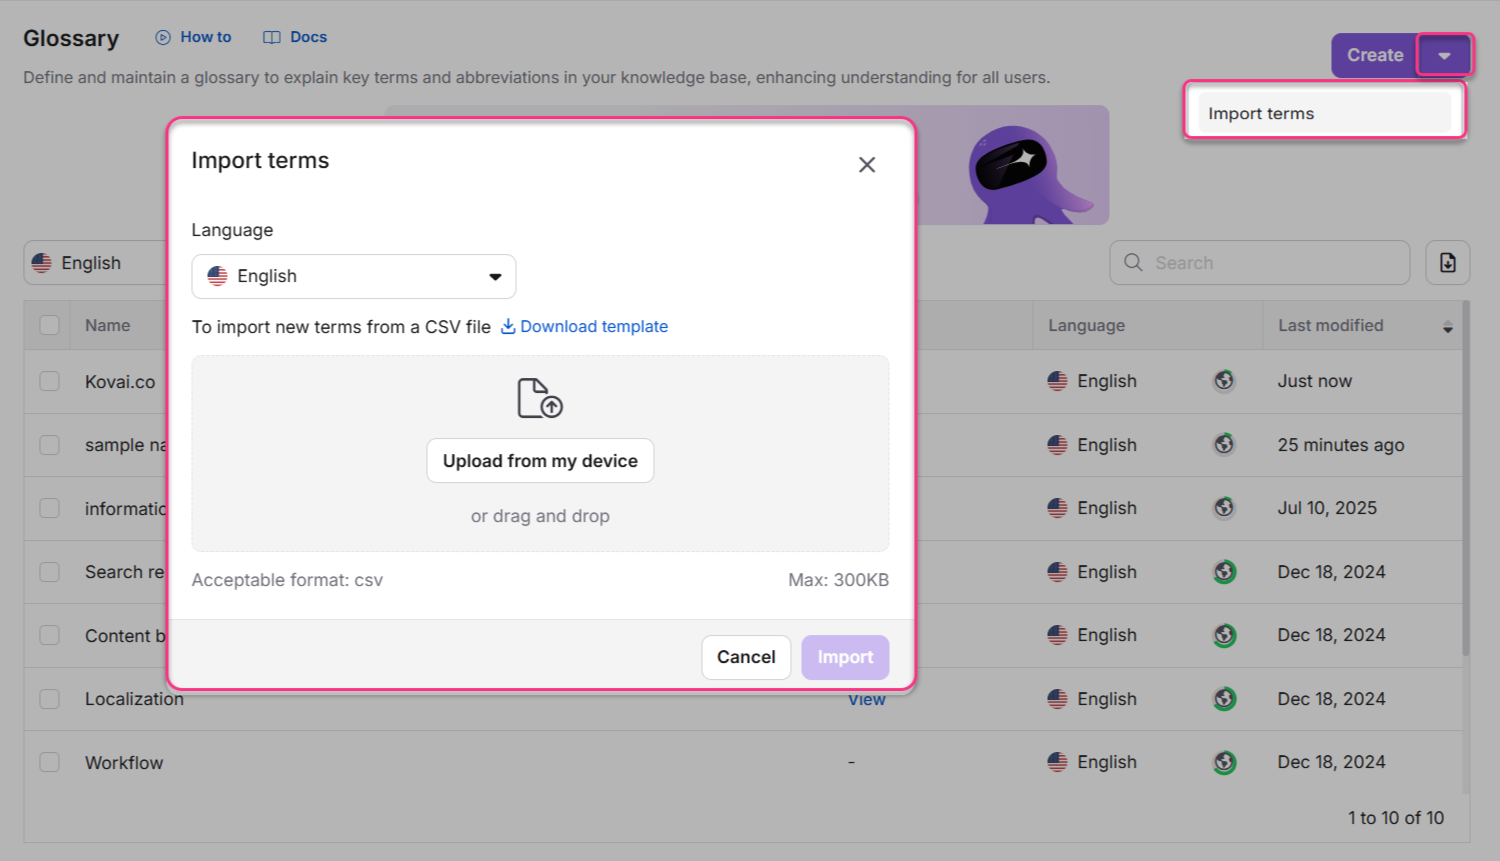
- Click Create > Import terms to open the Import terms dialog.
- Select the language from the Language dropdown.
- Click Download template to download the sample CSV format if needed.
- Drag and drop the CSV file or click Upload from my device to select the file. Wait for validation. The system displays the number of valid and invalid terms. If any terms are invalid, click Download next to the error count to review the errors.
- Click Import. The newly added terms appear in the Glossary overview.
Troubleshooting
CSV upload error
Error: "Please make sure the CSV follows the sample template"
This error usually occurs when the CSV headers have changed because your Excel application's language is not set to English.
To resolve using Excel:
- Open your glossary CSV template in Excel.
- Go to File > Options > Regional Settings.
- In the Change Regional Format Settings panel, select English (United Kingdom) from the dropdown.
- Close and reopen the CSV template.
- Confirm the headers match the sample template exactly.
- Save the file and retry the upload.
To resolve using Windows regional settings:
- Open Settings in Windows.
- Navigate to Time & Language > Language & Region.
- Change the regional format to English (United Kingdom).
- Reopen the CSV file, confirm the headers, save, and retry.
If the issue persists, contact Document360 Support.
Limitations
| Item | Detail |
|---|---|
| Name character limit | 100 characters. |
| Term character limit | 100 characters including spaces. |
| Definition character limit | 1000 characters. |
| Global terms | Cannot be translated. |
| Term name after creation | Cannot be changed. |
| Sub-glossaries | Not supported |
FAQ
Can I add images to the glossary while importing terms from a CSV file?
Only web images can be imported through definitions. Use the tag <img src="Image_URL"/> in your definition cell to add images. For example: JSON Web Token <img src="https://jwt.io/img/logo-asset.svg"/>. Imported images are stored in My Drive > Images > Glossary.