Plans supporting this feature: Professional Business Enterprise
You can set up an article redirect rule for any published or draft article URL. The redirect feature is helpful when you change an article's URL and that same URL has been referenced in other articles across your Knowledge base site. You can also perform a bulk import of redirect rules.
Adding an article redirect rule
You can change an article's URL or slug before or after publishing the article or category page. The URL of an index-type category can also be modified. You can make these changes directly in the article editor.
To add the article redirect rule, follow the steps below:
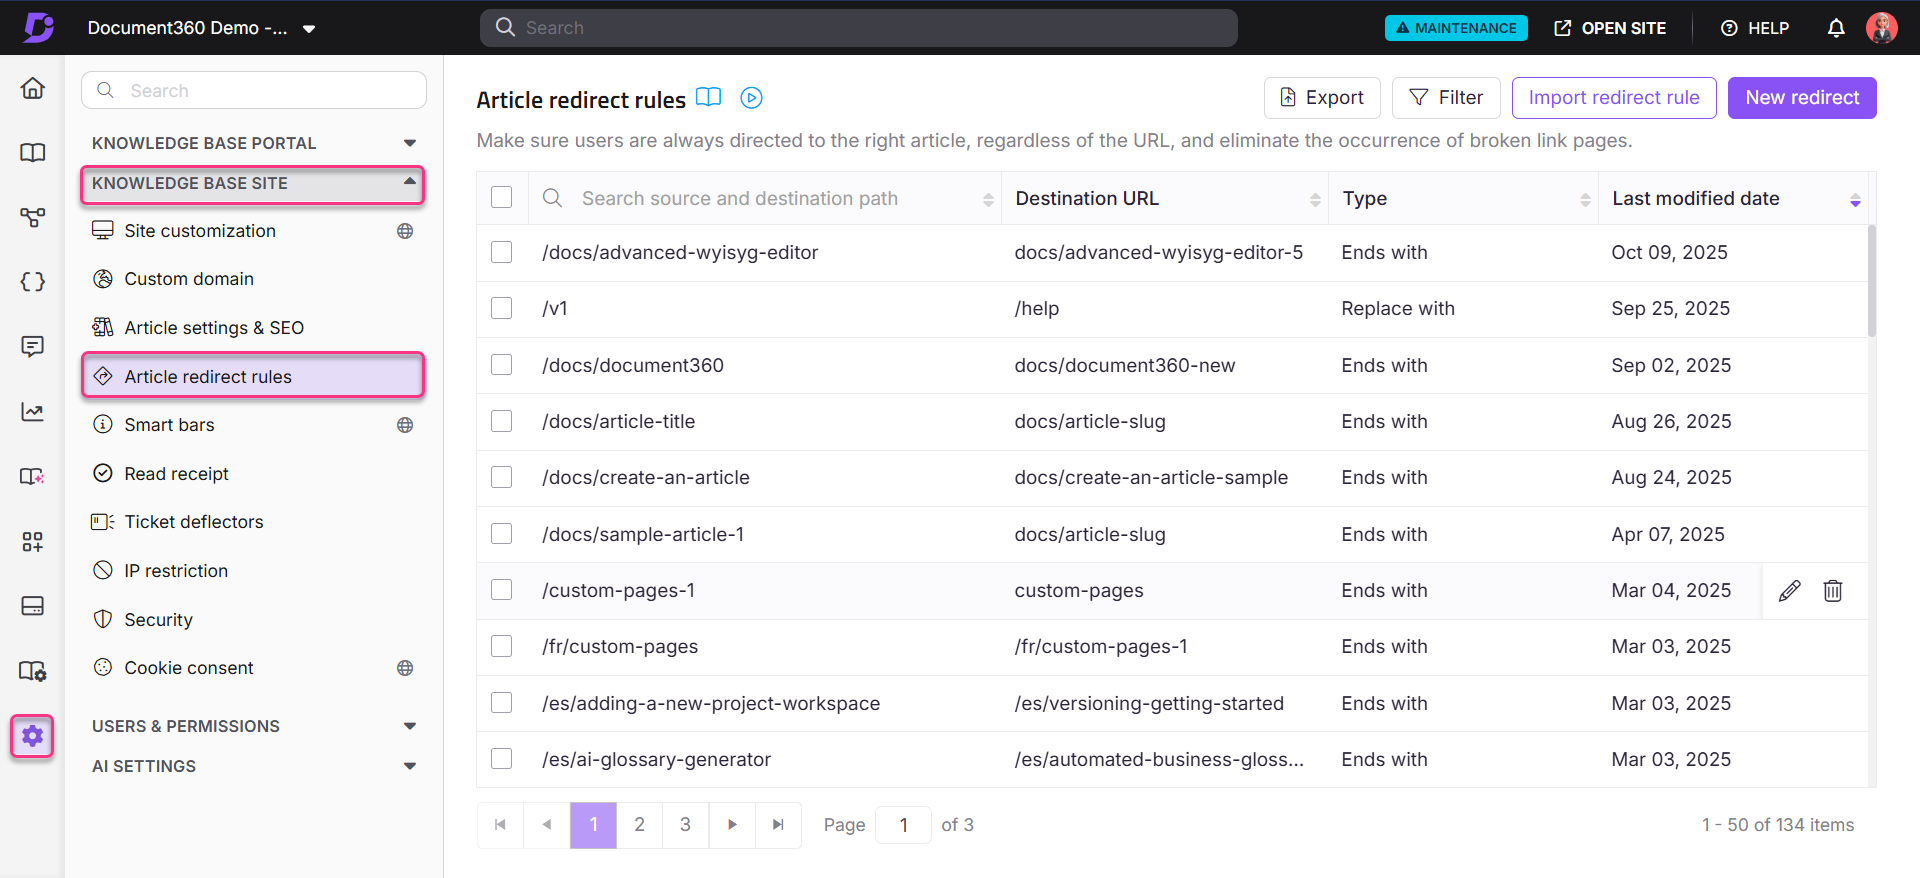
Navigate to Settings () > Knowledge base site in the left navigation bar in the Knowledge base portal.
In the left navigation pane, navigate to Article redirect rules.
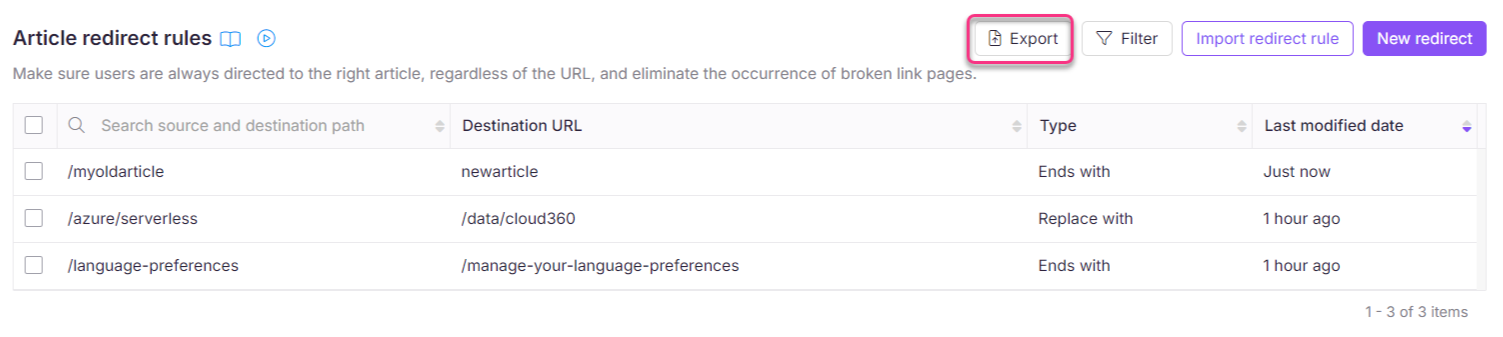
The Article redirect rules page will appear with a list of existing rules (if any).
Click New redirect to create a new redirection rule.
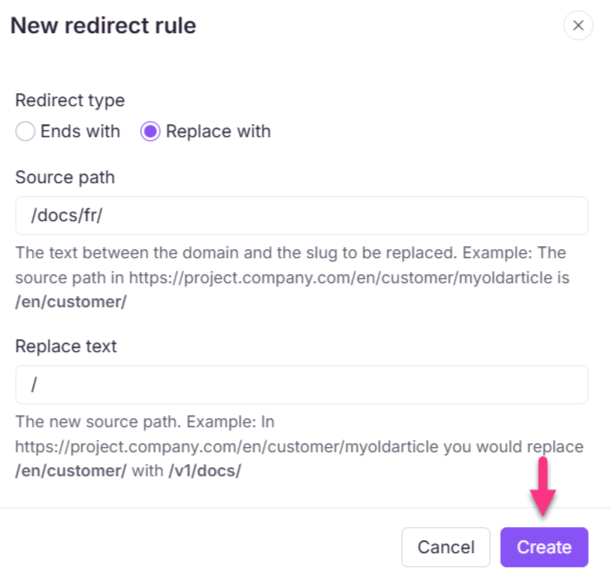
The New redirect rule panel will appear.
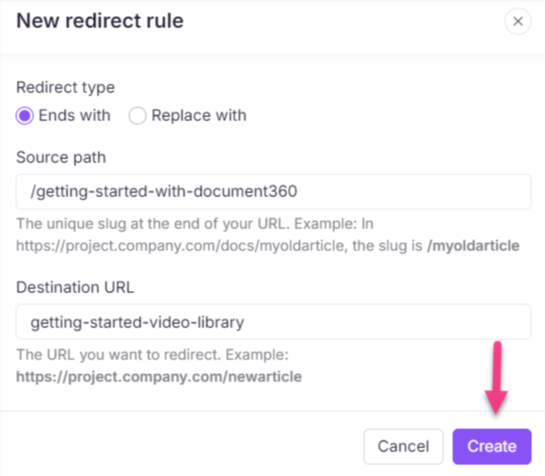
Select the desired Redirect type:
a. Ends with: To set the redirection rule for an article with the unique slug at the end of your URL.
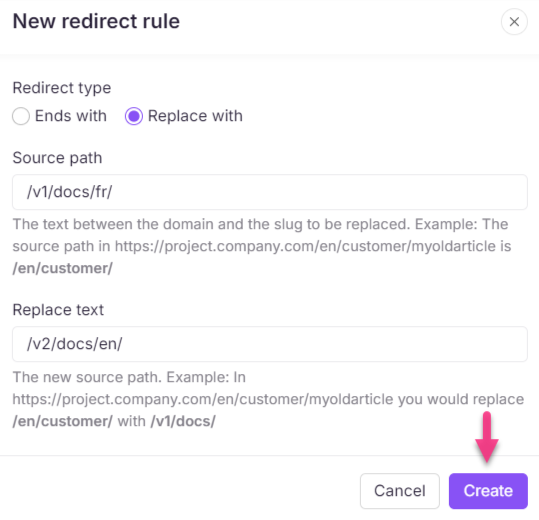
b. Replace with: To set the redirection rule for the URL text between the domain name and the article slug.NOTE
In the Redirection rule field, the following special characters are supported:
# % ^ & _ - + = | . ? /
Ends with
In the Source path field, type the unique slug at the end of your URL for the redirect.
NOTE
The URL slug in the source path must start with a forward slash (
/).
In the Destination URL field, type the full destination URL or type the new slug for redirection. Adding a forward slash (/) at the beginning of the destination URL is optional.
Example: To redirect the article URL from
https://docs.document360.com/docs/getting-started-with-document360tohttps://docs.document360.com/docs/getting-started-video-library, add the source path and destination URL as mentioned below:
Source path:/getting-started-with-document360
Destination URL:getting-started-video-library
Click Create.
Replace with
In the Source path field, type the text between the domain and the article slug that you want to redirect.
Example: The source path in the URL
https://project.technicaldocumentation.com/v1/docs/fr/getting-startedis/v1/docs/fr/.
NOTE
The source path must start and end with a forward slash (
/).
In the Replace text field, type the new URL text you want to use for redirection.
Example: Replace
/v1/docs/fr/with/v2/docs/en/in the URLhttps://project.technicaldocumentation.com/v1/docs/fr/getting-started.
NOTE
The replace text must start and end with a forward slash (
/).
Click Create.
Best practices
If you manage a multilingual Knowledge base with multiple project workspaces, set redirect rules based on language or workspace. For instance, if you set a rule with the source path /customer-support and the destination /sales-and-support, this applies only to the default language of the main workspace.
To apply this rule to another language (e.g., German:
/de/), create a new rule with the source path/de/customer-supportand the destination/de/sales-and-support.To apply the rule in another workspace (e.g., version 1:
/v1/), set the source path/v1/docs/customer-supportand the destination/v1/docs/sales-and-support.
Site-level redirect rule
In the Article redirect rules page, you can set a subfolder redirect rule at the site level using the Replace with option. This is useful for migrating from another platform or redirecting removed or hidden workspaces/languages.
Example: Set a redirect rule for the subfolder
/azure/serverlessto/data/cloud360in the URLs likehttps://apidocs.serverless360.com/azure/serverless/article_slug.
Editing a redirect rule
To edit the article redirect rule, follow the below steps:
Navigate to Settings () > Knowledge base site in the left navigation bar in the Knowledge base portal.
In the left navigation pane, navigate to Article redirect rules.
The Article redirect rules page will appear with a list of existing rules (if any).
Use the Filter to find the desired redirection rule.
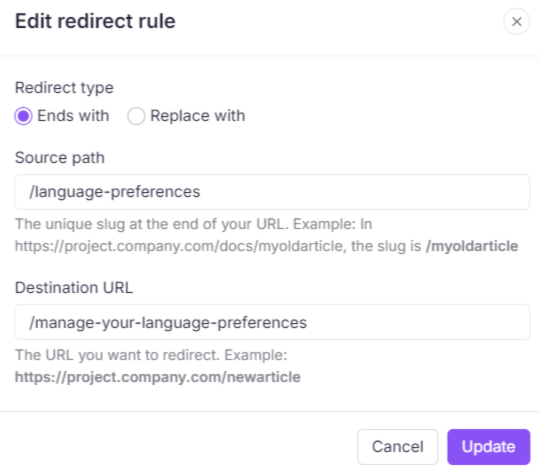
Hover over the desired rule and click the Edit () icon.
The Edit redirect rule panel will appear.
Update the necessary field(s).
Click Update.
Deleting a redirect rule
To delete an article redirect rule, follow the below steps:
Navigate to Settings () > Knowledge base site in the left navigation bar in the Knowledge base portal.
In the left navigation pane, navigate to Article redirect rules.
The Article redirect rules page will appear with a list of existing rules (if any).
Use Filter to find the desired redirection rule.
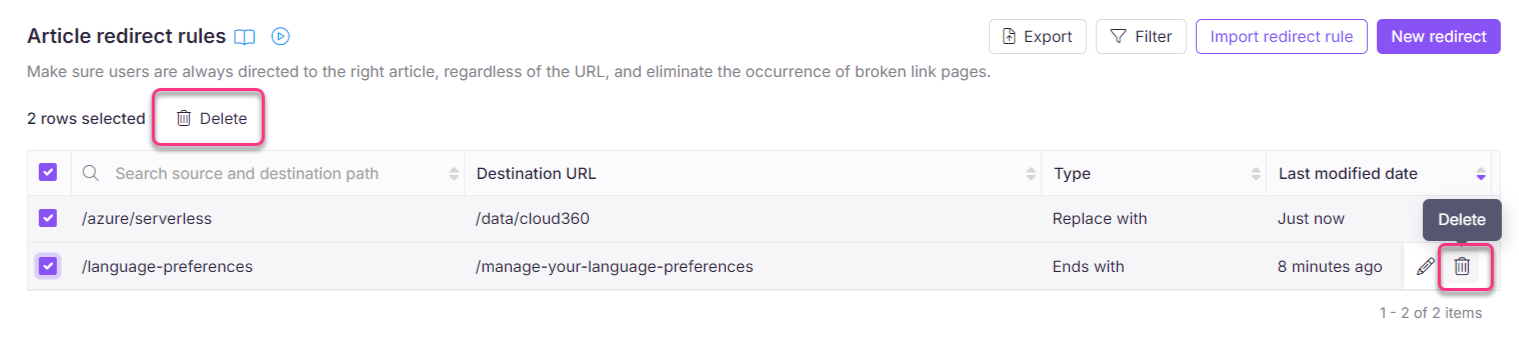
Hover over the desired rule and click the Delete () icon.
To delete multiple rules, select the checkboxes next to the rules and click Delete.
Click Yes in the Delete confirmation panel.
NOTE
Deleted redirection rules cannot be retrieved.
Filter a redirect rule
To filter the desired redirect rule, follow the steps below:
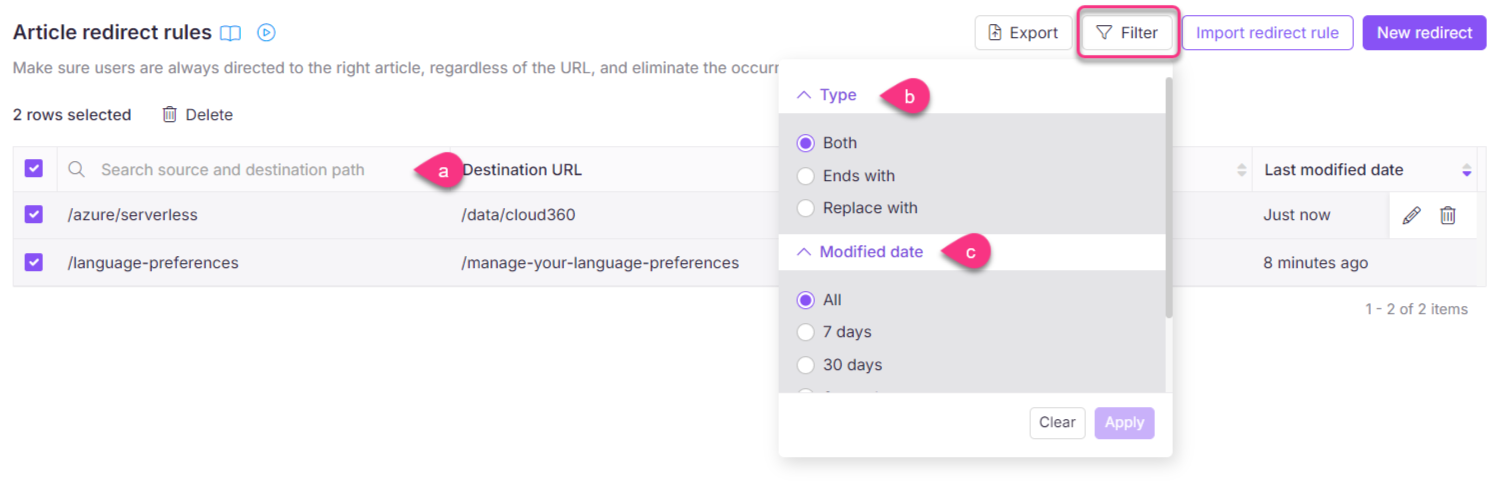
Search: Enter a keyword from the source path or destination URL in the search bar, and the result is populated.
Type: Filter by the type of redirect: Ends with, Replace with, or Both.
Modified date: Filter rules by the last modified date, with options such as 1 year, 3 months, 30 days, or 7 days. Click Custom date to choose any custom date range and select the desired date range.
Importing redirect rules
To import bulk redirect rules at once, upload a CSV that matches the following template:
Source | Destination | RedirectionType |
|
| endswith |
|
| replacewith |
NOTE
The file size should be less than or equal to 1MB.
Import redirect rule file template
You can also download the template here:
To import redirect rules in bulk:
Prepare a CSV file that matches the provided template (file size ≤ 1MB).
Navigate to Settings () > Knowledge base site in the left navigation bar in the Knowledge base portal.
In the left navigation pane, navigate to Article redirect rules.
Click Import redirect rule.
The Import redirect rules panel will appear.
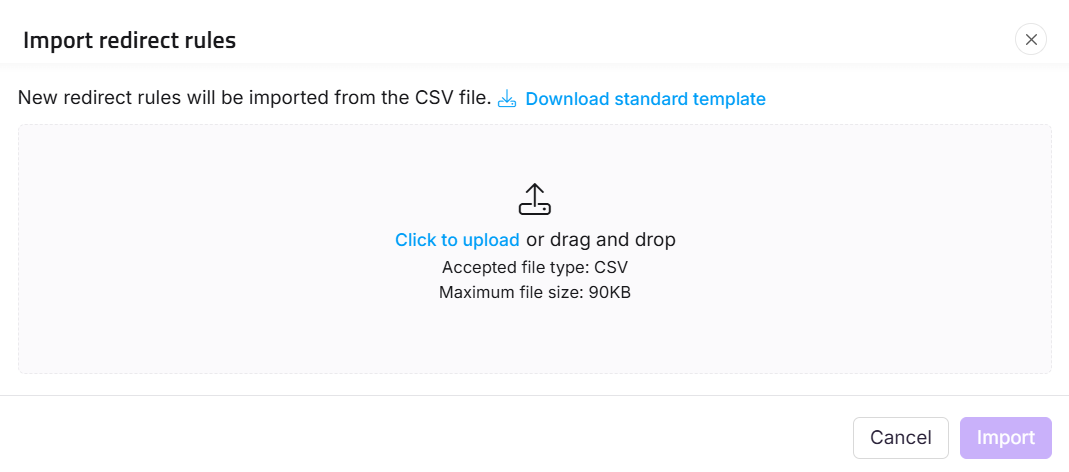
Drag and drop the CSV file or select Click to Upload.
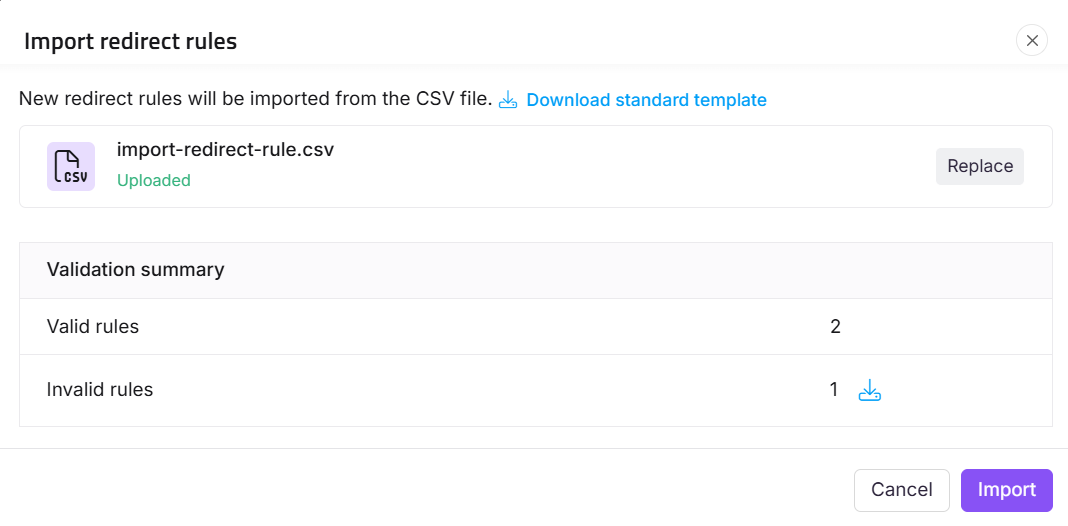
Review the list of valid and invalid rules.
NOTE
Click the Download () icon near to the invalid rules count to download the list of invalid rules.
Click Import to apply the valid rules.
Exporting redirect rules
To export redirect rules as a CSV file, follow the steps below:
Navigate to Settings () > Knowledge base site in the left navigation bar in the Knowledge base portal.
In the left navigation pane, navigate to Article redirect rules.
Click Export to download the rules as a CSV file.
Troubleshooting
Published article redirecting or showing a 404 error
A published article on the Knowledge base site may redirect to another article or lead to a 404 error due to a misconfigured redirection rule applied to the article’s link.
Steps to resolve:
Navigate to Settings () > Knowledge base site in the left navigation bar in the Knowledge base portal.
In the left navigation pane, navigate to Article redirect rules.
Use the search bar to find the article's slug and check if a redirection rule is applied.
If a redirection rule is applied, review its purpose. If the rule is unnecessary or misconfigured, remove it.
Save the changes and revisit the article to ensure it displays as expected on the Knowledge base site.
If the issue persists after following these steps, please contact the Document360 support team for further assistance: Contact Document360 Support
Encountering an error while saving an article redirection rule.
Error: Failed to save article redirection rule. The given source is already part of an existing destination.
This error occurs when a destination slug (the target of an existing redirection rule) is used as the source path for another redirection. Once a destination is set in a redirection rule, it becomes a static target and cannot be reused as a source in a new rule.
Steps to resolve:
Ensure that the destination slug is not used as a source path in any existing or new redirection rules.
Review and update your redirection rules to avoid conflicts.

Avoiding 404 errors after removing languages in the Knowledge base site
When languages are removed/hidden from the Knowledge base site, readers may encounter 404 errors if they try to access removed-language versions of articles.
Once a language is removed from the project, all articles associated with that language become unavailable. However, users with bookmarked links or direct access to those URLs may still attempt to open them, leading to 404 errors.
Steps to resolve:
To prevent 404 errors and redirect users to the main language version of the article, set up redirection rules for the removed languages:
Navigate to Settings () > Knowledge base site in the left navigation bar in the Knowledge base portal.
In the left navigation pane, navigate to Article redirect rules.
Click New redirect to add a new redirection rule.
The New redirect rule panel will appear.
Choose Replace with in the Redirect type section.
In the Source path, enter
/docs/<language_code>(e.g.,/docs/frfor French,/docs/esfor Spanish,/docs/defor German).In the Replace text, enter
/to redirect all language-specific article links to the main language.Click Create to save the rule.
Repeat the process for each removed language. Once these redirection rules are applied, any attempt to access a removed language article will automatically redirect users to the main language version, preventing 404 errors even if the links are bookmarked.
FAQ
What are Dead links?
Dead links, or broken links, are hyperlinks that no longer work due to issues like URL changes, incorrect URLs, or restricted/private articles. They typically result in a 404 error page.
What is an article slug?
A slug is the part of a URL that uniquely identifies a specific article/page. It comes after the / in your project's root URL.
Example:
Article URL:https://docs.document360.com/docs/why-did-we-build-document360Slug:
/why-did-we-build-document360
How many redirect rules can I set up in a project?
You can set up a maximum of 10,000 redirect rules per project. If you exceed the limit, please contact our support team.
Are there limits for the import redirect rules feature?
You can import up to 1,000 redirect rules per day and use the import feature up to five times per day. If you exceed the limit, please contact our support team.
Why do I see the error "The KB site is redirected too many times when accessed?"
This error occurs due to a redirect loop, often caused by setting the Document360 Knowledge base site URL as the Sign-in URL for JWT authentication. Ensure the Sign-in URL for JWT authentication is not the same as the Document360 KB site URL. Use a dedicated authentication page as the Sign-in URL to avoid redirect loops and resolve the error.
How can we address the issue of 404 errors when we discontinue functionalities that lead to incoming links from sources we cannot control?
For discontinued features, to manage 404 errors effectively, create a standard article informing users about the discontinuation of a functionality, which can be used to redirect relevant articles.
For multiple discontinued functionalities, consider establishing a centralized page that consolidates all related information, ensuring users can easily access updates and reducing the occurrence of dead links.
How do I redirect an article from one page to another using Custom JavaScript?
To redirect an article from one page to another using Custom JavaScript, follow the steps below:
Navigate to Settings () > Knowledge base site in the left navigation bar in the Knowledge base portal.
In the left navigation pane, navigate to Customize site.
Click Custom CSS & JavaScript.
Paste the following code in the JavaScript tab:
$(document).ready(function() {
  if(panel.location.href=="source URL") {
    panel.location.replace("destination URL");
  }
});
Replace the source URL and destination URL in the code.
Click Save.
How do I write a redirection rule to replace the workspace name in the URL?
You can use redirection rules when migrating from a different platform to Document360.
Old URL structure:
https://docs.document360.com/{oldworkspace}/section/pageNew URL structure:
https://docs.document360.com/{newworkspace}/section/page
The same domain must be mapped to both platforms for the redirection to work. For example,
If the old workspace is v1 and the new workspace is v2:
Source | Destination | Rule |
|---|---|---|
|
| endswith |
|
| replacewith |
This rule ensures that all requests pointing to the old workspace v1 are redirected to the new workspace v2.
How can I redirect a specific article/category URL to the homepage of my documentation?
To redirect a specific URL to the homepage of my documentation, change the destination URL as ‘/’.
For example, if you wish to redirect the URL https://docs.radixdlt.com/docs/welcome to https://docs.radixdlt.com , set the source URL as /docs/welcome and destination URL as ‘/’ in the replace with redirection rule.