Mailchimp is a marketing platform for creating, managing, and sending email campaigns to your audience. When new articles are published in your Document360 knowledge base, you may want to notify your subscriber list through a Mailchimp campaign — for example, to share a product update, a new how-to guide, or a release note. By connecting Document360 and Mailchimp through Zapier, you can automate this: whenever a new article is published in Document360, Zapier automatically creates or updates a Mailchimp campaign draft, keeping your audience informed without manual effort.
When to use this integration
- You publish knowledge base articles on a regular schedule and want each new article to automatically generate a Mailchimp campaign draft so your marketing team can review and send it to subscribers.
- You maintain a product documentation newsletter and want Document360 publish events to drive campaign creation in Mailchimp rather than building campaigns manually.
- You want to bridge your documentation workflow and your audience engagement workflow — ensuring that new content in Document360 always has a corresponding outreach campaign ready in Mailchimp.
Before you begin
- You must be logged into your Zapier account.
- You must have a Mailchimp account with an audience list configured.
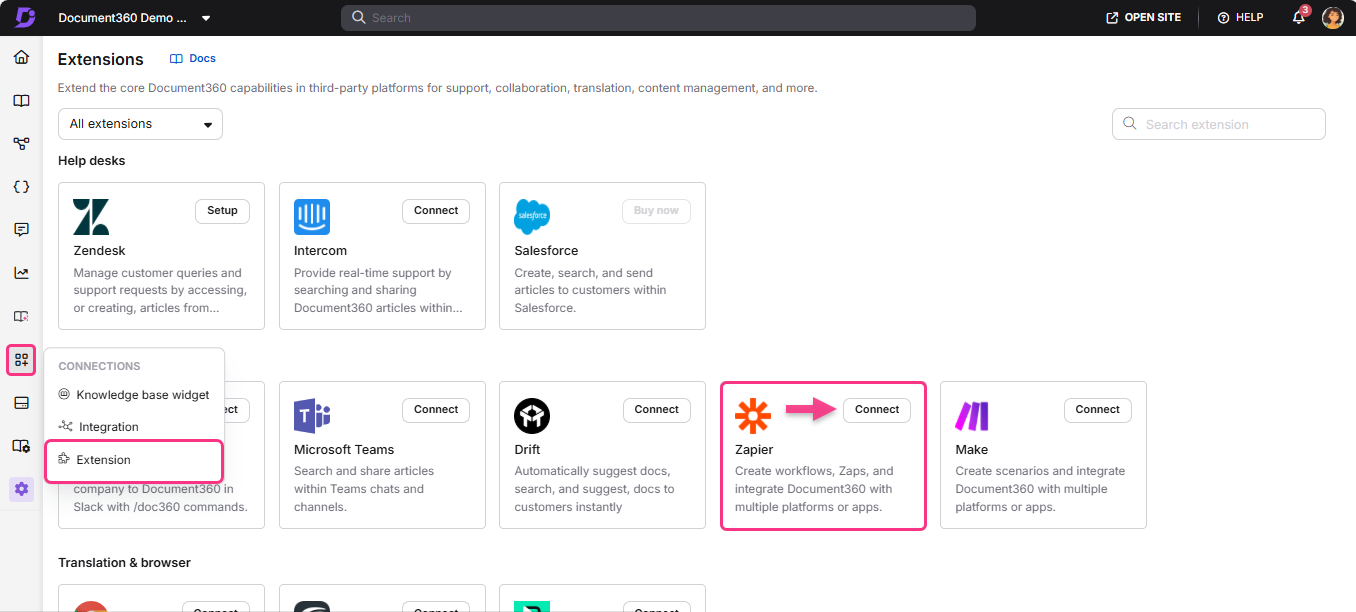
- You must have your Document360 API token ready. To generate one, navigate to Connections > Extensions , locate the Zapier tile, and click Connect to copy the token.
How to set up the Zap
Step 1 — Create a new Zap
- Log in to your Zapier account.
- From the left navigation menu, click Create then select Zaps.
- A new Zap is created with a Trigger and Action flow.

Step 2 — Connect Document360 as the trigger
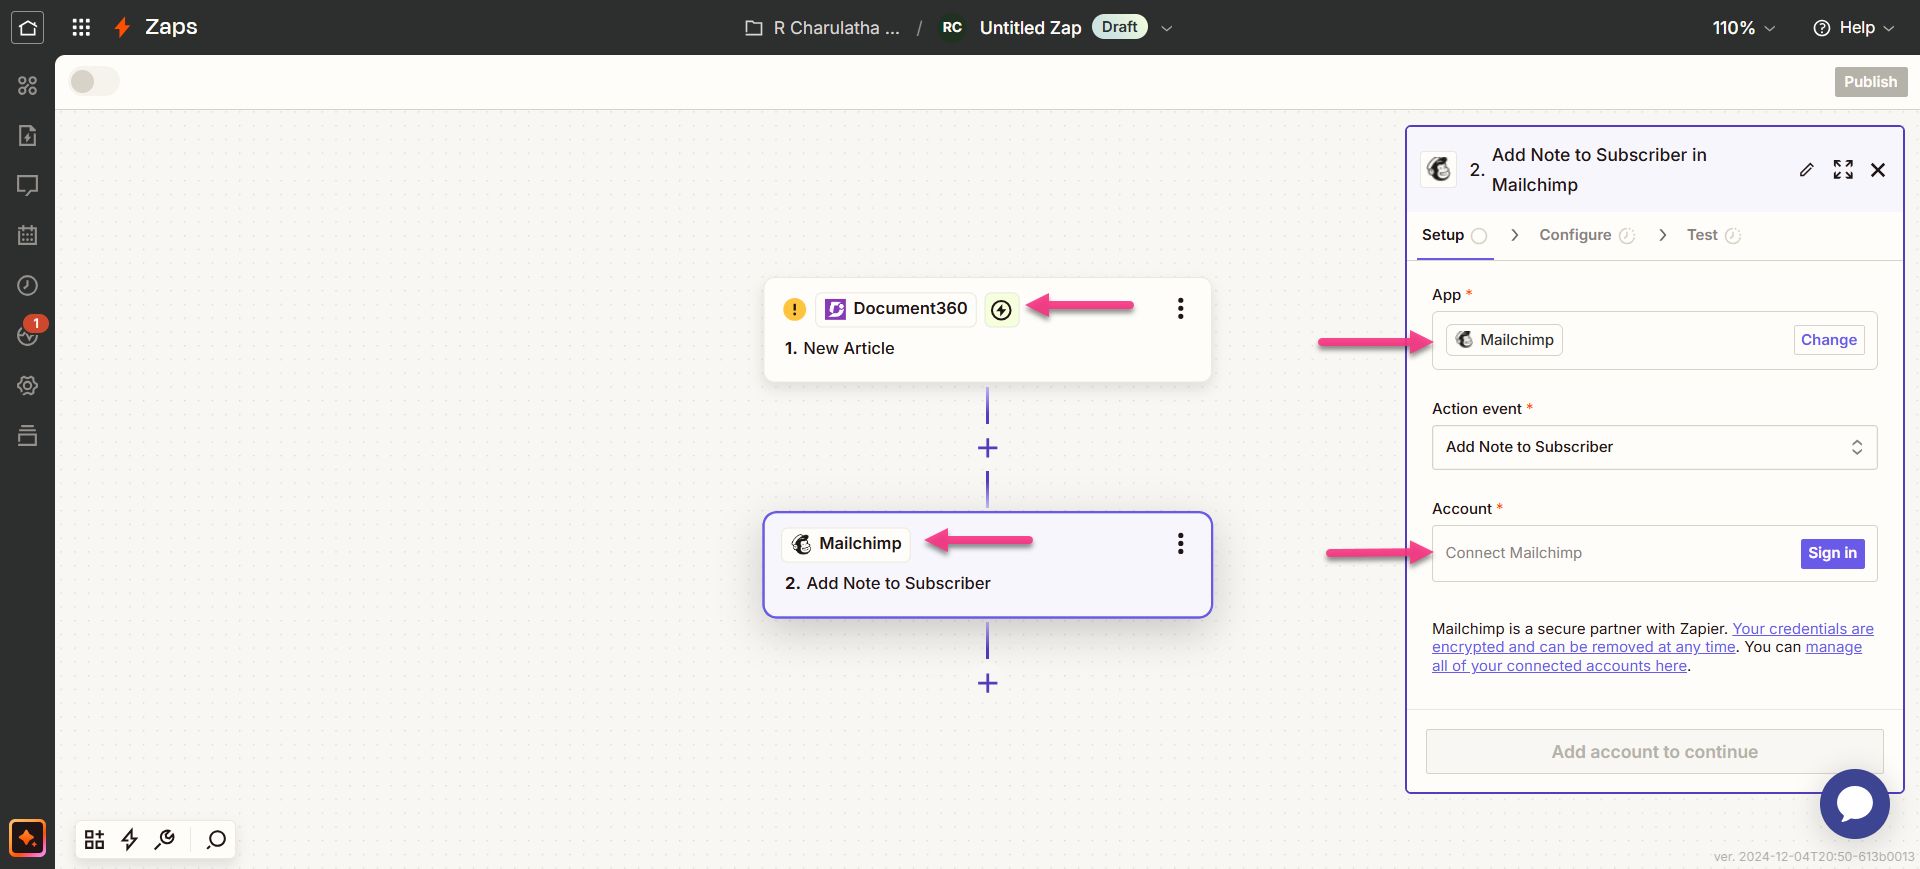
This Zap uses Document360 as the trigger and Mailchimp as the action — a Document360 event (such as a new article being published) initiates the workflow.
- In the Trigger field, choose Document360.
- On the Setup panel, select the desired event in the Event field.
- Click the Account field — a Sign-in panel appears.
- Enter your sign-in credentials and click Allow.
To generate the API token from Document360:
- Navigate to Connections > Extensions in the left navigation bar of the Knowledge base portal.
- On the Zapier extension tile, click Connect.
- Click the Copy icon to copy the token.
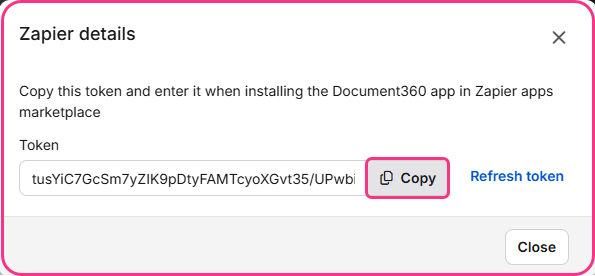
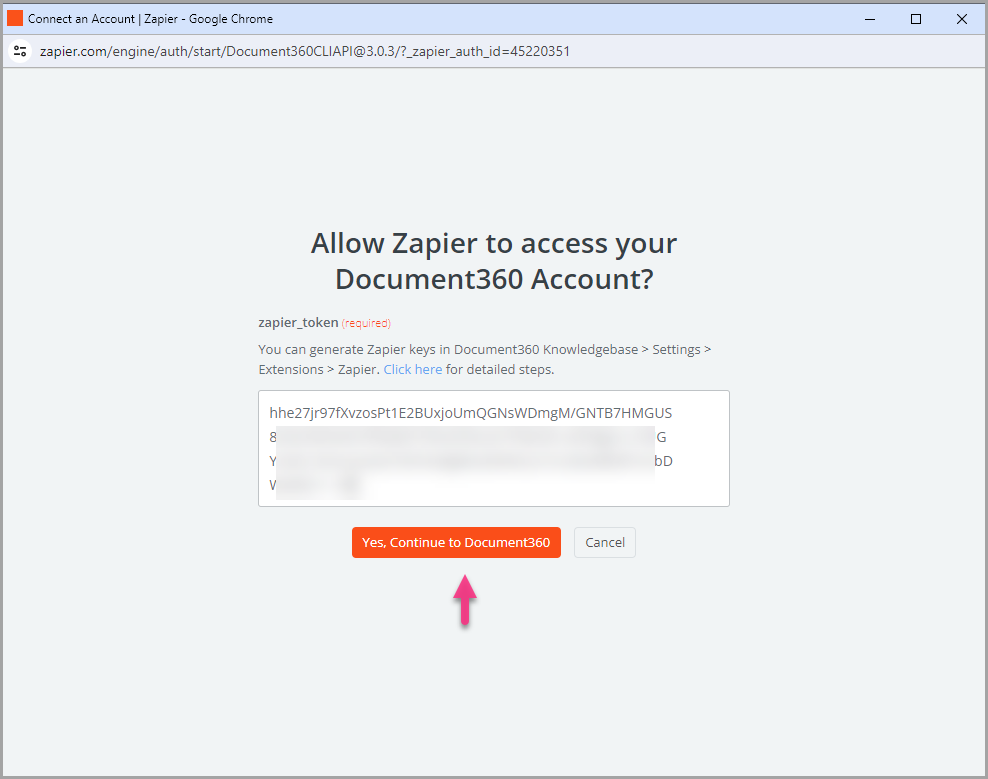
- Head back to the Zapier panel and paste the API token into the field.
- Click Yes, Continue to Document360.
- You can find the connected Document360 project on the Connect Document360 account page. To use a different account later, click Change.
- Click Continue.
Step 3 — Connect Mailchimp as the action
- In the Action field, choose Mailchimp.
- On the Setup panel, select the desired event in the Event field.
- Click the Account field — a Sign-in panel appears.
- Enter your Mailchimp credentials and click Allow.
- Click Continue.
Step 4 — Map the campaign fields
- Map the required fields to configure the Mailchimp campaign:
| Field | Description |
|---|---|
| Audience | Choose the audience group you want to target for the campaign. |
| Segment or Tag | Specify a segment or tag to filter your audience. If left blank, the campaign targets the entire selected audience. |
| Email Subject | Enter the subject line for the email campaign. |
| Preview Text | Add a snippet that appears alongside the subject line in recipients' inboxes. |
| From Name | Set a custom sender name (must be associated with the connected email address). |
| From Email address | Select the email address or alias from your connected Mailchimp account. |
| Template | Choose a Mailchimp template for the campaign email. |
| Email content (HTML) | Provide HTML content for the email. Only one of Template or Email content (HTML) can be used — if both are left blank, the campaign draft will have no content. |
Fields marked as required (*) must be filled in before the Continue button is enabled.
- Click Continue.
Step 5 — Test and publish the Zap
- In the test section, click Test step.
- If successful, you will get the message A Draft was sent to your mail.
- Head back to the Zapier setup panel and click Next, then click Publish.
- Review or edit the trigger and action settings as needed. You will see a success message: Your Zap is on. Click Manage your Zap to go to the Zap overview page.
Zap overview
Once active, you can view and manage the Zap from the Zapier dashboard. The overview page shows the trigger, action, and run history for the Zap.
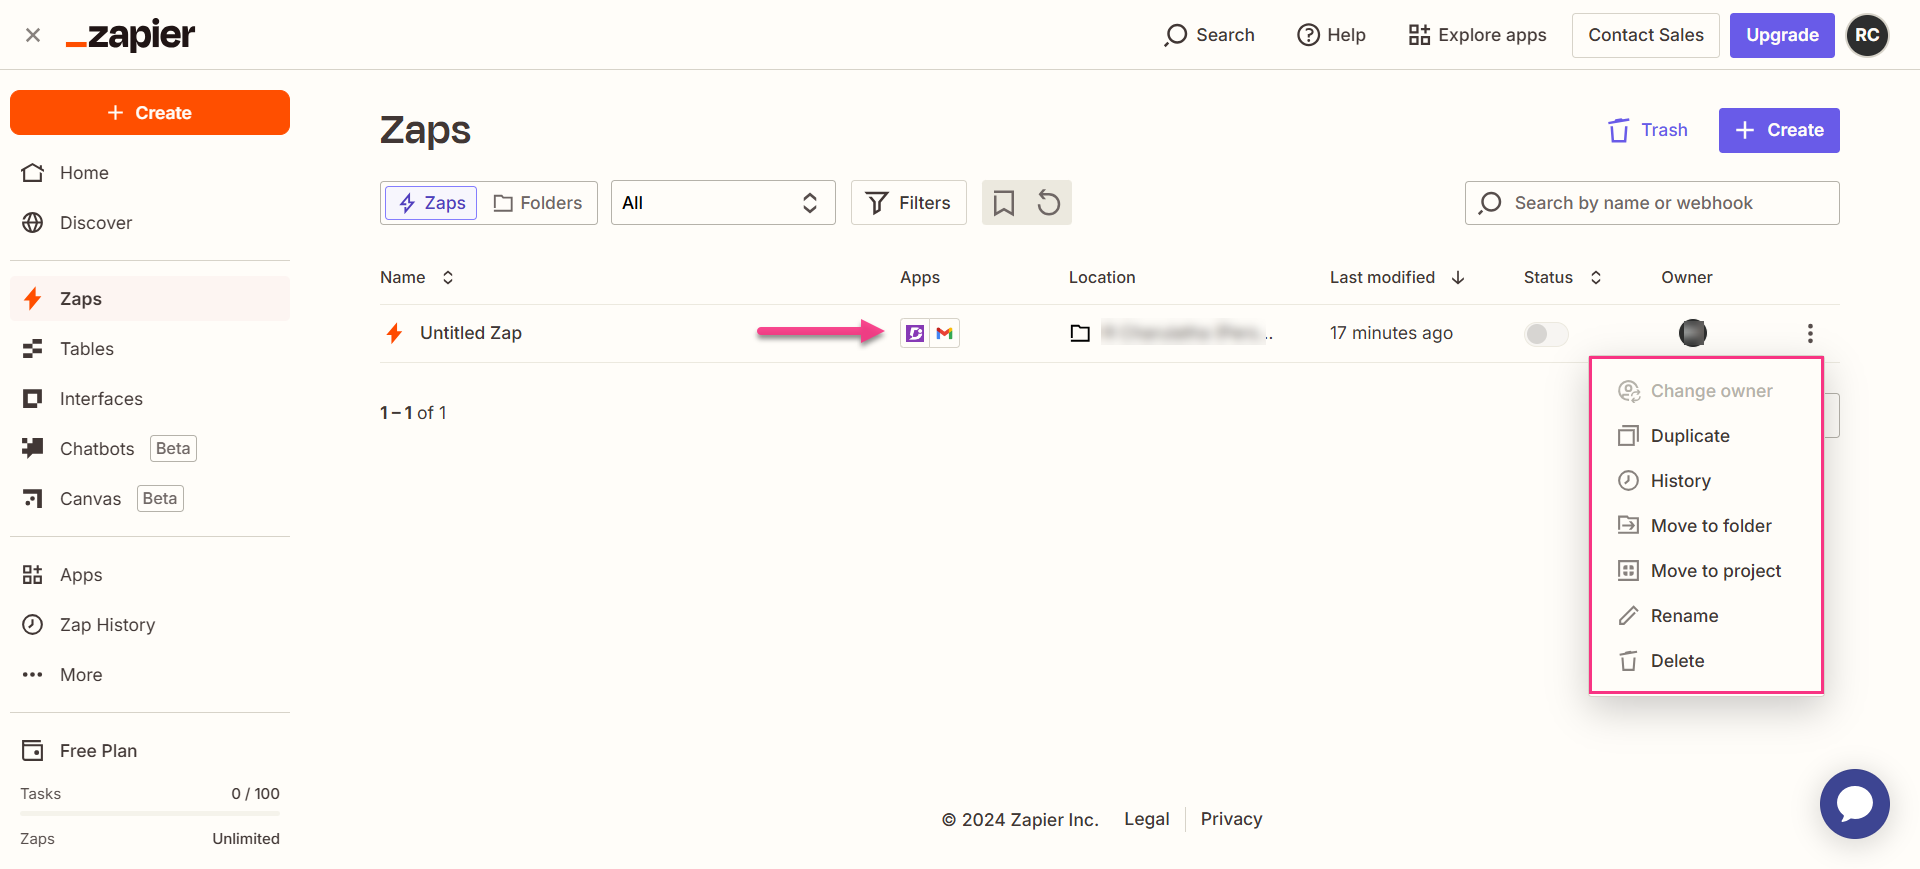
How to delete a Zap
- Navigate to the Zapier dashboard. A list of all existing Zaps is displayed on the overview page.
- Click the Zap actions () icon to the right of the Zap you want to remove and click Delete. The Zap is permanently deleted.
Best practices
- Create campaign drafts rather than sending immediately by ensuring the Zap action creates a draft in Mailchimp rather than sending the campaign outright. This gives your marketing team a chance to review, personalize, and schedule the email before it reaches your audience.
- Use the Segment or Tag field to target a specific subset of your audience — for example, subscribers who opted in for product updates — rather than sending every new article notification to your entire list. Relevant, targeted communication drives better engagement.
- Prepare a Mailchimp template that includes a placeholder for article content before connecting this Zap. Having a template ready makes the Email content (HTML) field easier to populate and ensures your campaigns look consistent regardless of which article triggers them.