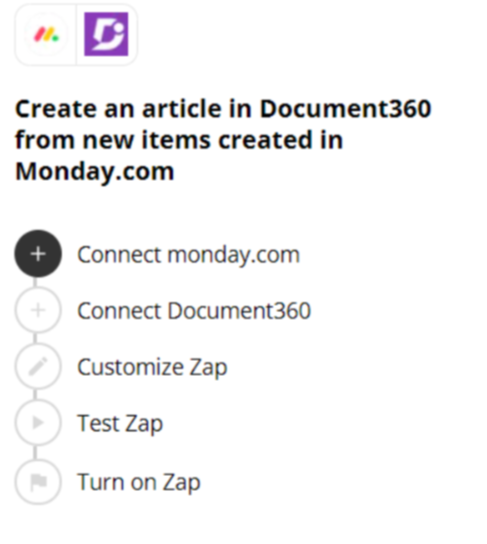
Monday.com's versatile boards and customizable workflows make it a popular choice for managing content collaboration across teams. When a documentation team works with writers, editors, and external agencies in Monday.com, content often needs to move into Document360 as knowledge base articles once it's ready. Doing this manually is time-consuming and error-prone. By connecting Monday.com and Document360 through Zapier, you can automate this: whenever a specified event occurs on a Monday.com board, Zapier creates a corresponding article in your knowledge base automatically.
When to use this integration
- Your documentation team tracks writing assignments and content tasks on Monday.com boards, and you want completed or newly created items to automatically generate articles in Document360.
- You collaborate with external content agencies through Monday.com and want their contributions to flow into your knowledge base without a manual handoff step.
- You want board item data — titles and content from Monday.com — to serve as the starting point for new knowledge base articles, keeping your documentation in step with your project activity.
Before you begin
- You must be logged into your Zapier account.
- You must have a Monday.com account with access to the board you want to monitor.
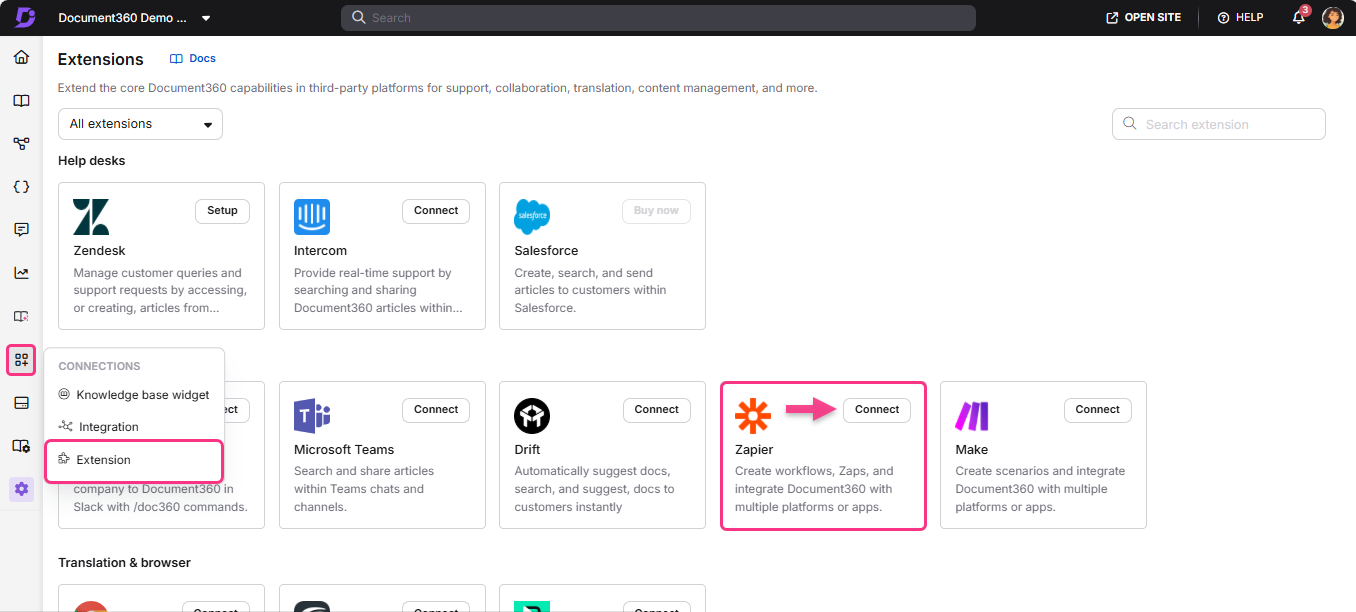
- You must have your Document360 API token ready. To generate one, navigate to Connections > Extensions , locate the Zapier tile, and click Connect to copy the token.
How to set up the Zap
Step 1 — Create a new Zap
- Log in to your Zapier account.
- From the left navigation menu, click Create then select Zaps.
- A new Zap is created with a Trigger and Action flow.

Step 2 — Connect Monday.com as the trigger
- In the Trigger field, choose Monday.com.
- In the Trigger event field, select the required event to trigger on Monday.com.
To change the trigger app later, click Change in the Trigger field.
- Click the Account field — a Sign-in panel appears. You will need to enter the API v2 Token from your Monday.com account.
To obtain the API v2 Token from Monday.com:
- Navigate to Profile > Administration in Monday.com.
- From the left navigation sidebar, click Connections.
- Under the API tab, click the Copy icon to copy your personal API token.
- Paste the token in the Zapier panel and click Yes, Continue to Document360. Zapier runs a test to confirm the trigger is correctly configured.
- Click Continue.
Step 3 — Connect Document360 as the action
- In the Action field, choose Document360.
- On the Setup panel, select the desired event in the Event field.
- Click the Account field — a Sign-in panel appears.
- Enter your sign-in credentials and click Allow.
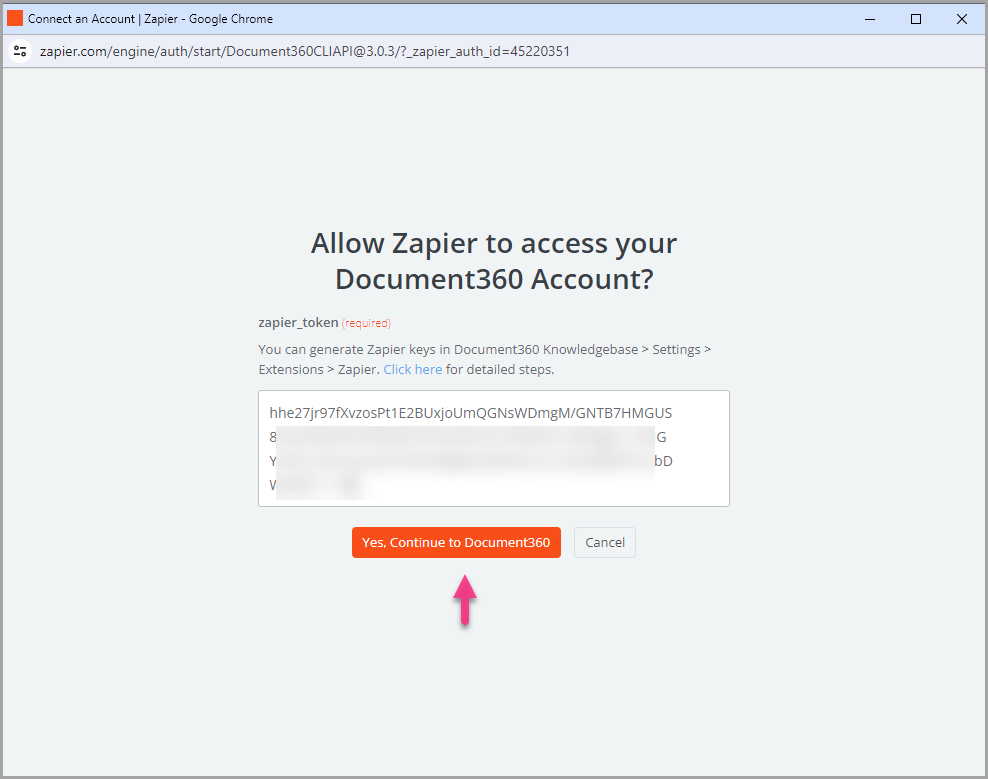
To generate the API token from Document360:
- Navigate to Connections > Extensions in the left navigation bar of the Knowledge base portal.
- On the Zapier extension tile, click Connect.
- Click the Copy icon to copy the token.
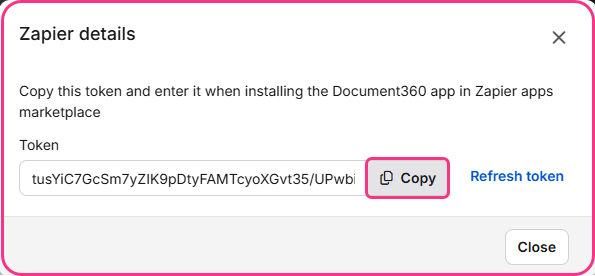
- Head back to the Zapier panel and paste the API token into the field.
- Click Yes, Continue to Document360.
- You can find the connected Document360 project on the Connect Document360 account page. Click Continue.
Step 4 — Map the fields
- Map the required fields from Monday.com to Document360:
| Field | Description |
|---|---|
| Title | Choose a suitable title from the available Monday.com item fields. |
| Content | Choose suitable content based on your business requirements. |
| Version | Select the workspace in your Document360 project where the article should be created. |
| Language | Choose the language within the selected workspace. |
| Article | Choose the article within the selected category. |
The Continue button is only enabled after all required fields have been mapped.
- Click Continue.
Step 5 — Test and publish the Zap
- In the test section, click Test step.
- If successful, you will get the message A Document was sent to Document360.
- In your Document360 portal, you'll find the article located in the folder you previously selected.
- Head back to the Zapier setup panel and click Next, then click Publish.
- Review or edit the trigger and action settings as needed. You will see a success message: Your Zap is on. Click Manage your Zap to go to the Zap overview page.
Zap overview
Once active, you can view and manage the Zap from the Zapier dashboard. The overview page shows the trigger, action, and run history for the Zap.
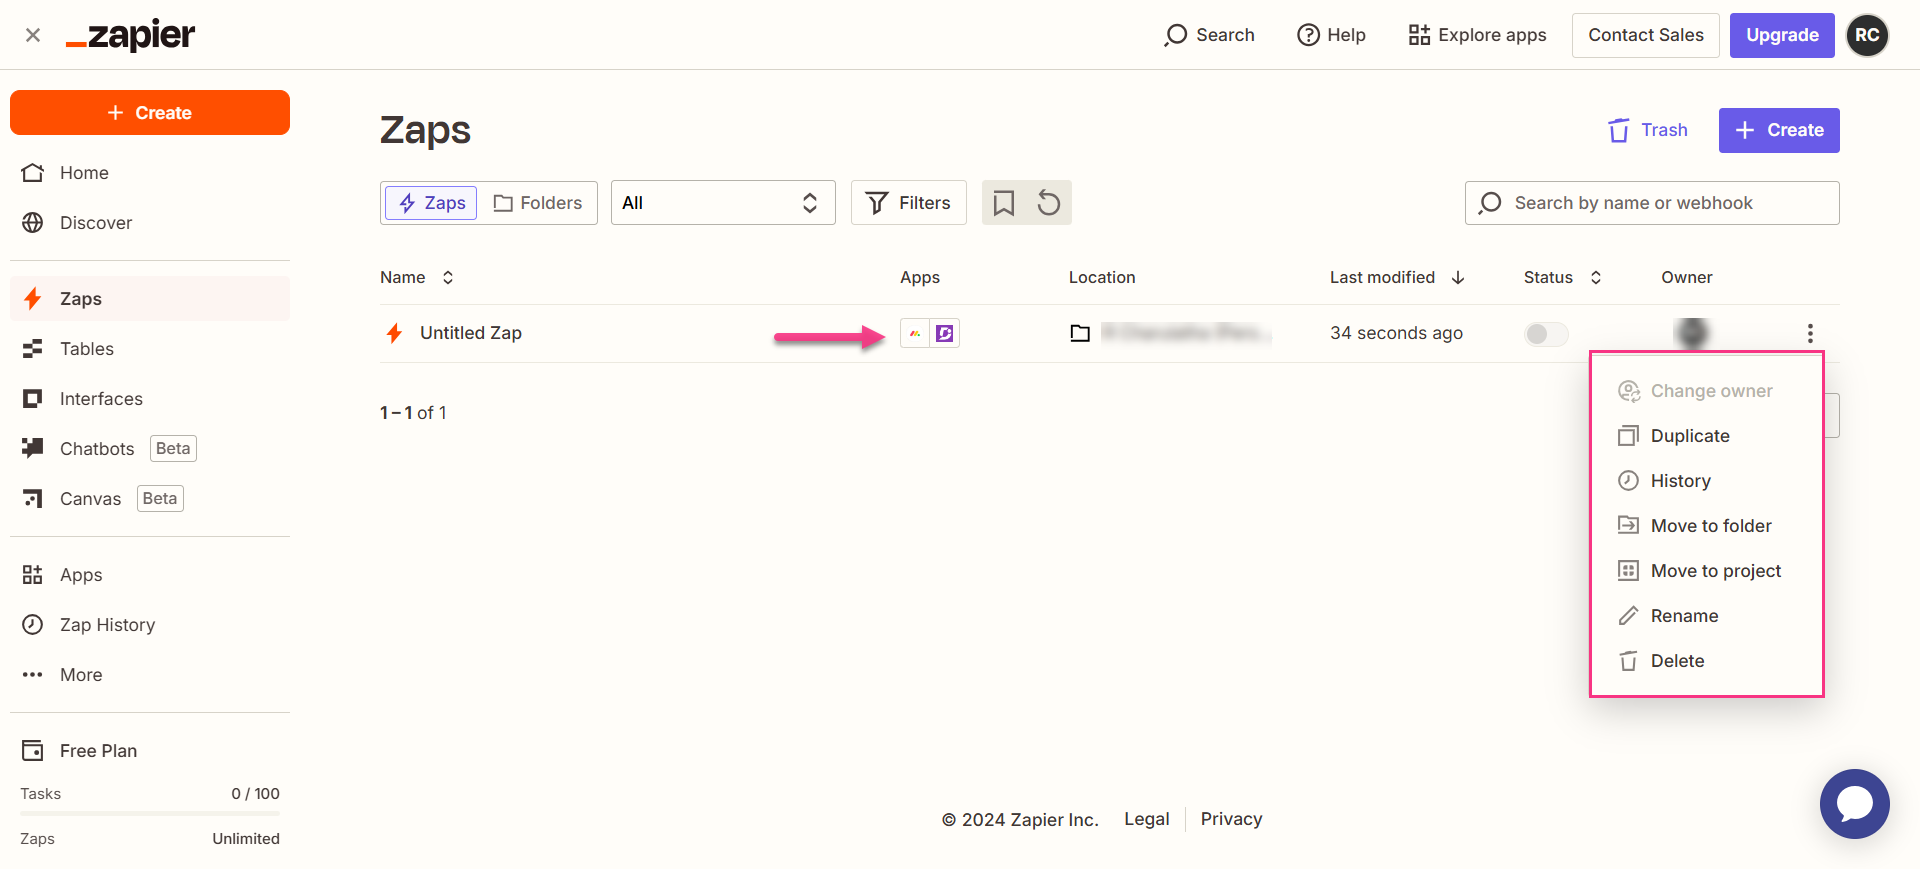
How to delete a Zap
- Navigate to the Zapier dashboard. A list of all existing Zaps is displayed on the overview page.
- Click the arrow (>) icon to the right of the Zap you want to remove and click Turn off and delete Zap. The Zap is permanently deleted.
Best practices
- Use a dedicated Monday.com board for documentation work rather than connecting a general project board. This keeps the Zap scoped to content-relevant activity and prevents unrelated board items from generating unwanted articles in Document360.
- Choose a specific trigger event that reflects a meaningful point in your workflow — for example, when a task status changes to "Ready for publishing" rather than when any new item is created — so articles are only generated when content is actually ready.
- Regenerate your Monday.com API v2 Token if you suspect it has been compromised. Since this token is used to authenticate the trigger, you'll need to update it in the Zapier connection settings for Monday.com if it changes.