The Project settings page in Document360 lets you configure how your knowledge base portal behaves — including project details, default editor, drive file restrictions, review reminders, analytics privacy, and support access. Use it to control workspace navigation, set article review schedules, restrict uploaded media formats, and manage reader data privacy for your project. These settings apply at the project level and can be overridden by article-level or workspace-level configurations where available.
When to use project settings
Use the Project settings page when you need to:
- Rename your project or customize the workspace label shown to readers and team members.
- Set a default editor (Markdown or Advanced WYSIWYG) so all new articles start with a consistent format.
- Restrict which file types contributors can upload to the Drive.
- Schedule automatic review reminders so published articles don't go stale unnoticed.
- Exclude internal or known IP addresses from analytics, or anonymize reader-identifiable data in private projects.
Understanding Project-Level vs. Workspace-Level Settings
Project settings and workspace settings serve different purposes in Document360. Understanding this distinction helps you apply changes at the correct scope and avoid unintended impacts across your knowledge base.
Project-Level Settings
Project-level settings apply uniformly across all workspaces in your project. When you configure a project-level setting, the same configuration applies to every workspace — there is no option to customize it per workspace. Examples of project-level settings include the default editor format, drive file upload restrictions, review reminder schedules, and analytics privacy options. These settings affect all users and all content regardless of which workspace they are viewing.
How to Identify Project-Level Settings
In the portal interface, project-level settings do not include a workspace selector dropdown. If you navigate to a settings page and there is no dropdown to choose a specific workspace, the changes you make apply at the project level. Most basic configurations under the Settings section fall into this category.
Workspace-Level Settings
Workspace-level settings are specific to individual workspaces and allow for granular customization. When you configure a workspace-level setting, your changes apply only to the workspace you select. Other workspaces retain their own independent configurations. This gives you flexibility to maintain different settings for different sections of your knowledge base.
How to Identify Workspace-Level Settings
In the portal interface, workspace-level settings include a workspace dropdown selector. If you see a dropdown menu for selecting a specific workspace, the changes you make will apply only to that workspace. Any other workspaces you do not explicitly configure will remain unaffected.
Understanding the scope of settings helps you accomplish two goals. First, you can avoid unintentional changes that affect all workspaces when you only intended to customize one. Second, you can customize settings effectively for specific workspaces when you need different configurations for different sections of your knowledge base. Always check whether a settings page includes a workspace selector before making changes, as this determines whether your configuration is project-wide or workspace-specific.
Before you begin
You need a role with permission to access Settings in the Knowledge base portal.
How to configure project settings
Access the Project settings page
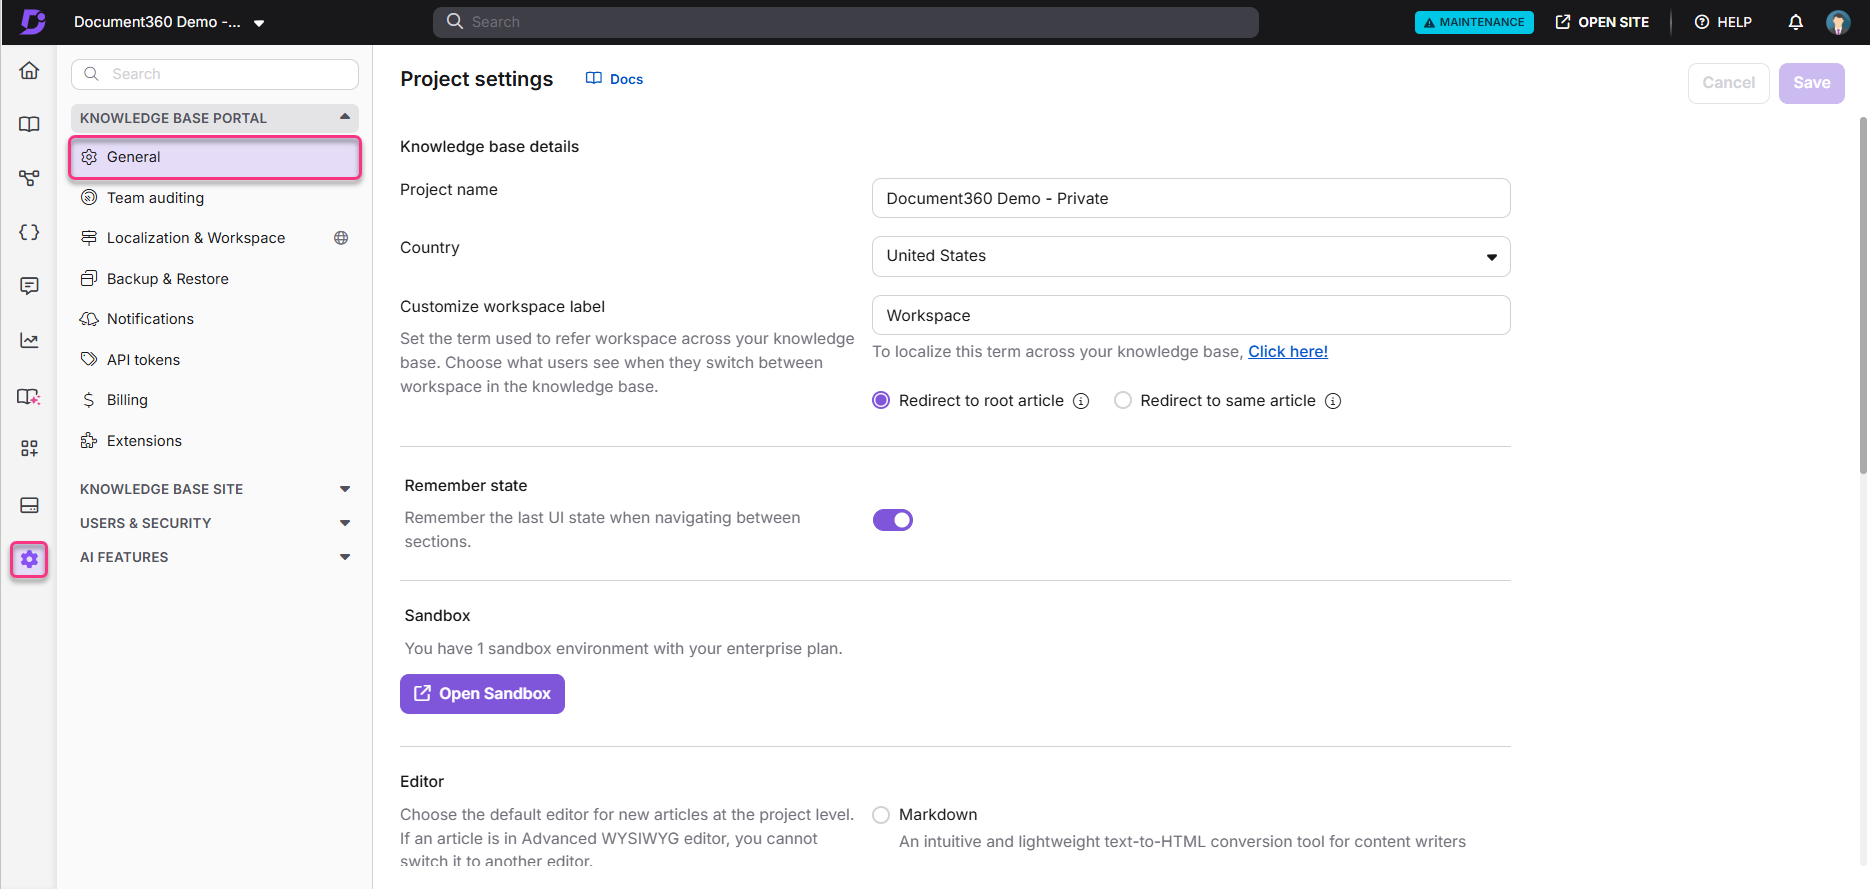
- Navigate to Settings () > Knowledge base portal in the left navigation bar.
- In the left navigation pane, select General.
Use the Settings search bar above the Knowledge base portal section to quickly locate a setting by name. It searches only the left navigation pane, not the content within individual settings pages.
Set knowledge base details
- In the Project name field, enter your project name.
- From the Country dropdown menu, select your country.
- In the Customize workspace label field, enter a custom workspace name (for example, Product name or Version).
- Choose your preferred navigation behavior when readers switch between workspaces:
- Redirect to root article — takes readers to the root article of the selected workspace.
- Redirect to same article — opens the same article in the selected workspace if available; otherwise, takes readers to the root article.
For more details, see Managing workspace label and switching behavior.
Turn on Remember state
- Turn on the Remember state toggle to retain the portal's last UI state — such as the article you were editing, applied filters, expanded categories, and selected workspace — when you navigate away and return.
Remember state is enabled by default.
Set the default editor
Choose a default editor for new articles:
- Select Markdown, and optionally select Show line numbers in markdown editor.
- Select Advanced WYSIWYG editor, and optionally select Show outline view in advanced WYSIWYG editor.
This setting applies only to new articles created after the change.
Set the default article view
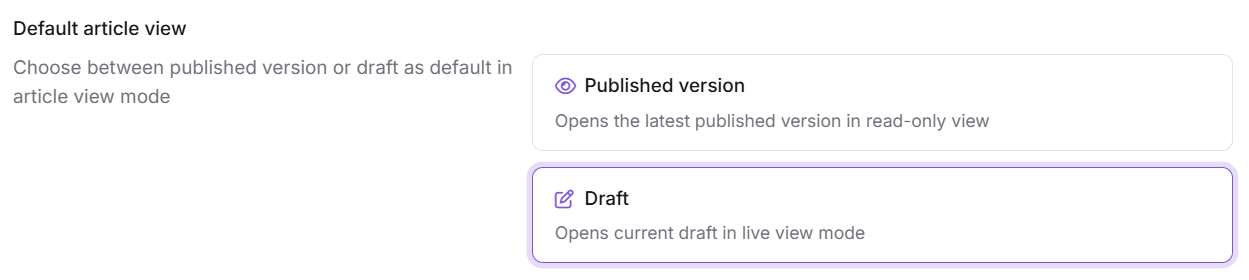
Default article view: Choose the version that opens when you select an article.
- Published version: Opens the latest published version in read-only mode. Any changes in a newer draft won't be visible until you select Edit, which opens the current draft.
- Draft: Opens the current draft in a live, read-only view showing all changes made so far, including real-time avatars and edits from other contributors. Select Edit to start making changes yourself.
Configure review reminders for articles
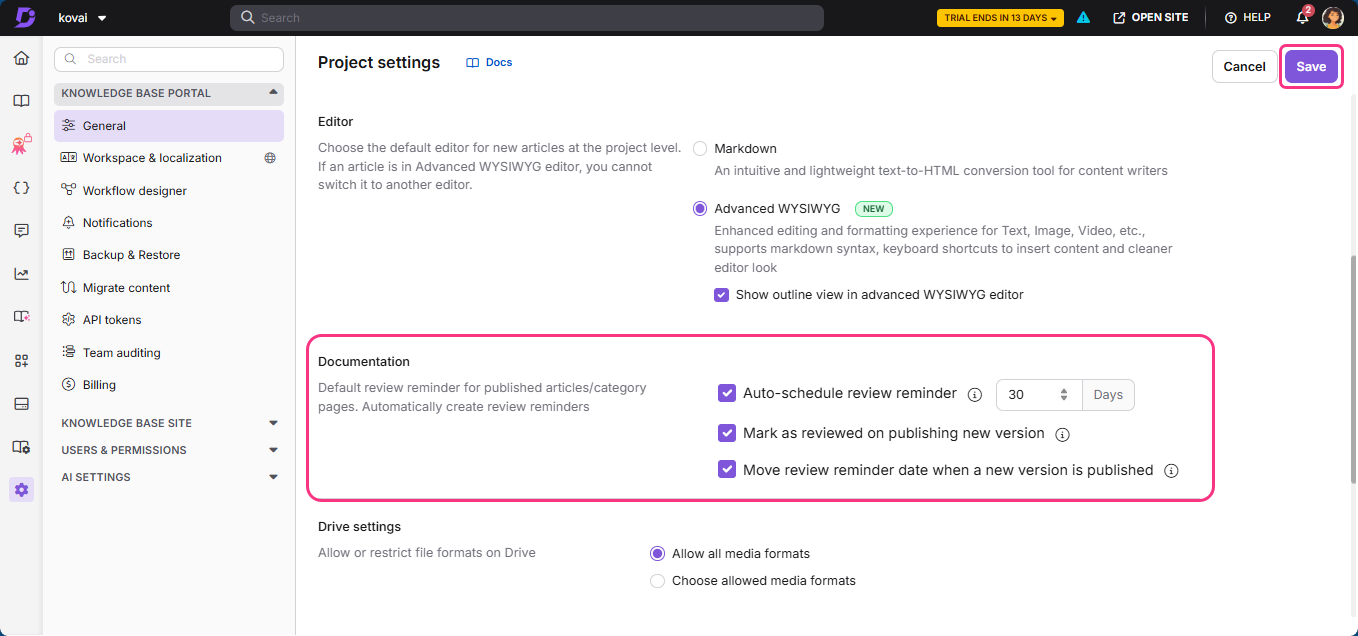
- Select Auto-schedule review reminder to automatically create a review reminder for all published articles, then enter the number of days after which an article moves to the Stale state. For example, an article published on January 1 with a 90-day reminder moves to Stale on April 1.
- Select Mark as reviewed on publishing new version to automatically clear the Stale status when a contributor updates and publishes a new version of a stale article. If disabled, the article stays Stale until someone marks it as reviewed manually.
- Select Move review reminder date when a new version is published to restart the review timer from the new publish date whenever an article is updated and republished before its reminder date. For example, an article published January 1 with a 90-day reminder (due April 1) that is republished on February 15 gets a new reminder date of May 16.
Article-level review reminders override these project-level settings. See Creating a review reminder for an article.
Restrict allowed media formats in the Drive
- Select Allow all media formats to permit any file type to be uploaded to the Drive, or select Choose allowed media formats to restrict uploads to specific formats.
- If you selected Choose allowed media formats, click Add.
- In the Add allowed format panel, enter the Media type and Extension.
- To add another media format, click Add media type.
- Click Save.
Exclude IP addresses from analytics
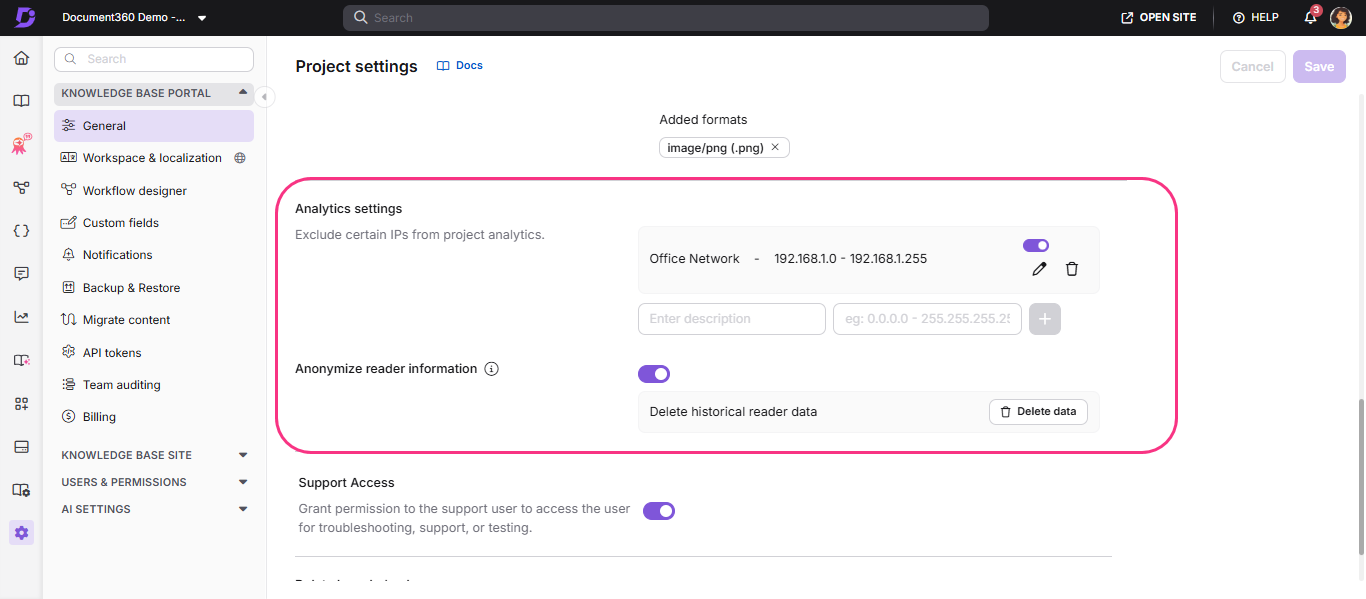
- Enter a Description and the IP address you want to exclude from project analytics.
- Click the add icon to apply the restriction. A toggle is created for the IP address.
- Turn off the toggle to remove the restriction.
- Click Edit to update the description, or Delete to remove the IP restriction.
Anonymize reader information
- Turn on the Anonymize reader information toggle to remove reader-identifiable data from analytics in private projects and private workspaces within mixed projects. When enabled:
- Reader names, email addresses, and reader IDs no longer display in analytics modules.
- Reader Analytics becomes unavailable.
- Feedback analytics and Eddy AI analytics display anonymized reader information.
- CSV and PDF exports exclude reader-identifiable information.
- Aggregated analytics metrics remain available.
- To permanently delete previously stored reader-identifiable data, click Delete data.
Deleted historical reader data cannot be restored. This applies only to private projects and private workspaces in mixed projects.
Grant support access
- Turn on the Support Access toggle to give the Document360 support team access to your account for troubleshooting, support, or testing.
To delete your project, contact the Document360 support team.
Once you've made your changes, click Save.
Delete knowledge base
If you want to delete your entire project or knowledge base, this is not available as a self-service option. Contact the Document360 support team to request deletion.
Best practices
- Set the default editor to match your team's primary authoring workflow before onboarding new contributors, so all new articles start consistently formatted.
- Enable Auto-schedule review reminder with a review window that matches your release cadence (for example, 90 days for fast-moving products) to keep content from going stale unnoticed.
- Restrict allowed media formats in the Drive if your team frequently uploads large or unsupported files, to keep storage usage predictable.
- Consider anonymizing reader information in private projects where readers expect their activity to stay confidential, since the change is not reversible once historical data is deleted.
- Turn on Support Access only when actively working with the Document360 support team, and turn it off afterward.
FAQ
Why should I activate or deactivate the Remember state feature?
Activating Remember state helps team members resume work without losing context, since the portal returns to the last viewed article, filter, or workspace. Deactivating it resets the view to the default starting point each time you navigate back to a section.
What scenarios does Remember state apply to in Document360?
Remember state applies to filters (retained when switching between Drive and Analytics), the category manager (retains its last expanded position in Documentation), and the workspace dropdown (retains the selected workspace across sections).
How do I find IDs in Document360?
All IDs — project, article, category, user, user group, reader, and reader group — can be found in the browser URL when you open the relevant item in the portal. The user ID uses a 24-character hexadecimal format; all other IDs use the standard UUID format.
Does Document360 involve any generative AI or large language model (LLM) features?
Yes, Eddy AI, a feature in Document360, uses third party LLMs such as OpenAI and generative AI to enhance the user experience.