Tables in the Markdown editor let you organise and present data in a structured, readable format — useful for comparing features, listing options, or summarising information. There are two ways to create a table in the Markdown editor: using the Insert table toolbar icon, or typing the Markdown table syntax manually.
When to use tables
- Feature comparisons — display differences between plans, options, or configurations side by side.
- Reference data — list parameters, field names, or settings with their descriptions in a structured format.
- Structured summaries — present data sets where rows and columns make relationships between values immediately clear.
Tables are only available in the Markdown editor. In the Advanced WYSIWYG editor, use the Insert menu to add a table block.
Quick reference
Markdown table syntax
| Column 1 | Column 2 | Column 3 |
|:-------- |:--------:| --------:|
| Left     | Center   | Right    |
Column alignment
| Syntax | Alignment |
|---|---|
:--- |
Left |
:---: |
Centre |
---: |
Right |
Limits
| Item | Value |
|---|---|
| Maximum columns (via toolbar) | 10 |
| Maximum rows (via toolbar) | 15 |
| Header row required | Yes — Markdown tables always require a header row |
How to create a table in Markdown
Using the toolbar
-
Open the desired article in the Markdown editor in the Knowledge Base portal.
-
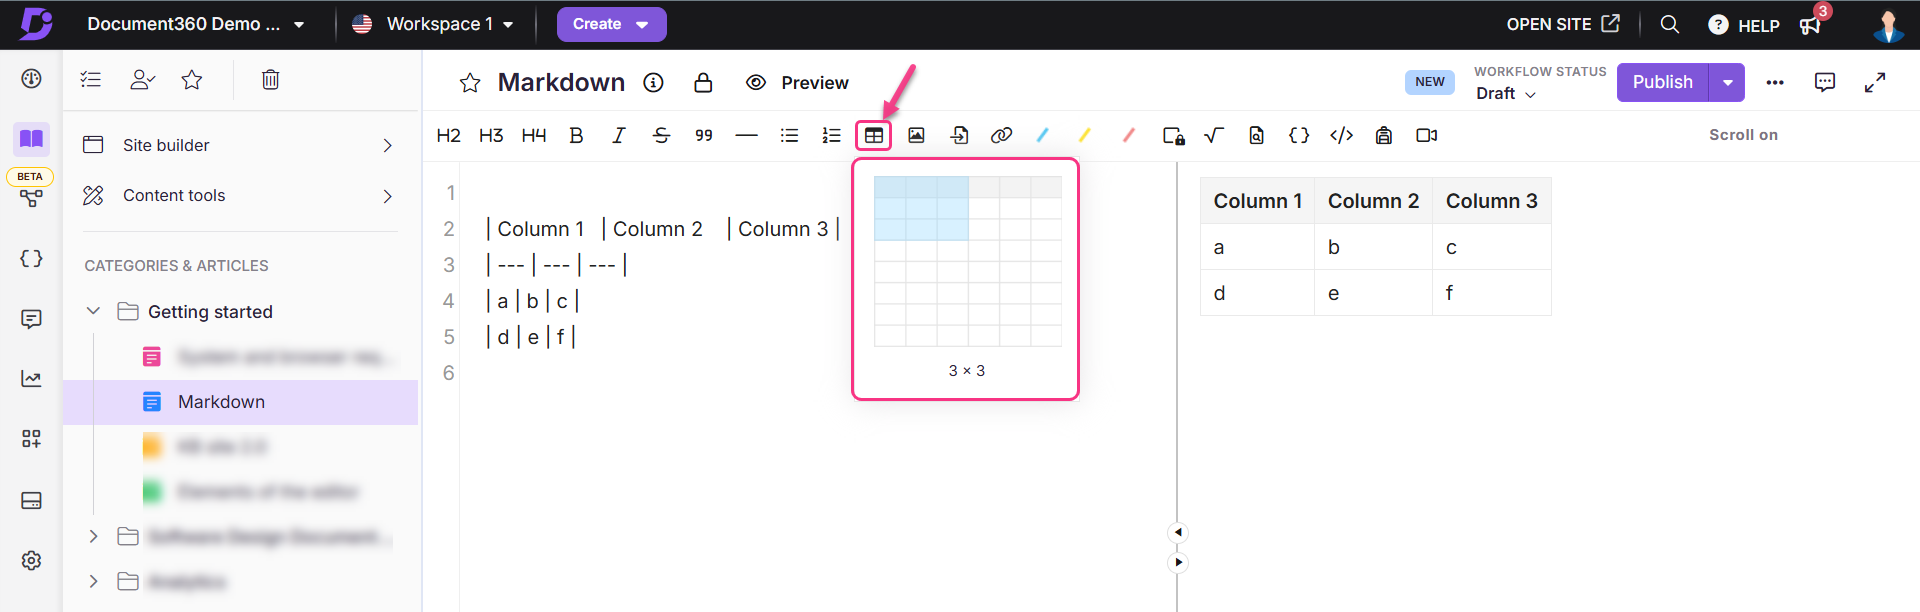
Click the Insert table (⊞) icon in the editor toolbar.
An interactive grid appears.
-
Drag to select the number of rows and columns you need. You can select up to 10 columns × 15 rows.
-
To add more rows beyond the initial selection, move to a new line below the table and enter cell content using vertical pipes (
|) to separate each column. Each new line represents a row.Example:
| Basic | Yes | Limited | Like    |
| Pro   | Yes | Full    | Dislike |
Typing manually
-
Open the desired article in the Markdown editor.
-
Type vertical pipes (
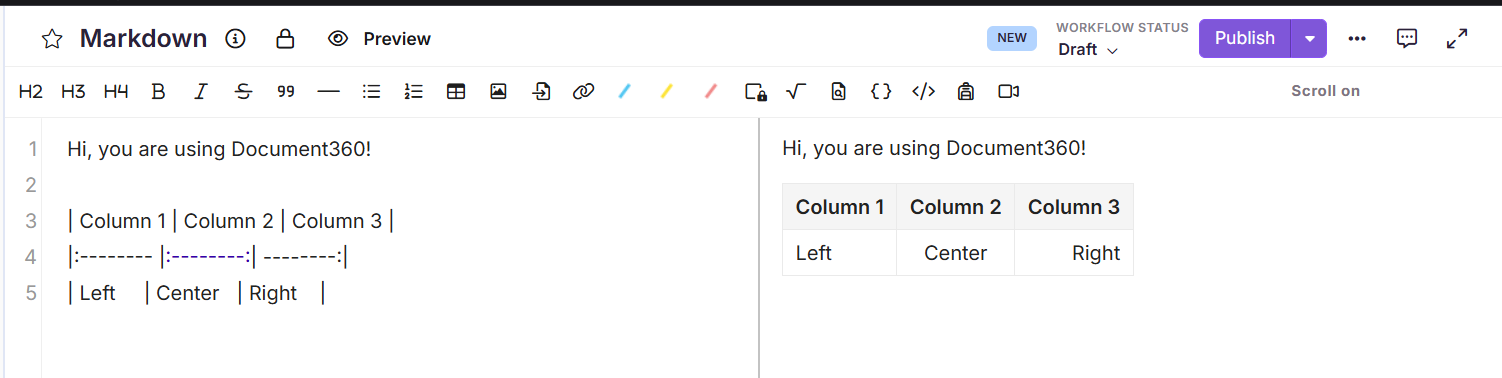
|) and hyphens (-) to define the table structure. Use colons (:) in the separator row to set column alignment.Sample code:
| Column 1 | Column 2 | Column 3 | |:-------- |:--------:| --------:| | Left | Center | Right | -
The separator row (second line) is required. Without it, the content will not render as a table.
Outcome:
How to create a table without a header row
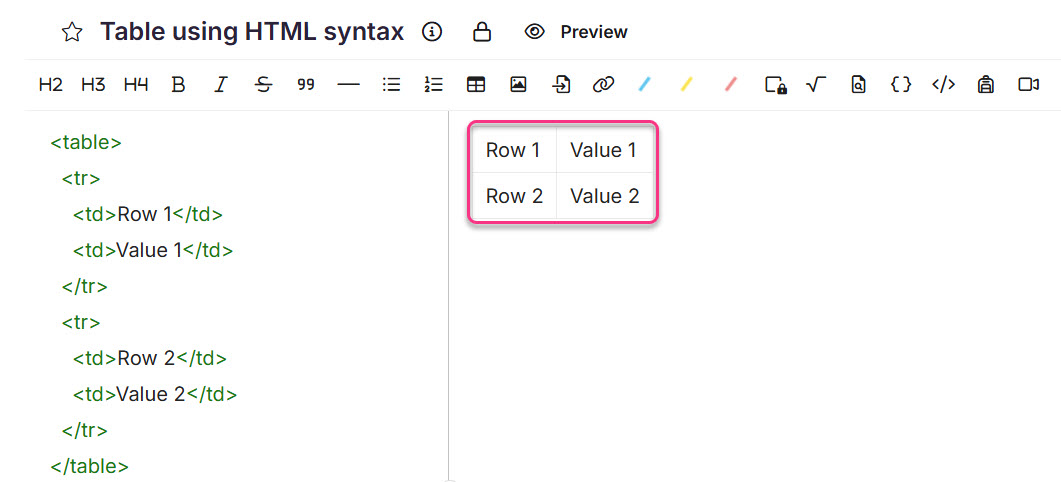
Standard Markdown always requires a header row. If you need a table without a visible header, use HTML <table> syntax instead:
<table>
  <tr>
    <td>Row 1</td>
    <td>Value 1</td>
  </tr>
  <tr>
    <td>Row 2</td>
    <td>Value 2</td>
  </tr>
</table>
Add more <tr> blocks for additional rows and more <td> cells within each row for additional columns, following the same structure.
Output:
Best practices
- Always include a header row — even if the column names are generic (Column 1, Column 2), a header row makes the table easier to scan and is required for standard Markdown syntax.
- Keep cell content concise — long text in cells makes tables hard to read. If a cell needs more than a sentence, consider using a list or paragraph instead.
- Use alignment intentionally — left-align text columns, right-align numeric columns, and use centre alignment sparingly for labels or status values.
- Use the toolbar for quick tables — the Insert table icon is the fastest way to create a standard table. Switch to manual syntax when you need precise control over alignment or are adding rows beyond the 15-row toolbar limit.