The Advanced WYSIWYG editor provides a range of table formatting and management features to help you create, structure, and style tables effectively. Use tables to compare features, list options, or present structured data in a readable format.
Why use tables
- Present structured comparisons between features, plans, or options
- Summarize configuration values, parameters, or settings
- Display step-action pairs or keyboard shortcut references
- Organize hierarchical or relational data that prose cannot convey clearly
Creating a table
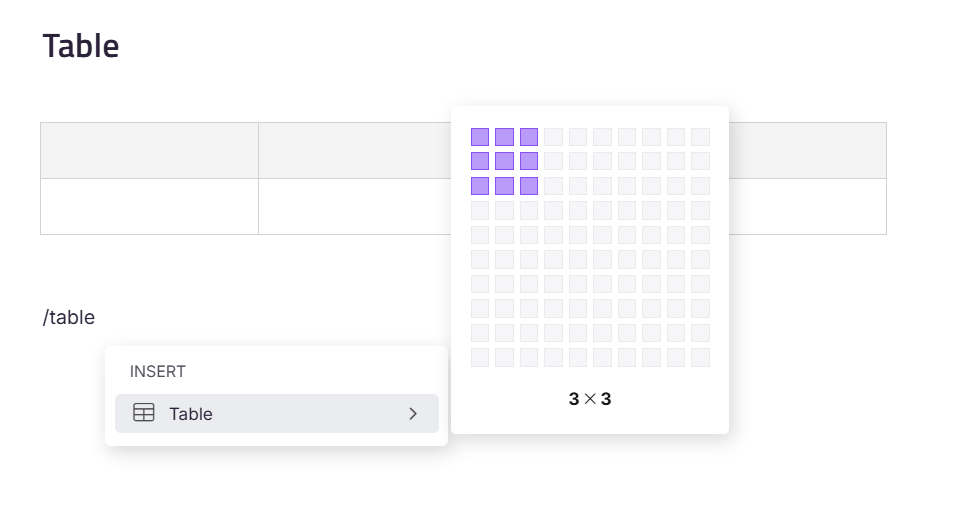
Click the Table icon in the Quick insert menu (appears when a block is empty) to insert a default 3×3 table at the cursor's location. You can also type /table and press Enter, then select your preferred grid size from the picker.
- When a table is wider than the screen on the knowledge base site, a persistent horizontal scrollbar lets users scroll through the columns.
- When exporting the article as a PDF, the table will be adjusted to fit within the document layout; the table layout will adjust to fit the page in the downloaded file.
💡 PRO TIP: Tables with many columns or long cell content may not render as a single aligned table in PDF exports. See Wide tables in exported PDFs
for details and workarounds.
Editing table layout
Freeze rows & columns
Freeze rows & columns keeps critical table information visible as users scroll through large tables.
Freeze row: Select the row and choose Freeze until this row from the dropdown menu. The selected row and all rows above it will remain visible while scrolling. To unfreeze, select the row again and choose Unfreeze row.
Freeze column: Select the column and choose Freeze until this column from the dropdown menu. The selected column and all columns to its left will remain visible while scrolling. To unfreeze, select the column again and choose Unfreeze column.
Rows and columns can be frozen simultaneously without overriding each other.

Only users can configure freeze settings while editing tables in the portal. Readers can view the table with frozen rows & columns on the knowledge base site, but cannot modify the freeze settings.
Inserting a row or a column
Insert row: Click on a cell, then click the + icon to insert a new row below. You can also click the row action menu and select Insert row above or Insert row below. A new row cannot be added above the first row of the table.
Insert column: Click on a cell, then click the + icon to insert a new column next to the selected column. You can also click the column action menu and select Insert column left or Insert column right.
Deleting a row or a column
- To delete a row, click the action menu and click Delete row.
- To delete a column, click the action menu and click Delete column.
Merging cells
Select multiple cells, then click the Merge cells icon in the menu that appears. The selected cells will be combined into one.
.png)
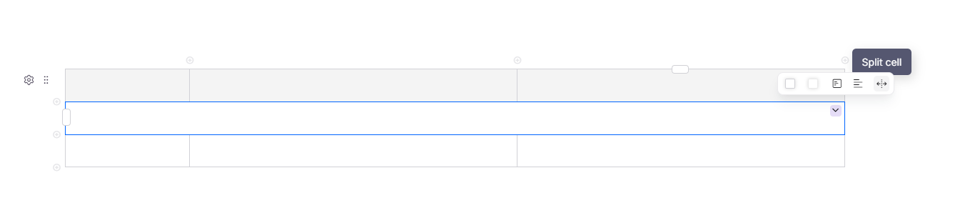
Splitting merged cells
Select a merged cell, then click the Split cell icon in the menu that appears. The merged cell will be divided back into its original individual cells. Only merged cells can be split; individual cells have no split option.
Formatting a table
Select the entire table using its block selection handle to open the table toolbar, then choose from the following options.
Header rows
The top row is a header row by default when you insert a table. The header row is indicated with a grey background.
- To hide the header row, select the entire table and click Hide table header.
- To show a hidden header row, select the entire table and click Show table header.
Background and border color
- To set the background color of one or more cells, select the cells, click Background color in the menu that appears, then choose a color from the palette.
- To set the border color of one or more cells, select the cells, click Border color in the menu that appears, then choose a color from the palette.
Once you make updates to the background color in tables, check the article preview in dark mode to verify the table's visibility.
Border style
Select the entire table, click the Border style option in the menu, then choose your preferred style: Solid, Dashed, Dotted, or No border.
.png)
The No border option applies only when the entire table is selected using the table's block selection handle. It will not be available when selecting individual cells.
Alternate row style
To apply banded rows, select the entire table and click the Alternate row style option in the menu. Row colors will alternate between white and light gray.
.png)
You can customize your tables even further using CSS code snippets. To learn more, visit the Table Style article.
Fit table to page width
Select the table, then click Fit table to page width in the menu that appears. This automatically adjusts the table to span the full width of the page with content evenly distributed across the available space.
You can manually adjust column width by hovering between two columns until the resize cursor appears, then dragging to set the desired width.
Copying a table
Select the entire table and click Copy in the menu that appears.
Formatting table cells
Quick cell actions
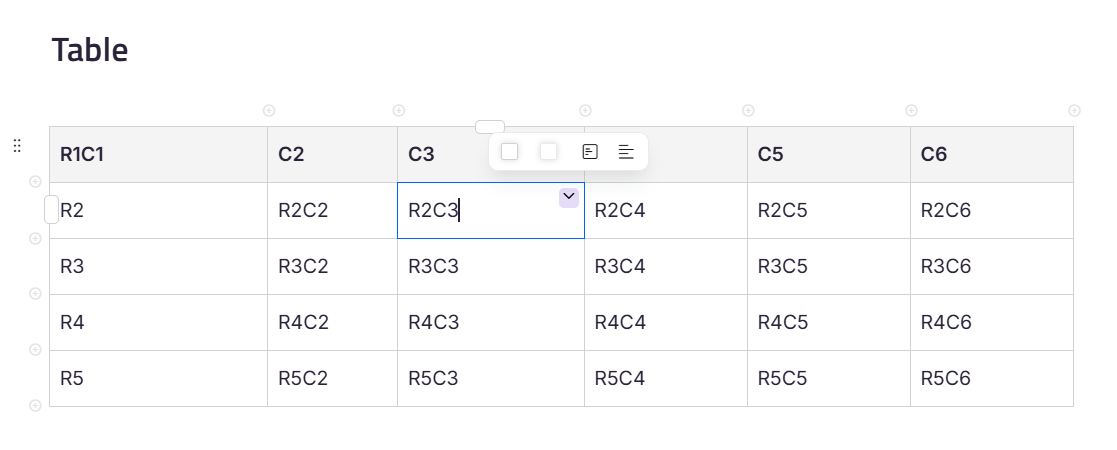
To make quick changes to a single cell, hover over it to find the Cell options icon, then click to access the following options:
- Cell background color - set a background color for the selected cell
- Cell border color - set a border color for the selected cell
- Vertical align - align cell content to the Top, Middle, or Bottom of the cell.
- Horizontal align gives you four options: Left, Center, Right, and Justify. Selecting Justify spaces the text equally to cover the full width of the cell.
Text selection inside cells
You can select text accurately within table cells.
- Single-click to place the cursor at the exact position clicked.
- Double-click to select the clicked word (or the character, if single).
- Triple-click to select the entire line.
- Fourth-click to select all cell content, including text, images, and lists.
Filter & Sort table data
Table sort and filter let readers sort and filter table data directly on the knowledge base site.
- Navigate to Settings > Knowledge base site > Article settings & SEO.
- Scroll down to Other article content and turn on the Table Sort & Filter toggle.
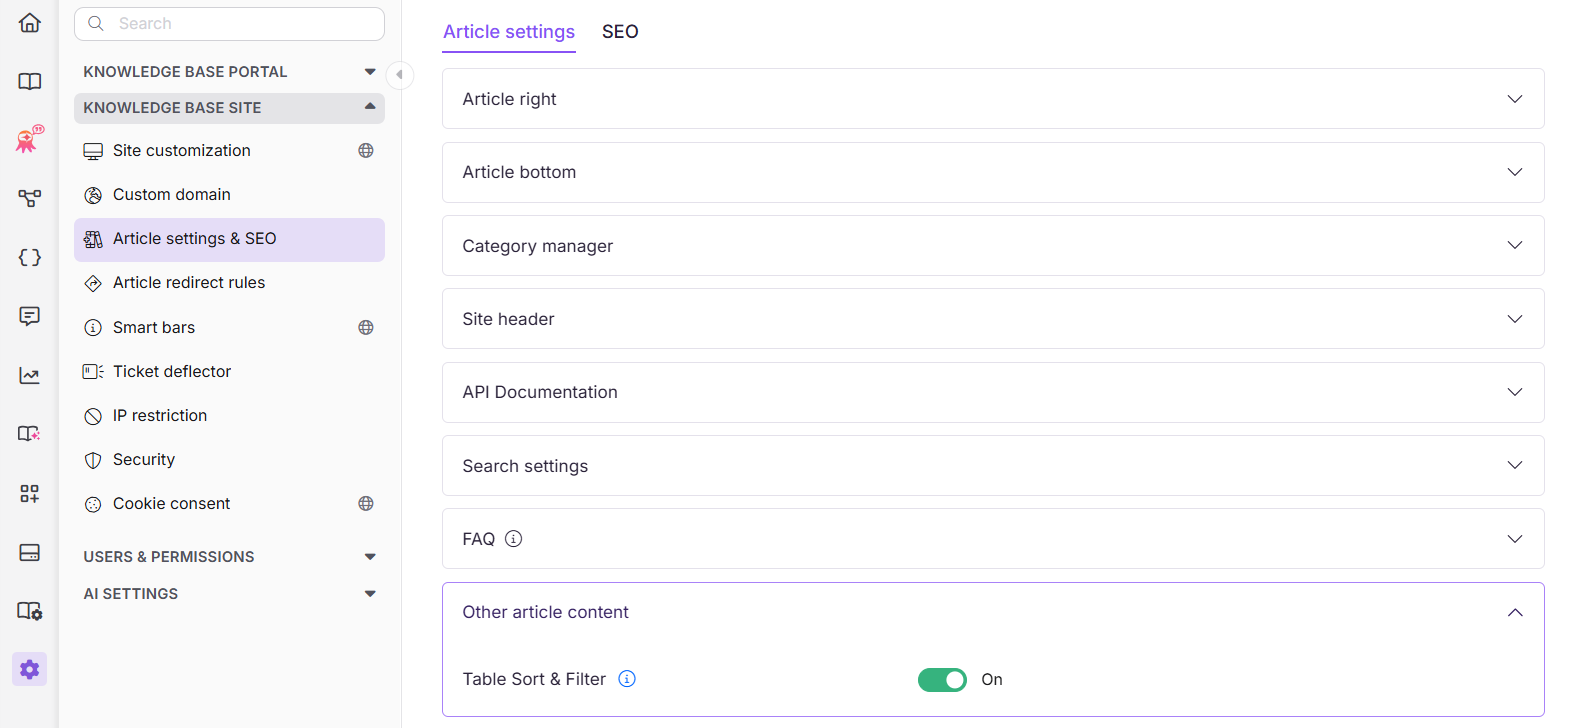
Table data filtering and sorting are only available on the Knowledge Base site (both private and public) and Custom Domain sites. These features are not supported in the Portal, Editor, or PDF Export.
Once enabled, on your knowledge base site:
- Hover over a table header cell, then click the Filter icon.
Your table must have a header row defined. Without a header row, the filter icon will not appear even if the Table Sort & Filter toggle is enabled in the settings.
- A dialog box will appear, allowing you to select the data you want to filter.
- To sort alphabetically, click Sort A to Z or Sort Z to A. To remove sorting, click Clear Sorting. This clears sorting for the selected column only.
- To filter data, select the desired values and click Apply. To remove filters, click Clear. This clears filters across all columns at once and is available only when filters are applied to more than one column.

- Any filters or sorting applied to the table are temporary and will reset to their default state upon refreshing the page.
- Only one column can have active sorting at a time. Applying sorting to a new column will clear the previous sorting.
- Sorting and filtering do not work on merged cells.
FAQ
Can I use the automatic number in a table?
While numbered lists are possible within a cell, you cannot apply an automatic number for rows in a table.
Can I add symbols or icons to a table?
Yes. Built-in symbols and icons can be added directly from the Format menu. For symbols or icons from external sources, switch to Code view, place the cursor in the desired location, and paste the HTML code for the required symbol or icon.
Will slash commands work inside a table?
Yes, all slash commands work inside a table.
Can I paste tables from Microsoft Word or Excel?
Document360 supports pasting tables from Microsoft Word and the web application of Microsoft Excel directly in the editor while retaining their structure. Pasting tables from the desktop application of Microsoft Excel is not currently supported. If you need to insert a table from Excel, use the web application to avoid loss of formatting.
How do I add a line break within a table cell?
Press Enter or Shift+Enter to add a line break within a table cell.
- For normal text, both create a new line within the same cell.
- For lists: press Enter to create the next list item, or Shift+Enter to insert a line break without starting a new bullet or number.
💡 PRO TIP: Use Shift+Enter in list items when you want to continue or elaborate on the same point on a new line.
How many rows and columns can I create in a table, and how can I add more?
The initial row and column limits depend on the editor you're using.
| Editor type | Max rows | Max columns |
|---|---|---|
| Markdown editor | 15 | 10 |
| WYSIWYG editor | 10 | 10 |
| Advanced WYSIWYG | 10 | 10 |
To add more rows or columns after creation:
- Markdown editor: Manually edit the table structure in Markdown syntax.
- WYSIWYG editor: Click a cell and use the Insert row or Insert column icon. Only one row or column can be added at a time.
- Advanced WYSIWYG editor: Hover over the desired row or column and click the plus (+) icon to insert. Only one row or column can be added at a time.
How can I remove or merge multiple rows/columns with a common row/column?
Use the Merge cells icon to merge the relevant rows or columns. The table will resize to fit the content, and any extra rows or columns will be removed automatically.