Plans supporting this feature: Business (add-on) Enterprise (add-on)
Eddy AI Chatbot allows you to create intelligent chatbots trained on your content. Unlike the Knowledge Base widget, Eddy AI Chatbot operates independently, giving you complete control over configuration, sources, and deployment. You can train your chatbot using multiple content sources, including your knowledge base articles, website pages, FAQs, files, support tickets from Freshdesk & Zendesk, and custom text entries.
With Eddy AI Chatbot, you can provide instant, AI-powered assistance to your users directly on your website or knowledge base, helping them find answers quickly and reducing support workload. It also improves content discoverability and provides round-the-clock assistance to users. By centralizing information from multiple sources, the chatbot delivers consistent answers while allowing teams to retain full control over the content used.
Pricing details
Eddy AI Chatbot is available only as an add-on for Business and Enterprise plans
Each chatbot includes a default 40 MB storage limit, which covers all connected sources. Storage limits and the number of chatbots can be increased based on your requirements with additional charges.
Create an Eddy AI Chatbot
To create a new Eddy AI Chatbot:
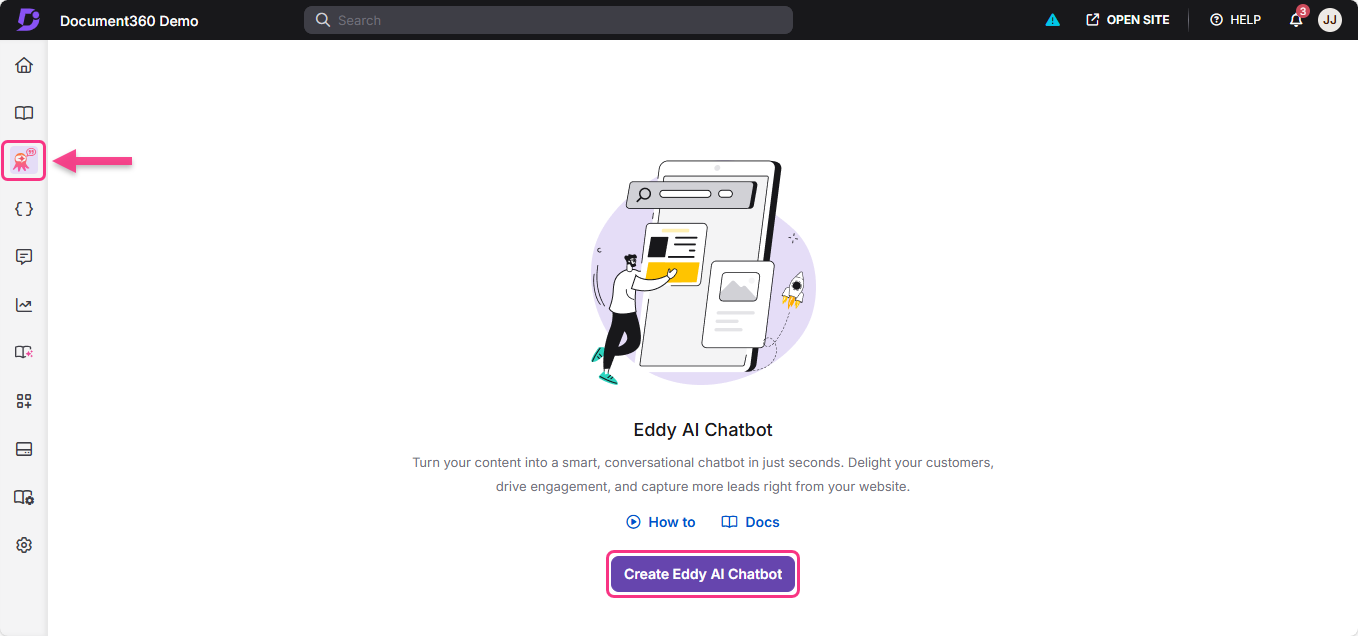
Navigate to AI Chatbot (
 ) in the left navigation bar in the Knowledge base portal.
Click Create Eddy AI Chatbot.
You'll be prompted to add sources for your chatbot. Sources are the content your chatbot uses to answer questions.
You can train your chatbot using the following sources:
Knowledge base - Your existing documentation articles
Website - Content from your website pages in different ways (Crawl Links, Sitemap, Individual Webpages)
Text - Custom text entries
FAQ - Frequently asked questions and answers
File - Documents in various formats (DOC, DOCX, PDF, MD, TXT)
Zendesk - Support ticket data from Zendesk
Freshdesk - Support ticket data from Freshdesk
You can add one or multiple sources to train your chatbot.
Adding sources to your chatbot
You can add one or more sources to train your chatbot and manage them at any time.
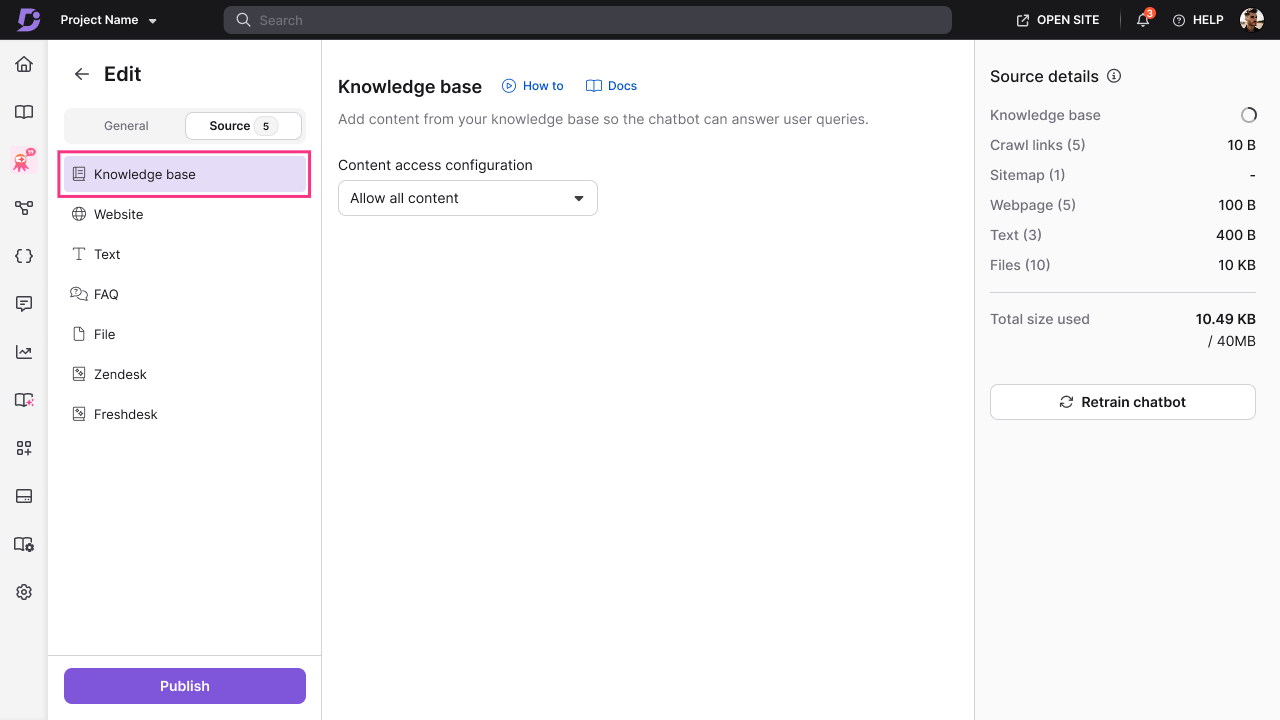
To add Knowledge Base as a source:
Click Knowledge Base (
 ) from the list of available sources.
Choose one of the following options for content access configuration:
Allow all content - This option includes all articles from all workspaces and categories in your knowledge base. The chatbot will learn from your entire documentation.
Allow selected content - Lets you restrict chatbot learning to specific parts of your knowledge base. You can choose between the following options:
Selected workspaces and languages
Includes content from the workspaces and languages you select. If new languages are added to those workspaces later, they will be automatically included.Selected categories
Includes only the specific categories you select. New categories added later are not included automatically and must be selected manually if needed.
NOTE
When you select an entire workspace, any new languages added to that workspace later will be included automatically.
If you select specific categories, new articles added later won't be included by default.
Click Create chatbot to add the Knowledge Base source.
You can add Website content to the chatbot in three ways: Crawl Links, Sitemap, or individual Webpages.
Crawl Links
Crawl Links allow you to provide a starting URL, from which the system automatically crawls and extracts content from linked pages within the same domain.
To add Crawl Links:
Click Website () from the list of sources.
Select the Crawl Links tab.
Click + Add new.
Enter the following details:
Source name - A descriptive name for this crawl link source
URL - The URL to crawl from
Include only paths (optional) - Specify path patterns to include only certain sections
Example:
blog/,docs/will only crawl pages under those paths
Exclude paths (optional) - Specify path patterns to skip certain sections
Example:
admin/,privacy/will skip those pages
Click Add crawl link.
The system will begin crawling the URL and extracting content. You'll see a progress indicator showing the number of links being crawled. Once added, you can Edit or Delete it based on your preference.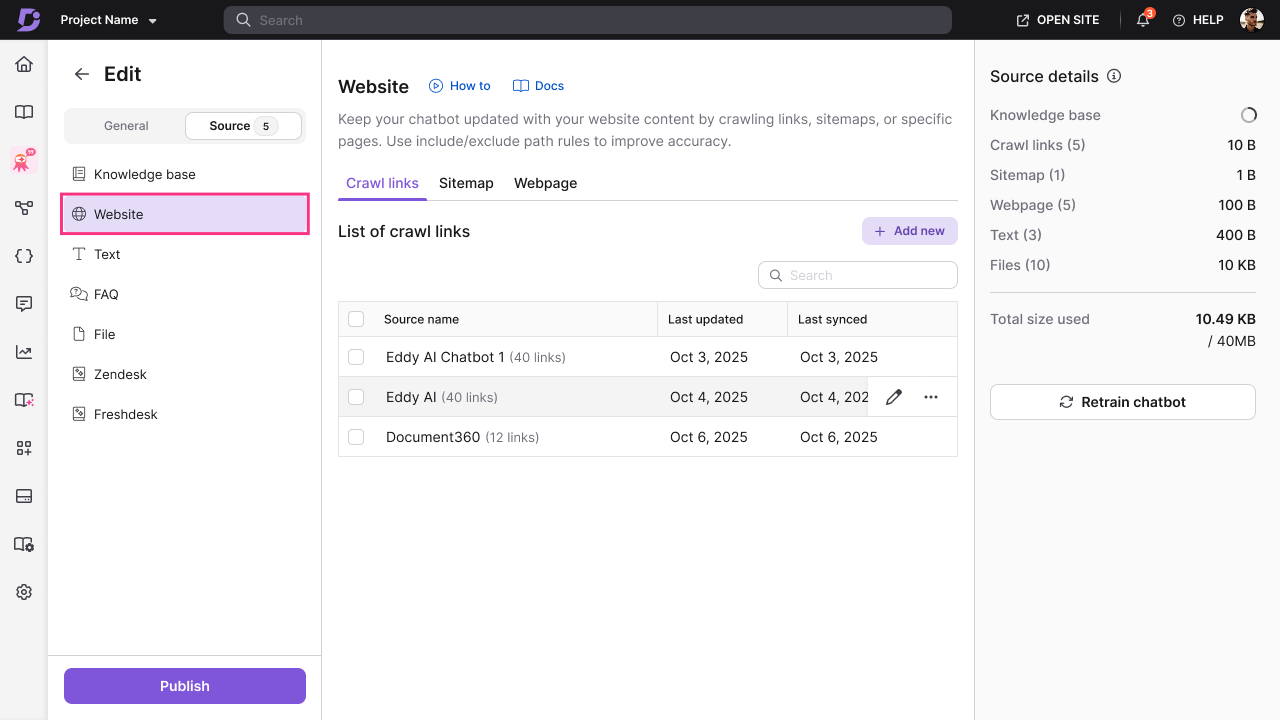
Additional considerations for Crawl Links:
Crawling is limited to the same domain as the starting URL; external domains are ignored.
The crawler follows links up to a maximum depth of 3 levels from the starting page.
Up to 1,000 URLs can be crawled per crawl session.
From any single page, a maximum of 200 discovered links are considered.
The crawler respects robots.txt rules and skips disallowed paths automatically.
Certain non-informational pages (such as social media, privacy policies, admin pages, and job listings) are excluded by default.
NOTE
Maximum of 200 links can be crawled per site. Individual crawl links can be recrawled up to 2 times per day.
Sitemap
Sitemap allows you to provide a sitemap URL, and the system will extract content from all pages listed in the sitemap.
To add a Sitemap:
Click Website () from the list of sources.
Select the Sitemap tab.
Click + Add new.
Enter the following details:
Source name - A descriptive name for this sitemap source
URL - The sitemap URL
Include only paths (optional) - Specify which paths from the sitemap to include
Example:
blog/,help/
Exclude paths (optional) - Specify which paths to exclude
Example:
archive/,test/
Click Add sitemap.
The system will fetch all URLs from the sitemap and begin extracting content. Once added, you can Edit or Delete it based on your preference.
Additional considerations for Sitemaps:
Only single-level sitemaps are supported. Nested or index sitemaps referencing other sitemap files are not processed.
Sitemap file size must be under 1 MB.
Up to 1,000 URLs can be extracted from a sitemap.
Include and exclude path rules are applied before ingestion.
Webpage
Webpage allows you to add individual page URLs manually for precise control over which pages to include.
To add Webpages:
Click Website () from the list of sources.
Select the Webpage tab.
Click + Add new.
Enter the following details:
Source name - A descriptive name for this webpage
URL - The exact page URL
Click Add webpage.
Repeat for additional individual pages you want to include.
Language support
Website content is ingested only if it matches the languages enabled for the project. Pages written in unsupported languages are skipped automatically across all website sources.
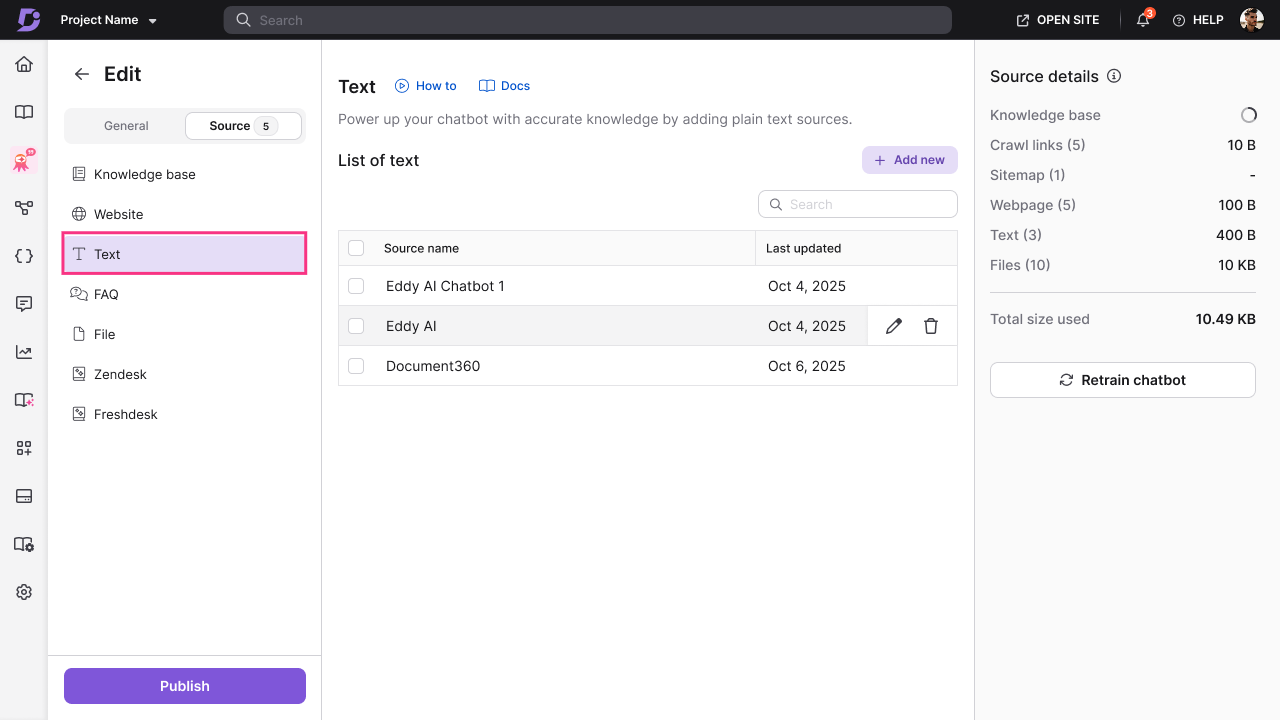
To add Text sources:
Click Text ( ) from the list of sources.
Click + Add new.
Enter the following details:
Source name - A descriptive title for this text entry
Content - Enter or paste your text content
Format your text using the available options:
Bold
Italic
Underline
Font color
Highlight
Hyperlink
Click Add text.
Add as many text entries as needed.
To add FAQ sources:
Click FAQ () from the list of sources.
Click + Add new.
Enter the following details:
Question - The question users might ask
Answer - The complete answer to the question
Format your answer using the available options:
Bold
Italic
Underline
Font color
Highlight
Hyperlink
Click Add FAQ.
Add as many FAQs as needed.

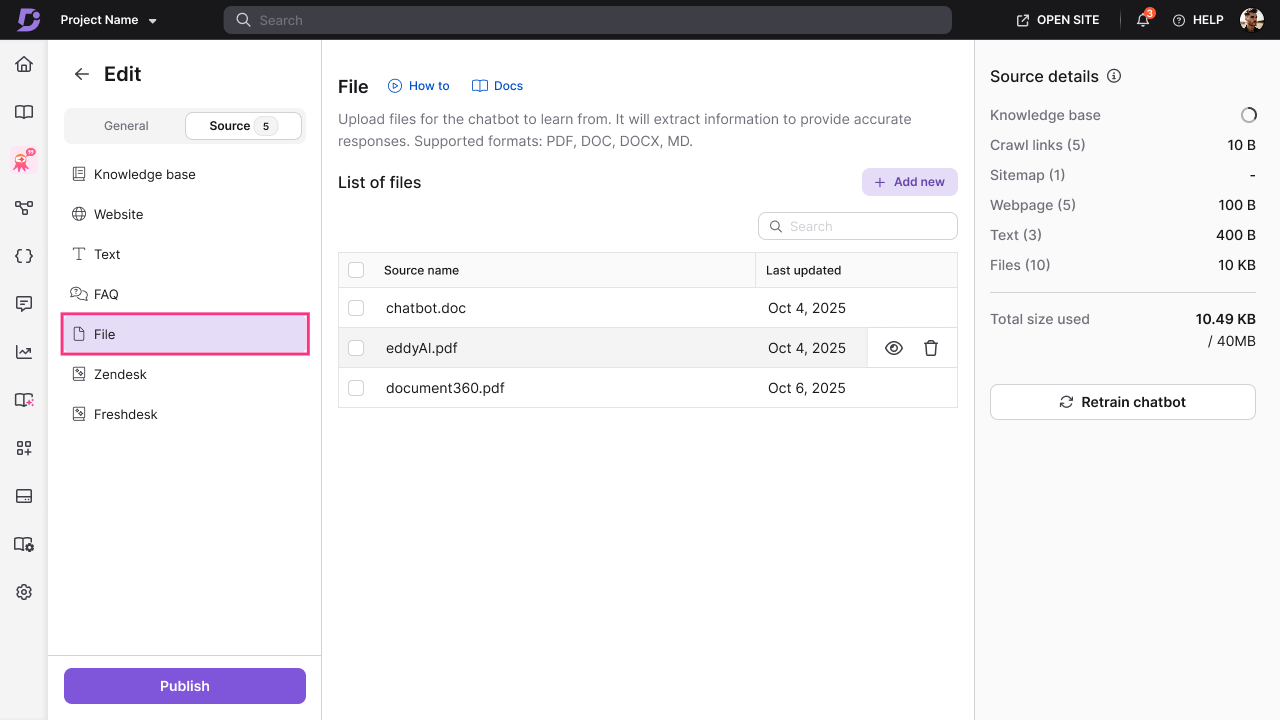
To add File sources:
Click File () from the list of sources.
Click + Add new.
Choose one of the following upload methods:
Upload from my device - Browse and select files from your computer
Choose from Drive - Select files from your Document360 Drive
Drag and drop - Drag files directly into the upload area
Select one or multiple files to upload. Supported formats include:
DOC
DOCX
PDF
MD (Markdown)
TXT
Click Add files to complete the upload.
NOTE
There is no individual file size limit, but the total size of all sources must not exceed your chatbot's storage limit (40 MB by default).
Only text content is extracted from files - images and other media are not stored.
If a file upload fails, you'll see an error message. Fix the issue and try uploading again.
To add Zendesk as a source:
Click Zendesk () from the list of sources.
Click Connect.
Enter your Zendesk connection details:
API Token - Your Zendesk API token for authentication
Administrator Email ID - The email address associated with your Zendesk account
Subdomain URL - Your Zendesk subdomain
Once validated, configure your ticket filters:
Tickets updated since - Select a date to fetch tickets modified after this date
Ticket tags - Filter tickets by specific tags
Agent groups - Filter tickets assigned to specific agent groups
Include private notes - Select and choose to include internal notes from agents
Status - Filter by ticket status (Open, Pending, Solved, Closed)
Types - Filter by ticket type (Question, Problem, Incident, Task)
Priority - Filter by priority level (Low, Normal, High, Urgent)
Click Save details to connect Zendesk and begin syncing ticket data.
Once connected, you can view the last synced date and number of tickets fetched
NOTE
Ticket data is fetched from newest to oldest based on your date filter.

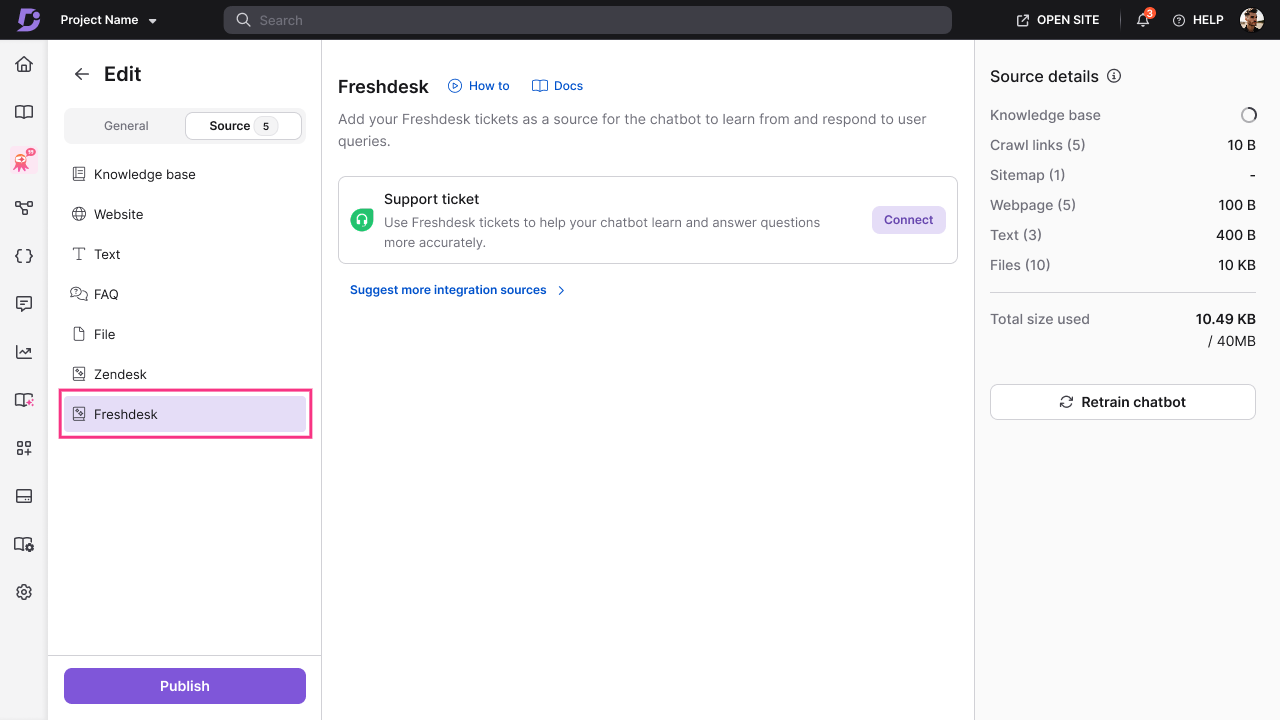
To add Freshdesk as a source:
Click Freshdesk () from the list of sources.
Click Connect.
Enter your Freshdesk connection details:
API Token - Your Freshdesk API token for authentication
Subdomain URL - Your Freshdesk subdomain
Once validated, configure your ticket filters:
Tickets updated since - Select a date to fetch tickets modified after this date
Ticket tags - Filter tickets by specific tags
Agent groups - Filter tickets assigned to specific agent groups
Include private notes - Select and choose to include internal notes from agents
Status - Filter by ticket status (Open, Pending, Resolved, Closed)
Types - Filter by ticket type (Question, Problem, Incident, Feature Request, Refund)
Priority - Filter by priority level (Low, Medium, High, Urgent)
Click Save details to connect Freshdesk and begin syncing ticket data.
Managing Freshdesk source:
Once connected, you can view the last synced date and number of tickets fetched.
NOTE
Ticket data is fetched from newest to oldest based on your date filter.
Configuring chatbot settings
Once you've added sources, configure how your chatbot looks, behaves, and integrates with your systems.
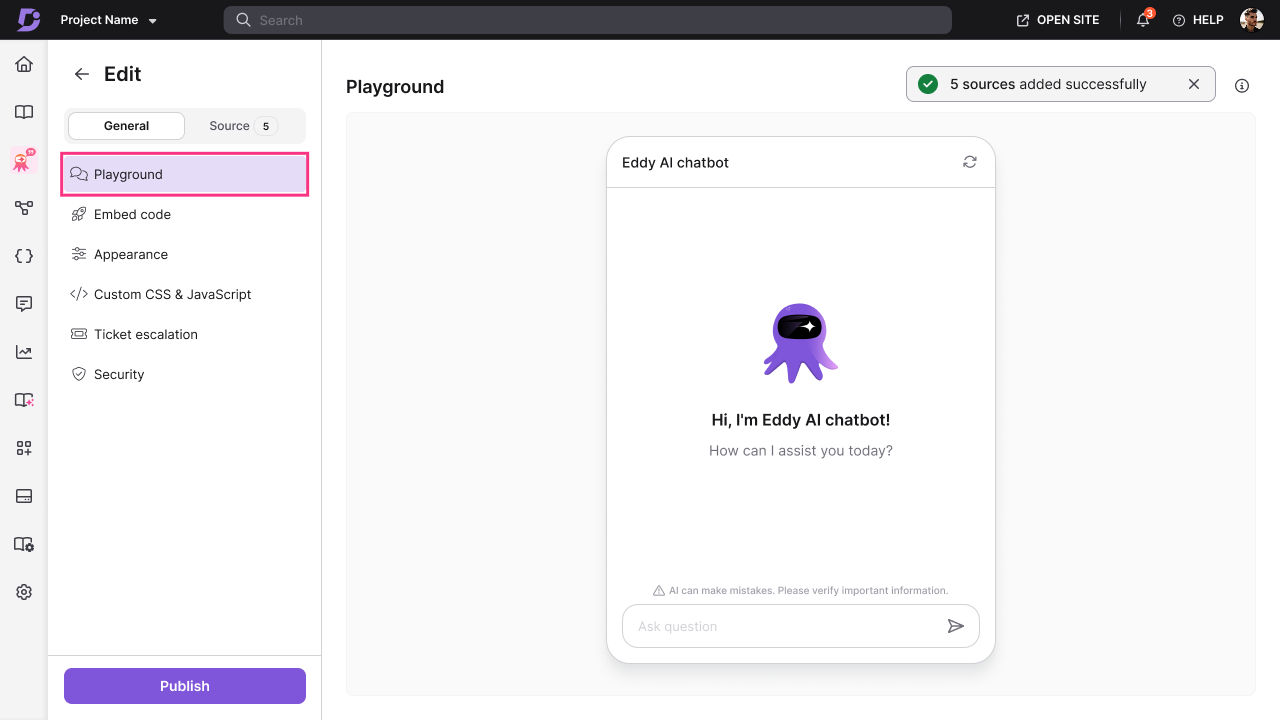
Playground
Use the Playground to test chatbot responses and preview behavior before and after publishing.
Before the chatbot is published for the first time, the bot and its sources are not live on your site. The Playground acts as a private testing space where you can interact with the chatbot and validate responses without affecting end users.
To test your chatbot:
Navigate to the Playground () tab.
Type a question in the chat input field, just as a user would.
Review the chatbot's response.
Continue asking questions to test different scenarios and verify accuracy.
 After the chatbot is published, any new sources you add are synced to the live chatbot immediately. You can still use the Playground to test responses based on newly added sources and to preview appearance changes before publishing them to the site.
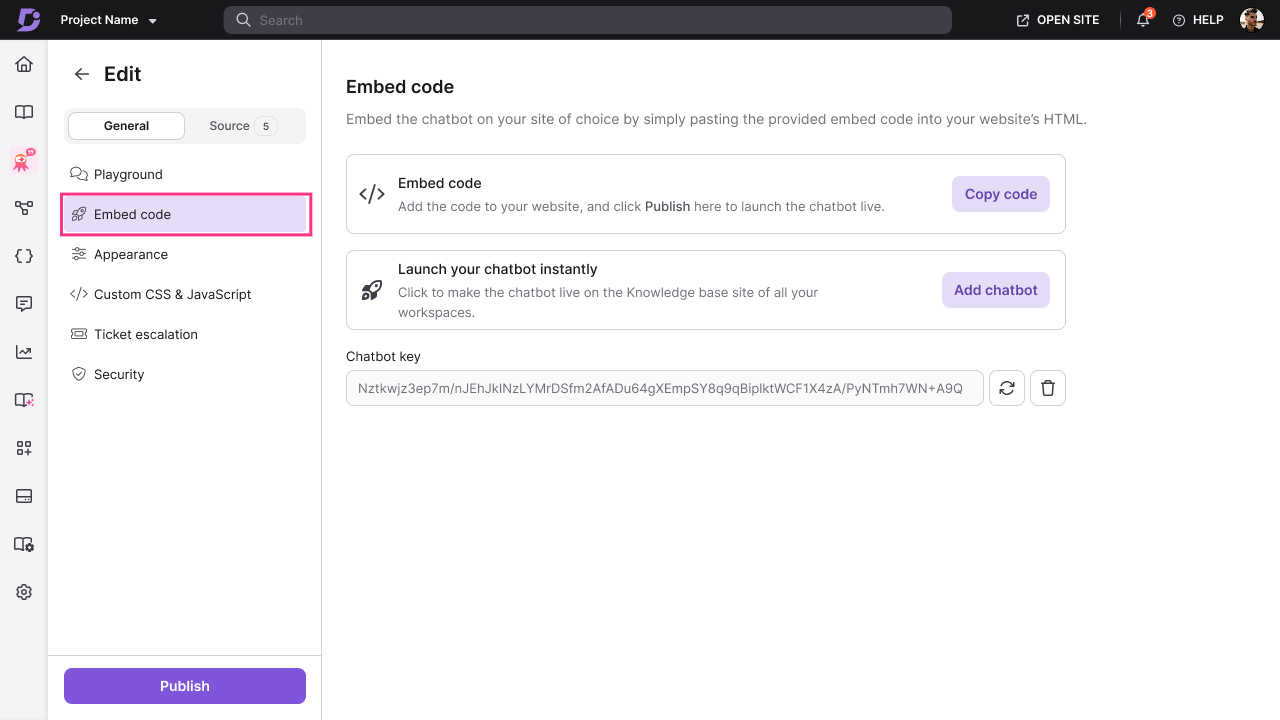
Embed Code
Generate an embed code to add your chatbot to your website or launch it instantly on your Knowledge Base site.
To get your Embed code:
Navigate to the Embed code () tab.
You'll see two options:
Option 1: Copy embed code
Click Copy embed code to copy the JavaScript snippet
Paste this code anywhere required into your website's HTML
Click Publish to make the chatbot live
Option 2: Launch chatbot instantly
Click Publish to activate the bot
Toggle Launch your chatbot instantly to enable the chatbot on your Document360 Knowledge Base site across all workspaces.
When enabled, a custom integration card is automatically created under Integrations
Click Publish to activate
NOTE
Only one chatbot or widget can be active per website domain.
If you enable "Launch chatbot instantly" and another chatbot is already active on the KB site, you'll be prompted to replace it.
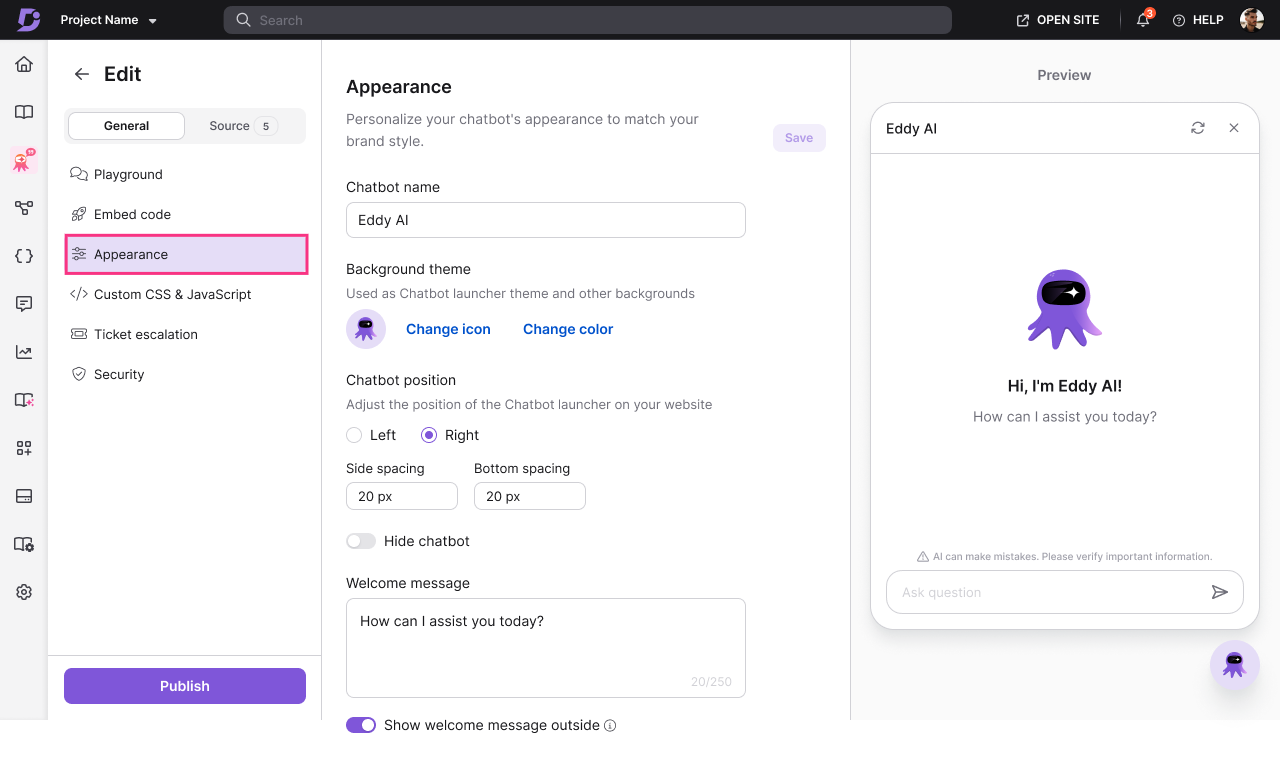
Appearance
Customize how your chatbot looks and where it appears on your website.
To configure Appearance:
Navigate to the Appearance () tab.
Configure the following settings:
Chatbot name - Enter a name that users will see in the chatbot interface.
Background theme
Icon - Upload a custom icon for your chatbot or choose from available options.
Color - Select a background color using the color picker or enter a HEX code.
Choose where the chatbot appears: Left, Right, Bottom.
Adjust Side spacing. (distance from the left or right edge)
Adjust Bottom spacing. (distance from the bottom edge)
Toggle on to hide the chatbot icon from the website.
Welcome message
Toggle Show welcome message outside to display the message as a message bubble before users click the chatbot icon.
You can preview all these changes in the Playground before publishing, ensuring they are not reflected on your live chatbot until you’re ready.
Click Save to finalize your changes.
Click Publish to make the changes visible on your website.
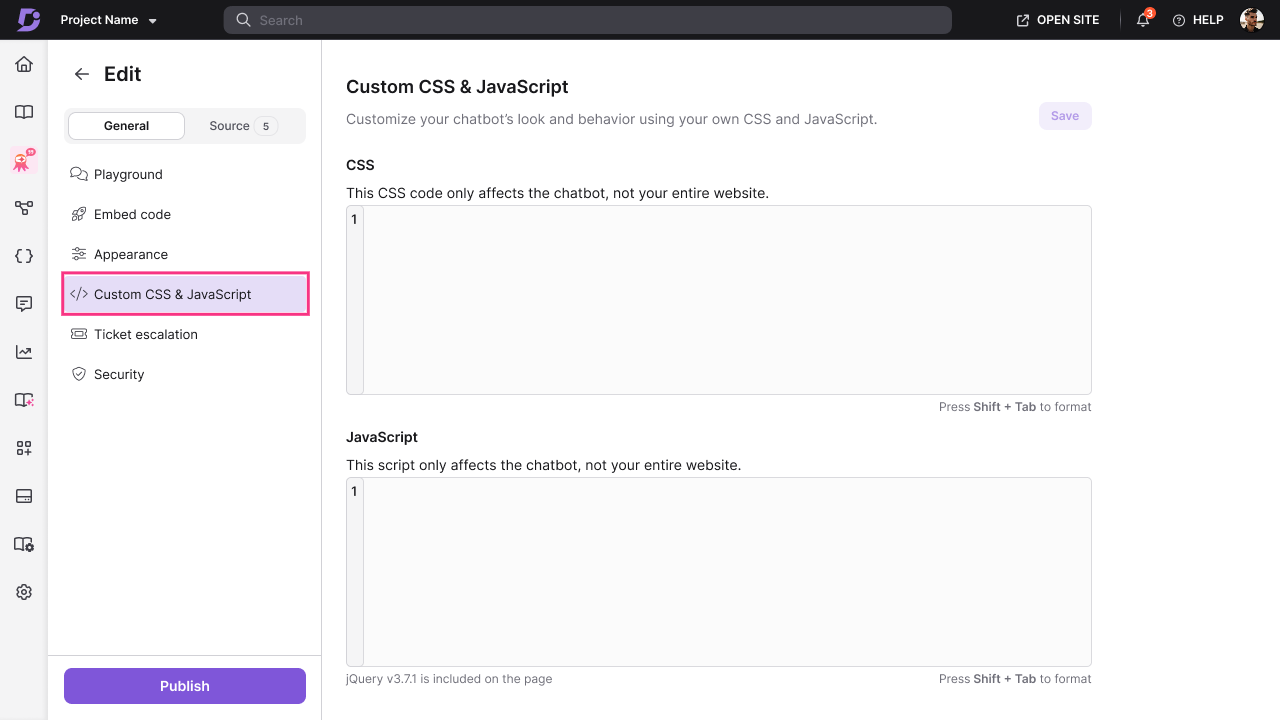
Custom CSS & JavaScript
Add custom code to further personalize your chatbot's appearance or behavior.
To add custom CSS or JavaScript:
Navigate to the Custom CSS & JavaScript () tab.
Enter your CSS code in the Custom CSS field to modify styling.
Enter your JavaScript code in the Custom JavaScript field to add interactivity.
Click Save to finalize your custom code.
Click Publish to apply changes to your live chatbot.
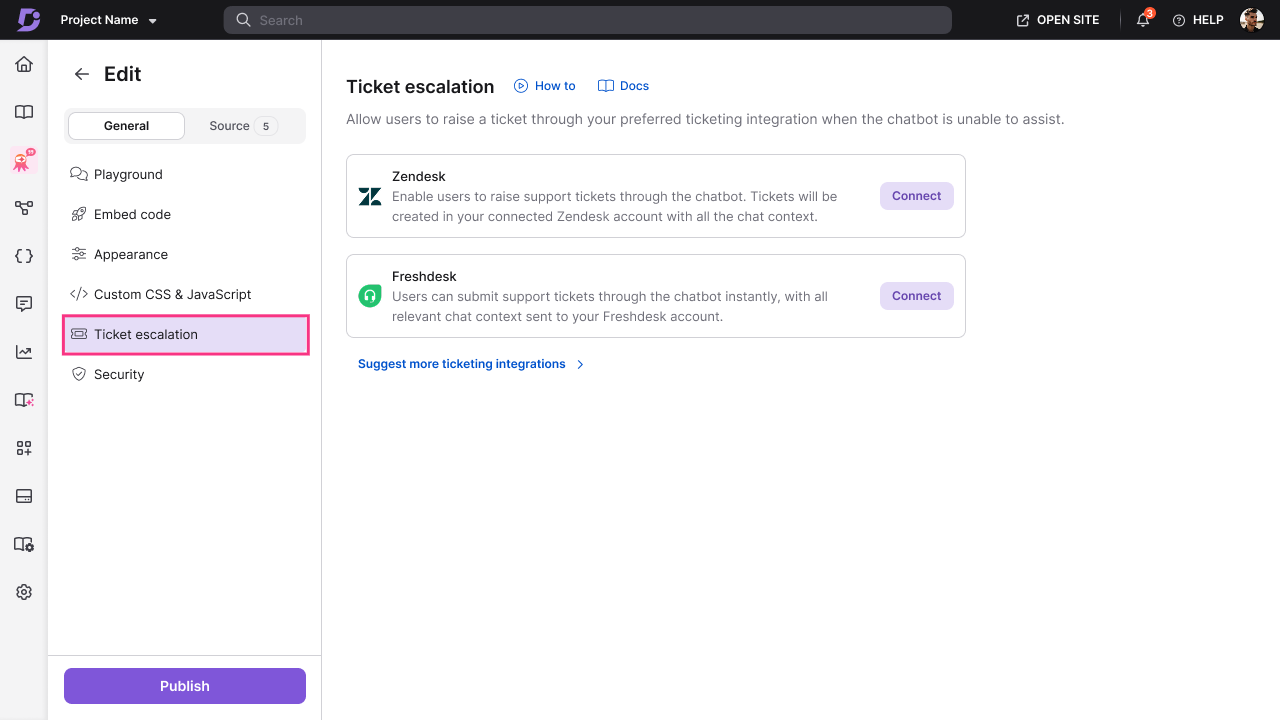
Ticket Escalation
Allow users to raise support tickets directly from the chatbot when it can't assist them.
To configure Ticket escalation:
Navigate to the Ticket escalation () tab.
Click Connect next to your preferred ticketing platform:
Zendesk
Freshdesk
Enter your connection details:
API Token - Your ticketing platform's API token
Subdomain URL - Your ticketing platform subdomain
Administrator Email ID (Zendesk only) - Admin email for authentication
Once connected, the chatbot will automatically prompt users to raise a ticket when:
A user marks a response as unhelpful
The chatbot cannot find an answer
The chatbot detects negative sentiment or frustration
A user explicitly says "raise a ticket" or "I need support"
Ticket forms are pre-filled with:
Chat transcript
AI-generated subject line
AI-generated issue description (editable by the user)
Once a ticket is created, the ticket ID and details are shared in the chat.
Suggesting additional ticketing platforms:
If you use a platform other than Zendesk or Freshdesk:
Click Suggest more ticketing platforms.
Select from the list:
Jira
Intercom
GitHub
HubSpot
Others (enter the platform name and purpose of integration)
Submit your suggestion to help us add more integrations.
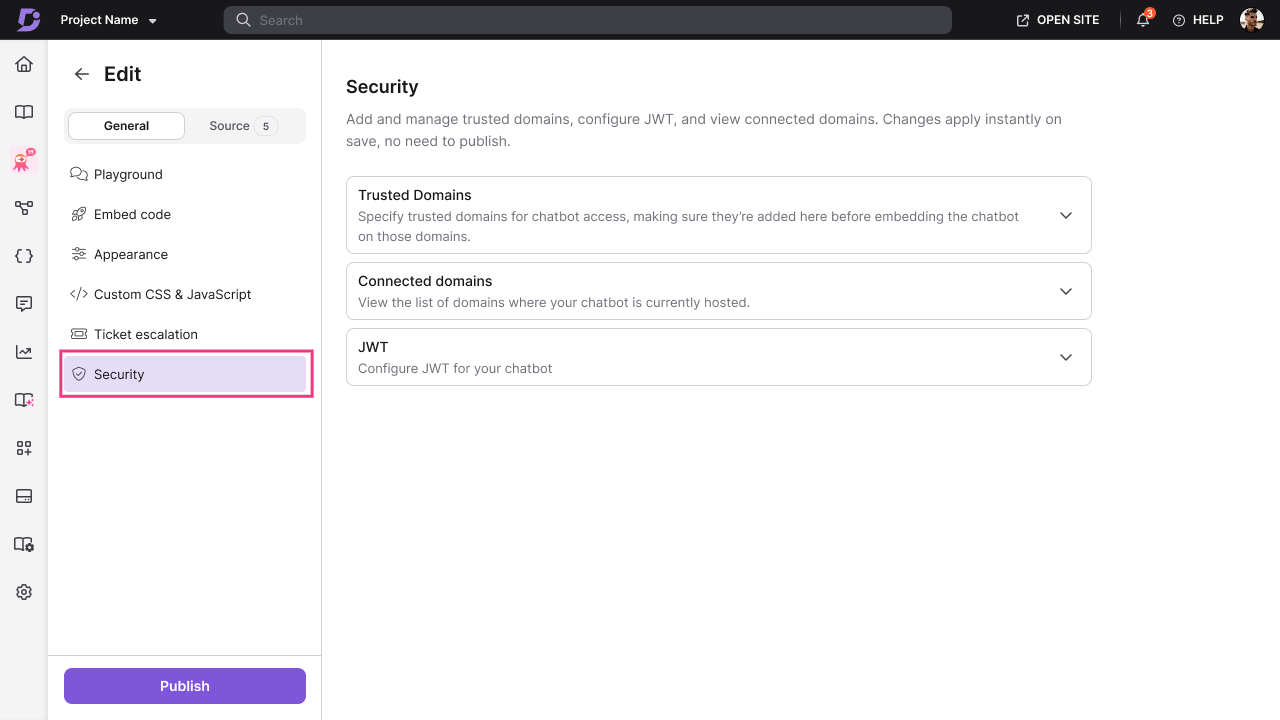
Security
Control where your chatbot can be embedded and configure secure authentication.
To configure Security settings:
Navigate to the Security () tab.
Click + Add to configure Trusted domains.
Enter the domain where your chatbot will be embedded.
Click Save to apply.
NOTE
If no trusted domains are added, the chatbot will work on any domain
Click Connected domains to view the list of domains where your chatbot is currently active.
If the chatbot is embedded on a domain that is not listed as a trusted domain, a warning is displayed and the chatbot will not be visible on that domain. To make the chatbot available there, add the domain to the trusted domains list.
Enable JWT (JSON Web Token) for secure chatbot authentication by configuring the following settings.
Client ID
Chatbot ID
Token endpoint
Client secret
Configure Authorization URLs and click Save to apply changes.
Managing sources
View and manage all sources connected to your chatbot in one place.
To view Source details:
Navigate to the Source tab.
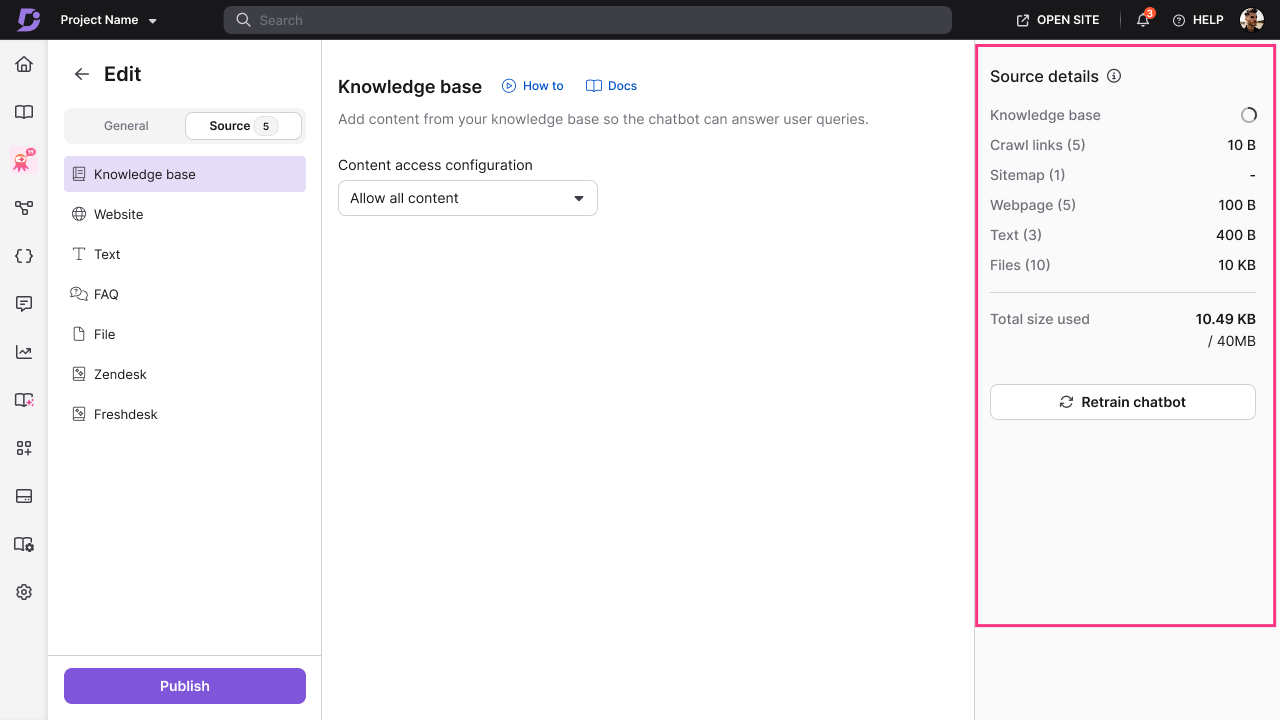
You'll see a summary of all added sources:
Source Type - Type of source (Knowledge Base, Website (crawl links, sitemaps, webpages), Text, FAQ, File, Zendesk, Freshdesk) and the number of sources you added in each.
Size - Storage space used by each source and the total size used in MB or KB to monitor your storage limit. By default, each chatbot supports up to 40 MB of source data.
Last Synced- When the source was last synced.
Retraining your chatbot:
Click Retrain chatbot to manually retrain all sources at once.
Click Retrain to update the chatbot with the latest content from all sources.
NOTE
Manual retraining is limited to 2 times per day.
Individual sources (website pages, Zendesk, Freshdesk) can be resynced or recrawled up to 2 times per day.
Zendesk, and Freshdesk sources syncs daily automatically on a periodic basis. Manual resync is required only when you want to reflect changes immediately.
Other sources (Knowledge Base, Text, FAQ, File, Website) instantly sync automatically when you add or update content.
Setting up Eddy AI Chatbot during onboarding
New users can set up Eddy AI Chatbot directly during the Document360 Onboarding process.
To set up during Onboarding:
When creating a new project, select Eddy AI Chatbot as your use case.
Follow the simplified onboarding flow:
Step 1: Add up to 2 sources (you can add more sources later in the portal)
Step 2: Configure appearance settings
Once complete, you'll land in your project with the chatbot ready to use.
Disabling AI Chatbot on Knowledge base site
If you want to disable the chatbot on your Knowledge base site:
Navigate to AI Chatbot (
) in the left navigation bar.Click Customize and select the chatbot you want to manage.
Go to the Embed code section.
Toggle off Launch your chatbot instantly.
Disabling the chatbot integration only removes it from the Knowledge base site. The chatbot itself is not deleted.
FAQ
How many sources can I add to my chatbot?
You can add unlimited sources as long as the total storage does not exceed your chatbot's limit (40 MB by default). Storage can be customized based on your requirements. Contact your Customer Success Manager to increase storage.
How often do sources sync?
Knowledge base, Text, FAQ, File: Sync instantly when added or updated.
Zendesk, Freshdesk: Syncs daily and also can be manually resynced up to 2 times per day.
To resync all these sources like Zendesk, Freshdesk, Website (Crawl Links, Sitemap, Webpage) at one go, click the Retrain chatbot. It can be used up to two times a day.
What happens if I exceed my storage limit?
If you attempt to add content or when you retrain or resync the chatbot and if that exceeds your chatbot's storage limit, you'll see an error message. To increase storage, contact your Customer Success Manager. Storage pricing is charged based on your requirements.
Can I have multiple chatbots active on the same website?
No, only one chatbot or widget can be active per website domain. If you try to launch another chatbot on the same site, you'll be prompted to replace the existing one.
How do I know if my chatbot is working correctly?
Test your chatbot in the Playground before publishing. Ask various questions and review responses to ensure accuracy. You can also view Analytics by navigating to Eddy Analytics page and choose source as Chatbots to view Chatbot related insights to monitor user interactions and identify areas for improvement.
What is the Chatbot Key used for?
The Chatbot Key is a unique identifier used in the embed code to link your chatbot to your website. It's automatically generated when you create a chatbot.
If you regenerate the Chatbot Key, for example, due to a potential security concern, the previously generated embed code will stop working. A new key will be issued, and you’ll need to replace the old embed code on your website with the updated one to keep the chatbot active.
What happens to my existing chatbot?
If you were already using the chatbot before February, all your existing chatbot configurations, sources, and content will remain fully intact. Your chatbot will continue to work as expected without any disruption.
However, any new source types introduced as part of January release will be locked by default for existing chatbots. To enable additional sources or expand your chatbot setup, please reach out to you CSM for pricing and any additional access details.
Can I create separate chatbots for different brands or products?
Yes. If you manage multiple brands, products, or websites and want a separate chatbot for each, you can purchase additional chatbots for your project.
Each chatbot is priced individually, and pricing may vary based on factors such as storage requirements and usage. To set this up, please reach out to your CSM, who can help you choose the right configuration and pricing for your needs.