PDF templates in Document360 define the design, styling, and text formatting of your exported PDF documents. Templates control elements such as the cover page, table of contents, watermark, header and footer, fonts, and layout. You create a template once and reuse it across multiple exports to maintain brand consistency. When initiating an export, you select a template along with the content to be included.
The PDF templates page
Navigate to Content tools () > Import & export > Export articles and select the PDF templates tab at the top.
The page lists all available templates, both the system default and any custom templates you have created, showing the template name and last modified date.
.png)
Hover over any template to access the following actions:
| Action | Description |
|---|---|
| Clone | Duplicates the template and opens it for editing with "Clone" appended to the name. Make changes and click Save. |
| Edit | Opens the template settings for editing. Click Save after making changes. |
| Delete | Removes the template after a confirmation prompt. |
The default template cannot be deleted. If only one template exists, it is treated as the default and cannot be deleted.
Create a PDF template
- On the PDF templates page, click Create new template.
- Enter a unique Name for the template. Maximum 250 characters, using letters, numbers, spaces, hyphens, and underscores.
- Configure the template using the three settings tabs below, then click Save.
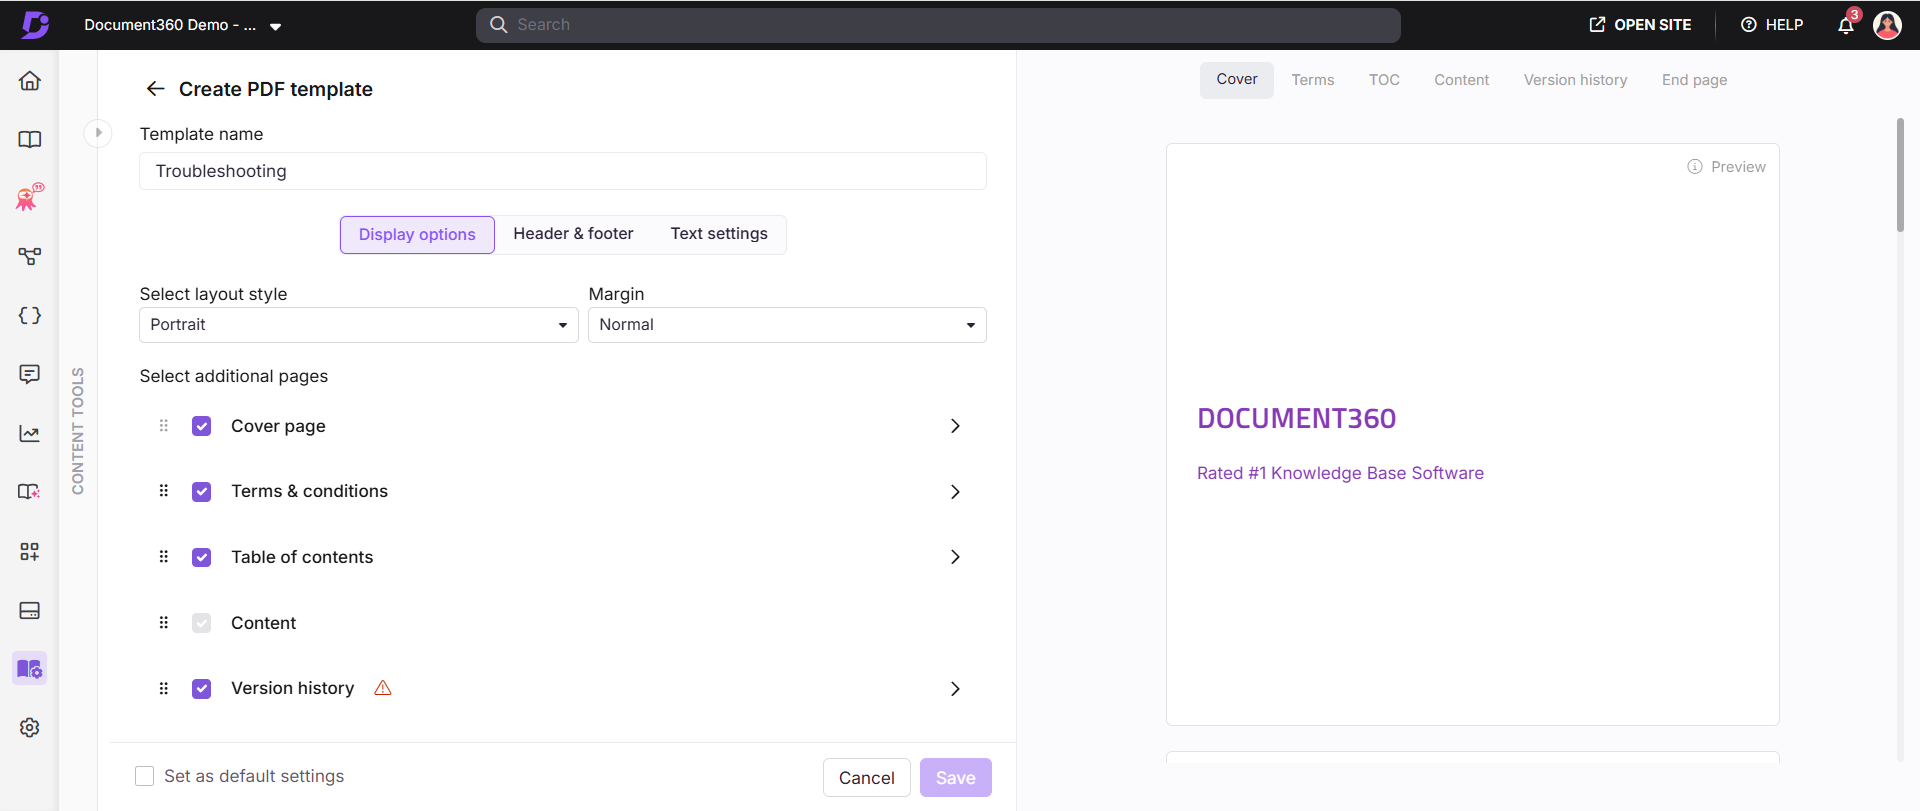
Display options
Configure page orientation, margins, cover page, table of contents, version history, end page, terms and conditions, and watermark.
Learn more →Header & footer
Add a header image, enable page numbers, and configure footer text that repeats across all pages.
Learn more →Text settings
Set font families, sizes, and colors for headings and paragraphs, and configure hyperlink behaviour.
Learn more →Display options
Layout and margins
Choose a page orientation: Portrait (height > width) or Landscape (width > height), and set margins.
| Preset | Top/Bottom | Left/Right |
|---|---|---|
| Normal | 50 px | 60 px |
| Moderate | 30 px | 40 px |
| Narrow | 10 px | 15 px |
| Wide | 70 px | 80 px |
You can also set custom margins between 10 and 80 px.
Cover page
Select Cover page and expand its dropdown to configure. The preview on the right updates as you make changes.
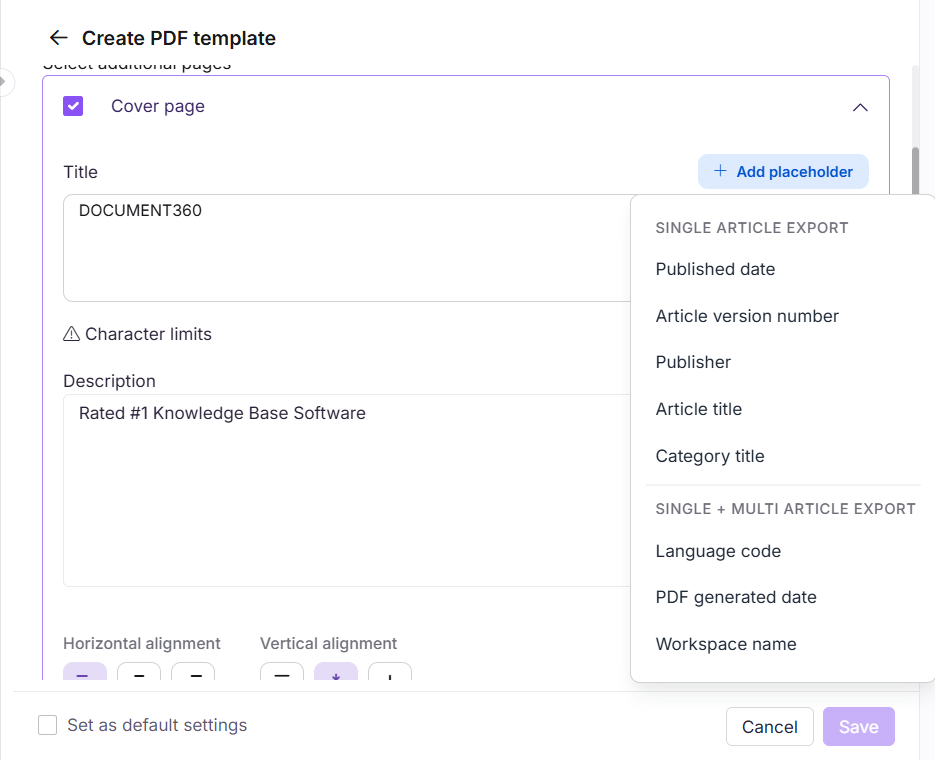
Title and description
| Field | Description | Limit |
|---|---|---|
| Title | Heading displayed on the cover. Type a static title or use + Add placeholder to insert dynamic metadata. | 250 characters |
| Description | Supporting text below the title. | 500 characters |
Using + Add placeholder on the title field:
- Click + Add placeholder next to the Title field.
- Select a field from the dropdown: PDF Generated Date, Language Code, Published date, Workspace name, Article version, Publisher, Article Title, or Category Title.
Example output: Installation_20.Oct.2025_EN_v2_Acme
Fields that do not apply to your export type are automatically skipped in the output.
If your title is too long, it is truncated at 60 characters, except when Article Title or Category Title is the last element, in which case the full 250 characters are used. Placeholder characters count toward the 250-character limit.
Appearance
| Setting | Description |
|---|---|
| Font color | Text color for the title and description. Use the color picker or a hex code. |
| Background color | Background fill color of the cover page. |
| Background image | Upload an image and set opacity as a percentage to control transparency. |
| Logo | Upload a logo. Sizes: Small (100 px), Medium (150 px), Large (200 px), or custom (20–300 px). |
Layout
| Setting | Options |
|---|---|
| Text — horizontal | Left, Center, Right |
| Text — vertical | Top, Middle, Bottom |
| Logo — horizontal | Left, Center, Right |
| Logo — vertical | Top, Middle, Bottom |
| Logo — placement | Above text, Below text |
The Placement option (Above text / Below text) only appears when the vertical alignment of the description text and the logo are the same.
Terms and conditions
Enable the Terms and conditions section to include an article or custom text in the exported PDF.
| Option | Description |
|---|---|
| Link an existing article | Select an existing article to include. |
| Custom text | Use the formatting toolbar to add text, links, numbers, and special characters. No character limit. |
Table of contents
Select Table of contents to include a navigable contents page in the PDF.
| Setting | Description |
|---|---|
| Title | Heading for the table of contents. Can be localized or customized. |
| Select headings | Choose which heading levels to include. Selecting a sub-heading such as H4 automatically includes its parent headings. |
| Page numbers | Each heading displays its corresponding page number. |
When readers click a heading in the exported PDF, the link navigates within the PDF if the linked content is included in the export. If not included, the link opens the corresponding article on the knowledge base site.
Version history
Select Version history to include a structured change log in the exported PDF.
Enable Show Published Version History in Settings > Article Settings & SEO to include version history in PDF exports.
.png)
-
The version history includes selected published versions, along with their publication dates, publishers, and publish comments, for all exported articles. A maximum of 10 version entries can be included per article. To customize revision history for PDF exports, read Revision history.
-
When enabled, the version history appears as a table in the PDF. Each article or page category is listed with its name as a header row, followed by its version entries sorted from latest to oldest.
| Column | Description |
|---|---|
| Version | The version number set at publish time. |
| Published date | The date the version was published. |
| Publisher | The name of the team member who published the version. |
| Version summary | The publish comment entered at the time of publishing. |
Version history is only included for article exports and page category exports. It is not available for folder category exports. Only versions marked as visible at publish time appear in the version history. If no visible versions exist, the section is not rendered in the PDF.
End page
The end page is the last page of the exported PDF, typically used for legal disclaimers, compliance content, or closing information.
Select End page and expand its dropdown to configure. The end page has the same configuration options as the cover page: Title, Description, Appearance, and Layout, with the same 250-character limit, placeholder support, and truncation logic.
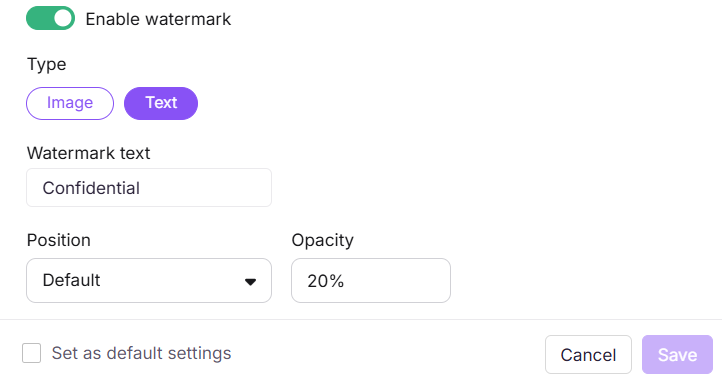
Watermark
Enable the Watermark option to overlay a faint image or text on every page.
| Type | Settings |
|---|---|
| Image watermark | Upload an image. Size: Small (150 px), Medium (200 px), Large (250 px), or custom (20–350 px). Set opacity as a percentage. |
| Text watermark | Enter text up to 65 characters, for example "DRAFT" or "CONFIDENTIAL". Set position: Default, Diagonal, or Inverse, and opacity as a percentage. |
Header and footer
These settings apply to every page of the PDF, excluding the cover page.
| Setting | Description |
|---|---|
| Header image | Upload a logo or image to appear at the top of every page. Set alignment (Left, Center, Right) and size: Small (50×60 px), Medium (70×80 px), Large (80×95 px), or custom (20–150 px). |
| Page numbers | Enable to show page numbers on every page. Choose format: Page 1 of 10 / Page 1, Page 2 / 1, 2, 3, and alignment (Left, Center, Right). |
| Footer text | Enable to show custom text at the bottom of every page. Maximum 120 characters. Set font size (10–16) and font color. Supports + Add placeholder for dynamic metadata. |
Using + Add placeholder in the footer:
- Click + Add placeholder next to the Content field.
- Select a field from the dropdown. Fields are grouped by export type. Fields under Single article export apply only to single-article PDFs. Fields under Single + Multi article export are available for both.
Example output: GettingStarted_20.Oct.2025_EN_UserGuide_ProductDocs_v3
If the footer exceeds 120 characters, it is cut off automatically. If Article Title or Category Title is the last element, it uses the full 120 characters. If it appears before the end, it is truncated at 60 characters. Placeholder characters count toward the 120-character limit.
Text settings
| Setting | Description |
|---|---|
| Heading font family | Font for H2, H3, and H4 headings, for example Arial, Calibri, or Verdana. |
| Heading color | Color picker or hex code for heading text. |
| Paragraph font family | Font for body text. |
| Paragraph font size | Font size for body text (10–24). |
| Paragraph font color | Color picker or hex code for body text. |
| Disable links | Toggle on to deactivate hyperlinks in the exported PDF. Links in the table of contents and direct URLs remain functional. |
| Link color | Color picker or hex code for hyperlink text. |
Reorder sections
You can reorder sections in your PDF using drag and drop (). The rearranged order is saved with the template and reflects in both the preview and the exported PDF.
| Section | Can be reordered? | Notes |
|---|---|---|
| Cover page | No | Always the first page. |
| Terms and conditions | Yes | Drag handle visible. |
| Table of contents | Yes | Drag handle visible. |
| Content | Yes | Mandatory. Cannot be disabled or removed. |
| Version history | Yes | Drag handle visible. |
| End page | No | Always the last page. |
If the cover page or end page is disabled, the next available section moves into its place.
Set a default template
Any template can be set as the default. The default template is automatically pre-selected in the Select PDF template field whenever a new export is initiated.
Select the Set as default settings checkbox on the template settings page before clicking Save. A Default tag appears next to the template name on the overview page.

The default template cannot be deleted.
Limitations
| Item | Detail |
|---|---|
| Template name | Maximum 250 characters. |
| Cover page / end page title | Maximum 250 characters. Truncated to 60 if a placeholder appears before the last element. |
| Cover page description | Maximum 500 characters. |
| Text watermark | Maximum 65 characters. |
| Footer text | Maximum 120 characters. Truncated to 60 if a placeholder appears before the last element. |
| Logo size (cover page) | Custom: 20–300 px. |
| Header image size | Custom: 20–150 px. |
| Watermark image size | Custom: 20–350 px. |
| Paragraph font size | 10–24. |
| Footer font size | 10–16. |
| Default template | Cannot be deleted. |
Best practices
- Create a branded template before your first export. Set up fonts, colors, and a logo that match your organisation's style guide before running any exports.
- Set a sensible default. If most exports use the same design, mark that template as default so it is pre-selected every time.
- Clone before editing a working template. Use Clone to preserve the original while you test changes, avoiding breaking a template already in use.
- Use placeholders in the footer for auto-populated context. Adding Article Title or Workspace name as a footer placeholder is useful for multi-article exports where readers need to know which section they are reading.
- Use text watermarks for draft content. Add "DRAFT" or "CONFIDENTIAL" when sharing PDFs that are not final so readers do not treat in-progress content as authoritative.
FAQ
How do links work in exported PDFs?
If the linked article or heading is included in the export, clicking the link navigates within the PDF. If it is not included, the link opens the corresponding article on the knowledge base site. External links always open in the browser.
Can I use the same template for multiple exports?
Yes. Templates are reusable. Once created, a template appears in the Select PDF template dropdown every time you initiate a new export. Set it as the default to have it pre-selected automatically.
Why can't I delete my only PDF template?
If only one template exists, it is automatically treated as the default and cannot be deleted. Create a second template first, then set it as the default before deleting the original if needed.
What is the difference between a text watermark and an image watermark?
A text watermark displays a short string such as "DRAFT" on every page. An image watermark displays an uploaded image. Both support opacity settings. Use text watermarks for status indicators and image watermarks for branding.
What happens when a placeholder value is too long for the title or footer?
If Article Title or Category Title is the last element in the string, it uses the full character limit (250 for the title, 120 for the footer). If either appears before the end, it is truncated at 60 characters. All placeholder characters count toward the limit.
Does version history appear in all PDF exports?
No. Version history is only included for article exports and page category exports. It is not available when exporting folder categories. Additionally, version history must be enabled in the PDF template and the exported versions must have been marked as visible at publish time. If no visible versions exist for an article, the section is not rendered even if the template has it enabled.