No Document360, você pode editar o papel do portal de um usuário existente e as permissões de acesso ao conteúdo a partir do portal da base de conhecimento. Atualizar essas configurações permite que você controle o que um usuário pode visualizar, gerenciar e contribuir dentro do seu projeto.
Por que editar um usuário
As responsabilidades dos membros da equipe mudam com o tempo. Um escritor pode ser promovido a editor, um colaborador pode precisar de acesso a espaços de trabalho adicionais, ou o escopo de um usuário pode precisar ser restringido após uma reestruturação do projeto. Editar um usuário permite manter as permissões alinhadas com as responsabilidades atuais sem remover ou adicionar novamente a conta.
Use este artigo quando precisar:
- Mude o papel do portal do usuário (por exemplo, de Contribuinte para Administrador).
- Atualize o papel de conteúdo que um usuário ocupa (por exemplo, de Roteiro para Editor).
- Ajuste quais espaços de trabalho, idiomas ou categorias um usuário pode acessar.
- Configure acesso misto — permissões de edição para algumas categorias e acesso somente leitura para outras.
Antes de começar
- Você deve ter as funções de Proprietário ou Administrador do projeto.
- O usuário que você quer editar já deve existir no projeto.
Como editar um usuário
-
Navegue até Configurações () > Usuários e segurança na barra de navegação esquerda do portal da base de conhecimento.
-
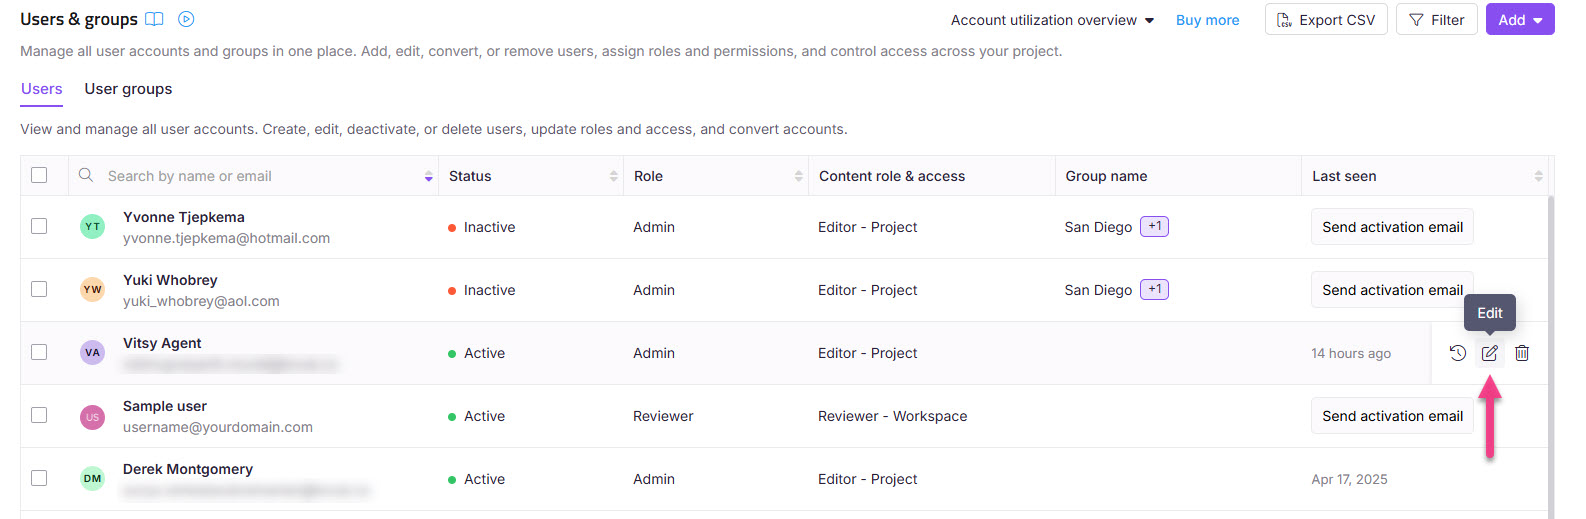
No painel de navegação à esquerda, navegue até Usuários e grupos > Usuários.
-
Passe o mouse sobre o usuário desejado e clique no ícone Editar ().
-
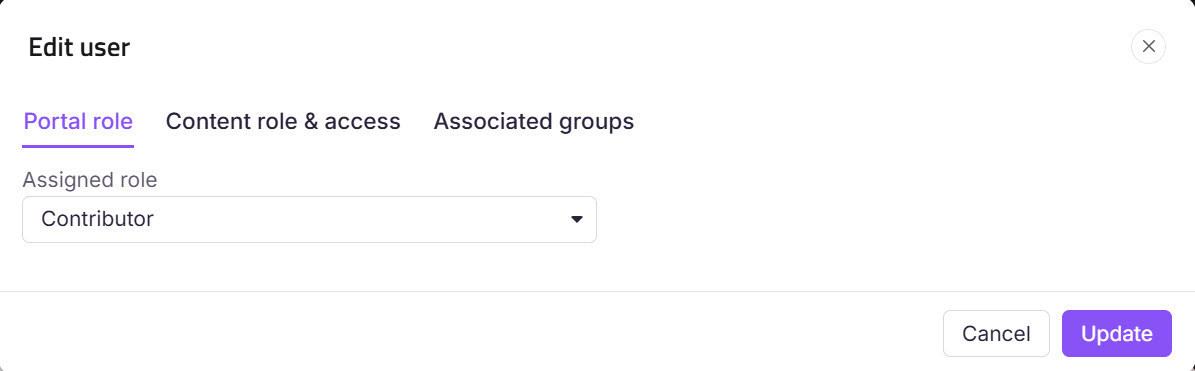
Para atualizar a função do portal:
- Clique em Gerenciar o papel do projeto.
- Selecione o papel desejado no portal no painel de usuário Editar .
- Clique em Atualizar.
-
Para atualizar permissões de acesso ao conteúdo:
- Clique em Gerenciar funções e permissões de conteúdo.
- Selecione o papel de conteúdo desejado e o acesso ao conteúdo no painel de usuário Editar .
- Clique em Atualizar.
NOTA
Para os usuários, o acesso é herdado, permitindo que visualizem tanto categorias quanto subcategorias, a menos que o acesso seja explicitamente restrito.
FAQ
Posso atualizar o ID de e-mail de um usuário no projeto?
Não, você não pode atualizar o ID de e-mail de outros usuários no seu projeto.
Quem pode alterar as permissões de acesso de um usuário?
Usuários com funções de portal Administrador ou Proprietário em um projeto podem alterar as permissões de acesso para um usuário.
Usuários com a permissão Gerenciar usuários também podem alterar as permissões de acesso para um usuário.
Os usuários não podem alterar suas próprias permissões de acesso.
Como adicionar um usuário com acesso de edição a uma categoria e acesso somente leitura ao restante?
Você pode conseguir isso criando um papel de conteúdo personalizado e atribuindo permissões apropriadas ao usuário.
Criando um papel de conteúdo personalizado
Navegue até Configurações () > Usuários e segurança na barra de navegação esquerda do portal da base de conhecimento.
No painel de navegação esquerdo, navegue até Funções e permissões.
Na aba de função de Conteúdo , clique em Nova função de conteúdo.
No painel Criar função de conteúdo :
Insira o nome e a descrição do papel desejado.
Na seção de Recursos , selecione a caixa de seleção Ver para Categorias e Artigos.
Clique em Criar Papel.
NOTA
Para mais informações, leia o artigo sobre Papéis e permissões.
Criando um usuário com permissões específicas
Navegue até Configurações () > Usuários e segurança na barra de navegação esquerda do portal da base de conhecimento.
No painel de navegação à esquerda, navegue até Usuários e grupos > Usuários.
Clique em Adicionar e selecione Usuário.
No painel de novos usuários :
Insira o endereço de e-mail do usuário.
Selecione o papel apropriado do Projeto.
Na seção de função de conteúdo e acesso :
Função de conteúdo: Selecione Editor no menu suspenso.
Acesso ao conteúdo: Escolha Categoria e selecione a(s) categoria(s) desejada(s) que você quer que o usuário edite.
Clique em Adicionar outro papel de conteúdo para definir acesso somente leitura para outras categorias:
Função de conteúdo: Selecione o papel de conteúdo personalizado criado na Etapa 1.
Acesso ao conteúdo: Escolha a categoria ou categorias desejadas que o usuário possa visualizar somente.
Clique em Criar usuário.
Isso cria um usuário com acesso de edição a categorias específicas e acesso somente leitura às categorias restantes.
Atualizando um usuário existente
Navegue até Configurações () > Usuários e segurança na barra de navegação esquerda do portal da base de conhecimento.
No painel de navegação à esquerda, navegue até Usuários e grupos > Usuários.
Passe o mouse sobre o usuário desejado e clique no ícone Editar ().
Na seção de função de conteúdo & acesso , clique em Gerenciar papéis de conteúdo e permissões.
Atribua dois papéis de conteúdo da seguinte forma:
Papel de editor: Atribua isso a categorias que o usuário deve editar.
Função de conteúdo personalizado: Atribua isso a categorias que o usuário deve visualizar somente.
Selecione as categorias respectivas para cada função e clique em Atualizar.
Isso atualiza o usuário para ter acesso de edição para categorias específicas e acesso somente leitura para as categorias restantes.