Plans supporting this feature: Business Enterprise
In Document360, article workflow management is streamlined using a single Workflow status button that controls both publishing and workflow transitions. This improves the content review experience by allowing you to manage workflow status, assign reviewers, and track progress, all in one place.
A workflow status represents a checkpoint or stage in the documentation lifecycle. You can manage and assign workflow statuses to team members directly within the Documentation editor.
Workflow status actions
The Workflow status option is available at the top right of the Documentation editor.
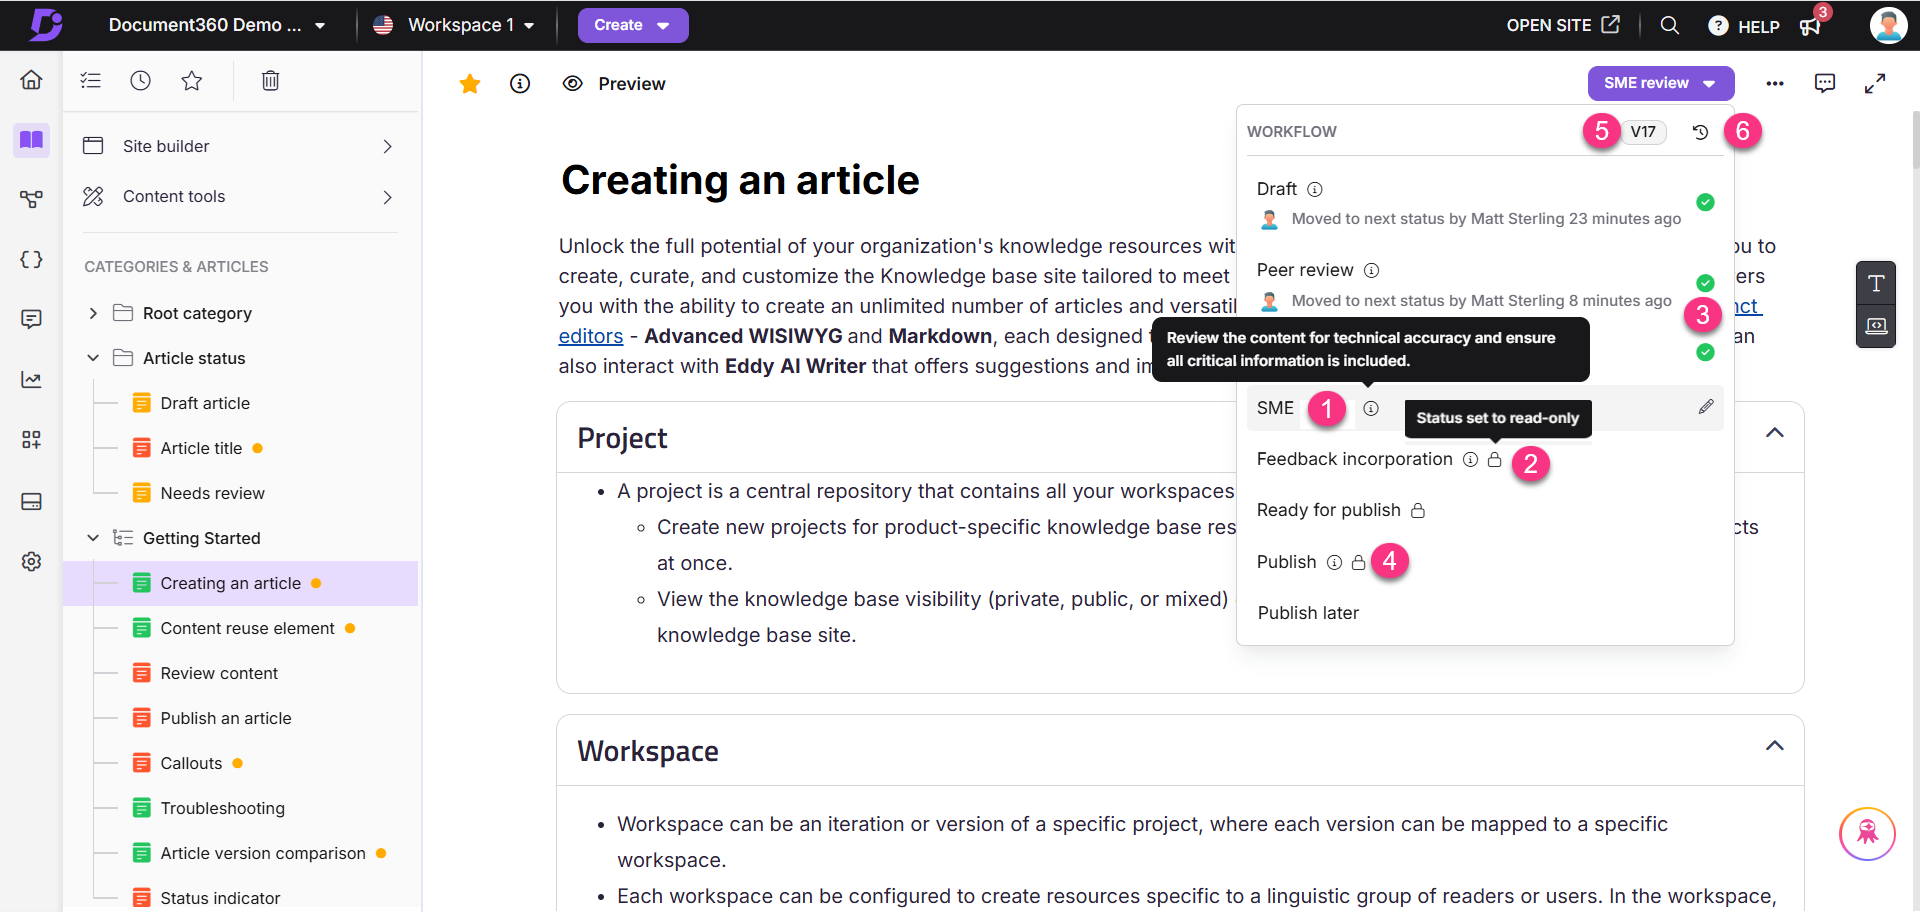
Information () icon: Click the information () icon next to the workflow status to view thw workflow state description.
lock () icon: The lock () icon indicates that the workflow status is in read-only mode. If the article is in a read-only workflow state, you cannot publish it directly.
Green check mark () icon: Completed statuses are marked with a green check. If the article is already published, all statuses will display a green check mark.
Publish: To publish an article immediately, open the Workflow status button and click Publish directly without selecting intermediate statuses.
Article version: Displays the current version of the article.
Workflow history (): Click to view the complete workflow history of the article.
View and update workflow status
The Workflow status button in the top-right corner of the editor also acts as the workflow status manager.
Click the Workflow status button.
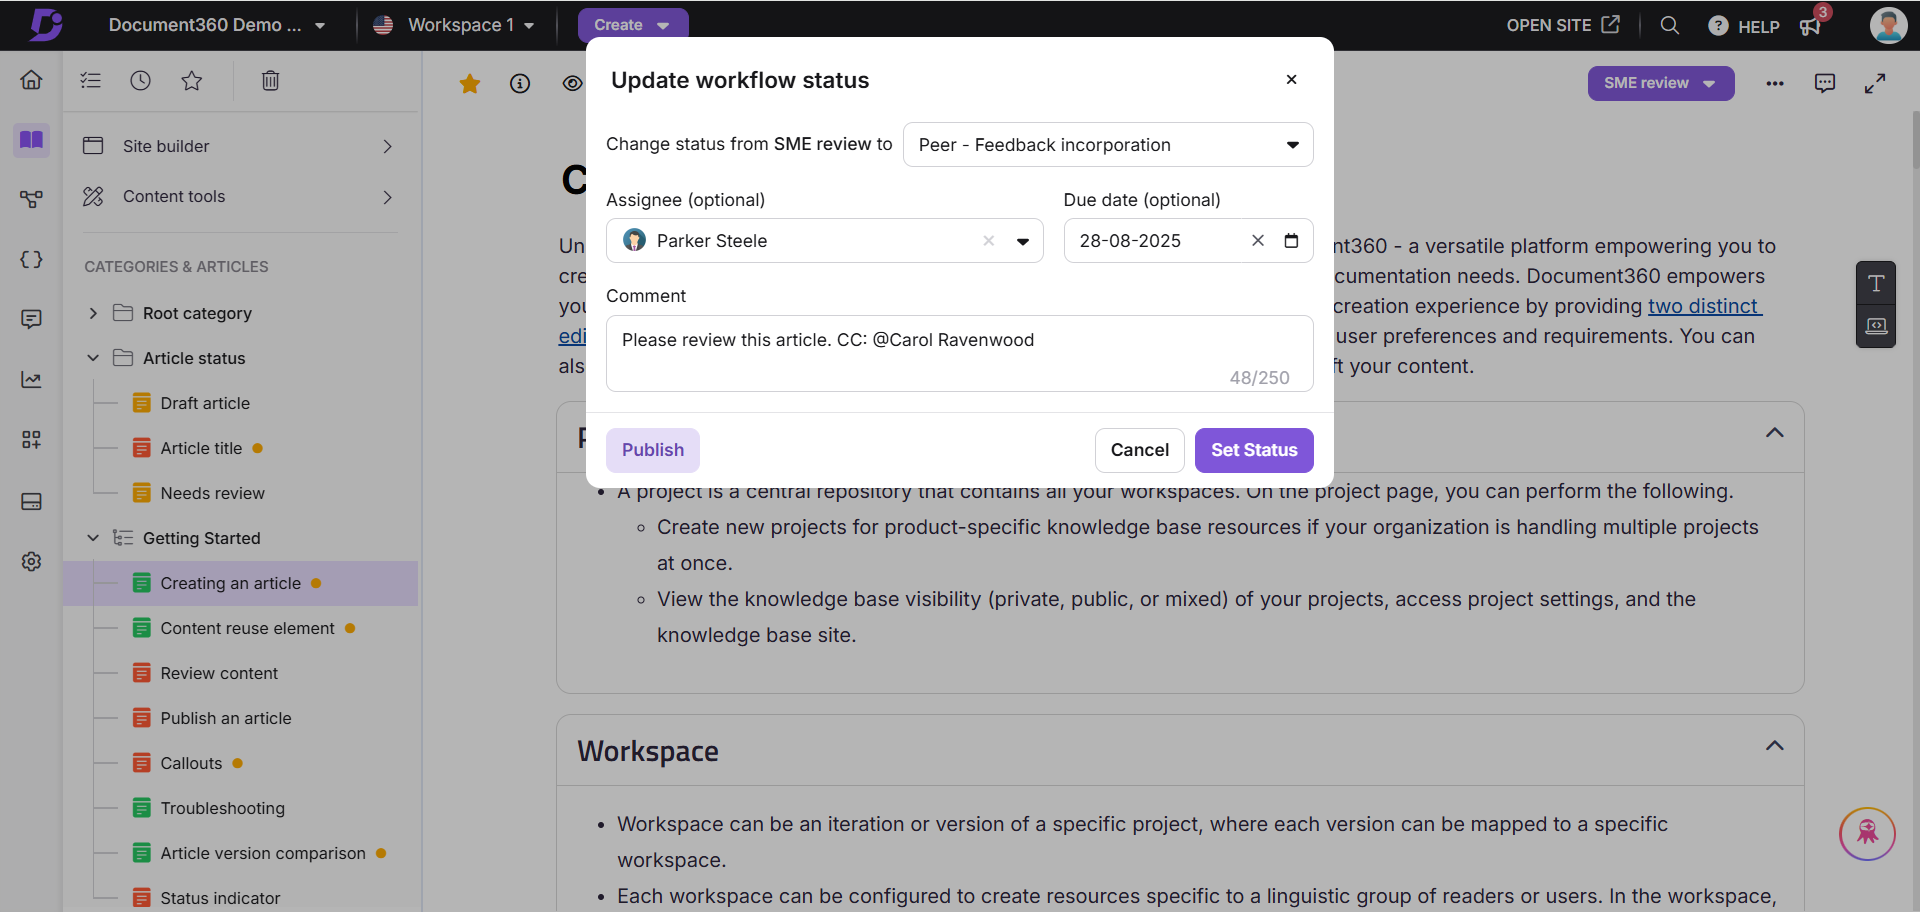
The Workflow dialog opens, where you can:
Select the next workflow status (e.g., Peer review, SME review, etc.)
Assign a team member to review the article
Set a due date for the review
Add a comment of up to 250 characters. This is an optional field.
Click Publish to publish the article directly.
Click Set Status to save and close the dialog.
After you update the workflow status, the button label displays the currently assigned status. For example:
If the article is in Review 1, the button shows Review 1, indicating the article’s current stage in the workflow.
Setting a due date
Keep your workflow on track by adding a due date when updating the status:
Click the Workflow status dropdown at the top-right of the editor.
The Update workflow status dialog will appear.
In the Due date field, select a date from the calendar.
To remove a due date, click the x icon next to the selected date.
If you are selecting a workflow status for the first time, click Set Status. If you are updating an existing workflow status, click Update.
Setting an assignee
Assign a team member to a workflow state:
Click the Workflow status dropdown at the top right of the editor.
The Update workflow status dialog will appear.
In the Assignee field, select or search for a team member from the list (sorted alphabetically).
NOTE
If your project has more than five team accounts, a search bar will appear for quicker access.
The assignee will receive an email notification.
To remove an assignee, click the ‘x’ icon next to their name.
Click Set status for a new assignment or Update to modify an existing one.
NOTE
When an article moves between workflow statuses, the previously assigned reviewer for that status is automatically retained. If the reviewer was manually changed, the updated reviewer will continue to be retained.
Adding a comment
Use the optional Comment field in the Update workflow status dialog to add context, notes, or instructions when assigning a workflow status.
Comments can be up to 250 characters.
You can tag team members using “
@”.
View workflow history
Users can view the entire workflow history with all the supporting information for an article.
Click the Workflow status dropdown at the top right of the editor.
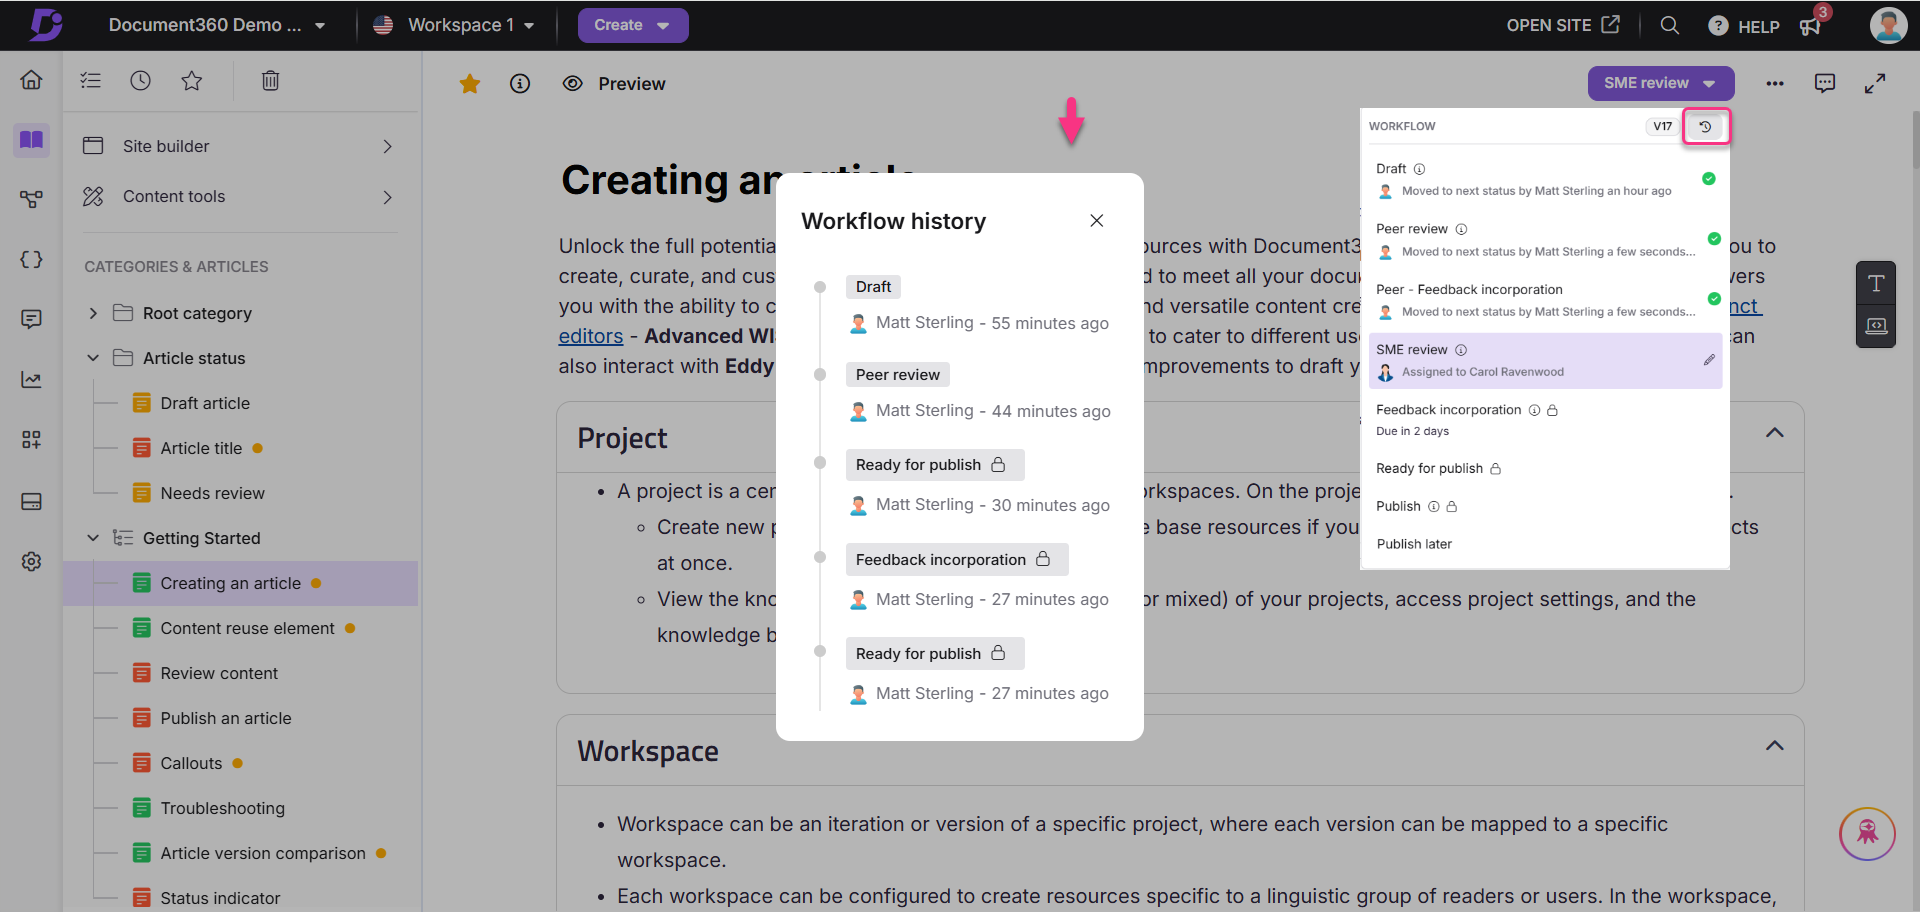
Click the History () icon.
The Workflow history dialog appears, showing:
All statuses the article has passed through
Assignees and due dates for each stage
Each version of the article revision can have its workflow history.
Managing workflow status from the Tasks page
You can also manage the workflow status of your articles from the Tasks page. You can either update the workflow status of individual articles or multiple articles.
To update the workflow status from the Tasks page,
Navigate to the Tasks page by hovering over the Home () icon and clicking on Tasks () in the menu that appears. Alternatively, you can also select the Tasks icon () at the top of the Categories & Articles pane.
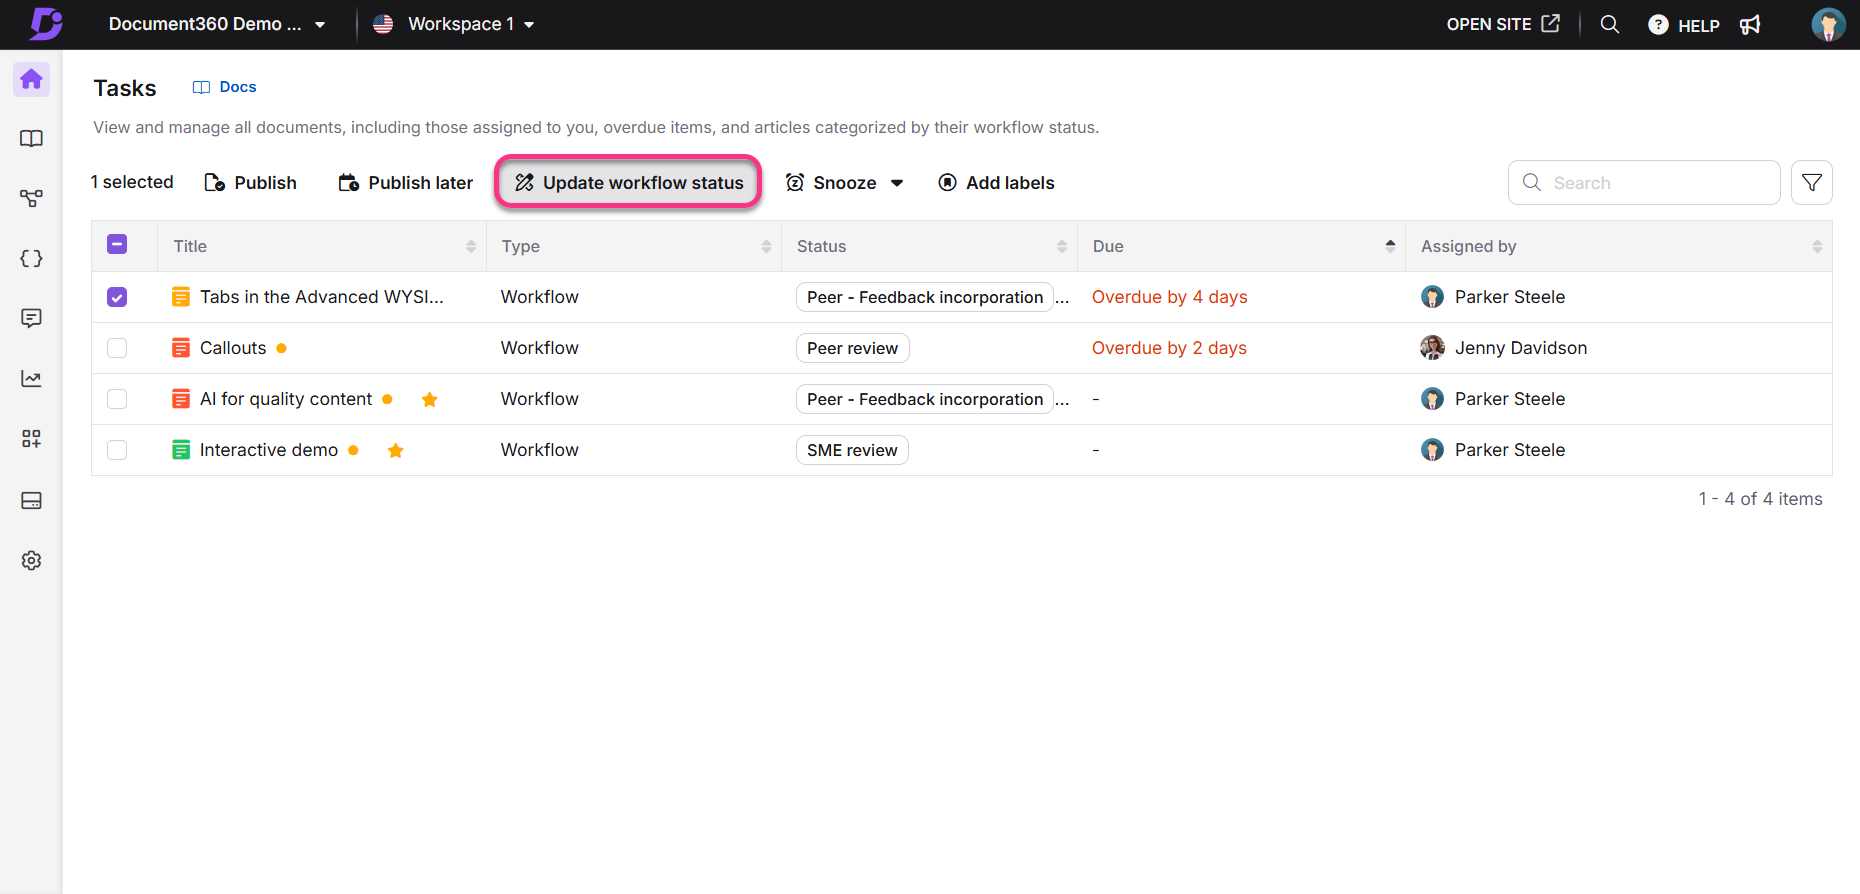
Select one or more articles from the list of articles on the Tasks page.
Click Update workflow status from the toolbar that appears at the top. This will open the Update workflow status dialog.
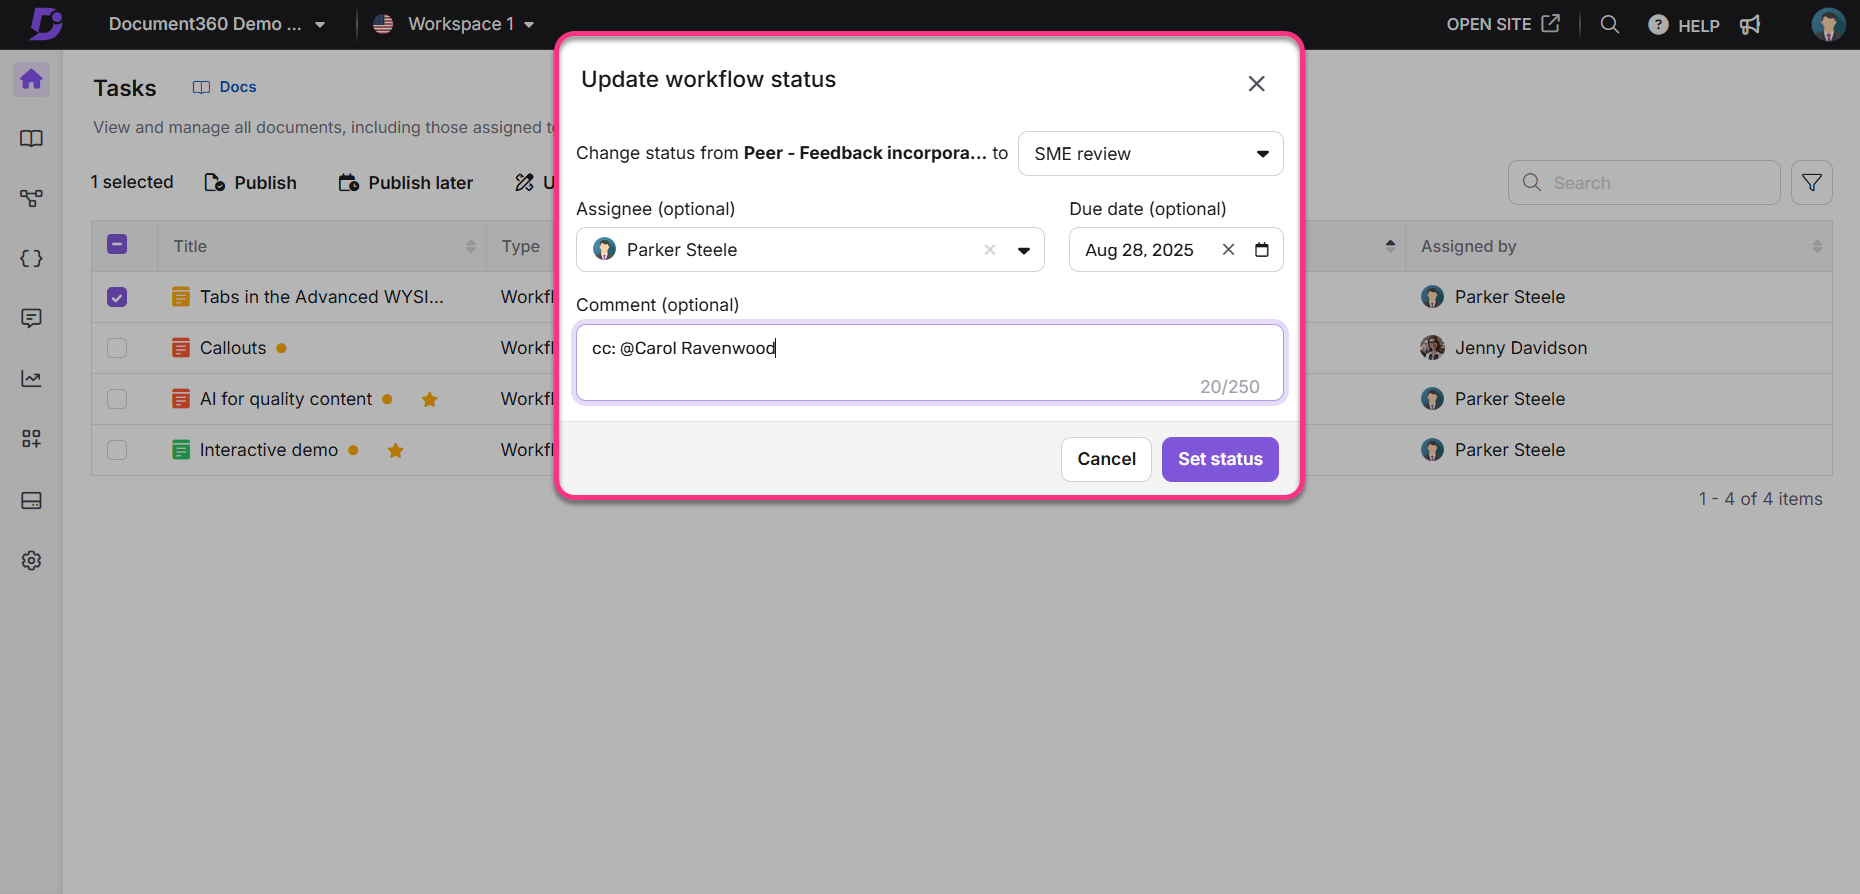
In the Update workflow status dialog, use the dropdown next to “Change status from [current status] to” to select the new workflow status.
In the Assignee dropdown, select a team member to assign the task (optional).
In the Due date field, select a deadline from the calendar picker (optional).
In the Comment field, add a message if needed. You can also @mention your teammates to notify them (optional).
Click Set status to update the workflow status for the selected articles.
FAQ
What steps should I take to ensure that team accounts receive notifications when I assign a workflow?
The email will be sent to the team account to which the workflow status is assigned, provided they have enabled the workflow events in the notification mapping. To ensure that team accounts receive notifications when assigning a workflow, they need to enable the relevant events in the notification section. Follow these steps:
Navigate to Settings () in the left navigation bar.
In the left navigation pane, navigate to Knowledge base portal > Notifications.
Go to the Notification mapping tab and expand the Documentation editor accordion.
Turn on the following toggles:
Article Workflow Status Updated
Article Workflow Due Date Updated
Article Workflow Assignee Updated
Additionally, to enable notifications for page category types, turn on the following toggles:
Category Workflow Status Updated
Category Workflow Due Date Updated
Category Workflow Assignee Updated
Can I assign different workflow statuses to an article in different languages within a workspace?
Yes, you can assign a different workflow status to each language version of an article within the same workspace.
eBook
Guide to setup documentation workflow
Our eBook will show you how to produce quality documentation!
You’ll learn,
A step-by-step guide to creating documentation workflows
Documentation of best practices that improve content quality
How to produce content that meets your customer's expectations