Default domain
When you create a new project in Document360, it automatically assigns a default domain name in this format: project-name.document360.com.
For example, if you name your project Project Greenfield, the assigned domain will be project-greenfield.document360.com.
Editing a Default domain
You can create a more personalized web address that reflects your brand and preference by editing the default web address, which makes it easier for users to find and remember your site.
To edit the default web address,
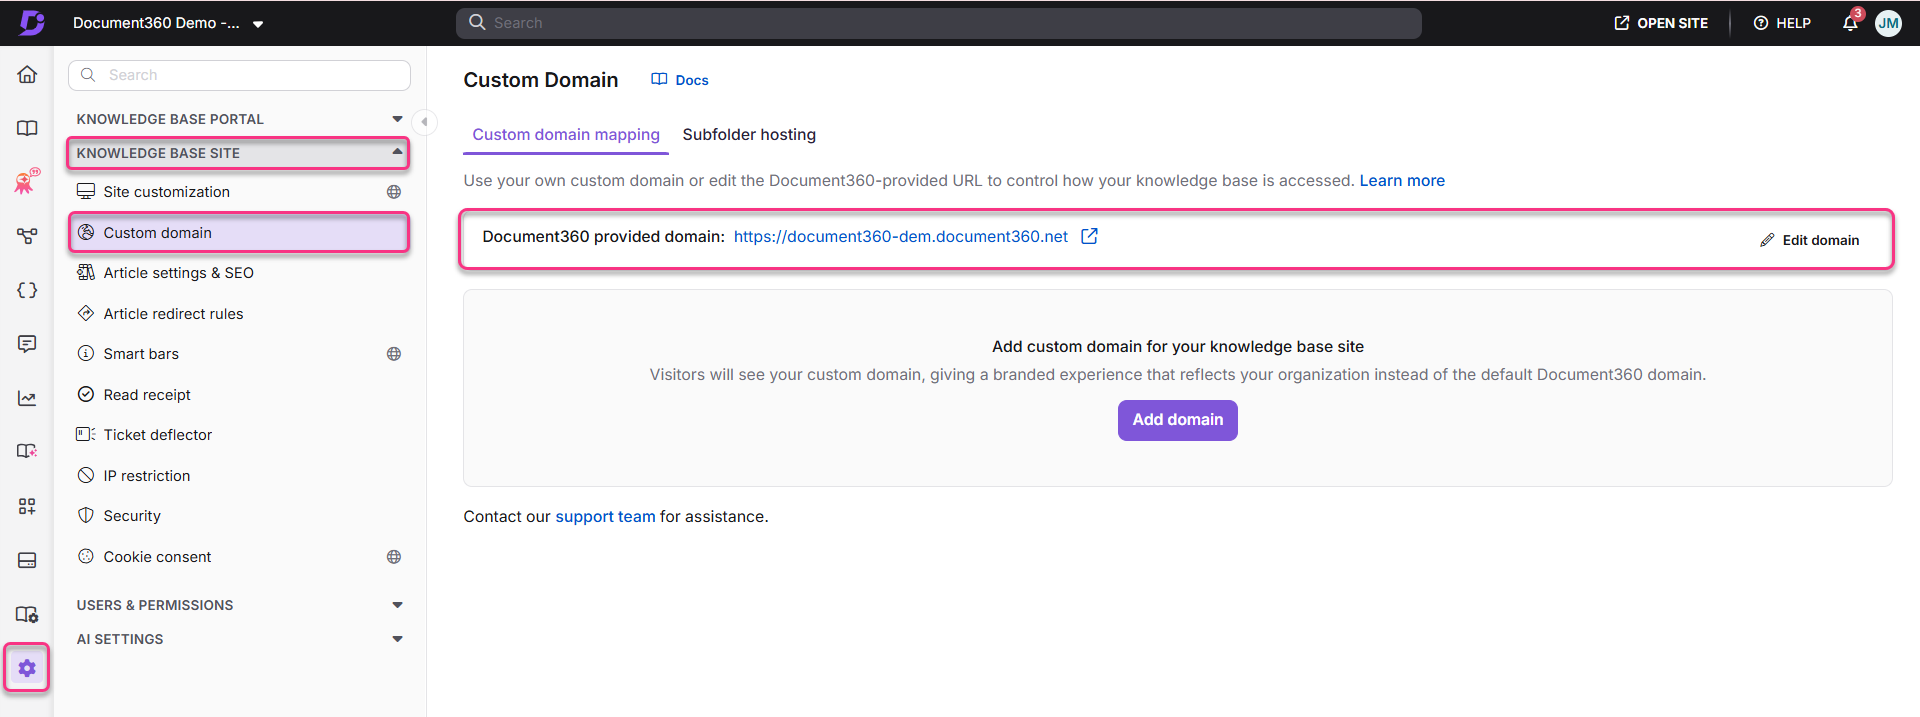
In the left navigation bar of your Knowledge base portal, navigate to Settings () > Knowledge base site > Custom domain.
Click Edit domain in the Document360 provided domain field.
The Edit subdomain dialog will appear.
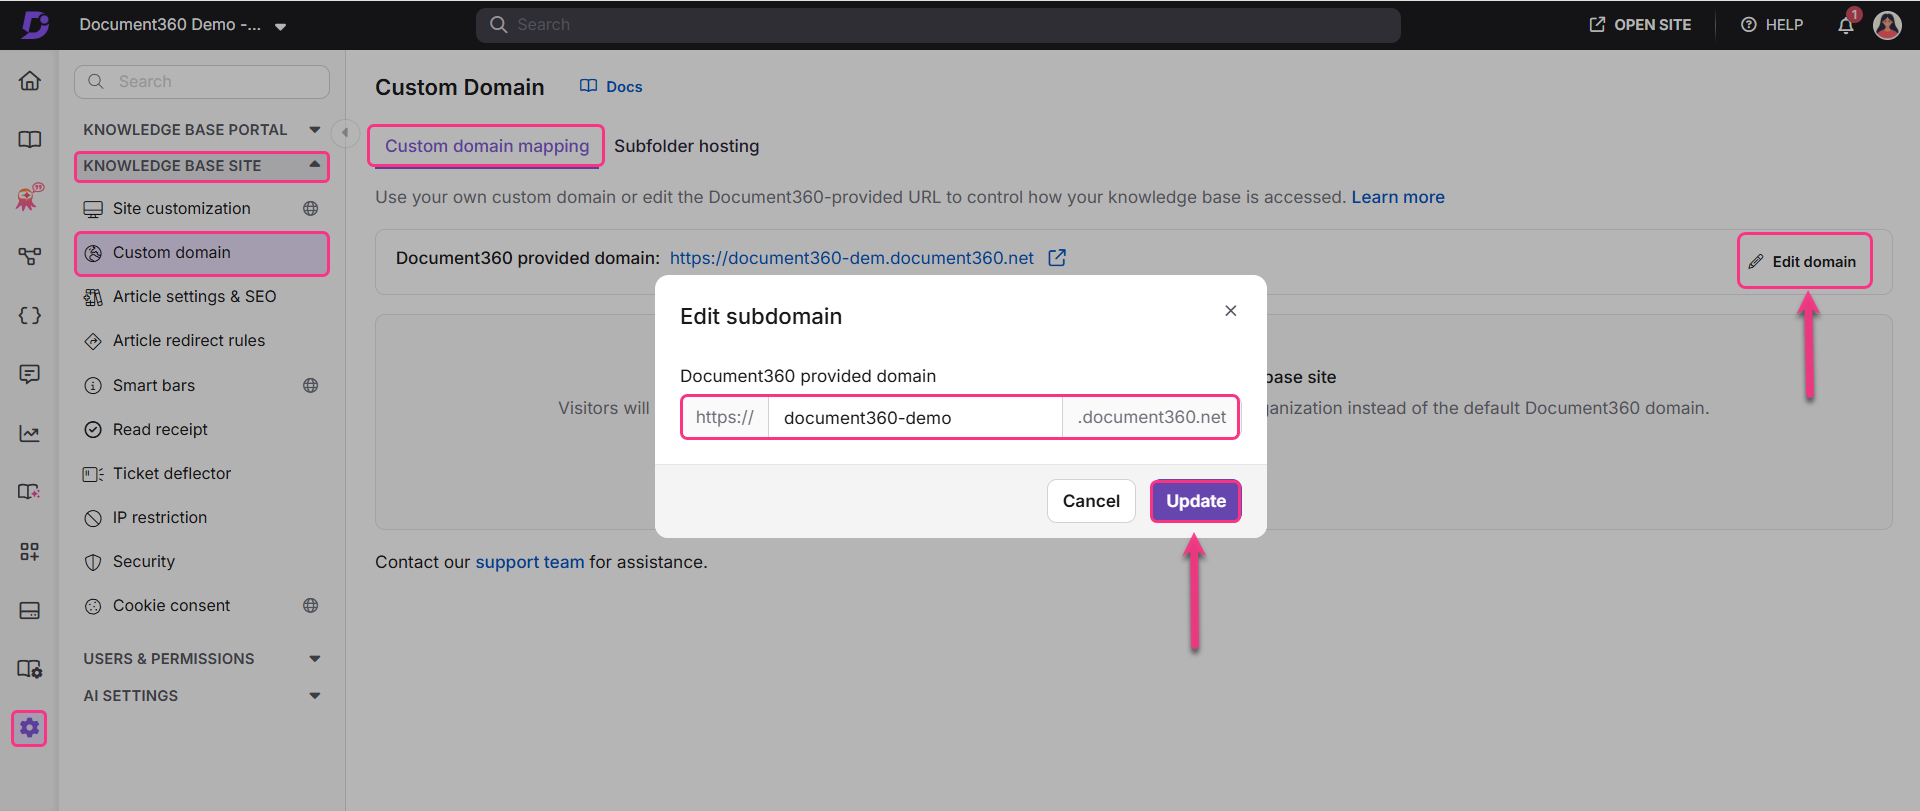
Enter your preferred domain in the field.
If your preferred domain is unavailable, the Update button will be inactive. You will need to try a different domain.
If the domain is already in use, the Update button will remain inactive.
If your preferred domain is available, the Update button will be enabled.
Click Update to update the web address of your Knowledge base site.
NOTE
Document360 provided domain and Custom domain cannot co-exist.
Creating a custom domain
You can strengthen your brand identity and provide a seamless experience for your users by mapping a custom domain to your knowledge base site, replacing the default Document360 URL with a domain that is entirely your own. You can configure a branded custom domain like help.yourcompany.com for your knowledge base site using the following steps:
Adding a custom domain in Document360
To add a custom domain,
In the left navigation bar of your Knowledge base portal, navigate to Settings () > Knowledge base site > Custom domain.
Click Add domain to add a custom domain for your knowledge base site.
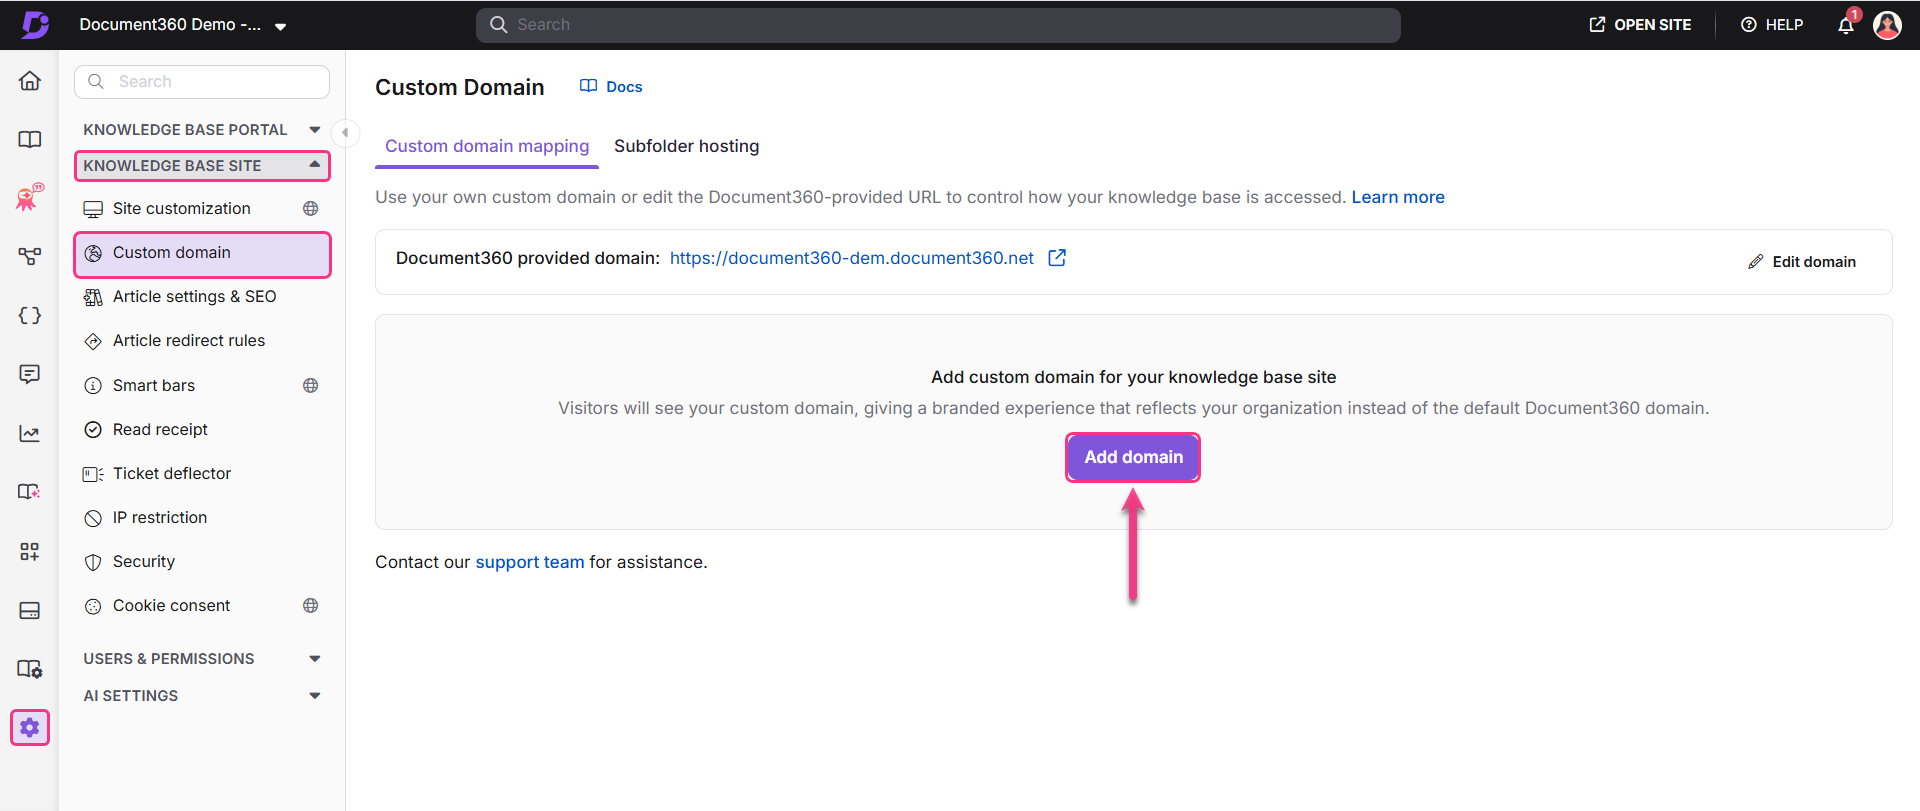
Enter your custom domain name in the Enter your custom domain field and click View configuration.
Your custom domain will be added successfully to Document360.
Configure DNS with Document360
Once you have added a domain to Document360, you will need to configure your DNS to Document360’s server.
To do so, you’ll have to:
.png)
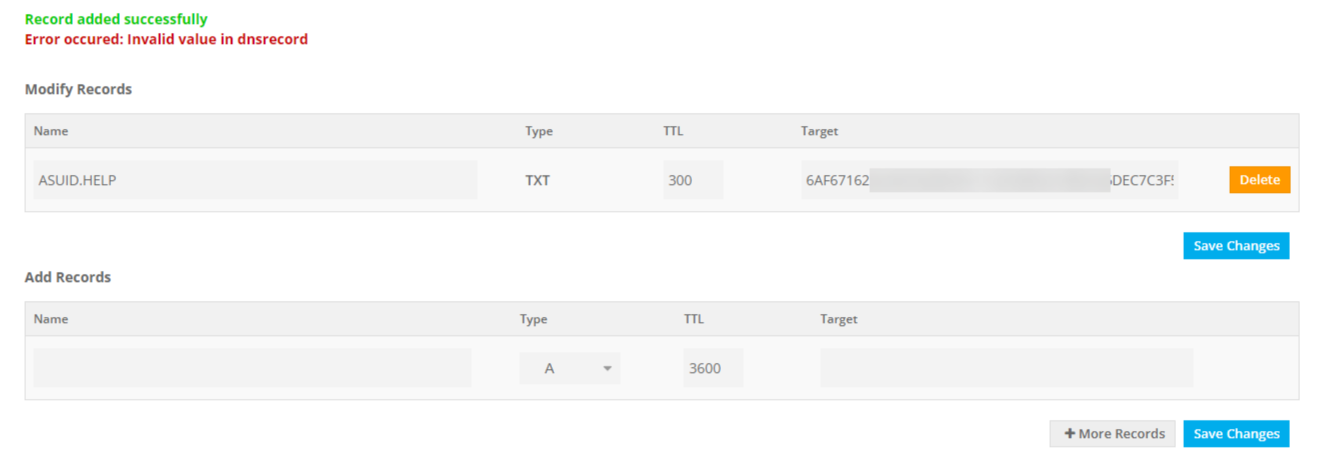
Configuring the TXT record in your domain registrar
Once the domain is added in Document360, you’ll need to configure a TXT record within your domain registrar to link your custom domain to Document360’s servers.
Log in to your domain registrar (e.g., GoDaddy, Namecheap, Google Domains).
Navigate to DNS settings and click add new record.
Select the Record type as TXT Record from the dropdown.
Enter the Host and Value/Target details from Document360 into your domain registrar.
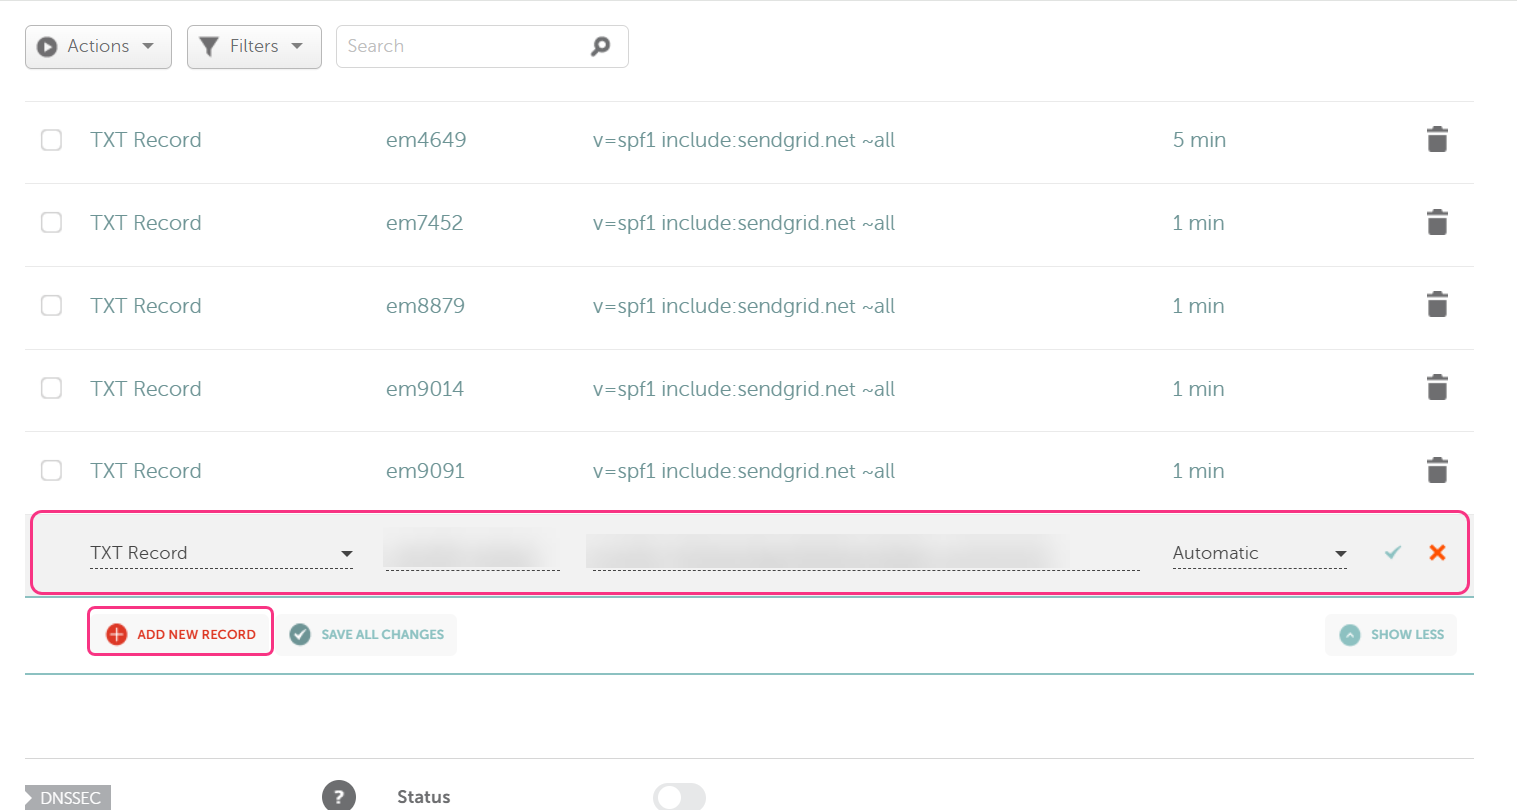
Then, click the Tick icon to save the changes.
Navigate to Document360, and click Verify. The status of the TXT record should change from Pending to Verified.
NOTE
DNS record verification in Document360 may take some time to get verified.
Configure the CNAME record in your domain registrar
Click Add new record and select the Record type as CNAME Record.
Enter the Host and Value/Target details from Document360 into the domain registrar.
Then click the Tick icon to save the changes.
.png)
In Document360, the status of the CNAME record should change from Pending to Verified.
Verify DNS configuration
In Document360, the SSL record type is automatically provisioned upon DNS verification and may take some time to set up.
Click Retry verification.
Once verified successfully, a success message will appear and your custom domain will now be verified and accessible.
.png)
After mapping the custom domain, click the Go to your knowledge base site icon to view the change in the site URL.
NOTE
If there is any issue in configuring the custom domain, check the Troubleshooting steps in the section below in this article.
Update your browser tab title after a domain or project name change
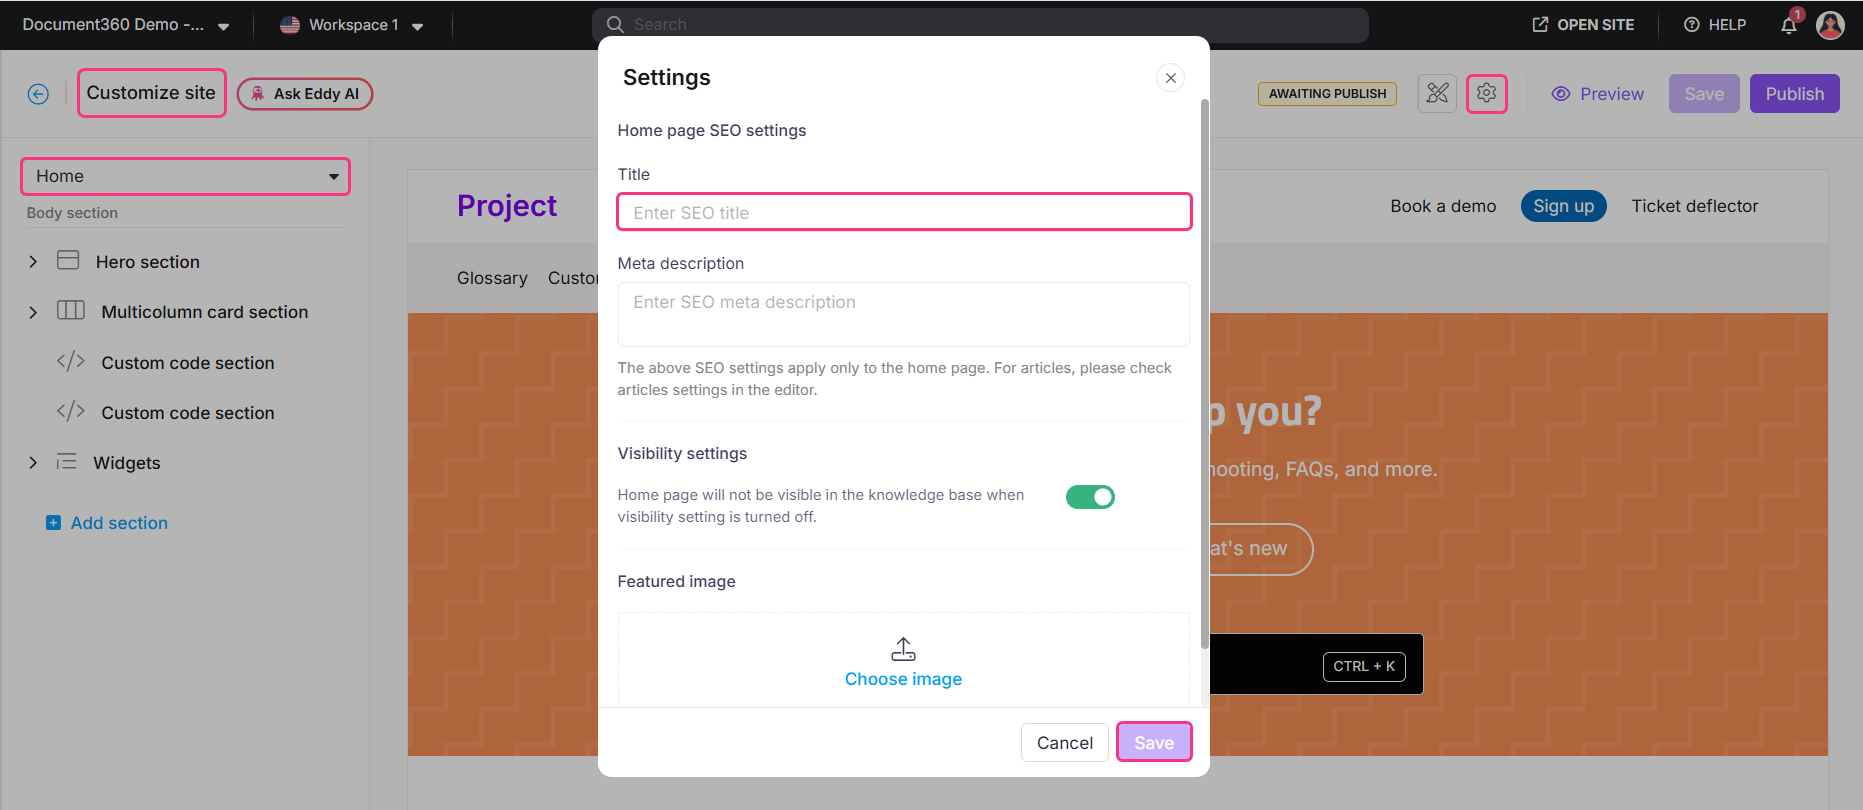
Changing your project name or custom domain does not automatically update the title shown in the browser tab. To update it:
Navigate to Settings > Knowledge base site > Site customization.
Click Customize site button.
Expand the Site header & footer dropdown and select Home.
Click the Settings icon on the Home page.
Update the SEO Title field to reflect your new project or domain name.
Click Save.
NOTE
This setting may require Owner or Admin-level permissions. If the fields are greyed out, contact a user with the appropriate permissions to make this change.
Common domain registrars
Below is a list of some common domain registrars:
NameCheap - Support article
Domain.com - Support article
Google Domains - Support article
Dreamhost - Support article
Hover - Support article
GoDaddy - Support article
Cloudflare - Support article
Bluehost - Support article
Post mapping issues
'Deceptive site ahead' message while accessing the site after successful custom domain mapping.
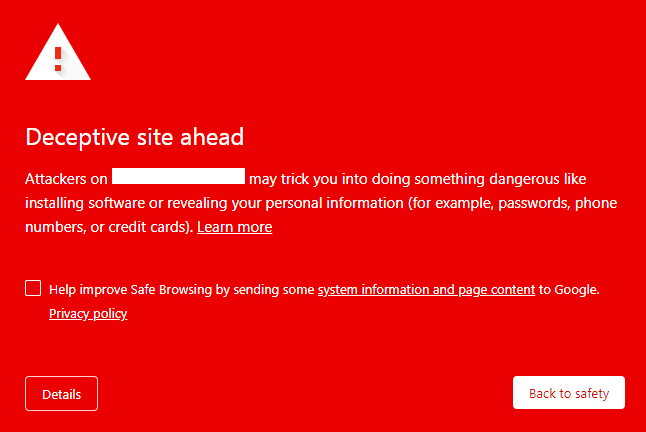
This means that Google has flagged the custom domain you have mapped as unsafe for browsing.
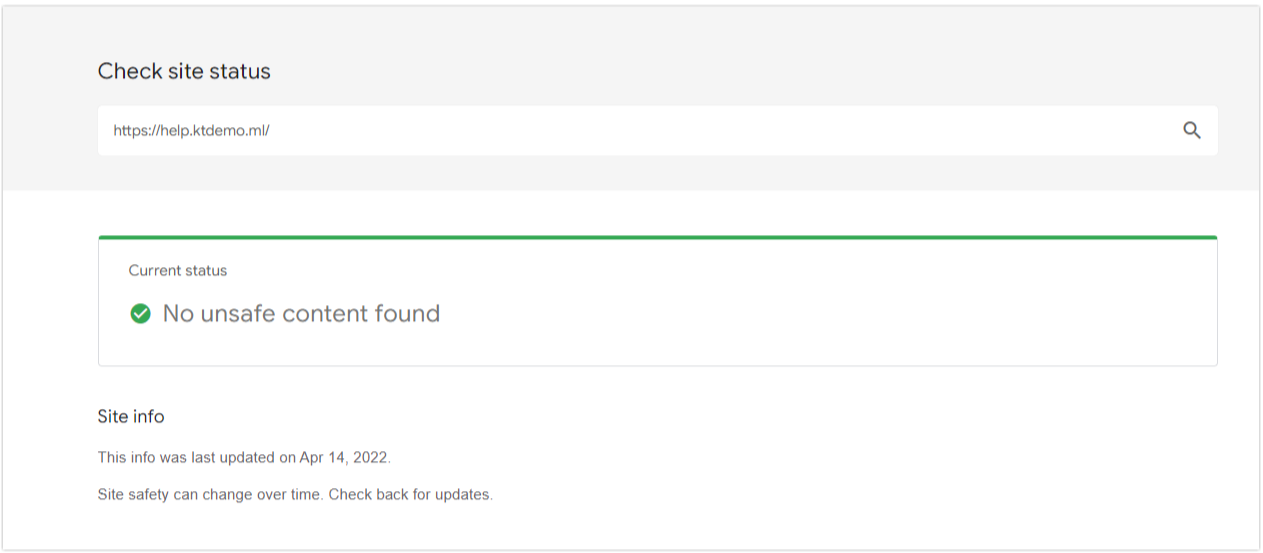
To check the flagged status, use the Safe Browsing site status by Google.
Type in your mapped domain and check if there are any issues.
Resolve and fix the issues detected (Phishing attacks, malware-infested, violating community guidelines, etc.).
Submit a review request from Google Search Console. Google will update the status and remove the warning from your website.
Here is a help article from Google support.
Load balancer
A load balancer distributes incoming traffic evenly across multiple servers, ensuring that your Knowledge base site remains fast and reliable, even during high traffic periods. This helps prevent any single server from being overloaded and enhances the overall performance and security of your site.
Upgrading the load balancer can provide additional benefits, such as improved security features and better traffic management.
Upgrading the load balancer
Navigate to Settings () > Knowledge base site in the left navigation bar in the Knowledge base portal.
In the left navigation pane, navigate to Custom domain > Custom domain mapping.
Click Upgrade.
Verify the custom domain mapping configuration in Document360.
Copy the CNAME record generated in Document360.
Set up the CNAME record in your domain registrar.
Verify the custom domain mapping configuration in Document360.
NOTE
This upgrade does not cause any downtime. However, we recommend this upgrade during your off-business hours
This upgrade is entirely free of cost
Please contact our support team for assistance.
Configuring a custom domain for Apex domains
When configuring a custom domain for Document360, you may want to use your Apex domain (root domain), such as abc.com without a subdomain like www. While configuring subdomains is straightforward, configuring Apex domains requires some extra steps, especially regarding DNS records.
DNS flattening is a method that allows you to use a CNAME record at the Apex (root) domain level, which not all domain registrars support. If your registrar does not support DNS flattening, you won’t be able to add a CNAME record for your Apex domain.
Configuring Apex Domains
If your domain registrar doesn't support DNS flattening (for example, GoDaddy), you can opt for a DNS provider that does, such as Cloudflare. Cloudflare offers free plans that include DNS flattening, enabling you to configure your custom domain for the Apex domain successfully.
For example, let’s say you're using GoDaddy, which does not support DNS flattening. In this case, switching to a DNS provider like Cloudflare will allow you to add a CNAME record for your Apex domain.
NOTE
For more information, read the article on CNAME Flatting from Cloudflare.
Using a custom SSL certificate
Use the SSL certificate provided by Document360 for your domain to ensure secure connections, as it offers automatic and seamless renewal for a smooth experience. Provide the following details to process your request to install a custom SSL certificate:
Common Name (CN): The fully qualified domain name for the certificate.
Organization (O): The legal name of your organization.
Organizational Unit (OU): The department or division within your organization.
NOTE
The certificate is typically valid for 90 days. You will have to renew the certificate on time and provide us with the updated certificate so we can install it on your domain.
Troubleshooting
Domain verification failed
If you are having issues verifying your custom domain, ensure that the CNAME matches the domain host.
There are chances for any other record to be mapped in the place of CNAME (such as AAAA records). This would also cause an error.
Suggestion: To view your domain's CNAME, and other DNS information, use Digwebinterface or Google's DNS lookup, or any other DNS lookup tool available on the web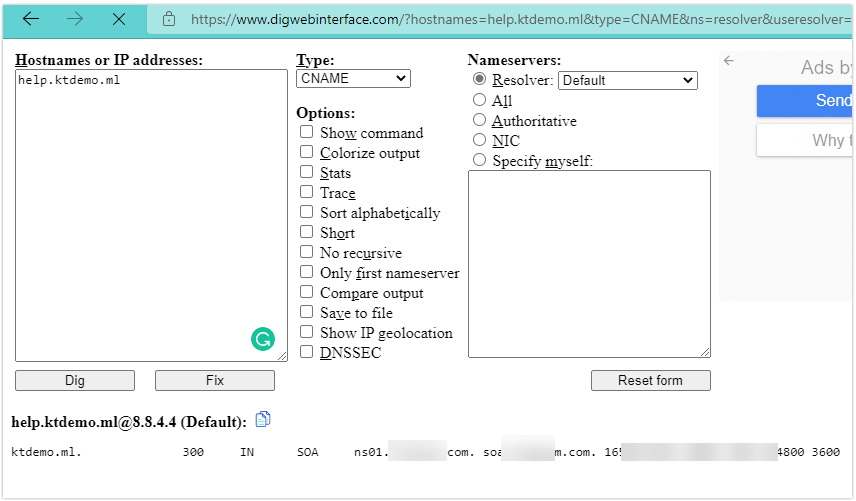
NOTE
For security reasons, some domain registrars can mask/restrict the DNS records from being discovered on the DNS lookup tools. One such example is Cloudflare.
In such cases, you can contact your domain registrar for more information.
Once the correct CNAME is mapped, it might take up to 24 hours for successful mapping.
Unable to Access the Knowledge Base Site
Error: The Knowledge Base site is inaccessible when using a www prefix in the URL (e.g., https://www.support.yourcompany.com/), but works correctly without it (e.g., https://support.yourcompany.com/).
Steps to resolve:
Access the Knowledge Base site using the correct URL, without the www prefix. (e.g., https://support.yourcompany.com/).
Verify your configured domain in Document360:
Navigate to Settings > Knowledge base site > Custom domain
Confirm the exact domain that was set up. Use the URL to access the Knowledge base site.
If you want both the www and non-www URLs to work, contact your DNS administrator to:
Add a separate CNAME record for the www variant
Configure a redirect from www.support.yourcompany.com to support.yourcompany.com
Wait time after DNS records are updated
If the CNAME match and the domain verification issue persist, the TTL (Time-To-Live) can be a possible reason.
If you're updating an existing DNS Record value, it may take time for the configured TTL to reflect globally. If the TTL is set to 3600 for a DNS record, then it may take up to 1 hour (3600 seconds) to reflect the DNS record value for the DNS Name server globally.
CAA restriction set by the domain registrar
Some domain registrars set a restriction that the SSL certificate should be provisioned by a specific CA (Certificate Authority).
For example, if a CAA DNS record has a value of 0 issues "letsencrypt.org", then only the Let's Encrypt (CA) will be able to generate a certificate for the particular custom domain. Other Certificate Authorities (DigiCert, in our case) would see this configuration and would deny generating an SSL certificate.
Check if you have any CAA records configured in the DNS configuration for the custom domain.
TXT Record Errors
TXT record not found
This error occurs when Document360 cannot detect the TXT record for your domain at the registrar.
Steps to resolve:
Log in to your domain registrar and navigate to DNS settings.
Add the TXT record exactly as shown in Document360:
Host:
_doc360-verify.followed by your domainValue: The unique verification code displayed in Document360
Save the record and click Retry verification in Document360.
NOTE
DNS changes may take a few minutes to propagate. If the record was just added, wait a few minutes before retrying.
TXT record mismatch
This error occurs when a TXT record is found, but the value does not match the verification code generated by Document360.
Steps to resolve:
Go to your domain registrar's DNS settings.
Locate the existing TXT record for
_doc360-verify.and check its value.Compare it against the exact value shown in Document360.
Update the value to match exactly — even a single character difference will cause failure.
Save and click Retry verification.
Multiple TXT records detected
This error occurs when more than one TXT verification record exists for the same host, causing a conflict during verification.
Steps to resolve:
Log in to your domain registrar and navigate to DNS settings.
Search for all TXT records with the host
_doc360-verify.Delete all duplicate entries, keeping only the one matching the value shown in Document360.
Return to Document360 and click Retry verification.
TXT record not propagated
This error occurs when the TXT record has been added correctly but has not yet propagated across DNS servers globally.
Steps to resolve:
Confirm the TXT record has been saved correctly at your registrar.
Use Google's DNS lookup tool or Digwebinterface to check if the TXT record is visible.
Wait a few minutes and click Retry verification.
NOTE
DNS propagation typically takes a few minutes but can occasionally take longer depending on your registrar's TTL settings.
Invalid TXT host
This error occurs when the host name of the TXT record has been entered incorrectly at the registrar.
Steps to resolve:
Log in to your domain registrar and locate the TXT record.
Verify that the host is set exactly as shown in Document360 — it should begin with
_doc360-verify.Correct the host name if it differs and save the record.
Click Retry verification in Document360.
CNAME Errors
CNAME record not found
This error occurs when Document360 cannot detect a CNAME record for your domain after TXT verification has passed.
Steps to resolve:
Log in to your domain registrar and navigate to DNS settings.
Add a new CNAME record:
Host: Your custom domain (e.g., help.yourcompany.com)
Points to: The CNAME value shown in Document360
Save the record and click Retry verification.
NOTE
CNAME verification only begins after TXT ownership verification is successfully completed.
Incorrect CNAME target
This error occurs when a CNAME record exists but is pointing to the wrong destination instead of Document360's servers.
Steps to resolve:
Go to your domain registrar's DNS settings.
Locate the existing CNAME record for your custom domain.
Update the Points to value to match the exact CNAME target shown in Document360.
Save and click Retry verification.
CNAME is proxied (Cloudflare)
This error occurs when the CNAME record is routed through Cloudflare's proxy, which prevents Document360 from verifying the record correctly.
Steps to resolve:
Log in to your Cloudflare account and navigate to the DNS settings for your domain.
Locate the CNAME record for your custom domain.
Click the orange proxy icon next to the record to switch it to DNS only (grey cloud).
Save the change and click Retry verification in Document360.
NOTE
Cloudflare's proxy (orange cloud) intercepts DNS resolution, which blocks Document360's verification. Switching to DNS only mode is required for successful verification.
Ownership not verified (CNAME blocked by TXT)
This error occurs when CNAME verification is attempted before TXT ownership verification has been completed.
Steps to resolve:
Return to the DNS records table in Document360.
Ensure the TXT record has been added correctly at your registrar.
Complete TXT verification first — CNAME verification will only proceed once TXT is confirmed.
SSL Errors
SSL provisioning blocked
This error occurs when SSL provisioning cannot begin because DNS verification (TXT and CNAME) has not been completed.
Steps to resolve:
Ensure both the TXT and CNAME records are verified successfully in Document360.
Once both records show a Verified status, SSL provisioning will begin automatically.
SSL provisioning failed
This error occurs when Document360 is unable to issue an SSL certificate for your domain.
Steps to resolve:
Check if any CAA records in your DNS are restricting SSL issuance. Ensure the following entries are present:
@ IN CAA 0 issue digicert.com@ IN CAA 0 issue letsencrypt.org@ IN CAA 0 issue pki.goog
Add any missing CAA entries and click Retry verification.
If the issue persists, contact Document360 support.
SSL still provisioning
This message appears when SSL setup is in progress and has not yet completed.
Steps to resolve:
No action is required — SSL provisioning is automatic.
Wait a few minutes and refresh the page to check the updated status.
If the status does not change after 15 minutes, click Retry verification.
General Verification Errors
Verification already running
This message appears when a verification attempt is already in progress.
Steps to resolve:
Wait for the current verification process to complete.
Do not click Retry verification while verification is running — this may cause a conflict.
Once the process completes, review the status of each record and retry if needed.
Verification incomplete
This error appears when some verification checks have passed but others have failed.
Steps to resolve:
Review the DNS records table in Document360 — failed records will be highlighted.
Fix only the records showing a failed or not verified status.
Records that have already passed do not need to be reconfigured.
Click Retry verification once the failing records are corrected.
Default Domain Errors
Domain already in use
This error appears when the subdomain you entered is already taken by another project.
Steps to resolve:
Enter a different subdomain name in the field.
The Update button will activate once an available name is entered.
Click Update to save the change.
Invalid domain name
This error appears when the subdomain entered contains unsupported characters.
Steps to resolve:
Ensure the subdomain uses only lowercase letters and hyphens.
Remove any special characters, spaces, uppercase letters, or leading/trailing hyphens.
Re-enter the corrected subdomain and click Update.
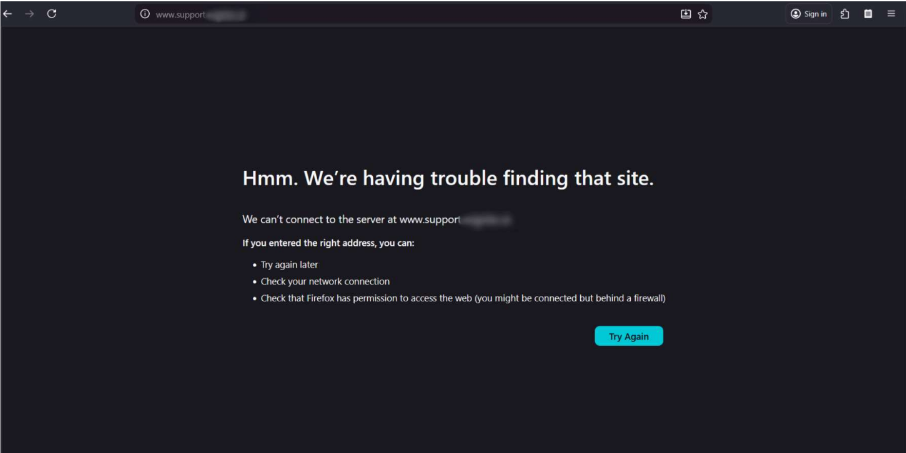
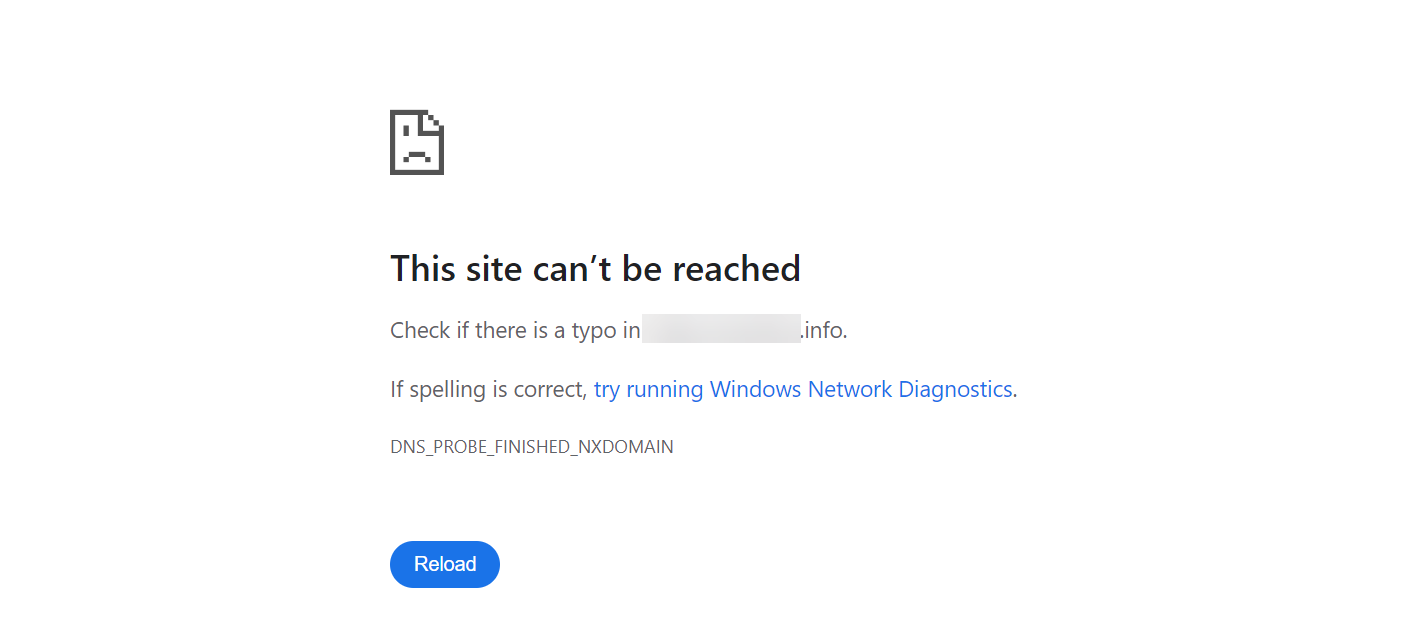
Resolving the error "This site can’t be reached" while configuring a custom domain
Error: This site can’t be reached
This error usually occurs when the CNAME record is not added promptly in your DNS after it's generated in Document360. If there's a delay, the CNAME may expire, leading to a failed domain verification.
Other possible causes include:
DNS propagation delays
Duplicate CNAME entries in your DNS
Missing CAA records for supported SSL providers like Let’s Encrypt, DigiCert, or Google
Steps to resolve:
Check when the CNAME was configured
Confirm whether the CNAME record was added to your DNS immediately after creating it in Document360.
If not, the CNAME might have expired.
Remove and reconfigure the custom domain
Go to your DNS provider and remove the existing CNAME record.
Then, in Document360, delete the existing custom domain entry.
Wait 15 minutes before proceeding.
Add the CNAME record again
Navigate to Settings () > Knowledge base site in the left navigation bar in the Knowledge base portal.
In the left navigation pane, navigate to Custom domain > Custom domain mapping, and create the custom domain again.
Immediately copy the CNAME record and add it to your DNS provider with a TTL (Time To Live) of 5 minutes.
Return to Document360 and click Verify.
Wait a few minutes for the configuration to complete.
Check for DNS propagation
DNS changes typically take 2–4 hours, but in some cases up to 24 hours.
Wait for full propagation before rechecking the domain.
Verify DNS using Google Dig tool
Use Google Dig tool to check if your DNS records are showing correctly.
Look for any duplicate CNAME entries for the same hostname. If found, remove duplicates.
Check for CAA record conflicts
Use dnschecker.org to view CAA records for your domain.
If any CAA records are configured, ensure they allow Document360’s SSL providers:
@ IN CAA 0 issue digicert.com
@ IN CAA 0 issue letsencrypt.org
@ IN CAA 0 issue pki.goog
Add these CAA entries to your DNS if missing.
If the issue persists after following these steps, please contact the Document360 support team for further assistance: Contact Document360 Support
Resolving errors such as “Your connection is not private” or “Your connection is not secure” while accessing the Knowledge base site
This error typically occurs due to the following reasons:
Issue: SSL certificate expired
Check if the SSL certificate has expired.
Visit the Knowledge base site and click the View site information option in the URL bar.
Click Connection is secure to view the SSL certificate details.
B. If the SSL Certificate has not expired, then try the below troubleshooting steps:
Try accessing the site from a different browser to rule out browser-specific issues.
Deactivate any website extensions in your browser and check again.
Verify if all users are experiencing the same issue to identify if it is user-specific or system-wide.
Clear your browser cache or switch to another browser, as this often resolves the problem.
C. VPN connection
Deactivate your VPN and try accessing the site again:
If deactivating the VPN resolves the issue, the VPN might be causing the problem.
Contact your IT team for further assistance.
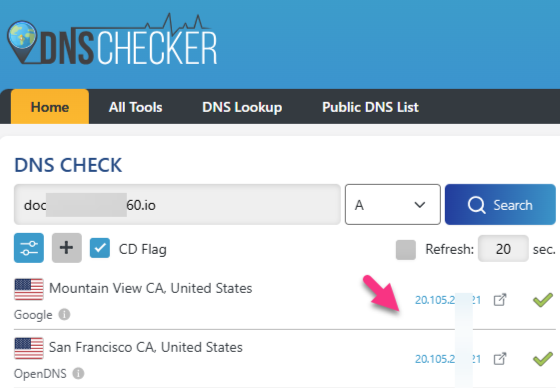
D. DNS records issue
There may be issues with the DNS resolver if the DNS records have not been updated successfully.
Use a DNS checker (e.g., DNS Checker) to verify the DNS records.
Confirm if all the records have been updated successfully.
If the records are not properly synced, contact your DNS provider or domain registrar to ensure the DNS zone is correctly configured and synced for the domain.
If the issue persists after following these steps, please contact the Document360 support team for further assistance: Contact Document360 Support
Resolving the “Secure Connection Failed - SSL_ERROR_NO_CYPHER_OVERLAP” error while configuring a custom domain
Error: Secure Connection Failed - SSL_ERROR_NO_CYPHER_OVERLAP
This error usually indicates that the SSL certificate couldn’t be issued due to a mismatch in the CNAME configuration. If the custom domain does not point to the correct Document360 domain, SSL validation fails, resulting in the error.
Steps to resolve:
Go to dnschecker.org.
In the search bar, enter your custom domain and select CNAME from the dropdown.
Verify the result:
The CNAME value should match the exact CNAME provided in the Document360 portal during domain setup.If the CNAME is incorrect:
Remove the current custom domain from your Document360 project.
Correct the CNAME record in your DNS provider by adding the one provided in Document360.
Wait a few minutes, then reconfigure the custom domain in Document360 and verify again.
Once the correct CNAME is in place and verified, the SSL certificate will be issued successfully, resolving the error.
Search returns no results after migrating to a new data center or reconfiguring the project
Issue: All users are unable to search for articles on the Knowledge base site. Search, Advanced Search, and Eddy AI Search all return no results, even though articles are published and accessible.
Cause: This can happen when the custom domain mapping has been removed from Document360, commonly after a data centre migration or project reconfiguration. Even if the CNAME record still exists in your DNS (keeping the custom domain URL accessible), the search feature will not function unless the custom domain is actively mapped within Document360.
How to identify: In the Knowledge base portal, click Open Site icon. If it loads the default Document360-provided domain (e.g., yourproject.document360.com) instead of your custom domain, the custom domain mapping has been removed.
Steps to resolve:
Navigate to Settings > Knowledge base site > Custom domain and check whether your custom domain is listed. If it is missing, proceed with the steps below.
Go to your DNS provider and remove the existing CNAME record for the custom domain.
In Document360, navigate to Settings > Knowledge base site > Custom domain, and re-add the custom domain.
Copy the new CNAME record generated by Document360 and add it to your DNS provider.
Return to Document360 and click Verify to complete the mapping.
Once verified, test the search on your custom domain to confirm it is working as expected.
NOTE
Removing the old CNAME record from DNS (step 2) before reconfiguring is essential. If the existing CNAME record is not removed first, it will conflict with the new one and the mapping will fail.
FAQ
Do I need an SSL certificate to configure a custom domain?
Document360 automatically provides an SSL certificate for your custom domain when you map it to your project. You do not need to purchase an additional SSL certificate. However, if you prefer to use your own SSL certificate instead of the one provided by Document360, please reach out to our support team at support@document360.com.
Will the custom domain URL reflect in the invitation email sent to readers?
Yes, if the invitation email is sent to readers after the custom domain has been successfully mapped, the email links will point to the custom domain.
What do I do if the CNAME is not verified after updating the DNS?
If the CNAME is not verified after updating the DNS, you will have to reconfigure your custom domain.
Remove the current custom domain configuration.
Re-add the custom domain and update the CNAME on your DNS.
Ensure the CNAME is verified to complete the setup.
Can I configure two custom domains for a single Knowledge base site?
No, it is not possible to configure two custom domains for a single KB site. However, you can set up a redirection from one domain to the other. This way, visitors to the first domain will be redirected to the second domain.
Can I set up multiple domains for a single project in Document360?
Currently, Document360 supports only one custom domain per project.
What is a Naked Domain?
A naked domain is a domain that does not include the "www" prefix. For example, if the domain is example.com, that's a naked domain, whereas www.example.com is not.
By default, most domains will have the "www" subdomain, but a naked domain like yourcompany.com doesn't include this subdomain.
What is a domain registrar?
A domain registrar is a company where you purchase and manage your website’s domain name (e.g., GoDaddy, Namecheap, or Google Domains). This is where you'll update the settings for your custom domain to connect it to Document360.
What is a CNAME record?
A CNAME (Canonical Name) record is a type of DNS setting (DNS, or Domain Name System, is like the internet’s address book, directing users to the right web server). The CNAME connects your custom domain (e.g., help.yourcompany.com) to another address, like the default domain provided by Document360. This ensures that when someone types your custom domain, they are taken to your Knowledge base site.
Why do I need to upgrade to the new load balancer?
It implements SSL offloading, reducing the load on servers and improving security by handling SSL encryption/decryption at the load balancer level.
It includes a web application firewall (WAF) for protection against common web attacks such as SQL injection and cross-site scripting.
It utilizes dynamic traffic management algorithms for optimal traffic distribution and improved performance.
We strongly recommend upgrading to this advanced solution for improved security and reliability.
Is it possible to create a separate domain for each version of my project?
No, it is not currently possible to assign separate domains to individual versions. When you create a new version, you can only customize the path within the existing domain.
Will changing the custom domain affect the widget or existing article links?
No, changing your Knowledge base domain will not affect the widget functionality.
The widget works using an API token, so it continues to function even after a domain change.
Article links in Document360 are usually relative (e.g.,
/docs/article-name), so they won’t break after the domain update.However, if you’ve used full URLs (e.g., https://yourproject.document360.io/docs/article-name), you should review and update them manually.
As a best practice, use relative links wherever possible to avoid issues when updating the domain.
Why am I seeing the Cloudflare Error 1014 – CNAME Cross-User Banned while setting up my custom domain?
This happens when both Document360 and your domain are hosted on Cloudflare. Cloudflare prevents CNAME records across different Cloudflare accounts.
To resolve this:
If you are on a paid Cloudflare account, check whether “Also prevent subdomains” (zone hold) is enabled. Temporarily uncheck it, wait for the domain to verify, then enable it again.
If you are on a free Cloudflare account, zone hold is disabled by default. In that case:
Ensure CNAME records are added and propagated quickly (within 7 days of generating records in Document360).
If verification fails, remove the custom domain from Document360 and reinitiate the configuration.
If issues persist, contact Cloudflare support, as it could be billing-related (e.g., expired card).
Does adding a custom domain change my Document360 portal link?
No. The portal URL (e.g., https://portal.us.aaa.document360.io/dashboard) remains the same. The custom domain applies only to the Knowledge base site, not the admin portal.
Can I customize the structure of my knowledge base URLs?
No, the URL structure in Document360 is fixed. While you can configure a custom domain or modify the article slug, core components such as project version, language, and system-defined paths (for example, /docs/) cannot be changed.
How can I get a cleaner or more user-friendly URL for my knowledge base?
The URL structure in Document360 follows a fixed format:
https://project-name/workspace-name/language-code/article-title
While the core structure cannot be changed, you can make your URL cleaner by:
Editing the default subdomain (e.g., changing liquidityhub-procedure-library.document360.io to orbian-knowledge-base.document360.io). To do so, navigate to Settings > Custom domain > Edit domain.
Configuring a custom domain (e.g., help.yourcompany.com) to fully replace the Document360 subdomain
Renaming the project to reflect a shorter, cleaner name, which also updates the default subdomain
Redirecting or removing the language code from the URL is not supported. Article-level redirection is available but cannot be used to change the URL format itself.
Why is Google Search Console verification not working for my knowledge base site?
Google Search Console verification is supported only for knowledge base sites configured with a custom domain. If your site is hosted on a Document360 subdomain (e.g., yoursite.document360.io), verification will not succeed regardless of the method used, including the HTML meta tag, Google Tag Manager, or Google Analytics approaches.
Document360 subdomains are shared under our platform's root domain. Verifying ownership of a subdomain in Google Search Console could create conflicts with Document360's own branding and SEO, which is why verification is intentionally restricted for subdomain-based sites.
To use Google Search Console with your knowledge base, configure a custom domain for your project first. Once your custom domain is set up, you can proceed with verification using any of the supported methods in Google Search Console.