Active Directory Federation Services (ADFS) is Microsoft's on-premises identity provider that enables federated identity and single sign-on across applications. With OpenID Connect SSO configured between ADFS and Document360, your users and readers can sign in to Document360 using their existing Active Directory credentials.
Only users with the Owner or Admin project role can configure SSO in Document360.
What you can do with ADFS as your IdP
| Capability | Supported |
|---|---|
| User (portal) authentication | Yes |
| Reader (knowledge base site) authentication | Yes |
| SCIM provisioning | Yes (via third-party tools or custom integrations only) |
| SSO configuration inheritance (parent-child projects) | Yes |
Before you begin
- You have administrative access to both Document360 and your ADFS server.
- You have Owner or Admin access in your Document360 project.
- Open Document360 and ADFS in two separate browser tabs before starting.
How to configure ADFS OpenID SSO in Document360
Step 1: Add the application in ADFS
- Log in to the ADFS Management console on your ADFS server.
- In the ADFS Management console, navigate to Relying Party Trusts.
- Right-click Relying Party Trusts and select Add Relying Party Trust.
- In the Add Relying Party Trust Wizard, choose Claims aware and click Start.
- Select Enter data about the relying party manually and click Next.
- Provide a display name (for example, "Document360 OpenID SSO") and click Next.
- In the Configure Certificate step, click Next (you can skip this if not using a certificate).
Step 2: Get the SP parameters from Document360
- Open Document360 in a separate tab.
- Navigate to Settings () > Users & permissions > SSO Configuration.
- Click Create SSO.
.png)
- Select ADFS as your identity provider to navigate to the Configure the Service Provider (SP) page automatically.
.png)
- On the Configure the Service Provider (SP) page, select the OpenID radio button.
- A set of parameters will be displayed.
.png)
Step 3: Enter the Document360 parameters in ADFS
- Switch to the ADFS Management console tab and enter the Document360 parameters into the corresponding fields in the Configure URL step using the mapping below.
| ADFS | Document360 |
|---|---|
| Relying Party Identifier | Subdomain name |
| Sign-On URL | Sign in redirect URL |
| Sign-Out URL | Sign out redirect URL |
- Click Next and complete the remaining steps in the wizard, such as setting up multi-factor authentication if required, and permitting all users to access the application.
- Review your settings and click Next to add the relying party trust.
- On the final screen, check the box for Open the Edit Claim Rules dialog and click Close.
Step 4: Add claim rules in ADFS
- In the Edit Claim Rules dialog, click Add Rule.
- Select Send LDAP Attributes as Claims as the rule template and click Next.
- Provide a name for the claim rule (for example, "Send LDAP Attributes").
- Configure the following:
- Attribute Store: Select Active Directory.
- Mapping:
- LDAP Attribute: User-Principal-Name | Outgoing Claim Type: Name ID
- LDAP Attribute: E-Mail-Addresses | Outgoing Claim Type: Email
- LDAP Attribute: Display-Name | Outgoing Claim Type: Name
- Click Finish to add the rule.
- Click Apply to save your changes and close the dialog.
Step 5: Configure the Identity Provider in Document360
- Return to Document360 on the Configure the Service Provider (SP) page and click Next to navigate to the Configure the Identity Provider (IdP) page.
- Enter the corresponding values from your ADFS configuration using the mapping below.
| ADFS | Document360 |
|---|---|
| Client Identifier (Client ID) | Client ID |
| Client Secret | Client Secret |
| Issuer URL | Authority (Authorization URL or Endpoint) |
Ensure that the Client ID in Document360 matches the Relying Party Identifier configured in ADFS.
- In the Scope (optional) field, type a scope value and click + to add it as a chip. This defines what user information or permissions Document360 requests from ADFS. You can add up to 3 scopes.
.png)
- Click Next to proceed to the SCIM provisioning page.
Step 6: Configure SCIM provisioning
SCIM provisioning allows you to automate user and reader lifecycle management between ADFS and Document360. Since ADFS does not natively support SCIM, this requires a third-party tool or a custom-built integration.
If you do not need SCIM provisioning, skip to Step 7: Configure SSO name and login options.
- Turn on the Enable SCIM provisioning toggle.
.png)
- A confirmation dialog appears. Review the terms, select the checkbox, and click Agree.
- The parameters required to complete the SCIM configuration will then be displayed.
SCIM provisioning in ADFS can be enabled using third-party tools or custom-built integrations only. ADFS does not natively support SCIM provisioning.
- Enter the required parameters from Document360 into the corresponding fields in your custom app.
.png)
- In the Default role field, the role is set to Contributor by default. You can change this from the dropdown if needed.
- In the User groups and Reader groups fields, select the groups you want to add. Multiple groups can be added, and they will inherit the default role you selected earlier.
- Click Next to navigate to the More settings page.
Step 7: Configure SSO name and login options
- In the SSO name field, enter a name for the SSO configuration.
- In Customize login button, enter the text for the login button displayed to users.
- Auto assign reader group: This option is only available for existing SSO configurations. For newly created SSO configurations, this toggle will not be displayed as SCIM automatically provisions users and groups.
- Toggle Sign out idle SSO user on or off based on your requirements.
- Choose whether to invite existing user and reader accounts to SSO.
.png)
- Click Create to complete the OpenID SSO configuration.
The SSO configuration using ADFS and the OpenID Connect protocol is now active in Document360.
Managing users in ADFS
To view readers added through your ADFS integration:
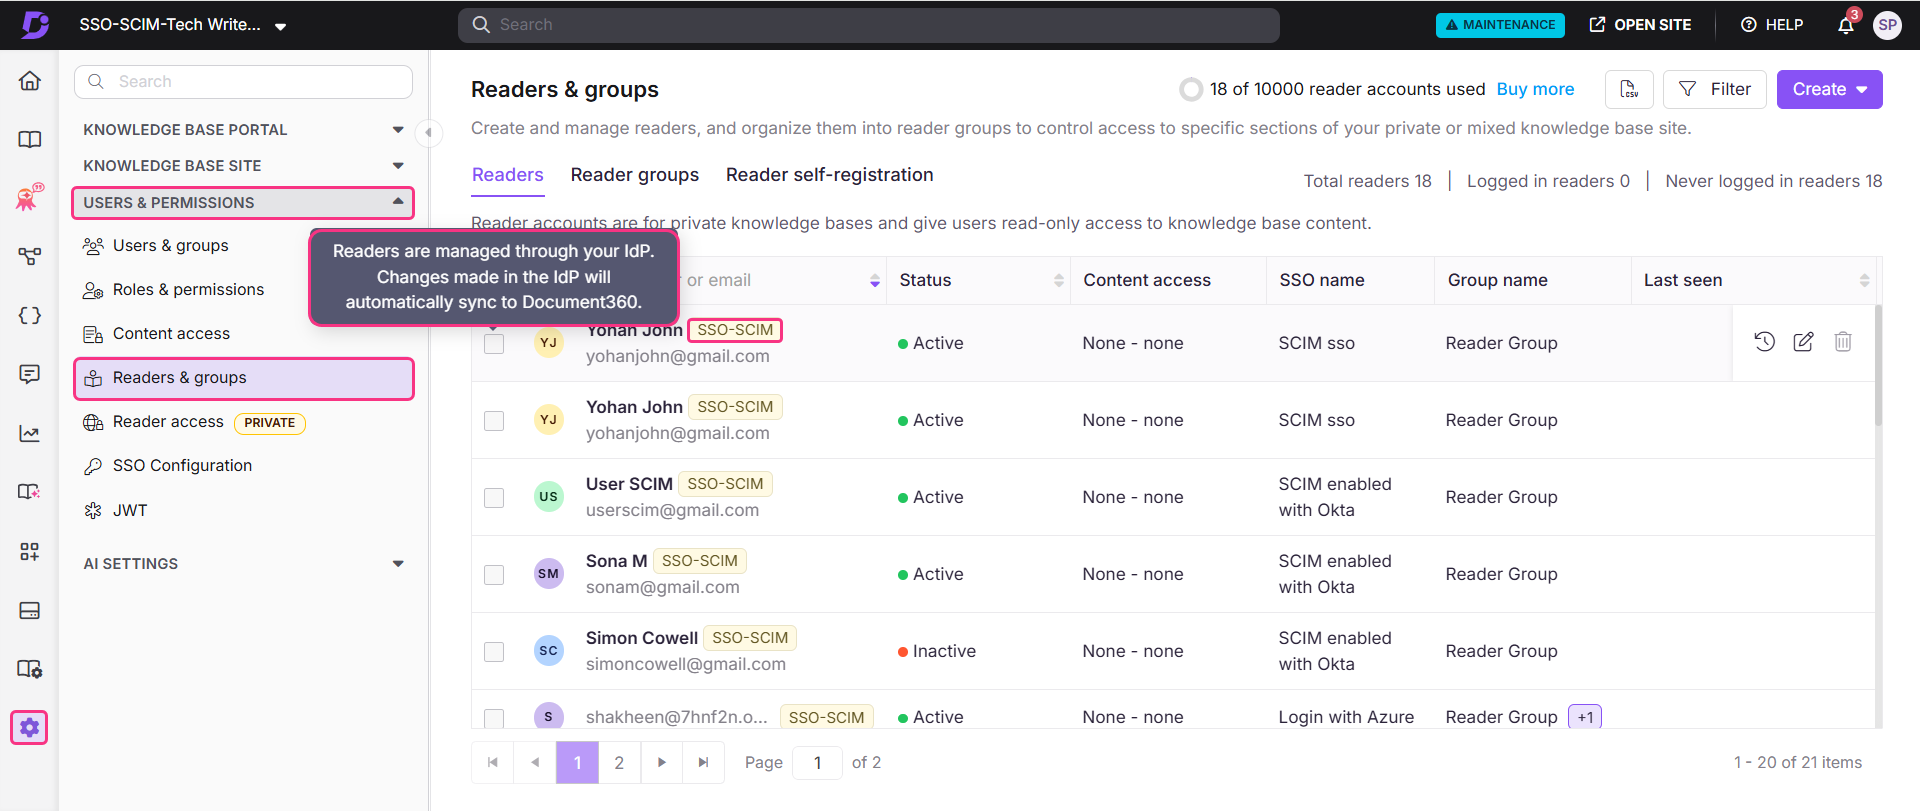
- In Document360, navigate to Settings () > Users & permissions > Readers & groups.
- Select the reader to navigate to their reader profile.
Readers provisioned via SCIM will display an SSO-SCIM badge next to their name.
When SCIM is enabled, editing a user's name or deleting a user directly in Document360 is disabled, as these actions must be managed through your IdP to keep both platforms in sync. You can only manage content access from Document360. Deleting a profile in your IdP does not remove it from Document360 — the profile will remain with an Inactive status.
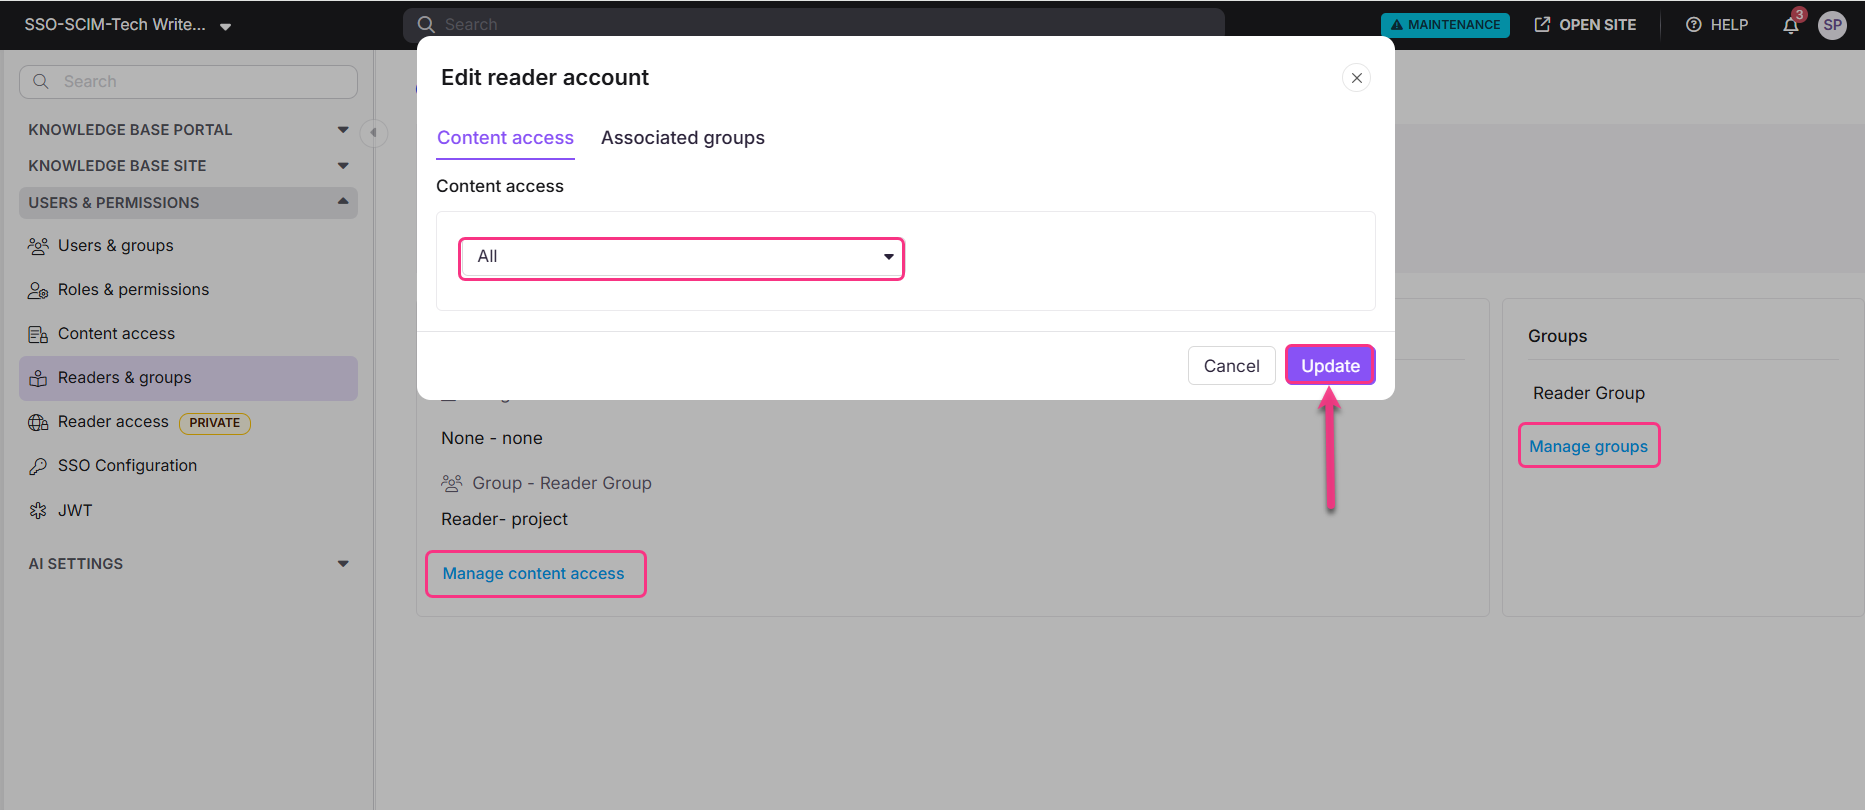
Manage content access of readers, users, and groups
The default content role assigned to any new user, reader, or group is based on what was configured during SCIM provisioning setup. Permissions will be set to None by default but can be updated at any time.
- Select the desired reader and click Manage Content Access.
- Choose the desired access level from the dropdown and click Update.
Best practices
- Verify the Client ID matches the Relying Party Identifier. The Client ID entered in Document360 must exactly match the Relying Party Identifier configured in ADFS. A mismatch will cause authentication failures.
- Use the correct outgoing claim type for email. For OpenID Connect ADFS, the outgoing claim type for email is Email, not Email-Addresses as used in the SAML configuration. Using the wrong claim type will cause user identity errors.
- Use a third-party tool for SCIM. ADFS does not natively support SCIM provisioning. Plan your user provisioning approach before enabling SCIM in Document360.
- Rotate client secrets before expiry. The client secret configured in ADFS has an expiry date. When it expires, SSO authentication will fail. Monitor expiry and rotate secrets in advance.
FAQ
Why is SCIM not natively supported in ADFS?
ADFS is an on-premises federation service built on SAML and WS-Federation protocols. It does not include a built-in SCIM endpoint. To use SCIM with ADFS in Document360, you need a third-party provisioning tool or a custom integration that bridges ADFS with the SCIM protocol.
What happens to a user's profile in Document360 if I delete them in ADFS?
Deleting a user profile in your IdP does not remove it from Document360. The profile will remain in Document360 with an Inactive status.
How is the ADFS OpenID claim rule mapping different from the SAML claim rule mapping?
The claim rule mapping for OpenID Connect ADFS uses Email as the outgoing claim type for email addresses, while the SAML configuration uses Email-Addresses. Ensure you use the correct claim type for whichever protocol you are configuring.