Document360 supports OpenID Connect SSO with any Identity Provider (IdP) that supports the OpenID Connect protocol, even if it is not listed explicitly in Document360's IdP options. This article walks you through configuring SSO between Document360 and a custom or unlisted Identity Provider using OpenID Connect.
Only users with the Owner or Admin project role can configure SSO in Document360.
Before you begin
- You have administrative access to both Document360 and your Identity Provider.
- You have Owner or Admin access in your Document360 project.
- Open Document360 and your Identity Provider in two separate browser tabs before starting.
How to configure OpenID SSO with other providers in Document360
Step 1: Add a new application in your IdP
- Log in to your Identity Provider's admin console.
- Navigate to the section where you can create or manage applications (often labelled Applications, Enterprise Applications, or similar).
- Select the option to create a new application.
- Configure the basic settings:
- Application Name: Enter a name, for example "Document360 OpenID SSO".
- Application Type: Select OpenID Connect as the sign-in method.
- Save your application settings.
Step 2: Get the SP parameters from Document360
- Open Document360 in a separate tab.
- Navigate to Settings () > Users & permissions > SSO Configuration.
- Click Create SSO.
.png)
- Select Others as your Identity Provider on the Choose your Identity Provider (IdP) page to navigate to the Configure the Service Provider (SP) page.
.png)
- Choose OpenID as the protocol on the Configure the Service Provider (SP) page.
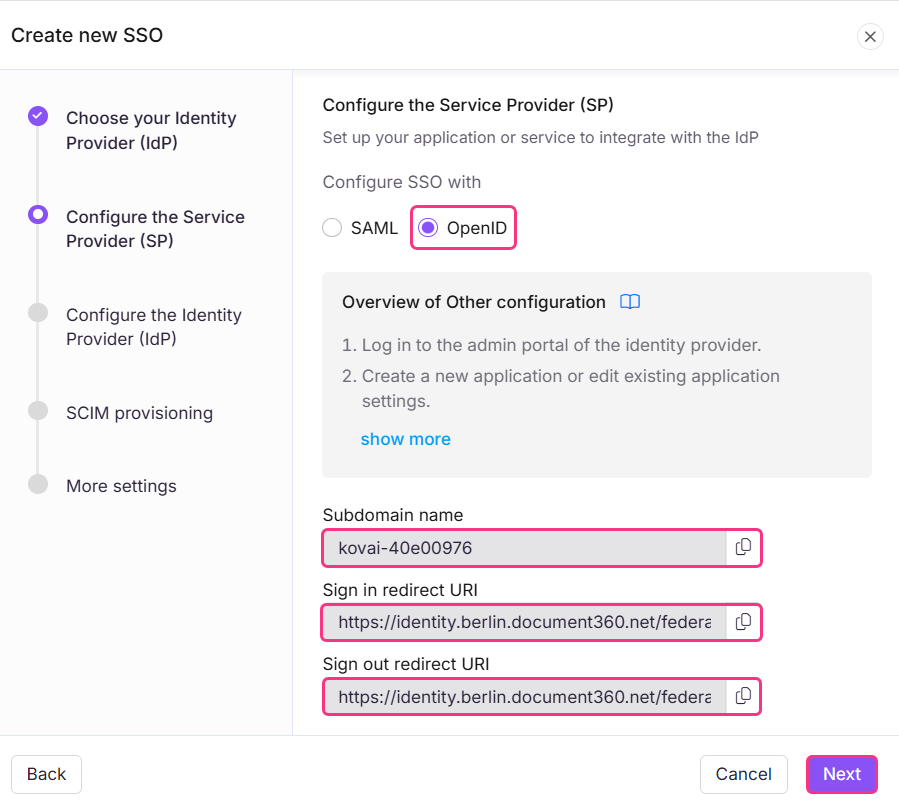
Step 3: Enter the Document360 parameters in your IdP
In your Identity Provider's OpenID configuration, enter the Document360 parameters using the mapping below.
| Your IdP | Document360 |
|---|---|
| Subdomain name | Subdomain name |
| Redirect URL (sign-in) | Sign in redirect URL |
| Redirect URL (sign-out) | Sign out redirect URL |
Step 4: Configure scopes and claims in your IdP
Ensure the following scopes are included in your IdP configuration.
| Scope | Description |
|---|---|
| openid | Required for OpenID authentication |
| Access to the user's email | |
| profile | Access to the user's basic profile information |
Map the following claims in your Identity Provider.
| Claim | Value |
|---|---|
| sub | User ID or identifier |
| user.email | |
| name | user.name |
Review your settings and save the configuration.
Step 5: Configure the Identity Provider in Document360
- Return to Document360 on the Configure the Service Provider (SP) page and click Next to navigate to the Configure the Identity Provider (IdP) page.
.png)
- Enter the corresponding values from your Identity Provider using the mapping below.
| Document360 | Identity Provider |
|---|---|
| Client ID | Client ID |
| Client Secret | Client Secret |
| Authority | Authorization URL or Endpoint |
- Upload the necessary certificates or keys if required by your IdP.
- In the Scope (optional) field, type a scope value and click + to add it as a chip. This defines what user information or permissions Document360 requests from your Identity Provider. You can add up to 3 scopes.
- Click Next to proceed to the SCIM provisioning page.
Step 6: Configure SCIM provisioning
SCIM provisioning automates user and reader lifecycle management between your Identity Provider and Document360. This is available if your IdP supports SCIM.
If you do not need SCIM provisioning, skip to Step 7: Configure SSO name and login options.
- Turn on the Enable SCIM provisioning toggle.
.png)
- A confirmation dialog appears. Review the terms, select the checkbox, and click Agree.
- A set of parameters will be displayed. Use these to enable SCIM provisioning in your IdP.
.png)
- Turn on the Enable group sync toggle if needed. This automatically assigns users and readers based on your IdP group mappings.
- In the Default role field, the role is set to Contributor by default. You can change this from the dropdown if needed.
- In the User groups and Reader groups fields, select the groups you want to add. Multiple groups can be added, and they will inherit the default role you selected earlier.
- Click Next to navigate to the More settings page.
Step 7: Configure SSO name and login options
- In the SSO name field, enter a name for the SSO configuration.
- In Customize login button, enter the text for the login button displayed to users.
- Auto assign reader group: This option is only available for existing SSO configurations. For newly created SSO configurations, this toggle will not be displayed as SCIM automatically provisions users and groups.
- Toggle Sign out idle SSO user on or off based on your requirements.
- Choose whether to invite existing user and reader accounts to SSO.
.png)
- Click Create to complete the OpenID SSO configuration.
The SSO configuration is now active in Document360 using your selected Identity Provider.
Managing users in your IdP
To view readers added through your IdP integration:
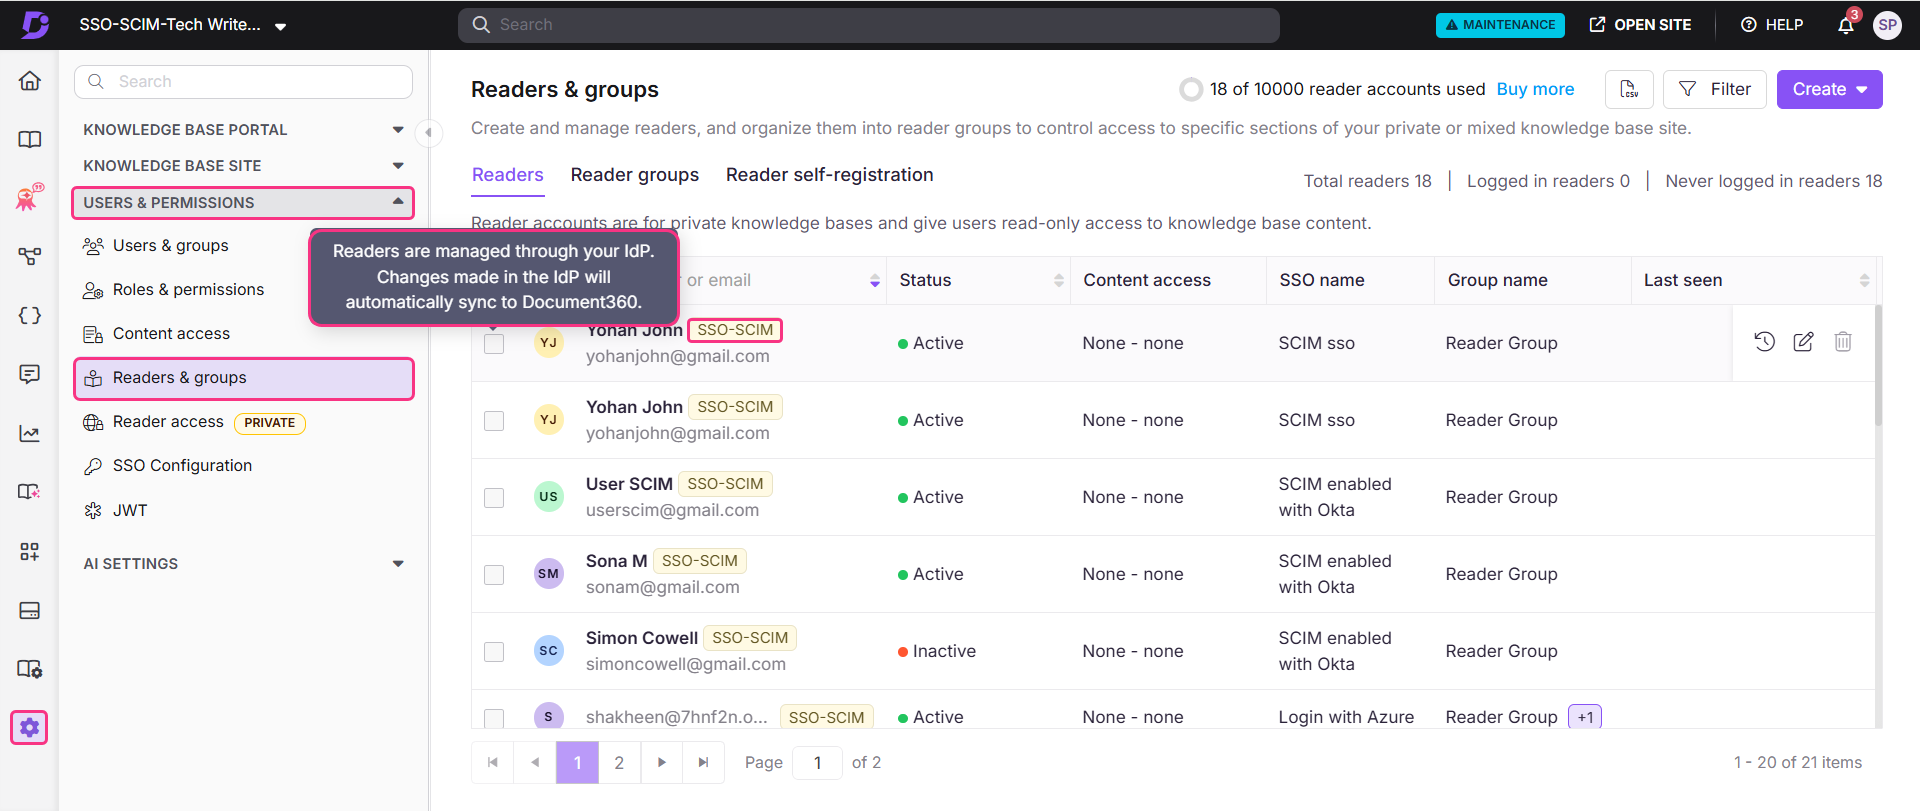
- In Document360, navigate to Settings () > Users & permissions > Readers & groups.
- Select the reader to navigate to their reader profile.
Readers provisioned via SCIM will display an SSO-SCIM badge next to their name.
When SCIM is enabled, editing a user's name or deleting a user directly in Document360 is disabled, as these actions must be managed through your IdP to keep both platforms in sync. You can only manage content access from Document360. Deleting a profile in your IdP does not remove it from Document360, the profile will remain with an Inactive status.
Manage content access of readers, users, and groups
The default content role assigned to any new user, reader, or group is based on what was configured during SCIM provisioning setup. Permissions will be set to None by default but can be updated at any time.
- Select the desired reader and click Manage Content Access.
- Choose the desired access level from the dropdown and click Update.
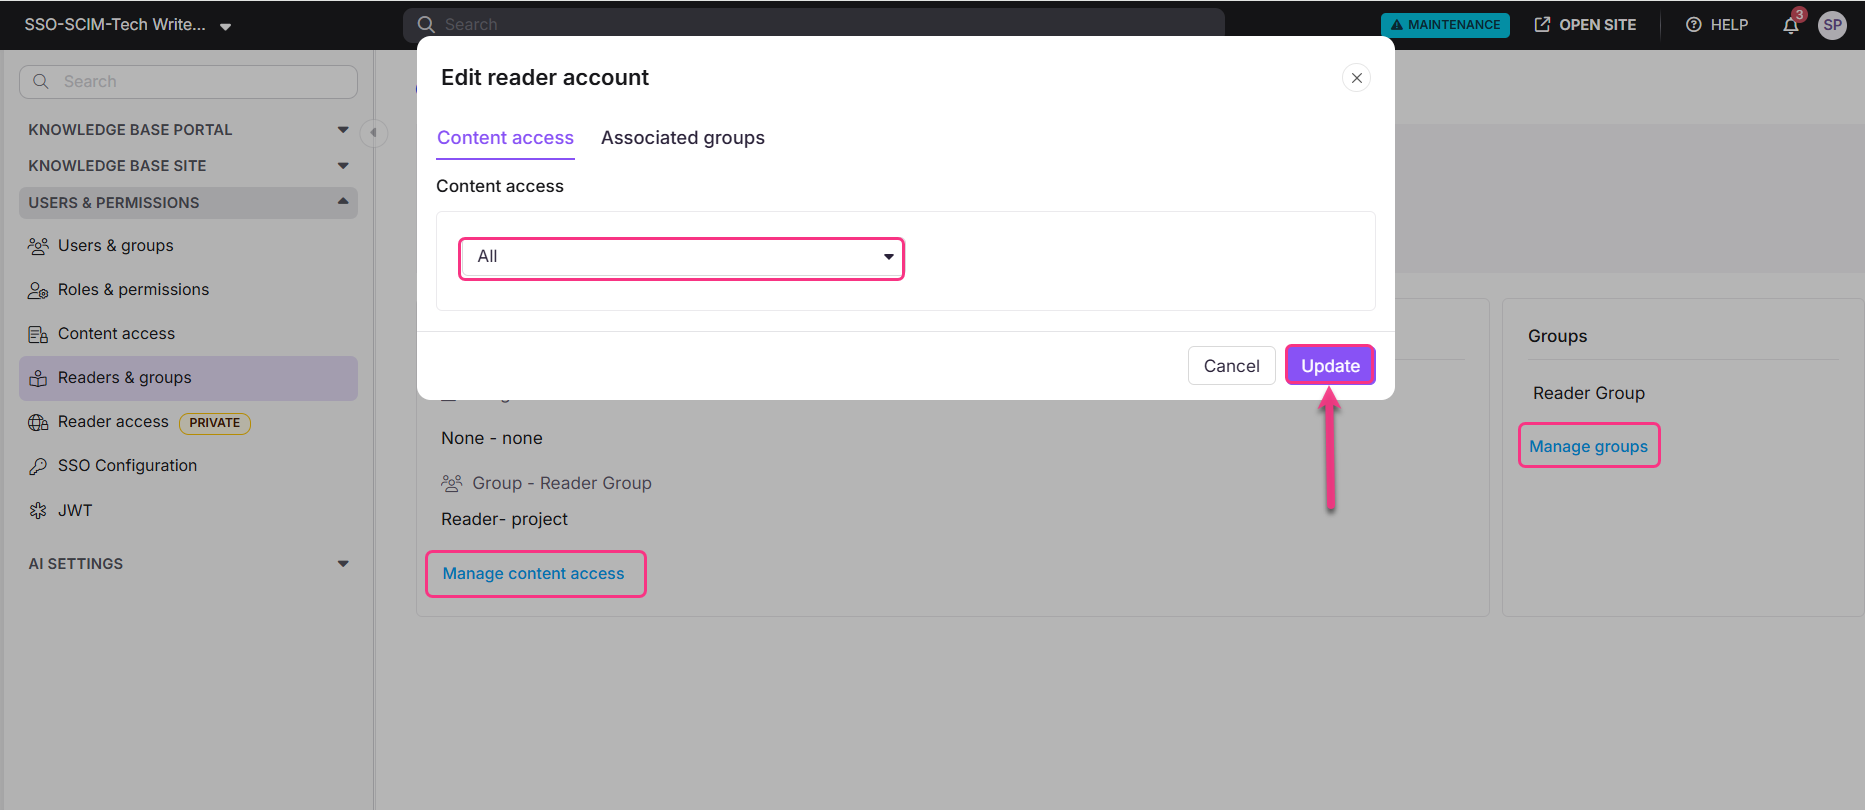
You can also manage groups for a reader by clicking Manage groups under the Reader Group section.