Auth0 is a cloud-based Identity Provider (IdP) that lets your users and readers sign in to Document360 using their existing Auth0 credentials via the OpenID Connect protocol. Instead of managing separate passwords for Document360, users authenticate through Auth0, giving your organization centralized access control and a consistent login experience.
Only users with the Owner or Admin project role can configure SSO in Document360.
What you can do with Auth0 as your IdP
| Capability | Supported |
|---|---|
| User (portal) authentication | Yes |
| Reader (knowledge base site) authentication | Yes |
| SCIM provisioning | No |
| SSO configuration inheritance (parent-child projects) | Yes |
Before you begin
- You have an active Auth0 account. If you need to create one, sign up at auth0.com/signup.
- You have Owner or Admin access in your Document360 project.
- Open Document360 and Auth0 in two separate browser tabs before starting.
How to configure Auth0 OpenID SSO in Document360
Step 1: Create an application in Auth0
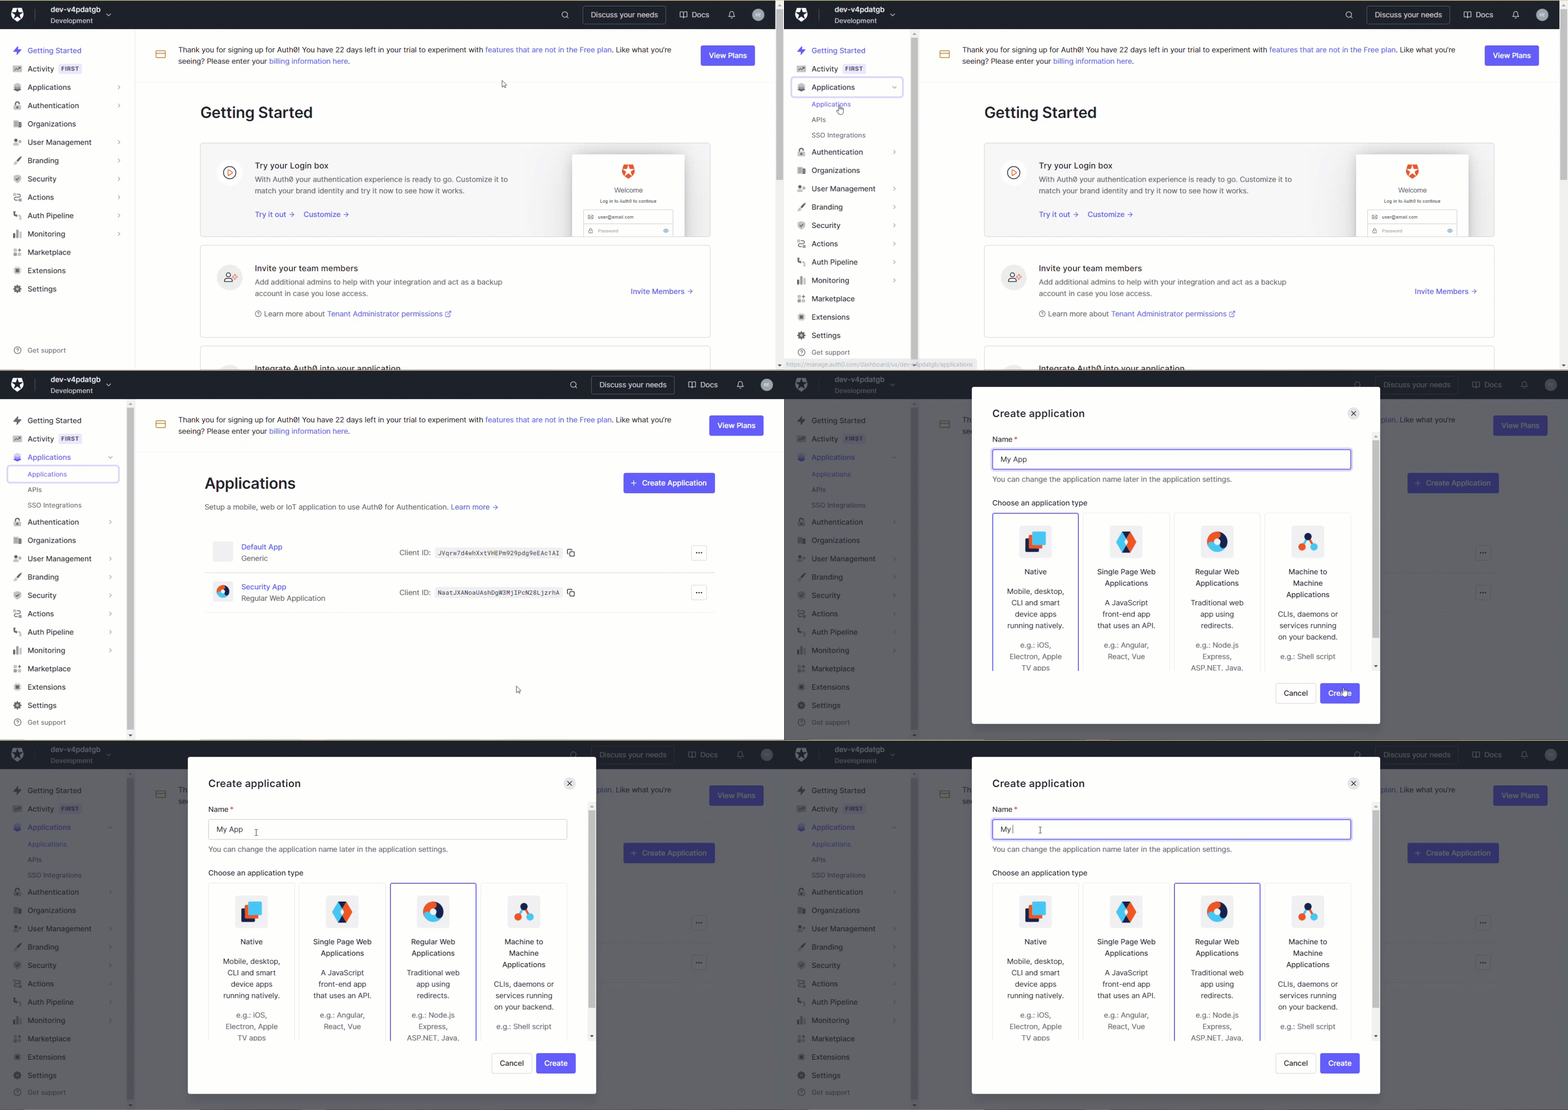
- Log in to your Auth0 account. After logging in, find the Applications menu in the left navigation.
- Click Applications > Create Application.
- Enter a name for your application and choose Regular Web Applications as the application type.
- Click Create.
Step 2: Get the SP parameters from Document360
- Open Document360 in a separate tab.
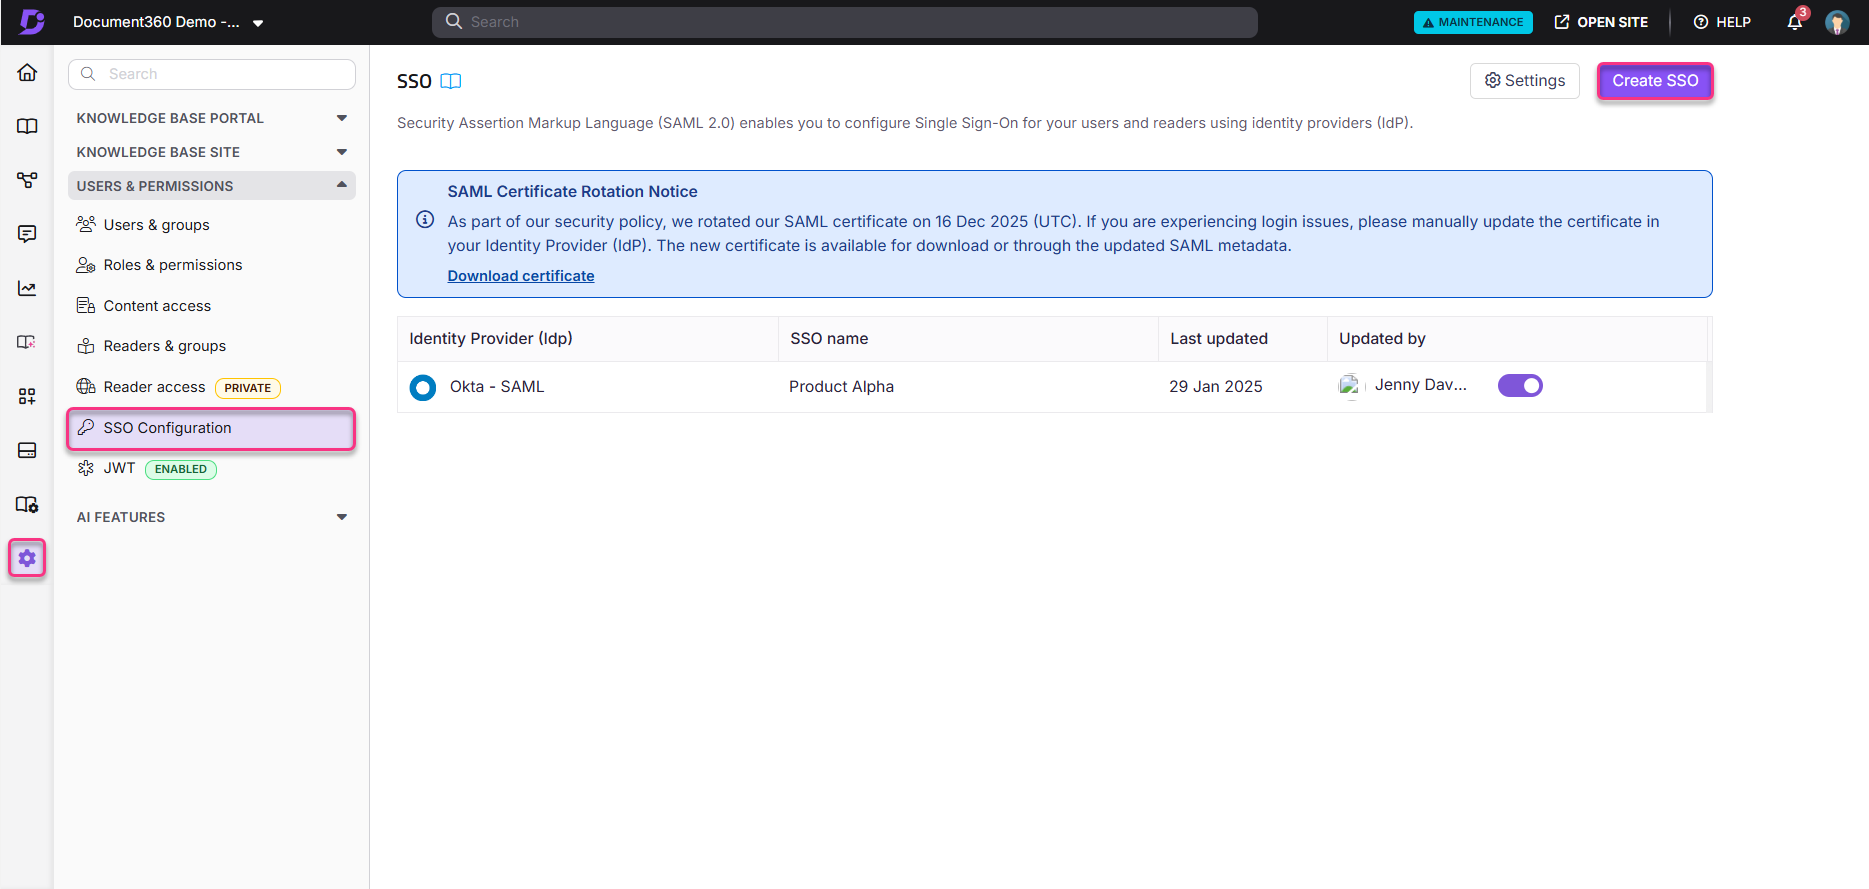
- Navigate to Settings () > Users & permissions > SSO Configuration.
- Click Create SSO.
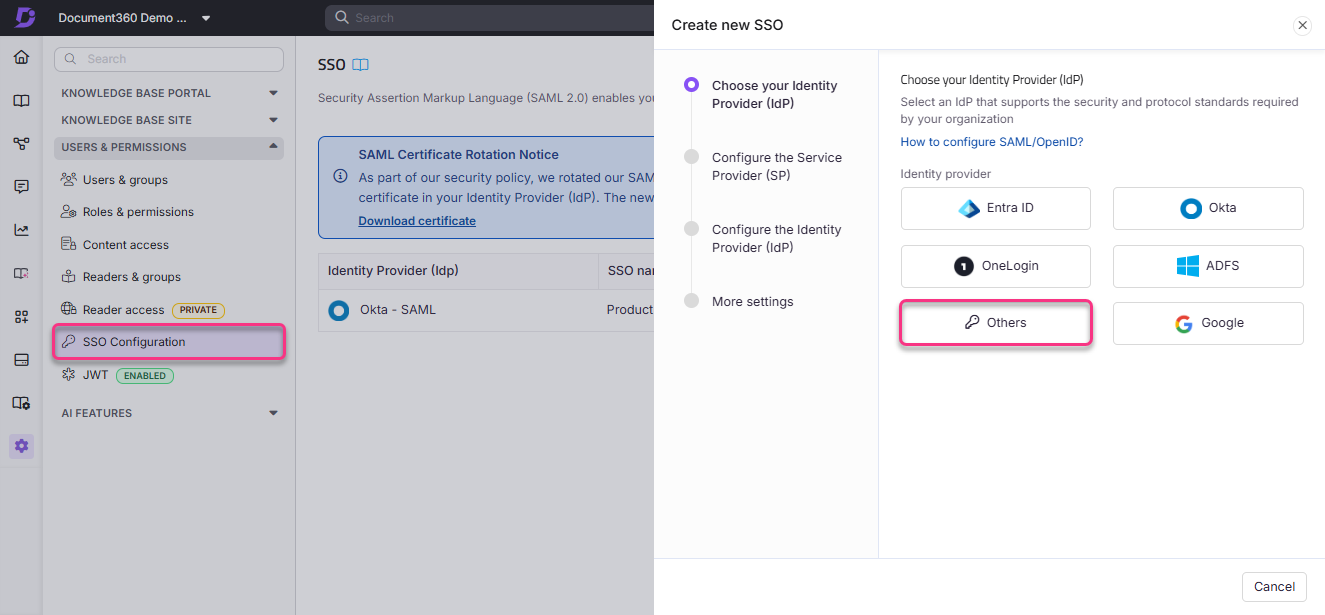
- Select Others as your Identity Provider on the Choose your Identity Provider (IdP) page.
- Choose OpenID as the protocol on the Configure the Service Provider (SP) page.
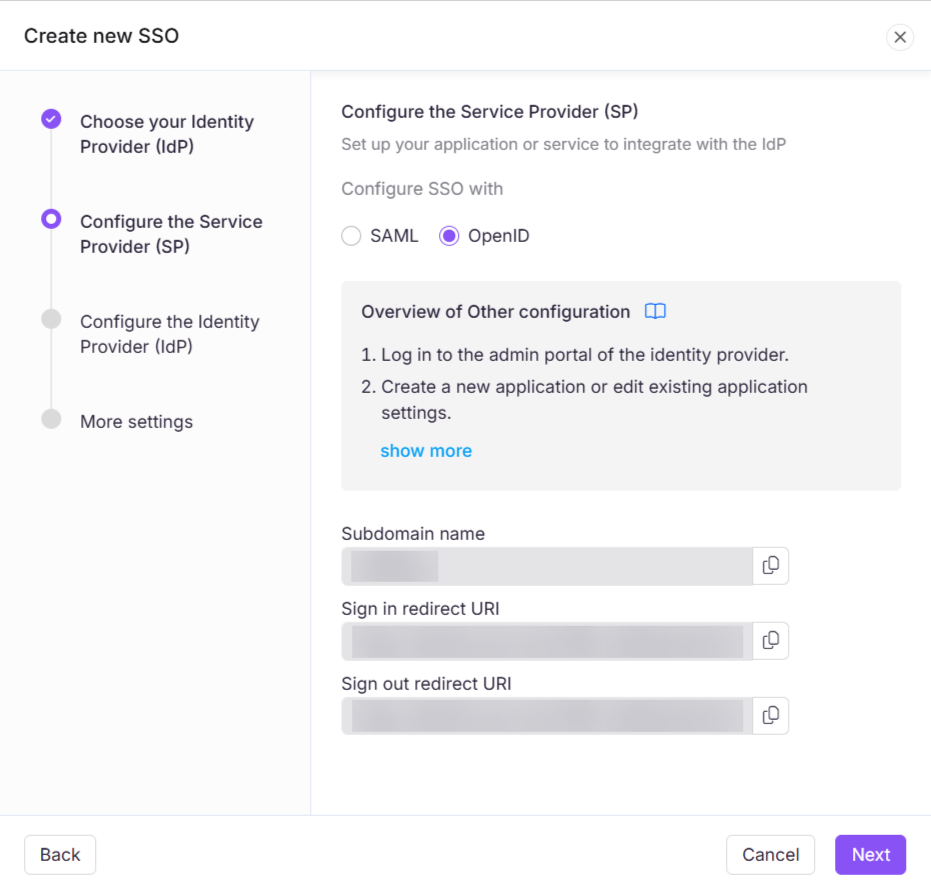
This page displays the parameters you need to configure in Auth0.
Step 3: Enter the Document360 parameters in Auth0
In your Auth0 application settings, enter the Document360 parameters using the mapping below.
| Document360 | Auth0 |
|---|---|
| Sign-in redirect URI | Application Login URI and Allowed Callback URLs |
| Sign-out redirect URI | Allowed Logout URLs |
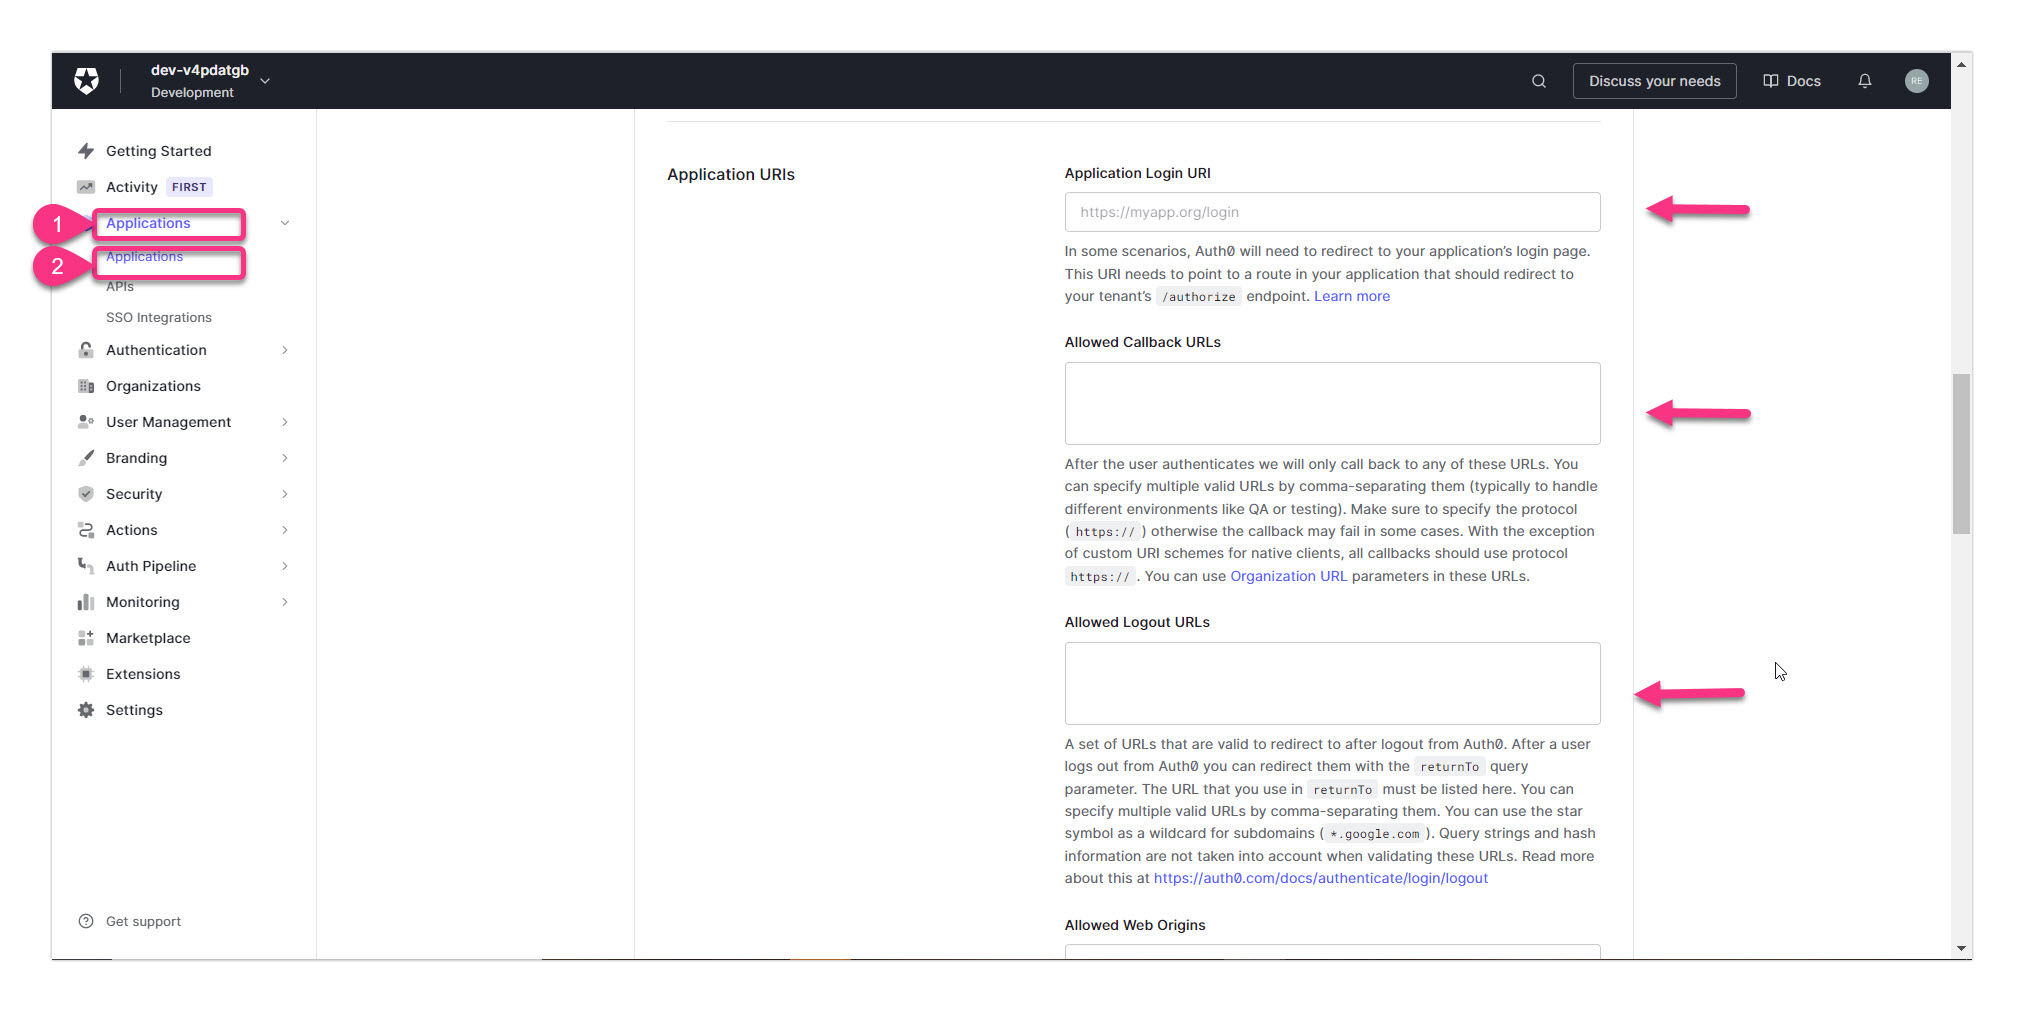
Once you have entered all the required fields, click Save changes at the bottom of the page.
Step 4: Configure the Identity Provider in Document360
- Return to Document360 on the Configure the Service Provider (SP) page and click Next to navigate to the Configure the Identity Provider (IdP) page.
.png)
- Enter the corresponding values from your Auth0 application using the mapping below.
| Document360 | Auth0 |
|---|---|
| Client ID | Client ID |
| Client Secret | Client Secret |
| Authority | Domain |
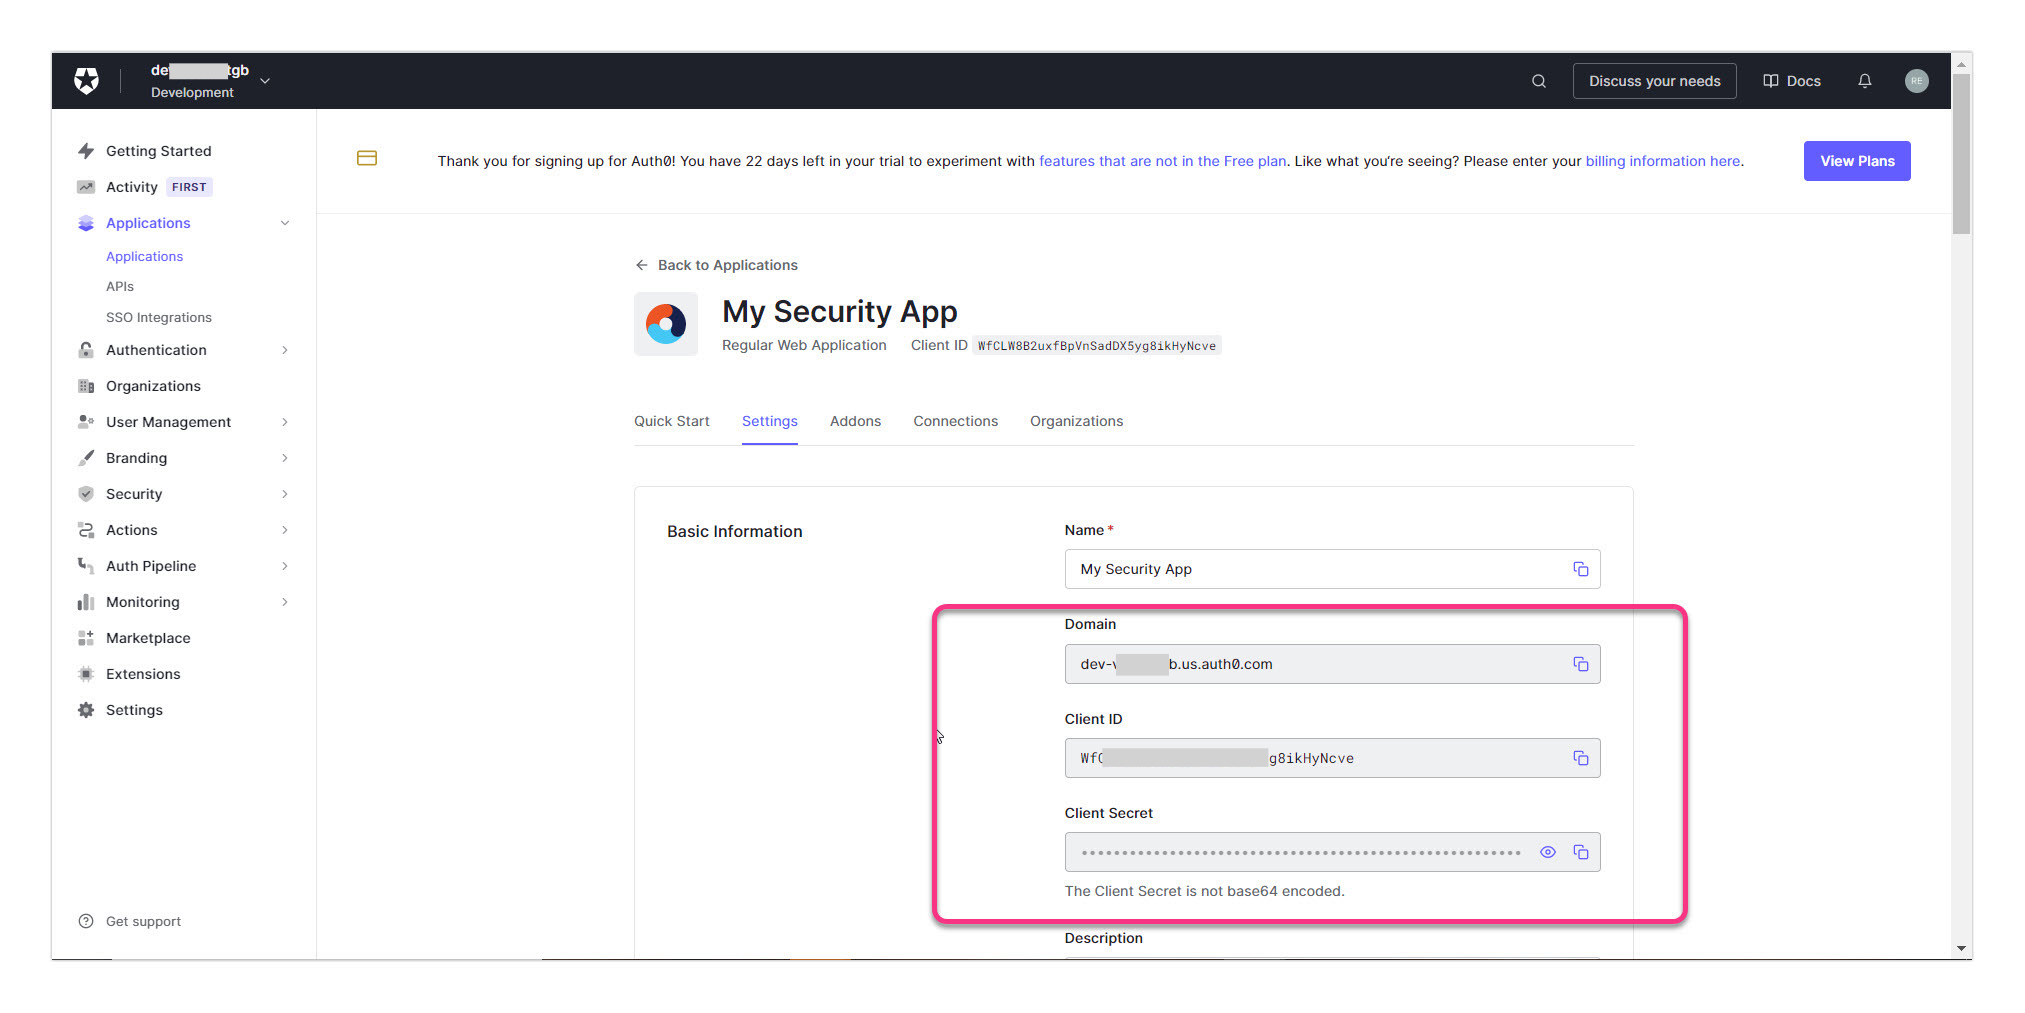
- In the Scope (optional) field, type a scope value and click + to add it as a chip. This defines what user information or permissions Document360 requests from Auth0. You can add up to 3 scopes.
- Click Next to proceed to the More settings page.
Step 5: Configure SSO name and login options
- In the SSO name field, enter a name for the SSO configuration.
- In Customize login button, enter the text for the login button displayed to users.
- Toggle Auto assign reader group on or off as needed. For newly created SSO configurations, this toggle will not be displayed as SCIM automatically provisions users and groups. Learn more about Auto assign reader group.
- Toggle Sign out idle SSO user on or off based on your requirements.
- Choose whether to invite existing user and reader accounts to SSO.
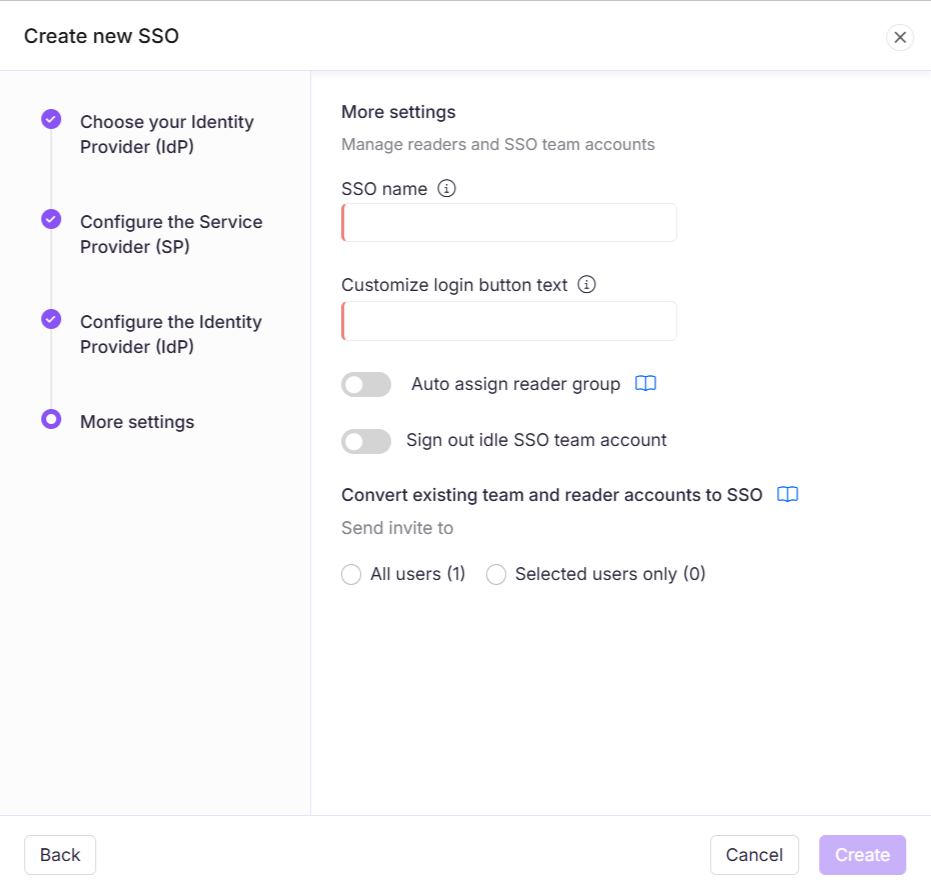
- Click Create to complete the OpenID SSO configuration.
The SSO configuration using Auth0 and the OpenID Connect protocol is now active in Document360.
Best practices
- Use the Domain value for Authority. Auth0 provides a Domain field in your application settings. This maps to the Authority field in Document360, not an Issuer URI or full URL.
- Paste the Sign-in redirect URI in both fields. The Sign-in redirect URI from Document360 must be entered in both Application Login URI and Allowed Callback URLs in Auth0. Missing either field will cause authentication failures.
- Test with a single user first. Before rolling out SSO to all users, verify the configuration with one test account to confirm that the Client ID, Client Secret, Domain, and redirect URIs are all set correctly.
FAQ
Why do I select "Others" instead of "Auth0" as the Identity Provider in Document360?
Auth0 is not listed as a dedicated IdP option in Document360's SSO configuration. It is configured using the Others option, which supports any OpenID Connect-compatible Identity Provider. The configuration steps and parameter mapping are specific to Auth0.
Where do I find the Client ID, Client Secret, and Domain in Auth0?
In Auth0, navigate to Applications and select your application. The Client ID, Client Secret, and Domain are all available on the application's Settings tab under Basic Information.
Does Auth0 support SCIM provisioning with Document360?
No. SCIM provisioning is not supported when Auth0 is configured as the Identity Provider in Document360. User and reader management must be handled manually in Document360.