Plans supporting this feature:Enterprise
Using the Export option in Documentation, you can export and download the contents of your project as a ZIP file or a WebHelp file and access your documentation offline without an internet connection. The exported project ZIP file can be easily imported into another project in Document360.
The offline documentation feature in Document360 allows users to export their project as WebHelp files, providing an offline, self-contained help system. These files offer better navigation compared to PDFs and can be used as help documentation for software accessed without an internet connection.
This functionality enables users to generate and distribute offline help files ensuring accessibility in environments where internet access is limited or unavailable as well as host your documentation on your own web server providing reliable access to documentation at all times. This will provide you with a fully functional offline version of your documentation site, complete with a structured table of contents, media support, intuitive navigation, and built-in search capabilities.
To export your documentation as a WebHelp file, follow the steps below:
In the left navigation bar, navigate to Content tools > Import and export project, and select Import & export project.
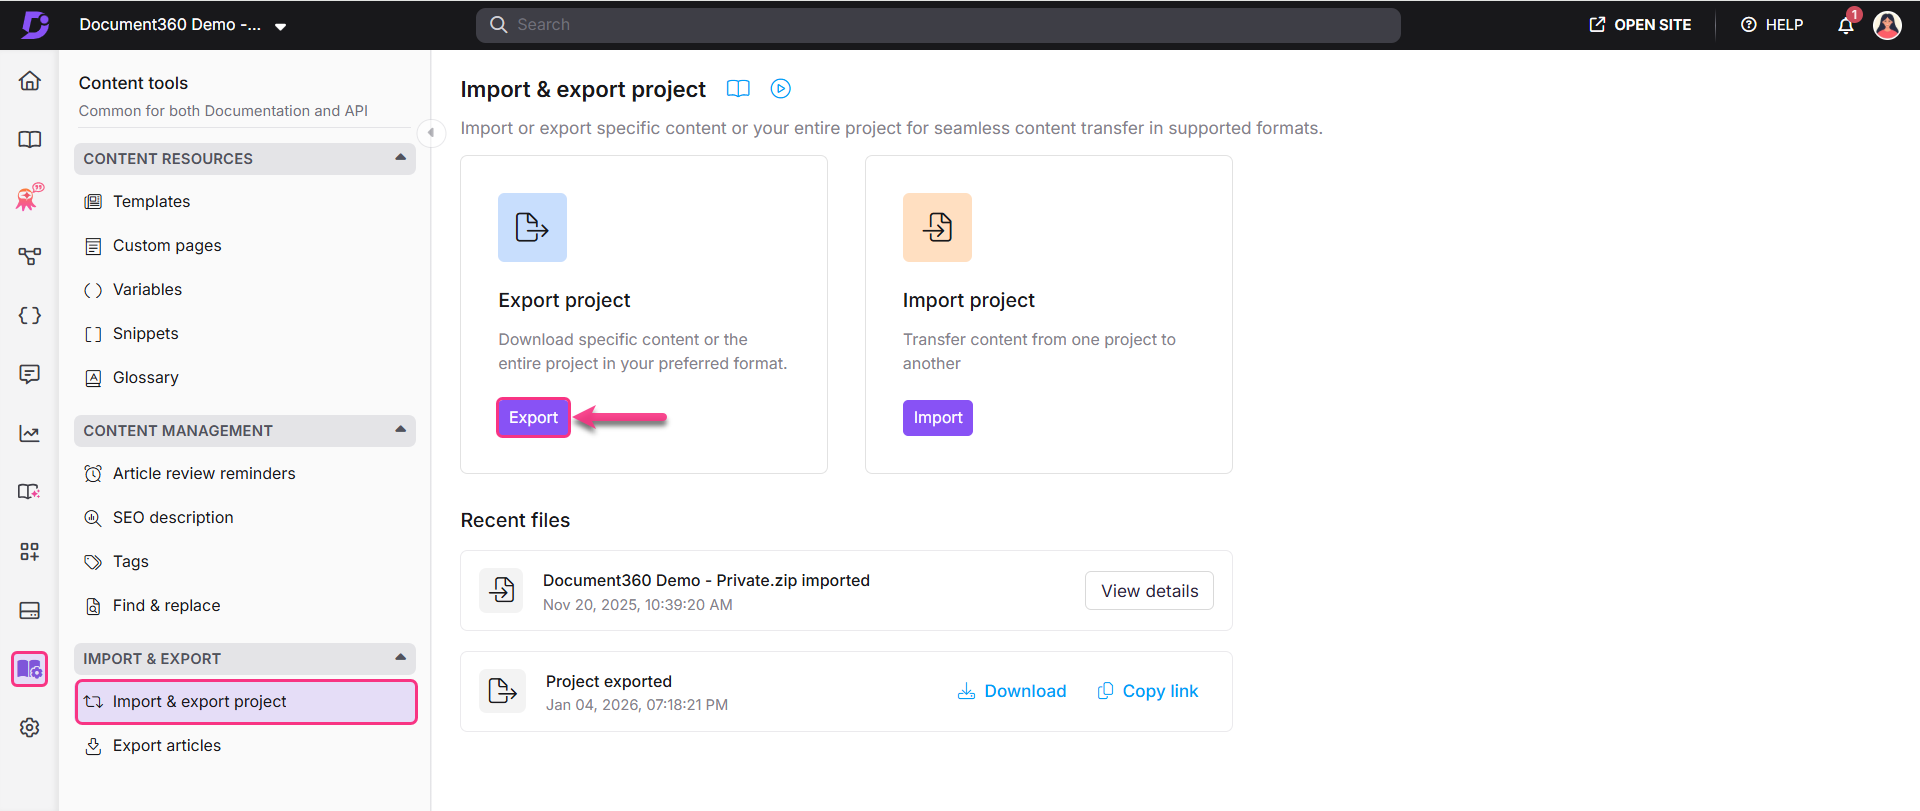
Click Export and the Export project dialog will appear.
From the Format dropdown, select HTML (Offline Documentation).
In the Select categories search bar, search for the category you want to export and select it. The search applies across all workspaces, languages, and categories.

NOTE
The Include new or modified articles in option is not available for the HTML (Offline Documentation) format.
Selecting and deselecting categories
When exporting your project, you can choose exactly what to include by selecting specific workspaces, categories, or sub-categories. Below are the different ways you can manage your selections.
Select Workspace
To select the entire workspace,
Select the checkbox next to the workspace, language, or category you wish to export. Selecting the checkbox automatically selects all its included languages and categories.
Click the arrow to expand and view all included languages and categories.
Respectively, to unselect all selections, unselect the checkbox next to the workspace. This will clear all the languages, categories, and sub-categories selected under it.
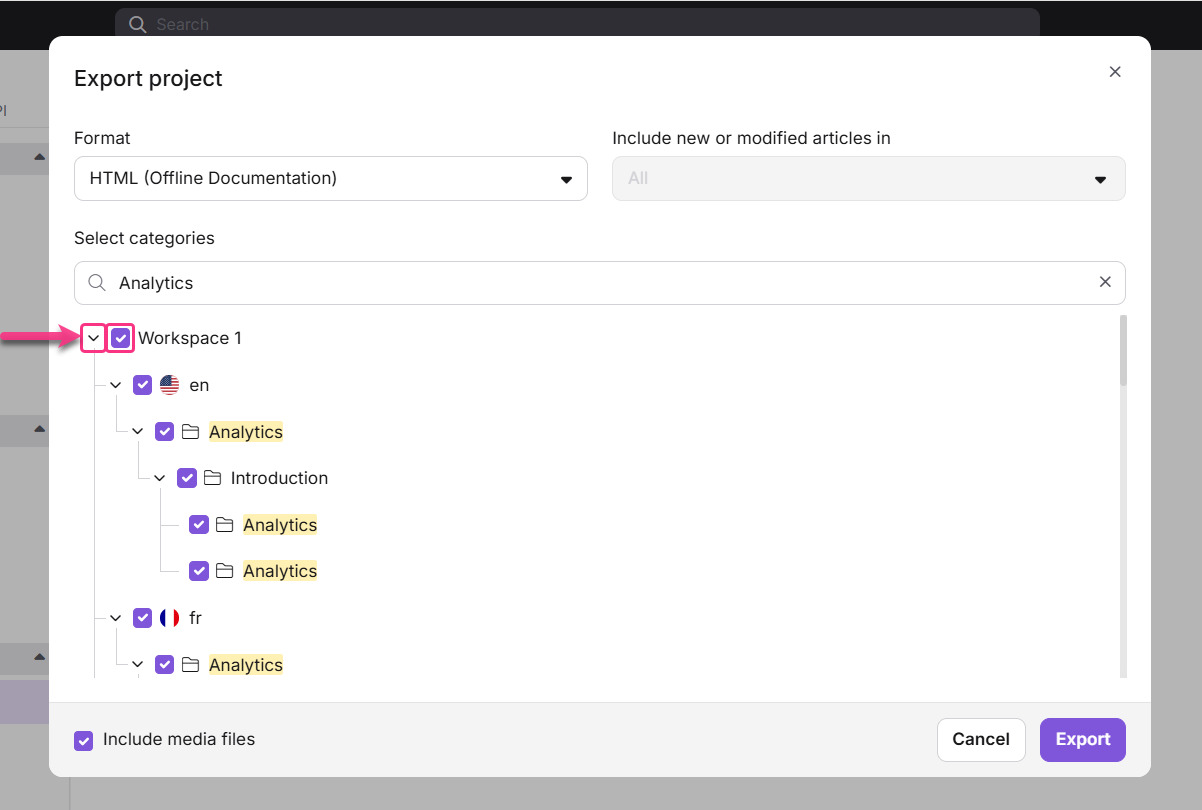
Select a specific category with its subcategories
To select a category and all its sub-categories,
Click the arrow next to the category to expand it.
Select the checkbox next to the category you want to export. All sub-categories inside it will be selected automatically.
.png)
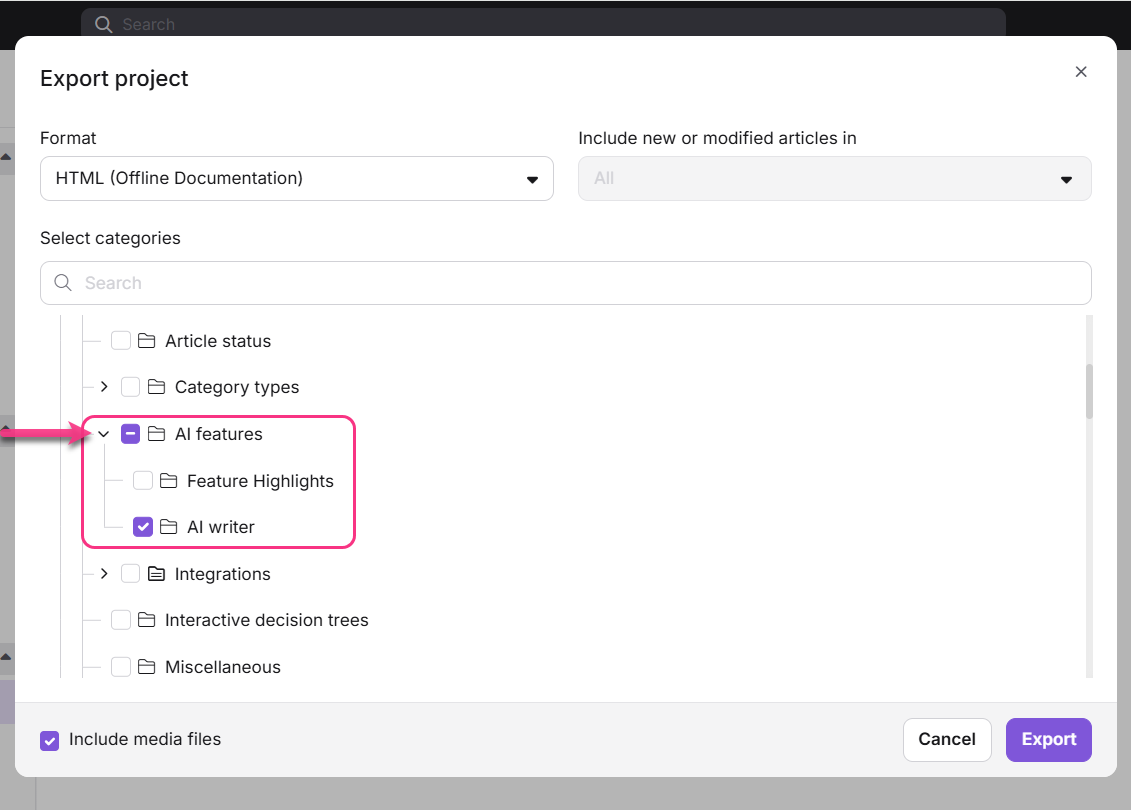
Select only a sub-category
To select only a sub-category without selecting its main category’s articles.
Click the arrow to expand the main category and view its sub-categories.
Select the checkbox next to the sub-category you want to export. Only that sub-category and its articles will be selected.
.png)
To unselect a specific sub-category while keeping others selected, select the checkbox next to the sub-category you want to remove. The sub-category will be deselected.
NOTE
The main category checkbox will appear in an indeterminate state (partially filled) to indicate that only some of its contents are selected.
Select only a category without its subcategories
To select only a category and not its subcategories,
If you want only the category to be selected, hover over the category and click Select this category.
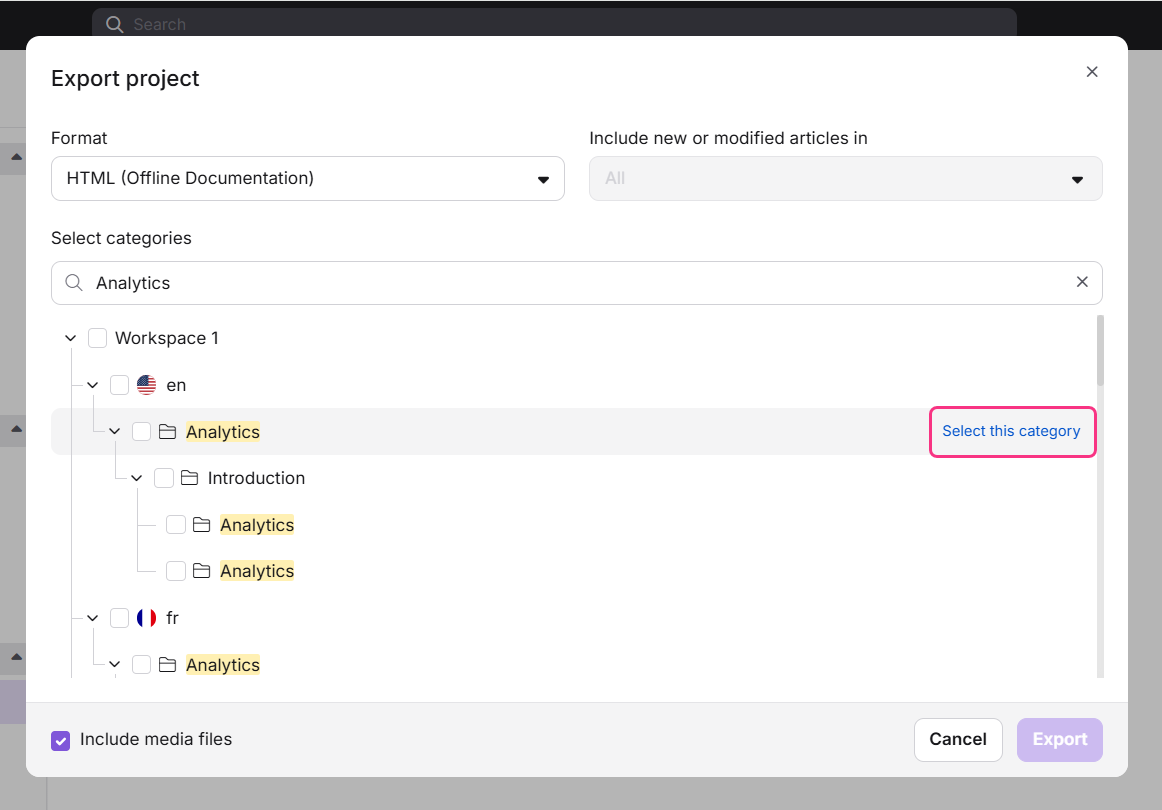
Only the category and its respective articles will be selected, and not its subcategories.
Unselect only a main category's articles
To exclude a sub-category without affecting the others,
Hover over the main category and click Unselect this category. Only the articles directly inside the main category will be removed.
.png)
The sub-categories under it will remain selected, and the main category checkbox will appear partially filled to reflect this.
.png)
Unselect only a sub-category's articles
To exclude a sub-category while keeping other sub-categories included,
Hover over the category and click Unselect this category. Only the articles directly inside that category will be removed from the selection.
.png)
Any sub-categories under it remain selected, and the category checkbox becomes indeterminate to show that some content is still included.
NOTE
This only removes articles at the category level you selected. Everything inside the sub-categories remains included.
Export Project
Once you have selected desired categories,
Select the Include media files checkbox to include related media files in the exported ZIP file.
Click Export to begin exporting the project contents.
.png)
The export process is initiated, and you will get a notification at the top-right when the export is complete and ready for download. You can navigate to other modules while the export is in progress.
Your downloaded WebHelp file will include an index file to open the exported knowledge base in your browser or any embedded browser engine.
You can search within your knowledge base, switch between workspaces and languages, and access all the exported articles and categories, including media assets and internal links attached.
The following elements will not be included in the offline documentation:
Navigation to the previous and next articles
Table of contents within each article
Inline comments
Glossary definitions
Breadcrumbs (article navigation path)
Attachments if any
NOTE
In WebHelp, embedded videos from platforms like YouTube/Vimeo, and external hyperlinks will be supported only when your system has internet connectivity.
Downloading the ZIP file
To download the exported Document360 project ZIP file,
Hover on Content tools in the left navigation bar.
In the sub-menu, navigate to Import & export > Import and export project.
The latest exported file will be available under Recent files (The date and time of export will be available in the file).
Click Download to save the file in your local storage. Alternatively, click Copy link to generate a downloadable link for the export file.
.png)
NOTE
Once you perform a new export operation, the previously exported ZIP available for download is overwritten.
Accessing the offline knowledge base
After the export process is complete, the documentation is downloaded as a ZIP file.
Extract the downloaded ZIP file to a local folder on your computer.
From the extracted folder, open the index.html file in a web browser to view the exported documentation offline.
This opens the offline version of your knowledge base with full navigation and structure. You can browse articles, switch between workspaces and languages, and use the built-in search without an internet connection.