The Export feature in Document360 lets you download your entire project — or selected categories — as a ZIP file containing your articles in JSON, Markdown, or HTML format. You can use the exported file to access your documentation offline, migrate content to another project, or send articles to an external translation service for localization.
When to use the export feature
- Offline access — Download your documentation to review or share it without an internet connection.
- Project migration — Export content from one Document360 project and import it into another.
- External translation — Export a specific language, translate the files offline, and re-import the translated content.
- Content backup — Keep a local snapshot of your knowledge base at a point in time.
- Moving to another platform — Export your content in a standard, portable format (JSON, Markdown, or HTML) to move it into a different documentation tool.
How to export your Document360 project as a ZIP file
Open the export dialog
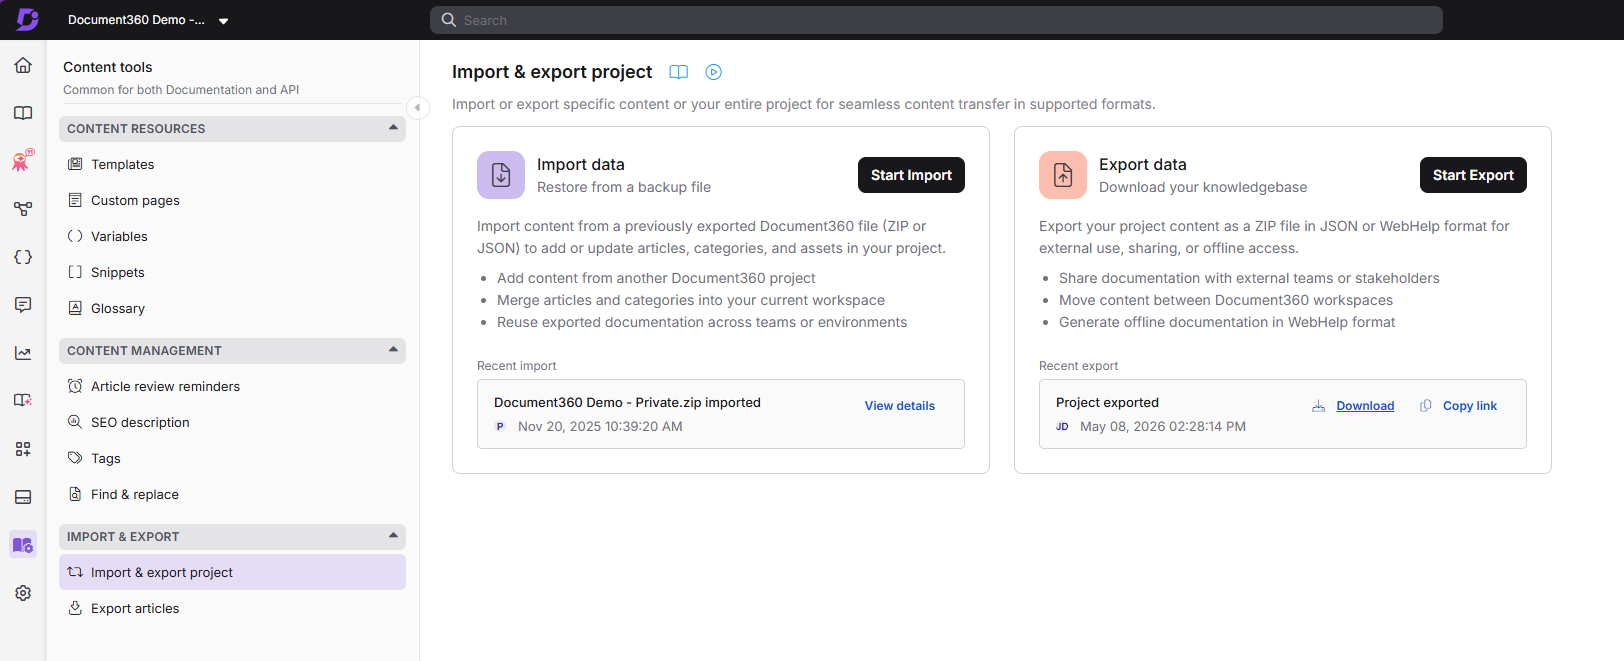
- In the left navigation bar, navigate to Content tools > Import and export project.
- Select Export project.
Configure export settings
- In the Export project dialog, select JSON from the format dropdown.
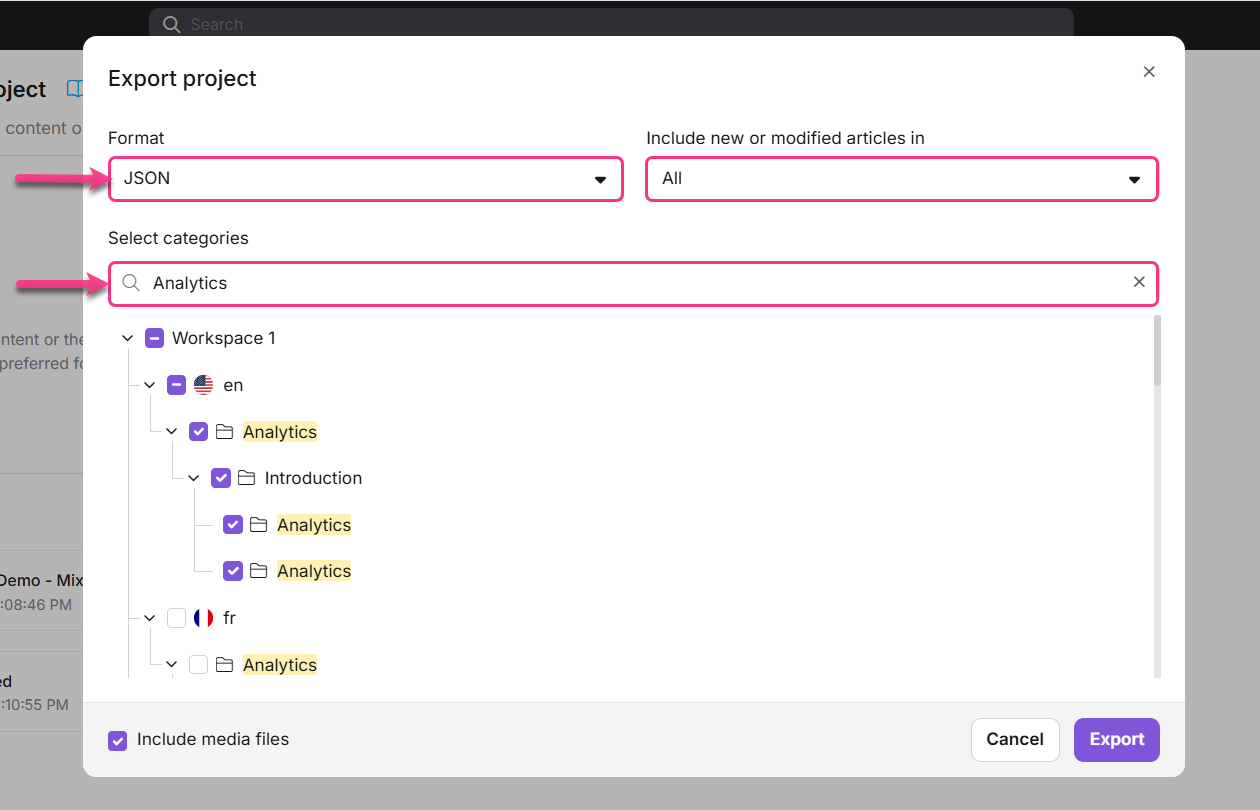
- In the Include new or modified articles in field, select the date range for the articles you want to export:
| Option | Description |
|---|---|
| All | Exports all articles regardless of modification date |
| 7 days | Exports articles modified within the last 7 days |
| 30 days | Exports articles modified within the last 30 days |
| 90 days | Exports articles modified within the last 90 days |
| Custom date | Exports articles within a date range you specify |
- In the Select categories search bar, search for the categories you want to include. The search applies across all workspaces, languages, and categories.
Select categories
You can control exactly which content is included in the export using the category selection options below.
Select an entire workspace
- Click the arrow to expand the workspace and view its languages and categories.
- Select the checkbox next to the workspace. All included languages and categories are selected automatically.
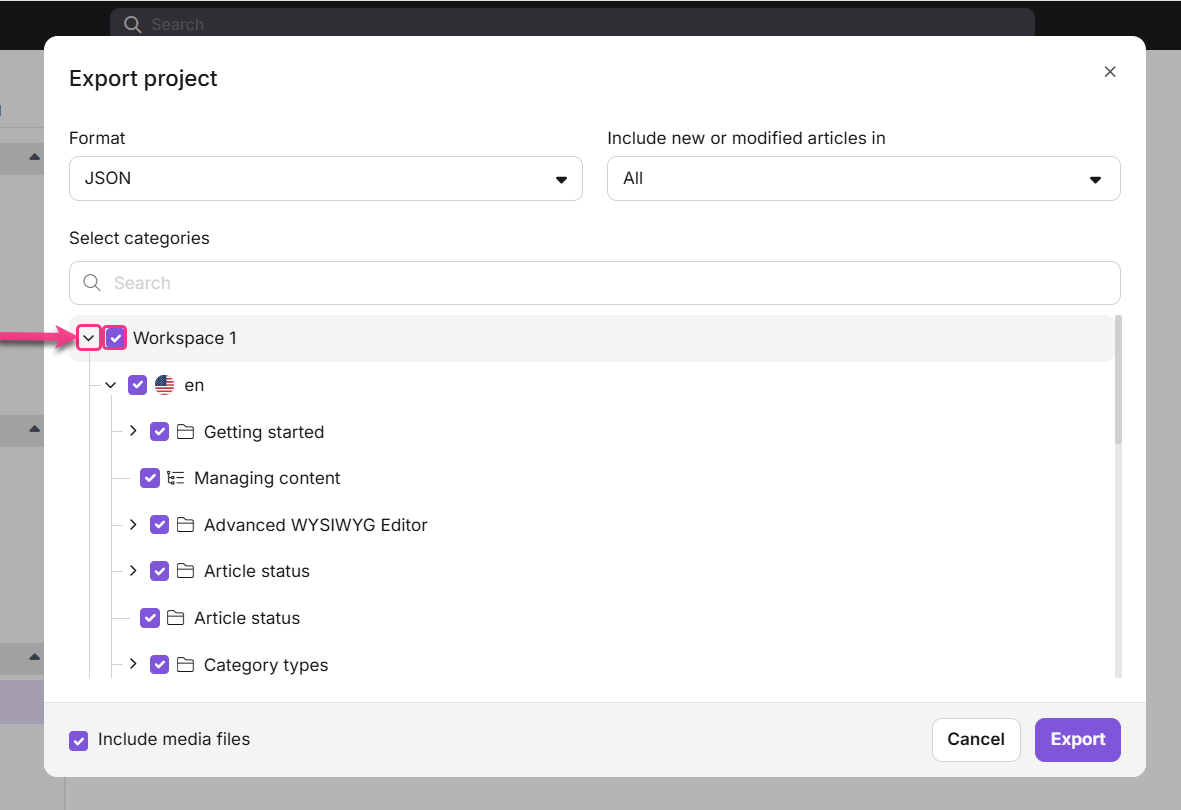
To deselect, uncheck the workspace checkbox. This clears all languages, categories, and sub-categories under it.
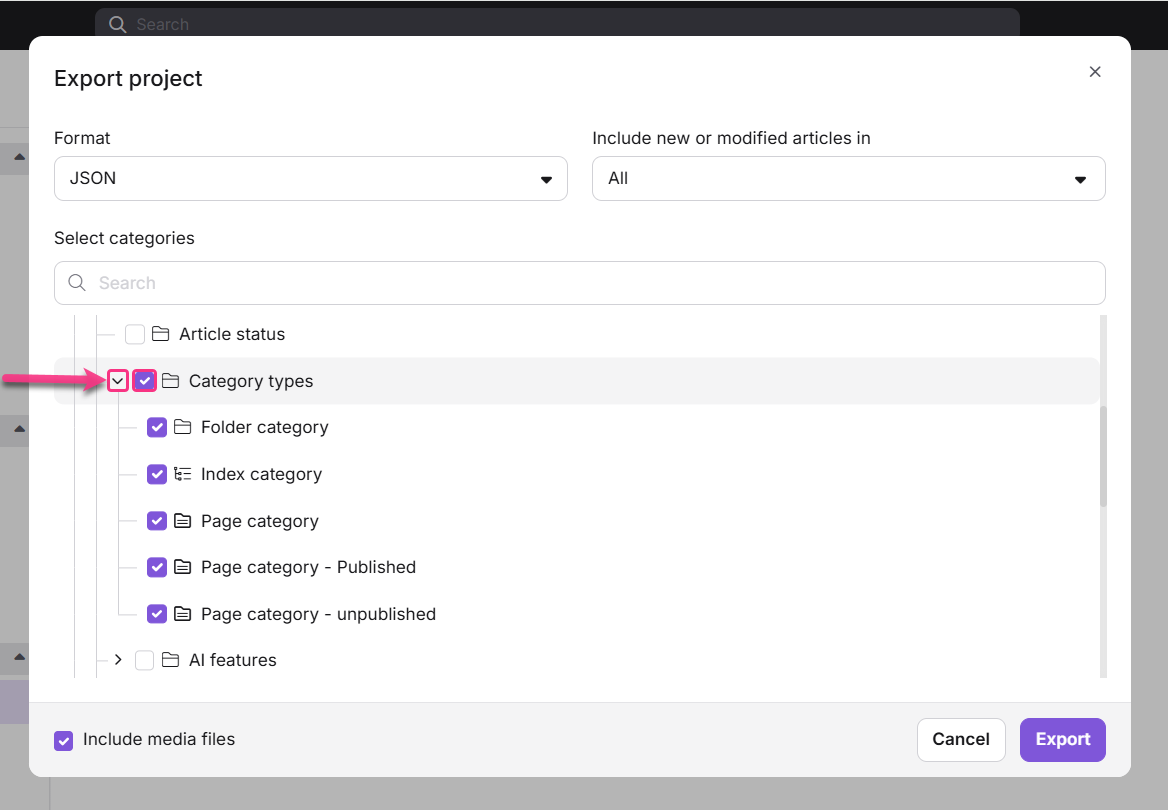
Select a category with its sub-categories
- Click the arrow next to the category to expand it.
- Select the checkbox next to the category. All sub-categories inside it are selected automatically.
Select only a sub-category
- Click the arrow to expand the main category.
- Select the checkbox next to the sub-category you want to include. Only that sub-category and its articles are selected.
- To deselect a specific sub-category, uncheck it. The sub-category is removed from the selection.
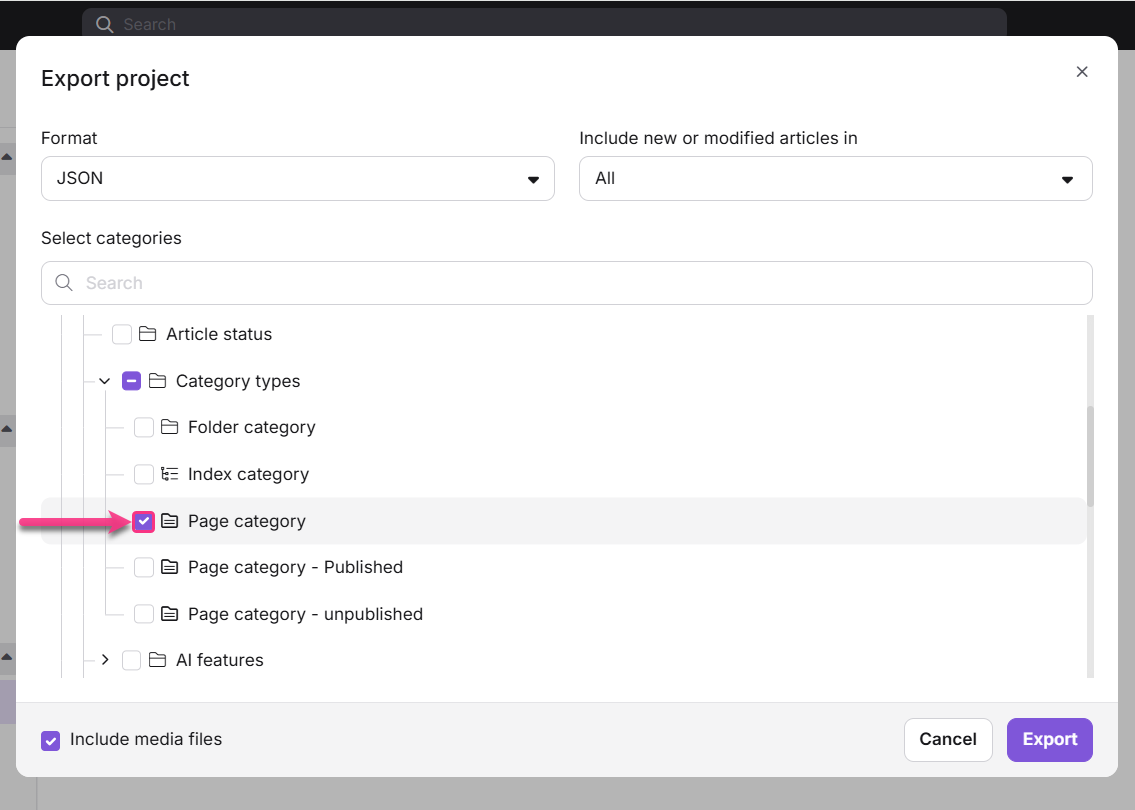
The main category checkbox appears in an indeterminate state (partially filled) when only some of its contents are selected.
Select only a category without its sub-categories
- Hover over the category and click Select this category.
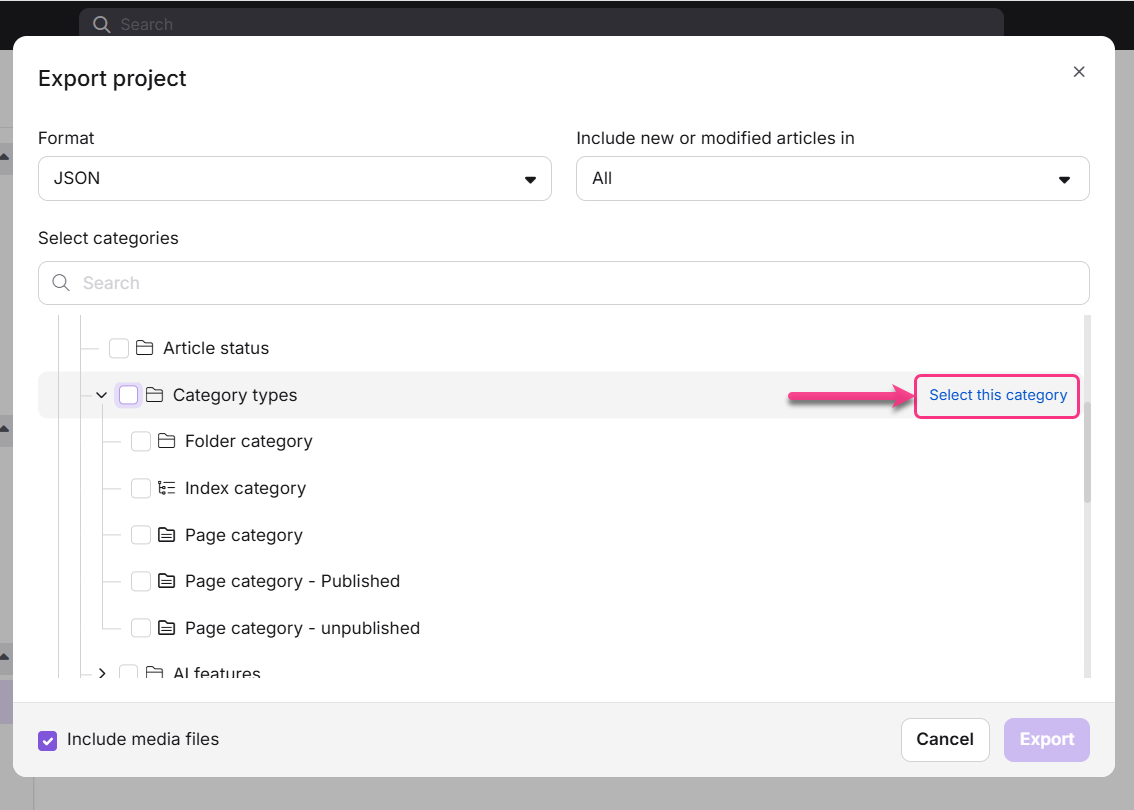
Only the category and its direct articles are selected. Sub-categories are not included.
Unselect a main category's articles while keeping sub-categories
- Hover over the parent category and click Unselect this category.
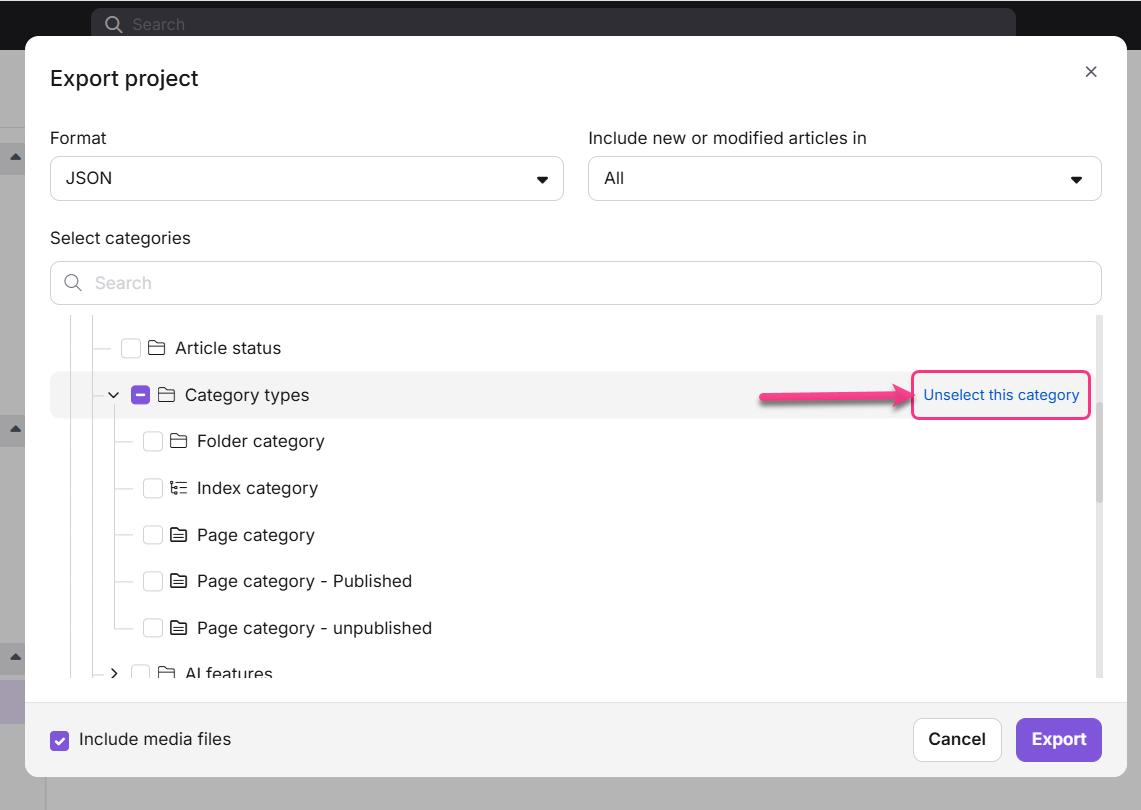
Only the articles directly inside the parent category are removed. Sub-categories under it remain selected, and the parent checkbox becomes indeterminate.
Unselect a sub-category's articles
- Hover over the sub-category and click Unselect this category.
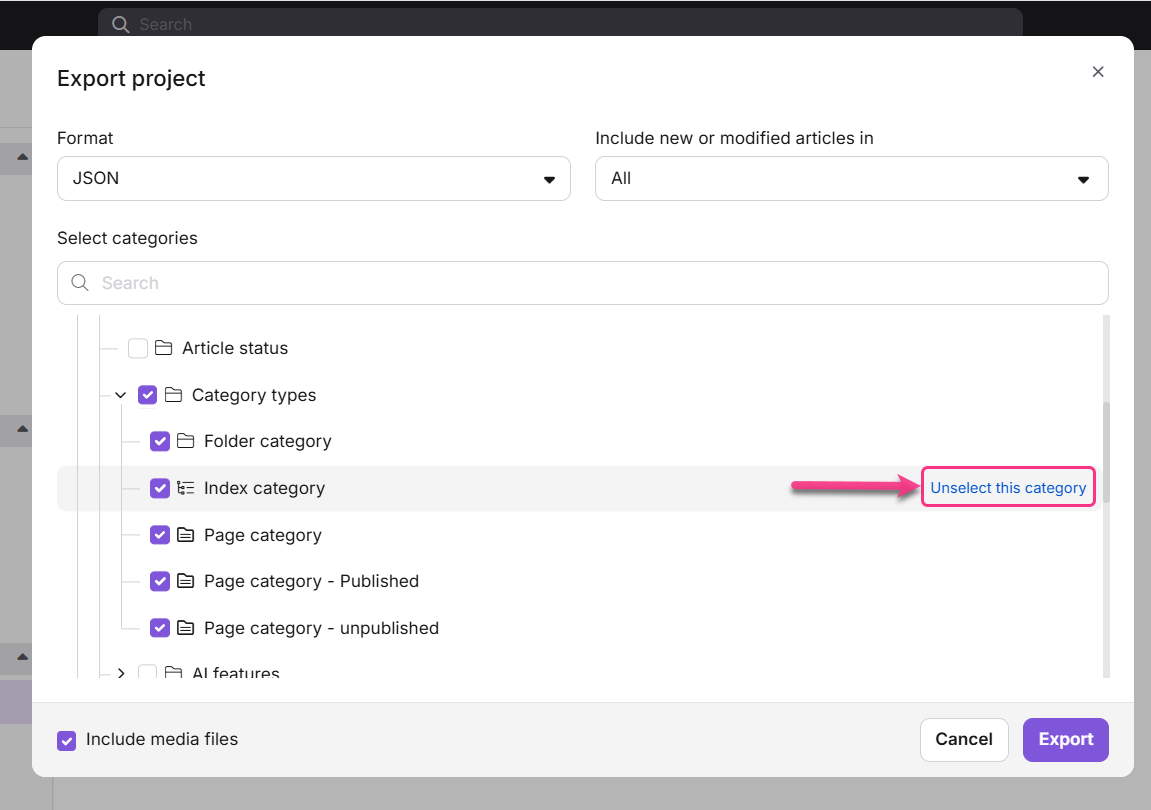
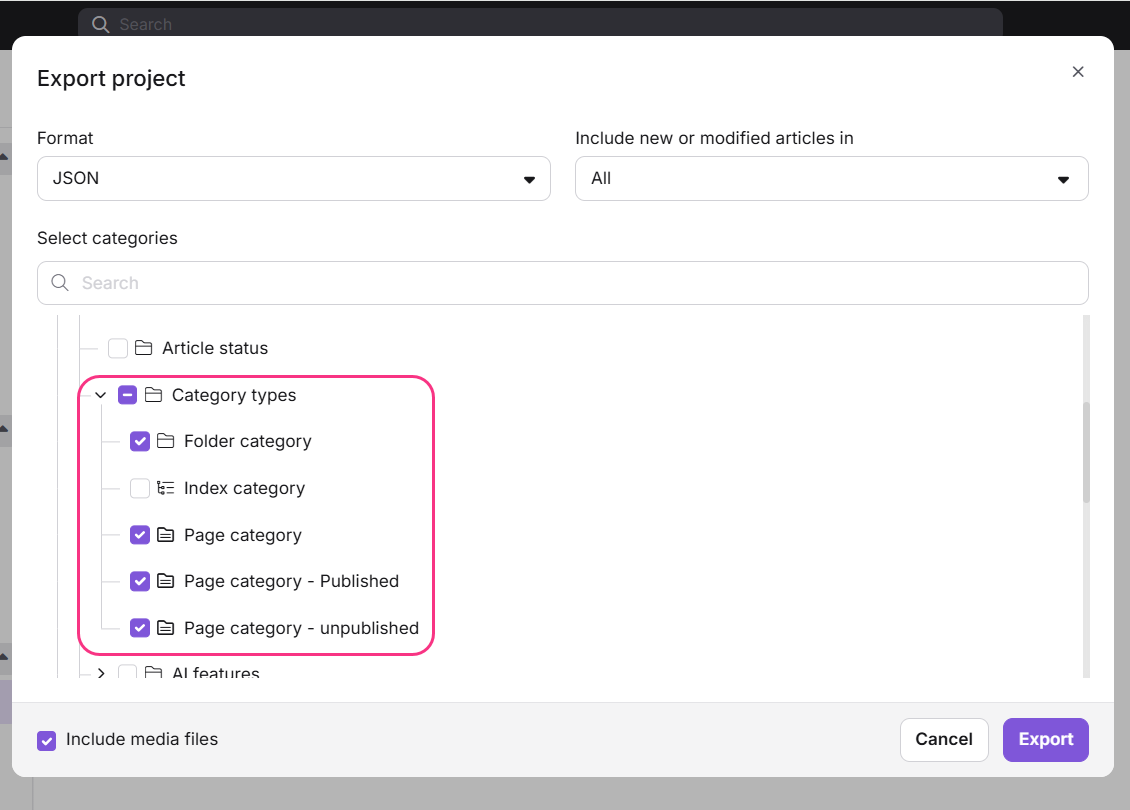
This only removes articles at the selected category level. Everything inside the sub-categories remains included.
Run the export
- Select the Include media files checkbox if you want related media files included in the ZIP.
- Click Export.
.png)
The export runs in the background. A notification appears in the top-right corner when the export is complete and ready to download. You can navigate to other modules while waiting.
A typical project export completes in 60 seconds or less. Larger content selections may take longer.
How to download the exported ZIP file
- Once the export is complete, find your file under Recent files — the export date and time are shown in the filename.
- Alternatively, open the export completion notification directly.
- Click Download to save the file to your local storage, or click Copy link to generate a shareable download link.
Each new export overwrites the previously exported ZIP file. Download the existing file before running a new export if you need to keep both versions.
How to export content for external translation
For teams using external translation services, you can export a specific language, translate it offline, and re-import it back into Document360.
- Confirm your knowledge base has more than one language configured (for example, English and French).
- In the left navigation bar, hover over Content tools.
- Navigate to Import and export > Import and export project.
- Click Export project.
- In the dialog, select the language you want to export (for example, Workspace 1 > fr). The Include media files checkbox is optional.
- Click Export and download the file once it is ready.
- Extract the ZIP, open the
.mdor.jsonfiles, and add the translated content. - After saving your edits, select only the workspace folder (not the entire export package) and compress it into a new ZIP file.
- Return to Import and export project in Document360 and click Import.
- Upload or drag and drop the ZIP file containing the translated content. The translated content is imported into the selected language in your knowledge base.
Best practices
- Export before bulk edits — Run an export before making large-scale changes to your knowledge base so you have a recoverable snapshot.
- Compress only the workspace folder for translation imports — When re-importing translated content, ZIP only the workspace folder, not the entire export package, to avoid import errors.
FAQ
In what format are articles available in the exported ZIP file?
The format depends on your editor type and how many languages you select:
- Single language export: Articles written in the Markdown editor are exported as .md files. Articles written in the WYSIWYG or Advanced WYSIWYG editor are exported as .html files.
- Multiple language export: All articles are exported in .json format regardless of editor type.
Can I export all documentation content in plain text or CSV format?
Document360 supports exporting documentation in HTML, PDF, Markdown (.md), or JSON formats depending on your editor type and language selection. You can export a list of articles and their statuses as a CSV from the All articles section, but this file contains only metadata — article titles, categories, status, dates, and URLs — not the full article content. Exporting full article content as plain text or CSV is not currently supported.
Can I re-import an exported ZIP file into another Document360 project?
Yes. The exported project ZIP file is compatible with the Document360 import feature. Navigate to Content tools > Import and export project in the target project and use the Import option to upload the ZIP file.
Does the exported HTML retain Document360's fonts and styling, or can I apply custom CSS to it?
No. Articles exported as individual .html files (single-language export, for articles written in the WYSIWYG or Advanced WYSIWYG editor) contain only the article content. They do not automatically carry over the fonts, colors, or other Custom CSS styling configured on your live knowledge base site. If you need to preserve your knowledge base's look and feel when embedding this exported content in another application, you will need to manually add or edit CSS within the exported HTML files after export.