Document360 Drive is your central media library for storing and managing all files used across your knowledge base. From uploading and organizing to tagging, replacing, and removing files, Drive gives you full control over your media assets in one place.
Navigating Drive
- Click the Drive icon in the left navigation bar of the Knowledge Base Portal.
- In the left navigation pane, browse or select the folder containing the files you want to manage.
- Use the search bar at the top to find files by name, or use the Filter option to narrow results by type, upload date, uploader, tags, or dependency status.
Switching between List view and Grid view
Drive supports two view modes. Click the List/Grid view icon in the top right corner of the Drive page to switch between them.
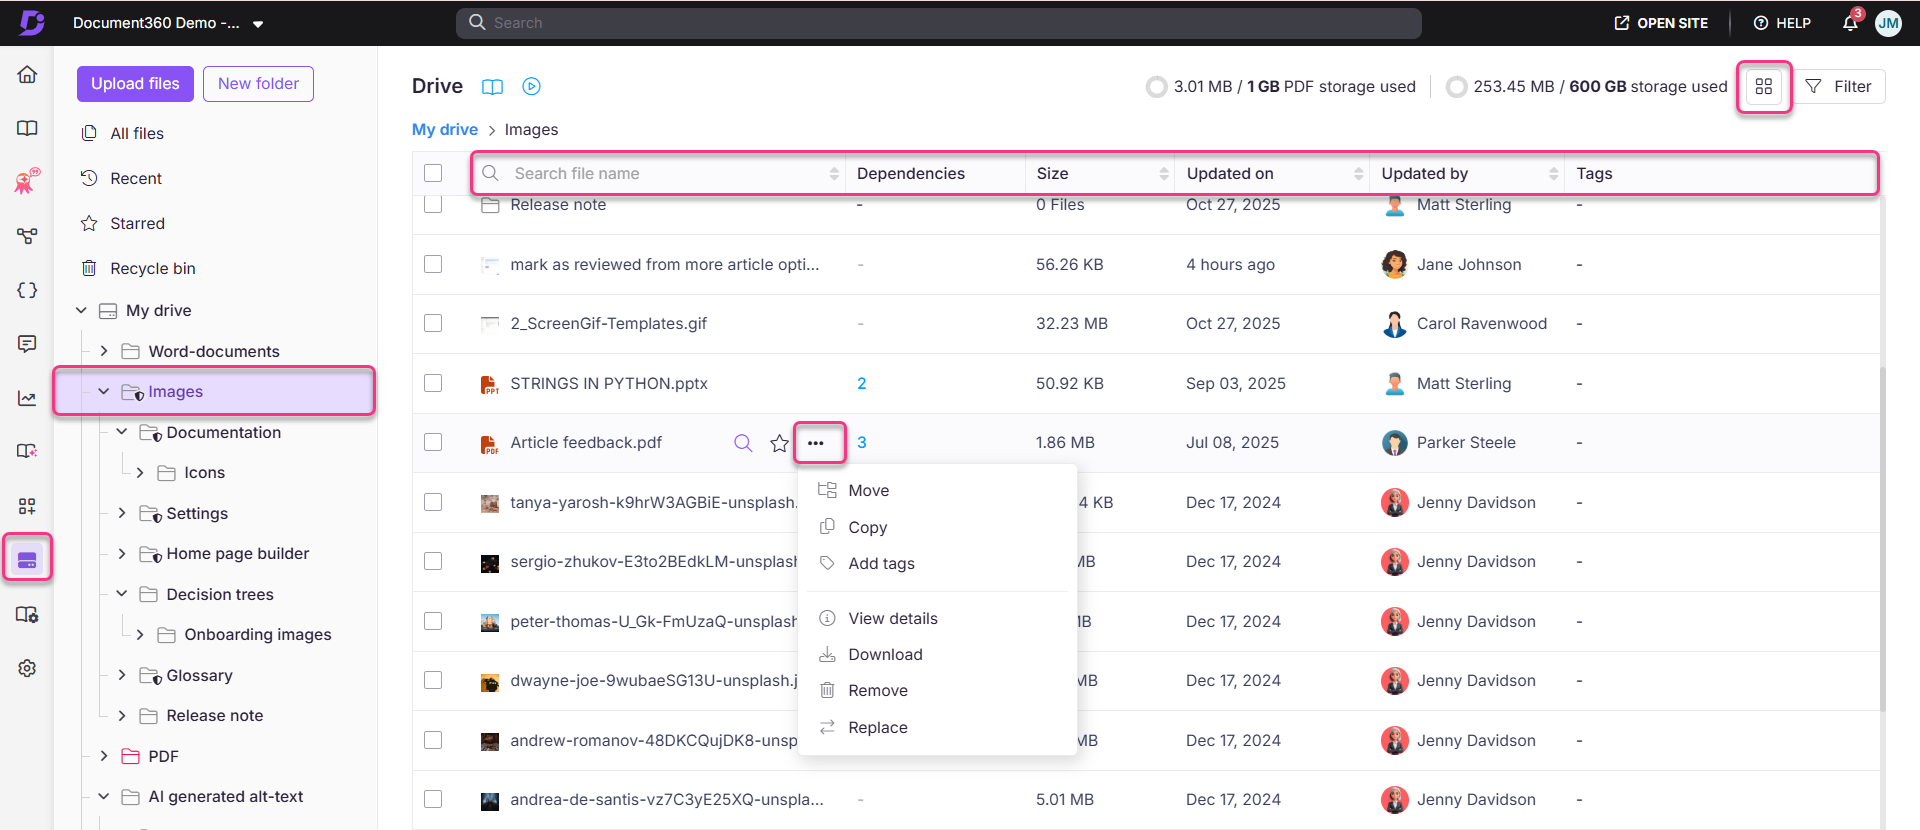
List view
List view is the default. It displays files in a table with the following columns:
| Column | Description |
|---|---|
| Name | The file name |
| Dependencies | The number of articles, pages, or content reuse elements referencing the file |
| Size | The file size |
| Updated on | The date the file was last modified |
| Updated by | The user who last modified the file |
| Tags | Tags associated with the file |
You can adjust the width of each column by dragging the column borders.
To access file actions in list view, click the More (⋯) icon next to the file name.
Grid view
Grid view displays files as thumbnails — useful for visually browsing image files.
To access file actions in grid view:
- Hover over a file and click the More (⋯) icon to access all actions for that file.
- Hover over a file and select its checkbox to select it. Once one or more files are selected, bulk actions — Move, Copy, Add tags, Download, and Remove — appear in the top menu bar.
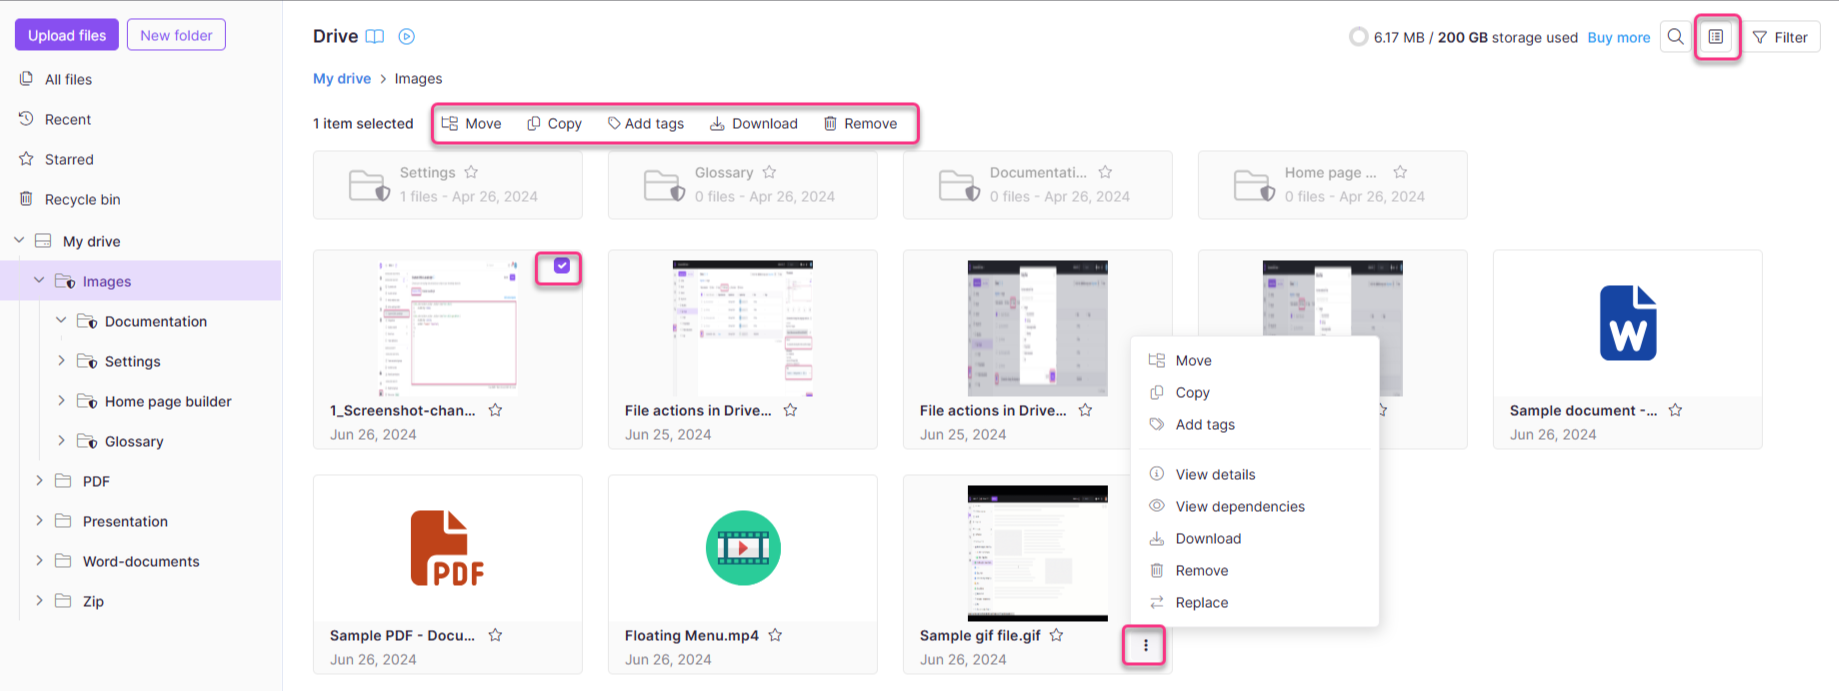
Column information — name, dependencies, size, updated on, updated by, and tags — is only visible in list view. Grid view shows thumbnails only.
File actions in drive
The table below summarizes all available file actions and links to the detailed steps for each.
| Action | Description |
|---|---|
| Add a file | Upload files to Drive |
| All files | View and manage all files across every folder from one page |
| Move files | Relocate a file to another folder without changing its URL |
| Copy files | Duplicate a file to another folder |
| Download files | Save files to your local storage as a .zip |
| Replace a file | Overwrite a file with a new version while keeping its URL |
| Add tags and alt text | Tag files for discoverability and add alt text for accessibility |
| View file details | See file metadata and access all actions from one panel |
| View file dependencies | See where a file is used across articles, pages, and content reuse |
| Remove files | Delete files from Drive |
| Recent, Starred, and Recycle bin files | Access recently viewed, starred, and deleted files |
Best practices
- Use list view for bulk management — The column layout makes it easier to scan dependencies, file sizes, and upload dates when auditing or cleaning up Drive.
- Use grid view for visual browsing — Switch to grid view when you need to identify images by appearance rather than filename.
- Search before uploading — Use the search bar to check whether a file already exists in Drive before uploading a duplicate.
- Tag files at upload — Adding tags when a file is first uploaded saves time later and keeps Drive searchable from day one.
- Check dependencies before removing — Always verify a file's dependency count before deleting it to avoid breaking articles or pages that reference it.