Plans supporting this feature: Professional Business Enterprise
By organizing your users into groups, you can streamline user management and ensure that everyone has the appropriate permissions to perform their tasks. User groups in Document360 allow you to efficiently manage your user's roles and access levels within the knowledge base portal.
Creating a new User group
To create a new User group in your project,
Navigate to Settings () > Users & permissions in the left navigation bar in the Knowledge base portal.
In the left navigation pane, navigate to Users & groups.
By default, the User tab will be selected.
Navigate to the User groups tab.
A list of existing User groups will appear if any have already been created.
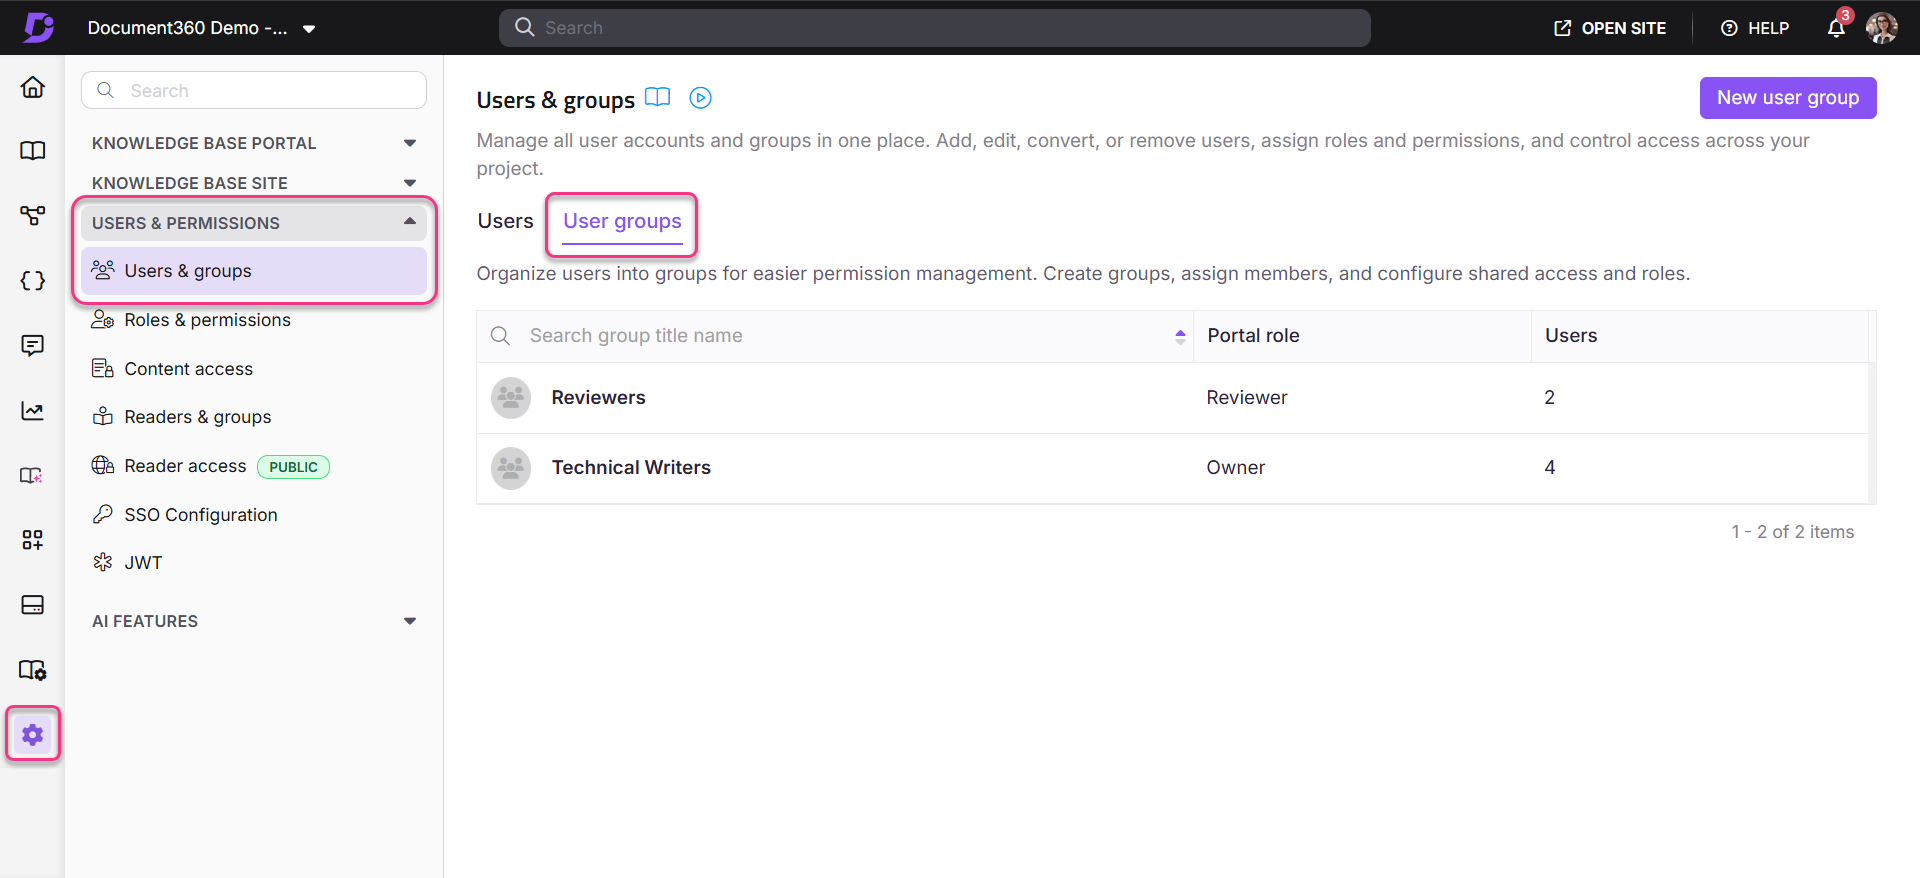
Click New user group.
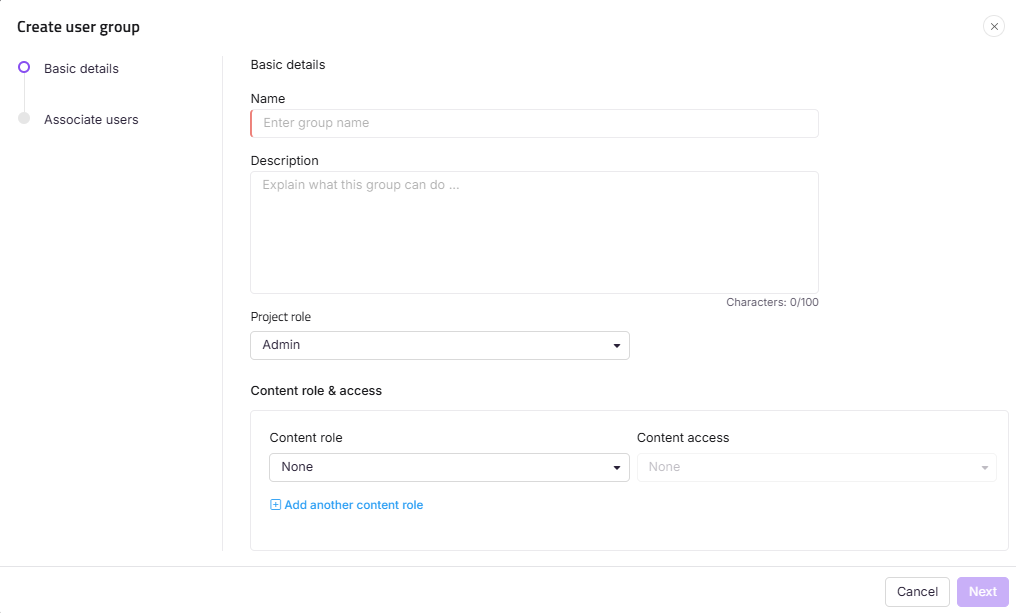
The Create user group panel appears with the Basic details page.
Enter your desired group name and description in the Name and Description field.
NOTE
The Description field can hold up to 150 characters.
Select the desired project role for the group in the Project role.
Choose the content role for the group and choose the level of content access for the associating user.
If needed, click Add another content role to create an additional content role.
Click Next.
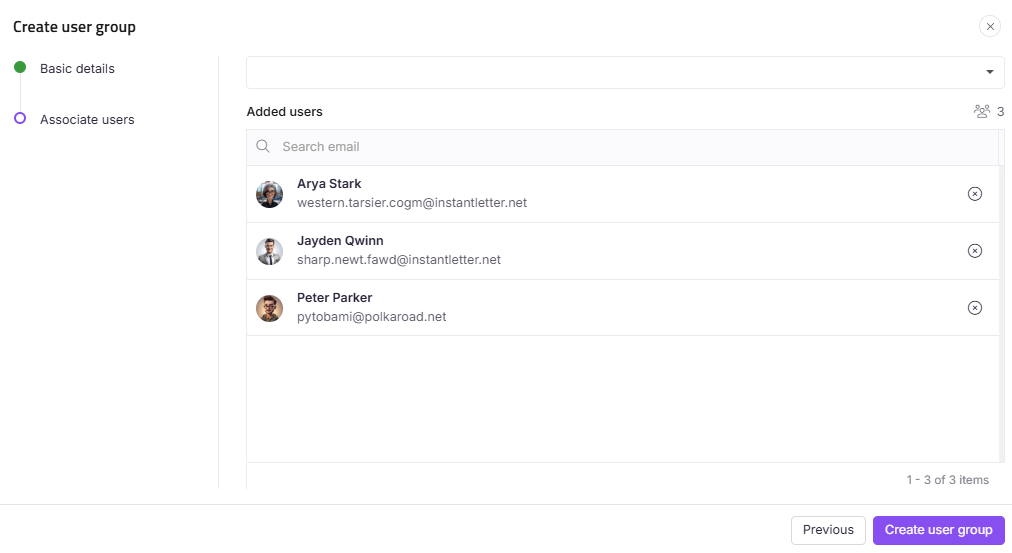
In the Associate user step, add the desired User accounts to associate with the groups.
Click Create user group.
NOTE
By default, users in user groups are organized alphabetically based on their email IDs.
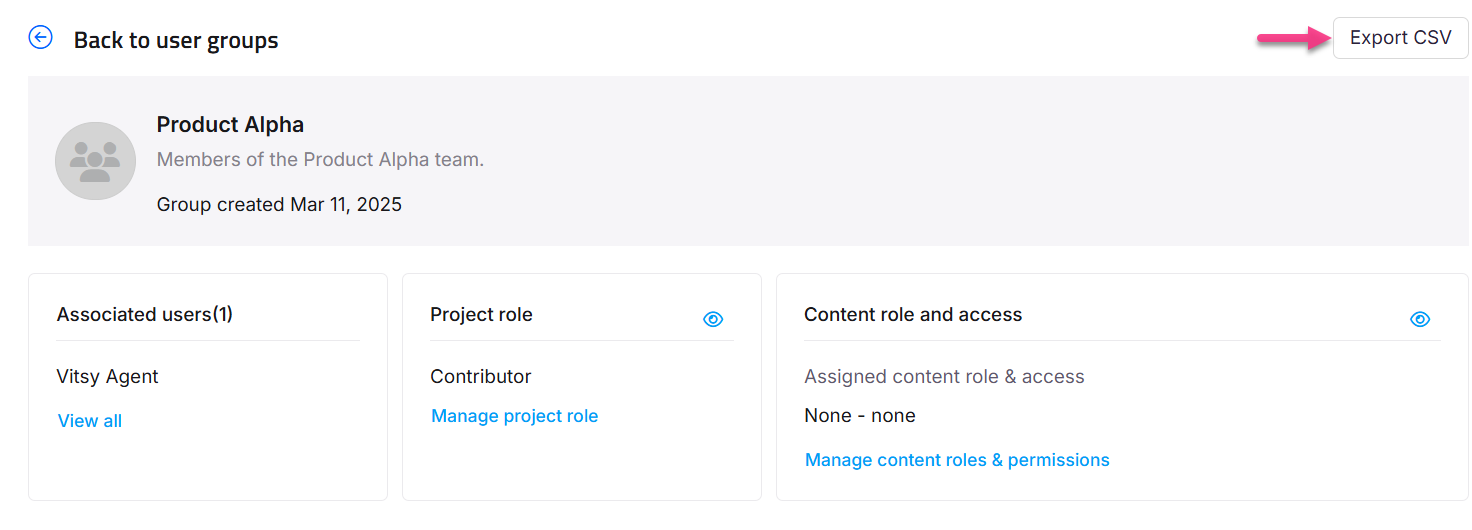
Click on the desired user group to view the details.
Click Export CSV on the top right to download the list of users in a reader group in Excel/CSV format.
Editing a User group
You can edit the User group by following the steps:
Navigate to Settings () > Users & permissions in the left navigation bar in the Knowledge base portal.
In the left navigation pane, navigate to Users & groups.
By default, User tab will be selected.
Navigate to the User groups tab.
A list of existing User groups will appear.
Hover over the desired User group and click the Edit () icon.
The User group page will appear.
NOTE
Click the preview () icon to view the portal role and content role.
In the Associated users pane, click View all if needed to associate another user.
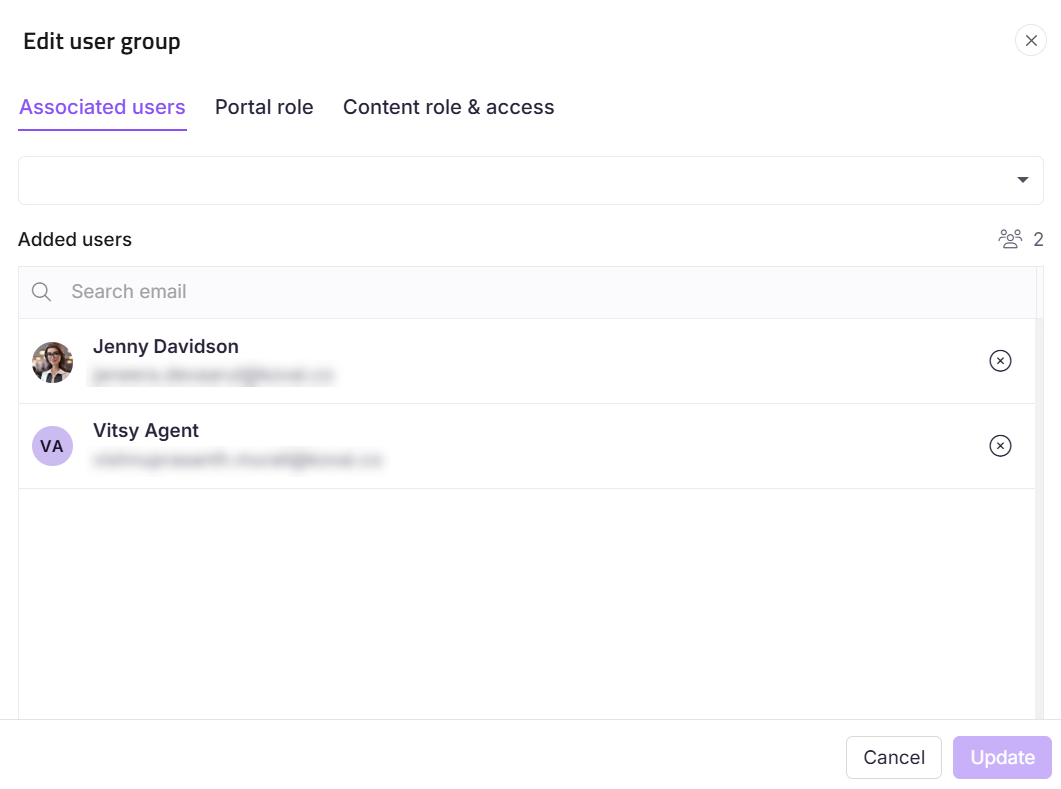
In the Edit user group panel, the Associated users section will appear.
In the User dropdown, search the desired user and select the checkbox.
Click Update.
In the Project role section, assign the desired portal role for the user.
In the Content role & access section, assign the desired content role and content access for the user.
NOTE
In the content access section, if you have selected Workspace/Language or Category, specify which workspace/language or which category the user has the provisions.
Once you have made the necessary changes, click Update.
FAQ
How do I delete a User group?
To delete the user groups, follow the below steps:
1Navigate to Settings () > Users & permissions in the left navigation bar in the Knowledge base portal.
In the left navigation pane, navigate to Users & groups.
In the User groups section, hover over the desired User group and click Delete () icon.
Click Yes in the confirmation prompt.
How do I rename a User group?
To delete the user groups, follow the below steps:
Navigate to Settings () > Users & permissions in the left navigation bar in the Knowledge base portal.
In the left navigation pane, navigate to Users & groups.
In the User groups section, hover over the desired user group and click the Edit () icon.
Hover over the User group name and click the Edit () icon.
Update the Name and Description fields.
Click Update.