When a team member leaves your project or no longer needs portal access, you can either deactivate or delete their account. Deactivation is reversible — the user loses access immediately, but their contributions, articles, and analytics data are preserved, and the account can be reactivated later. Deletion is permanent and cannot be undone. Choose deactivation when you may need to reinstate the user; choose deletion only when you are certain the account is no longer needed.
Deactivation vs. deletion
| Action | Deactivate | Delete |
|---|---|---|
| Portal access | Removed immediately | Removed permanently |
| Articles and content | Retained; attributed to the user | Retained; not attributed to the user |
| Analytics and audit data | Retained | Retained |
| Reversible | Yes — can be reactivated | No — permanent action |
| User seat freed | Yes | Yes |
Before you begin
- You have a Project Owner or Admin role. Admins cannot deactivate or delete Owners.
- You are not the last remaining Owner of the project. The last Owner cannot be deleted.
Delete a user
Deleting a user permanently removes their account from the project. Their authored articles and content remain in the knowledge base and continue to be attributed to them, but the account cannot be recovered. Use this option only when you are certain the user will not need access again.
WARNING
Deletion is permanent and cannot be undone. If you want to preserve the option to restore access later, use Deactivate instead.
You can delete a user using one of two methods.
From the user profile page
- Navigate to Settings () > Users and security in the left navigation bar in the knowledge base portal.
- In the left navigation pane, navigate to Users and groups > Users and select the desired user.
- In the user profile details page, click the Delete icon and select Yes in the confirmation dialog.
.png)
From the user list
- Select the checkbox next to the user in the list and click Deactivate. A dialog box will appear.
- Select the Delete user radio button and click Delete to permanently remove the user.
.png)
NOTE
Bulk selection of both Active and Inactive users will not display the Deactivate button.
Bulk selection of only Inactive users will display only the Activate and Delete buttons.
NOTE — Role-based restrictions
Admins cannot delete or edit Owners, but can delete all other roles.
Owners can delete Admins, Contributors, and Reviewers.
The last remaining Owner of a project cannot be deleted.
Deactivate and reactivate a user
Deactivation suspends a user's access to the knowledge base portal without removing their account or any data they have contributed. Their authored articles remain published, their name stays in audit logs and analytics, and the account can be reactivated at any time. Deactivation also frees up a user seat on your plan.
Deactivate a user
- Navigate to Settings () > Users and security in the left navigation bar in the knowledge base portal.
- In the left navigation pane, navigate to Users and groups > Users.
- Select the checkbox next to the desired user and click Deactivate at the top. The Confirm user deactivation panel will appear.
- Click Deactivate user to confirm.
NOTE
You can deactivate standard users, SSO users, and reader accounts.
Deactivated accounts lose portal access immediately but all their data — articles, analytics, audit logs — is retained.
For SSO users, deactivation takes effect only after the current SSO session ends. The user will remain signed in until their session resets.
.png)
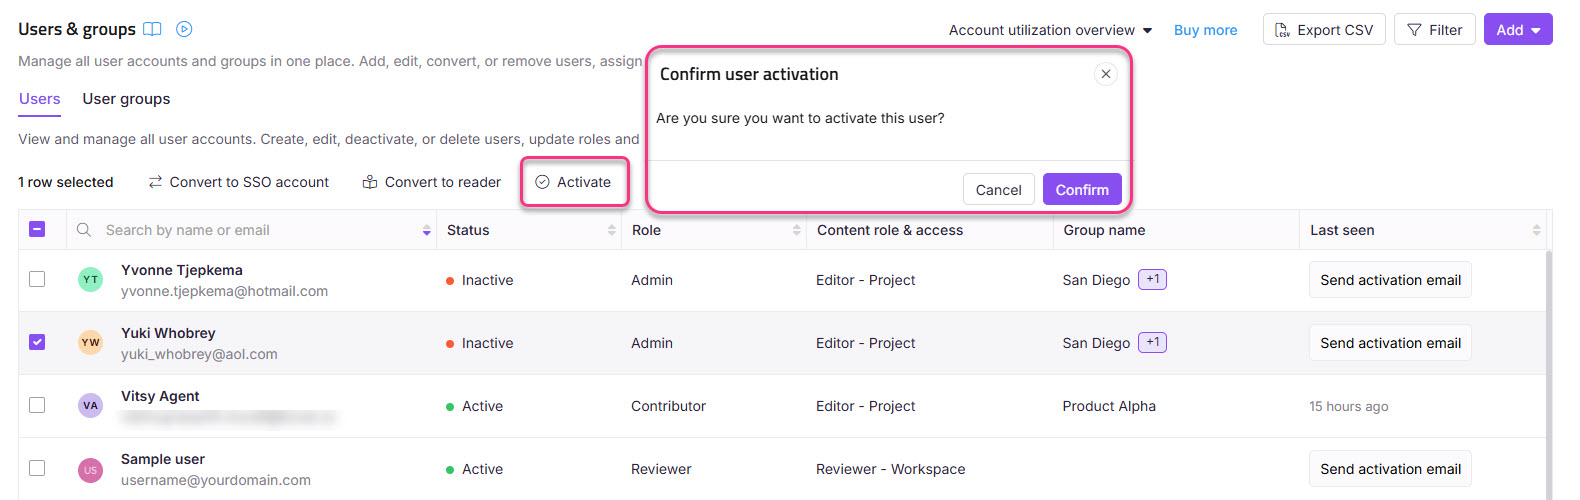
Reactivate a user
- Select one or more deactivated users from the list.
- Click Activate.
- Click Confirm in the Confirm user activation panel.
FAQ
Can a deleted user be recovered?
No. Deletion is permanent and cannot be reversed. The user's account is removed from the project and cannot be restored. Their authored articles and content remain in the knowledge base, but the account itself is gone. If there is any chance you will need to reinstate access, use Deactivate instead of Delete.
What happens to articles authored by a deleted or deactivated user?
Articles and content created by the user remain in the knowledge base exactly as they were. They stay published, are attributed to the original author, and continue to appear in analytics and audit logs. Neither deactivation nor deletion removes or unpublishes any content.
What is the difference between deactivating and deleting a user?
Deactivation suspends portal access but keeps the account intact — all data is preserved and the account can be reactivated later. Deletion permanently removes the account from the project and cannot be undone. In both cases, the user's authored content and historical data stay in the knowledge base.
Who can deactivate or delete a user?
Owners can deactivate and delete Admins, Contributors, and Reviewers. Admins can deactivate and delete Contributors and Reviewers, but cannot deactivate or delete Owners. The last remaining Owner of a project cannot be deleted by anyone.
Does deactivation free up a user seat on my plan?
Yes. A deactivated user no longer counts against your plan's active user limit, freeing up a seat that can be used to add a new user. If you reactivate the user and that would exceed your limit, you will be prompted to either remove an active user or purchase additional seats.
How do I remove a user from Document360?
To fully remove a team member from your Document360 project, use the Delete option described in this article. If you want to suspend their access without permanently removing them, use Deactivate. Both options are available from the user list under Settings > Users & security > Users & groups.