OneLogin is an Identity Provider (IdP) that simplifies user access management by allowing users to sign in to multiple applications with a single set of credentials. With SAML SSO configured between OneLogin and Document360, your team members and readers can access Document360 using their existing OneLogin credentials.
Only users with the Owner or Admin project role can configure SSO in Document360.
What you can do with OneLogin as your IdP
| Capability | Supported |
|---|---|
| Team member (portal) authentication | Yes |
| Reader (knowledge base site) authentication | Yes |
| IdP-initiated sign-in | Yes |
| SCIM reader provisioning | Yes |
| SCIM user provisioning | No |
| SCIM group mapping | No |
| SSO configuration inheritance (parent-child projects) | Yes |
User attributes and group mapping are not supported in OneLogin. Only readers can be managed via SCIM from OneLogin. Users and groups cannot be added from OneLogin.
Before you begin
- You have an active OneLogin account with administrator access.
- You have Owner or Admin access in your Document360 project.
- Open Document360 and OneLogin in two separate browser tabs. You will need to switch between them multiple times during setup.
Step 1: Start the SSO configuration in Document360
Create SSO in Document360
- In Document360, navigate to Settings () > Users & permissions > SSO Configuration.
- Click Create SSO.
.png)
- Select OneLogin as your identity provider in the Choose your Identity Provider (IdP) page.
.png)
Step 2: Create a SAML application in OneLogin
Add the SCIM Provisioner with SAML app
- Log in to your OneLogin Admin Portal.
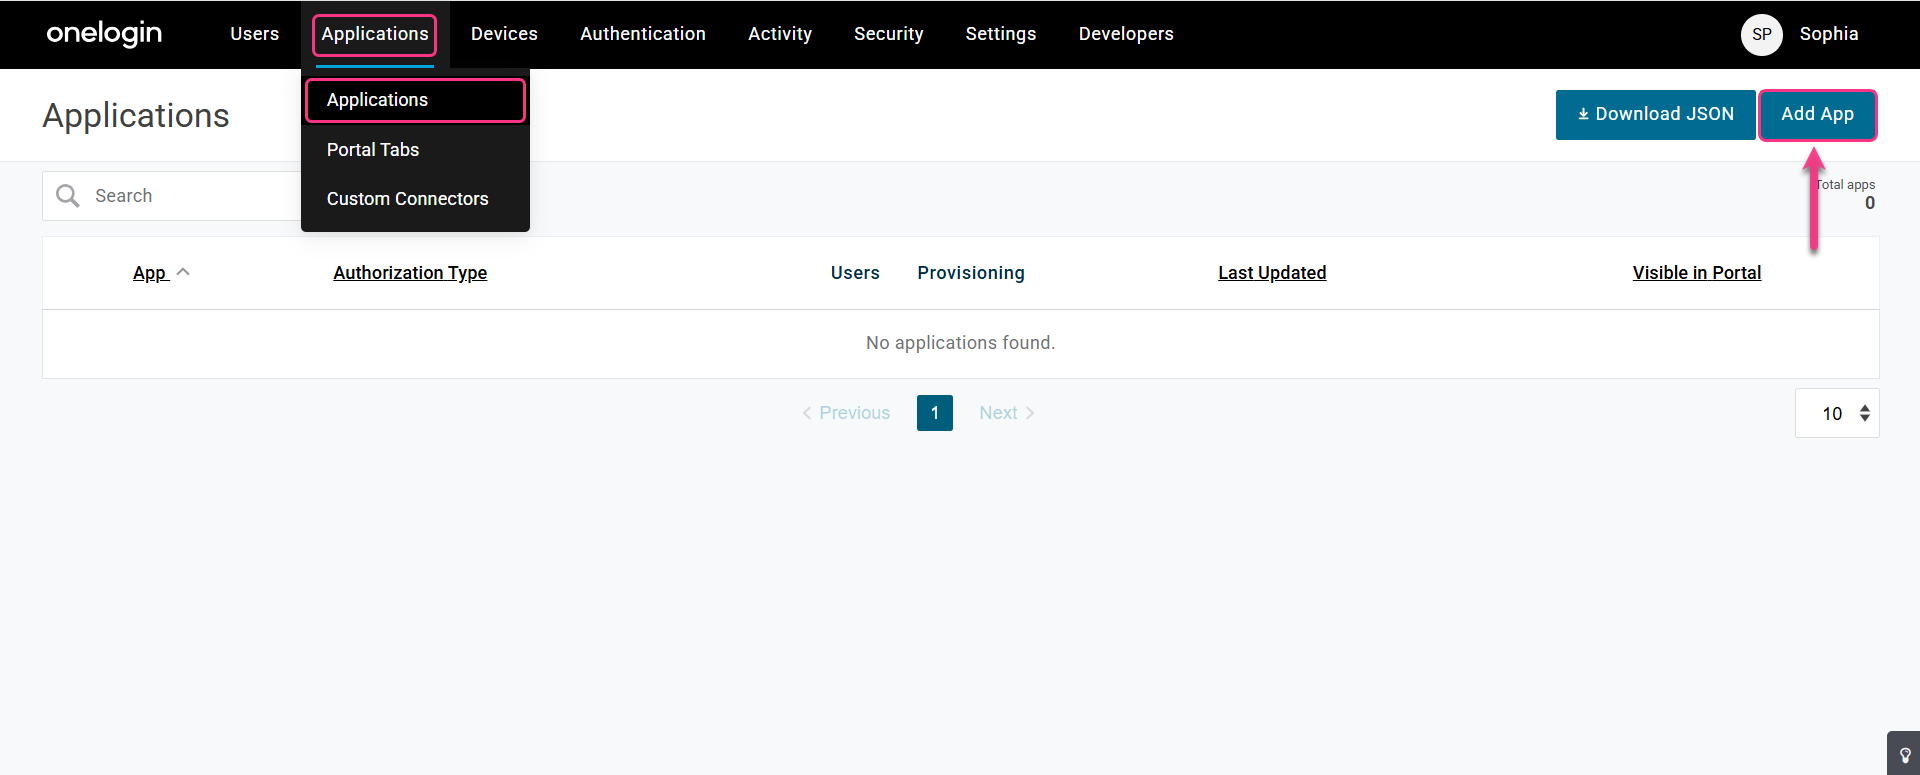
- On the top menu, select Applications.
- Click Add App.
- In the search bar, type SCIM and select SCIM Provisioner with SAML (SCIM v2 Enterprise, SCIM2 PATCH for Groups) from the list and click Save.
Download the X.509 certificate
- In your OneLogin application, navigate to the SSO tab.
- Click View Details to download the X.509 certificate.
.png)
Keep this certificate file. You will need to upload it later when configuring Document360 with OneLogin.
Step 3: Configure the Service Provider in OneLogin
Copy SP parameters from Document360 and enter in OneLogin
- In Document360, go to the Configure the Service Provider (SP) page and copy the parameters you need.
.png)
- Go to OneLogin and navigate to the Configuration tab. Enter the Document360 parameters using the mapping below.
| OneLogin | Document360 |
|---|---|
| SAML Audience URL | Service provider entity ID |
| SAML Consumer URL | Callback path |
.png)
Step 4: Complete the SSO configuration in Document360
Configure the Identity Provider in Document360
- In OneLogin, navigate to the SSO tab and copy the parameters displayed there.
.png)
- In Document360, click Next to go to the Configure the Identity Provider (IdP) page.
- In the Configure an existing connection field, you can inherit from an already created SSO configuration that has SCIM enabled in a parent project. By selecting and inheriting this connection, the current SSO configuration will be set as the child inherited SSO configuration and will automatically inherit the SCIM configuration from the parent.
For more information on inheritance, see Inherit from another application.
- Enter the parameters from OneLogin into Document360 using the mapping below.
| OneLogin | Document360 |
|---|---|
| Issuer URL | Entity ID |
| SAML 2.0 Endpoint (HTTP) | Sign on URL |
| X.509 certificate | SAML certificate |
- Attach the previously downloaded X.509 certificate in the SAML certificate field in Document360.
- Turn the Allow IdP initiated sign in toggle on or off based on your project requirements.
.png)
- Click Next to navigate to the SCIM provisioning page.
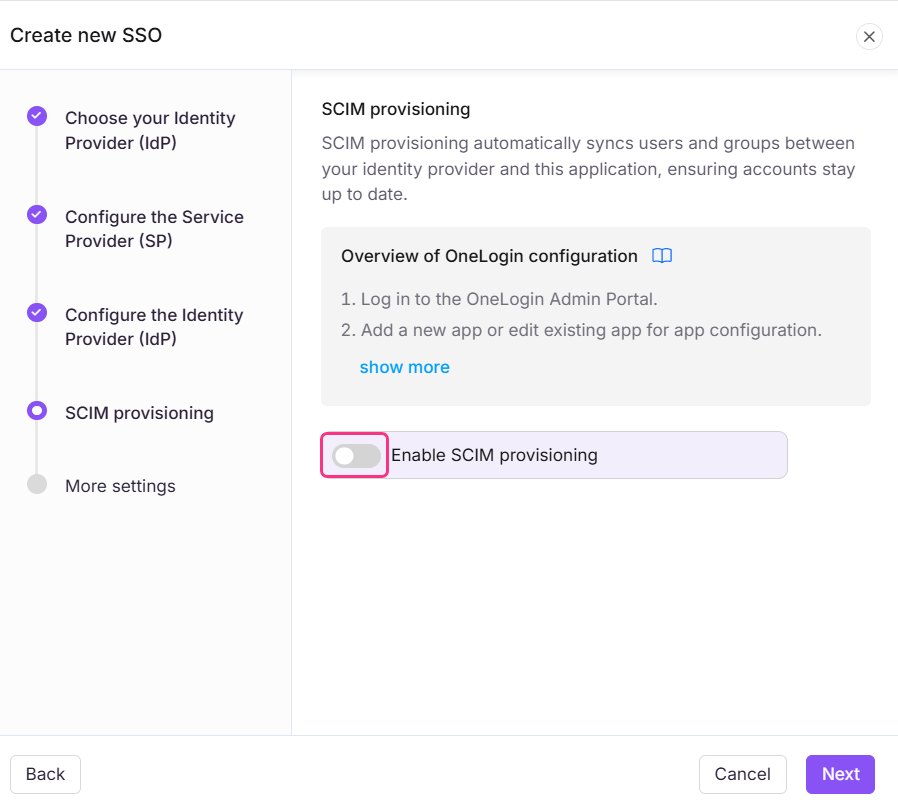
Step 5: Configure SCIM provisioning
SCIM provisioning automates reader lifecycle management between OneLogin and Document360. When enabled, readers added or deactivated in OneLogin are automatically synced to Document360.
If you do not need SCIM provisioning, click Next and follow the steps from Step 6: More settings.
User attributes and group mapping are not supported in OneLogin SCIM. Only reader accounts can be provisioned via SCIM from OneLogin.
Enable SCIM in Document360
- Turn on the Enable SCIM provisioning toggle.
- A confirmation dialog appears. Review the terms, select the checkbox, and click Agree.
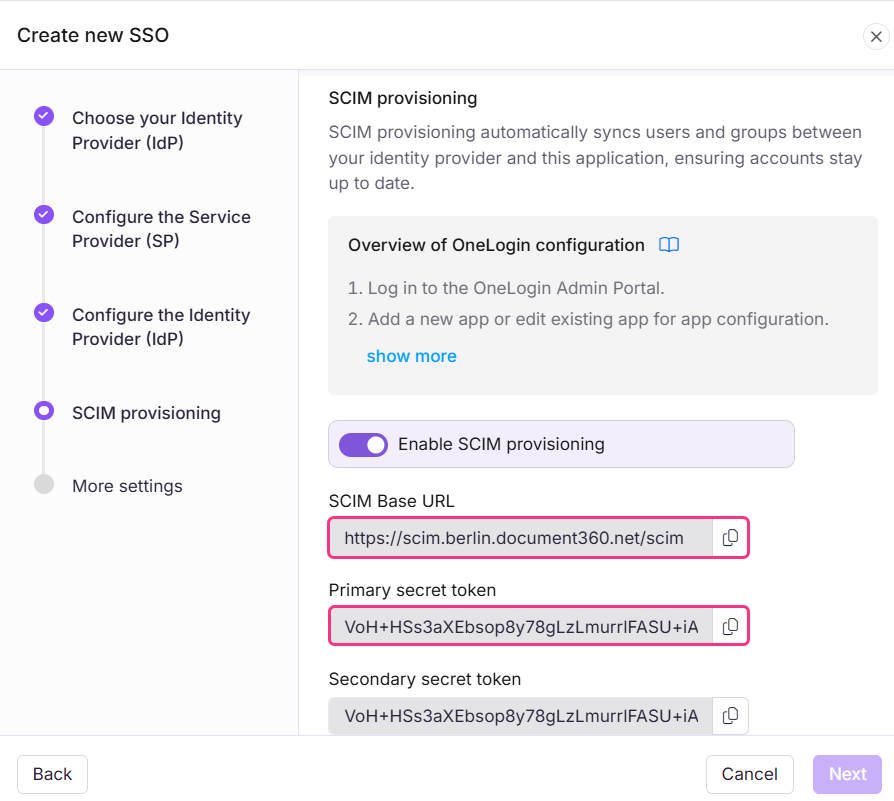
- The parameters required to complete the SCIM configuration in OneLogin will then be displayed.
Configure SCIM in OneLogin
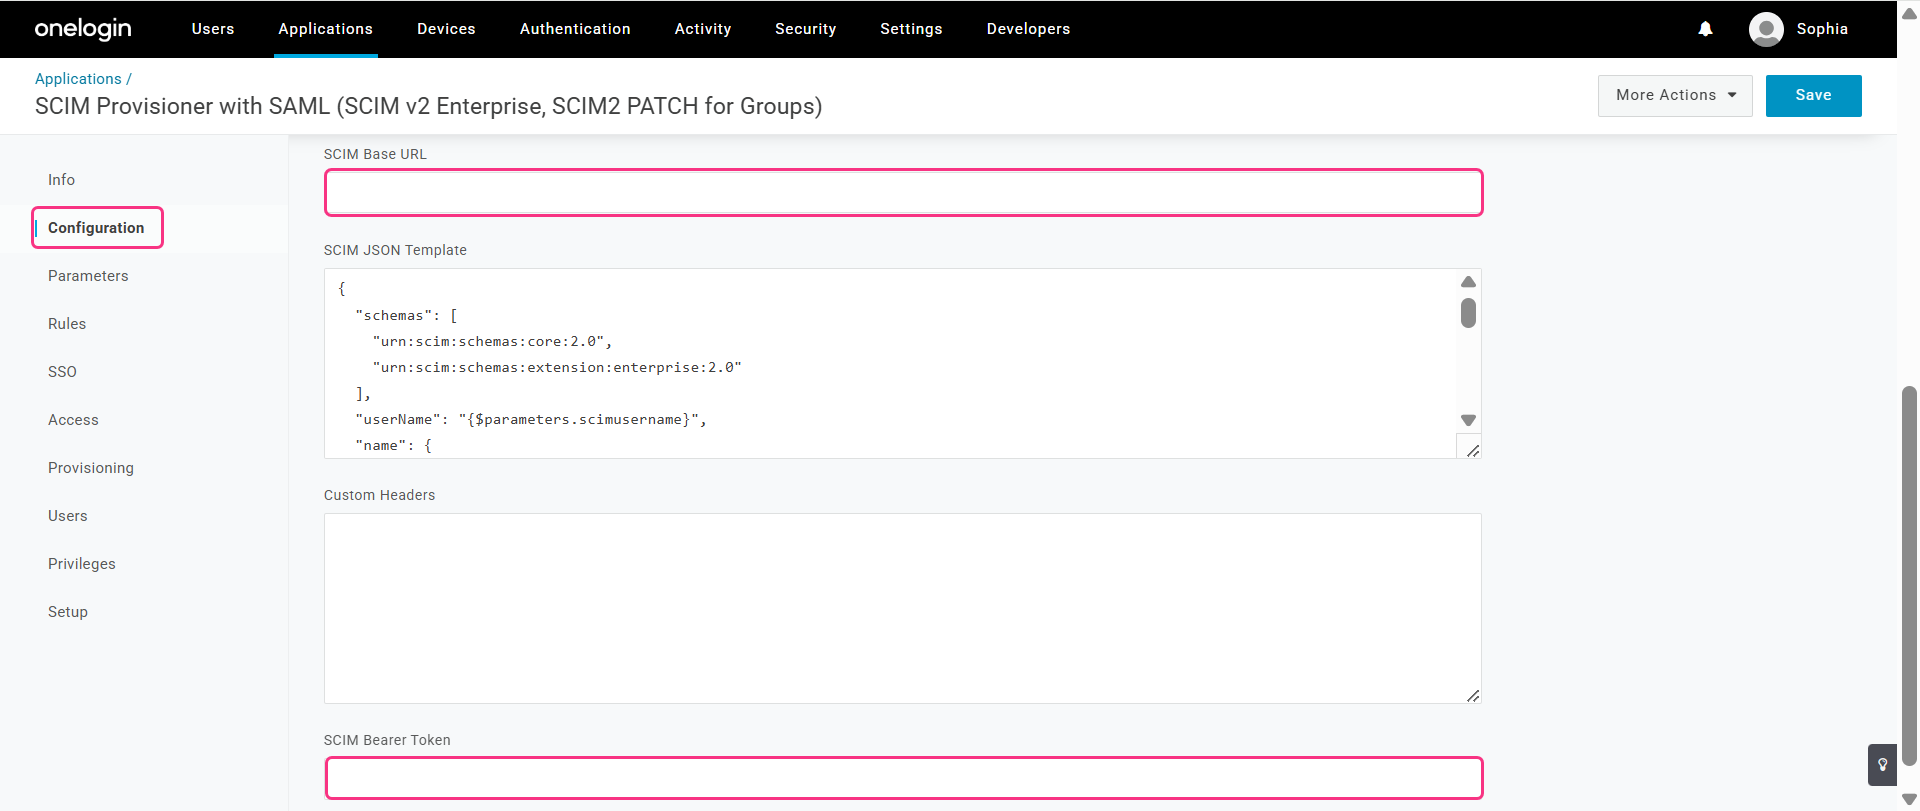
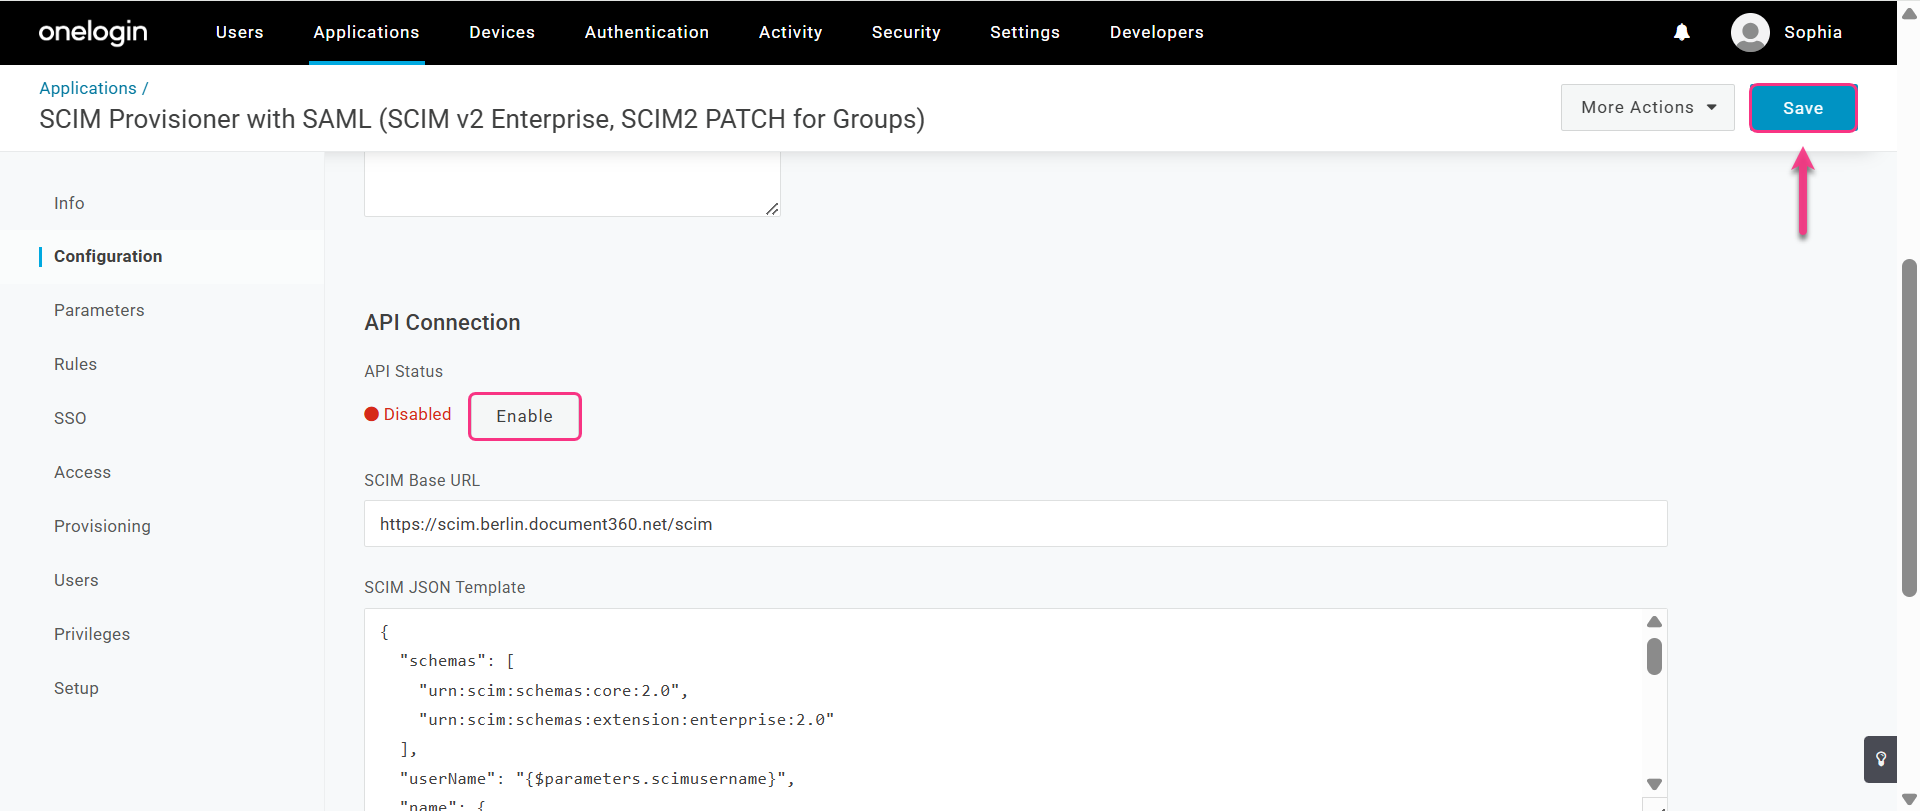
- In OneLogin, navigate to the Configuration tab and scroll down to the API Connection section.
- Enter the Document360 parameters using the mapping below.
| Document360 | OneLogin |
|---|---|
| SCIM Base URL | SCIM Base URL |
| Primary secret token | SCIM Bearer Token |
- Click Enable to enable SCIM provisioning in OneLogin.
- Click Save to successfully create the SAML application with SCIM enabled.
Enable SCIM provisioning in OneLogin
- In OneLogin, go to the Provisioning tab.
- Select the Enable provisioning checkbox and click Save.
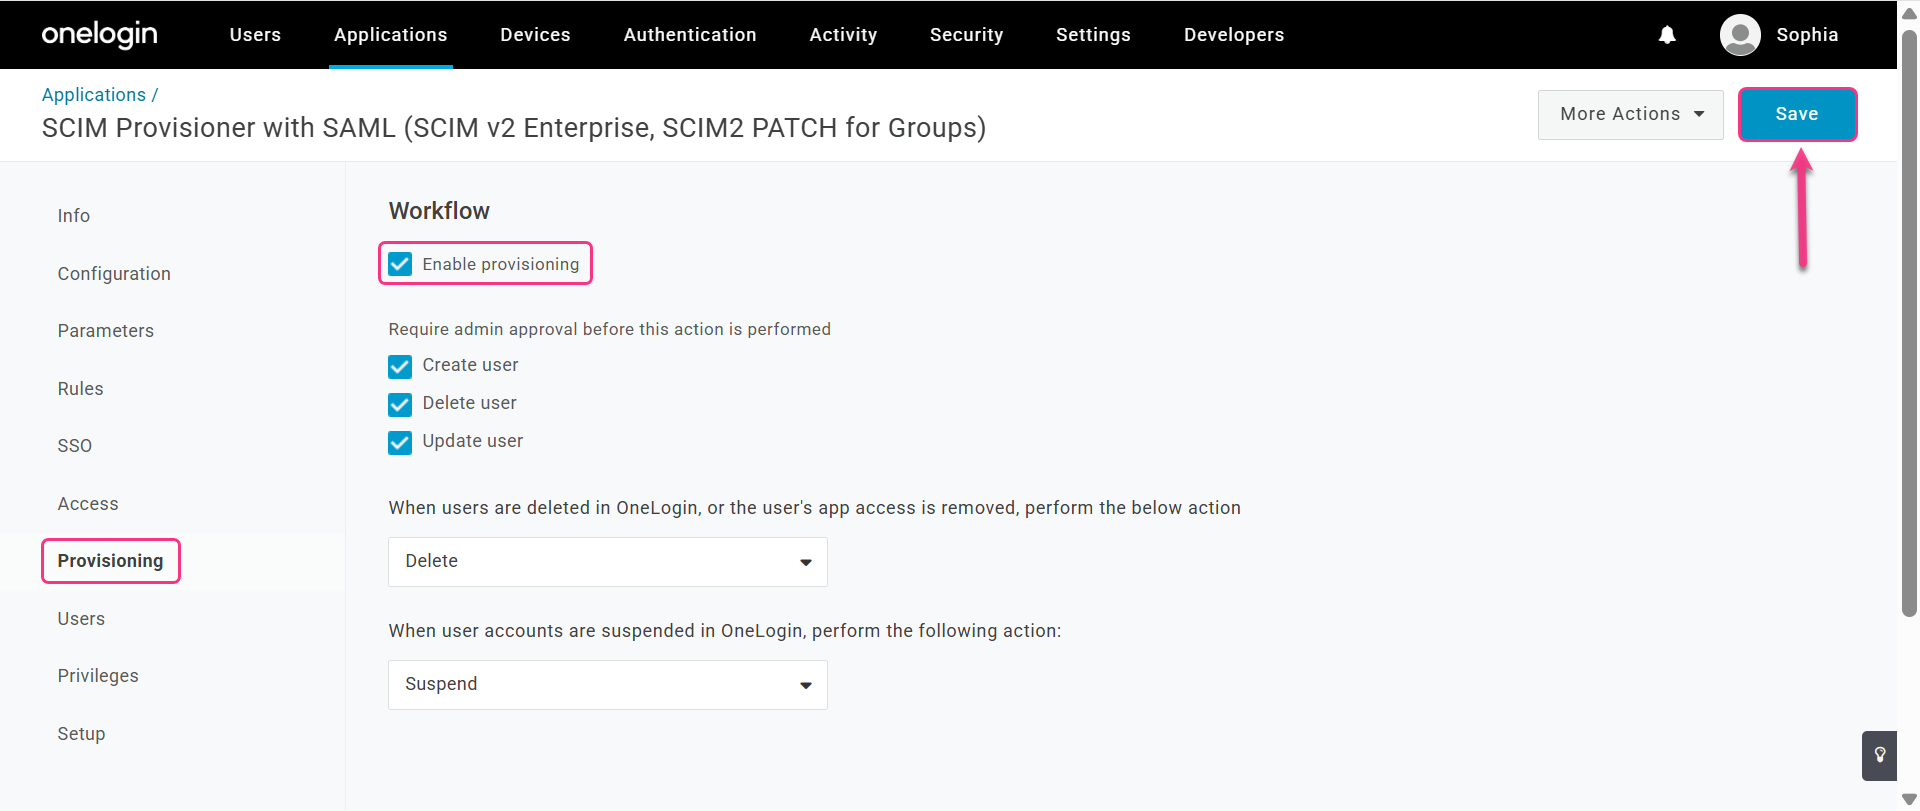
SCIM Provisioner with SAML application has been successfully created.
From the provisioning page, you can manage users by performing the following actions: Create user, Delete user, Update user. You can also customize these actions further using the available dropdown options.
Assign default role and groups in Document360
- Navigate back to Document360. In the Default role field, the role is set to Contributor by default. You can change this from the dropdown if needed.
- In the User groups and Reader groups fields, select the groups you want to add. Multiple groups can be added, and they will inherit the default role you selected earlier.
.png)
- Click Next to navigate to More settings.
Step 6: More settings
Configure SSO name and login options
- In the SSO name field, enter a name for the SSO configuration.
- In Customize login button, enter the text for the login button displayed to users.
- Auto assign reader group — this option is only available for existing SSO configurations. For newly created SSO configurations, this toggle will not be displayed as SCIM automatically provisions users and groups. Learn more about Auto assign reader group.
- Enable Sign out idle SSO user if needed, and toggle based on your requirements.
- Choose whether to invite All users or Selected users only to SSO using the radio buttons.
.png)
- Click Create to complete the SSO configuration.
SAML SSO with SCIM has been successfully set up. You can now manage readers directly from your OneLogin IdP.
Inherit from another application
When creating a new SSO configuration in Document360, you can inherit SCIM settings from an existing SSO connection. This simplifies the setup process, avoids repeating configuration steps, and helps administrators save time while ensuring consistency across integrations.
Child inherited SSO configuration
On the Configure Identity Provider (IdP) page, select the Configure an existing connection field and choose the parent SSO SCIM-enabled application you want to inherit from. Selecting this option designates the current project as the child project, inheriting all relevant properties from the parent.
.png)
Once the SSO configuration is created, the SCIM provisioning settings will be inherited from the parent application and cannot be modified in the child application.
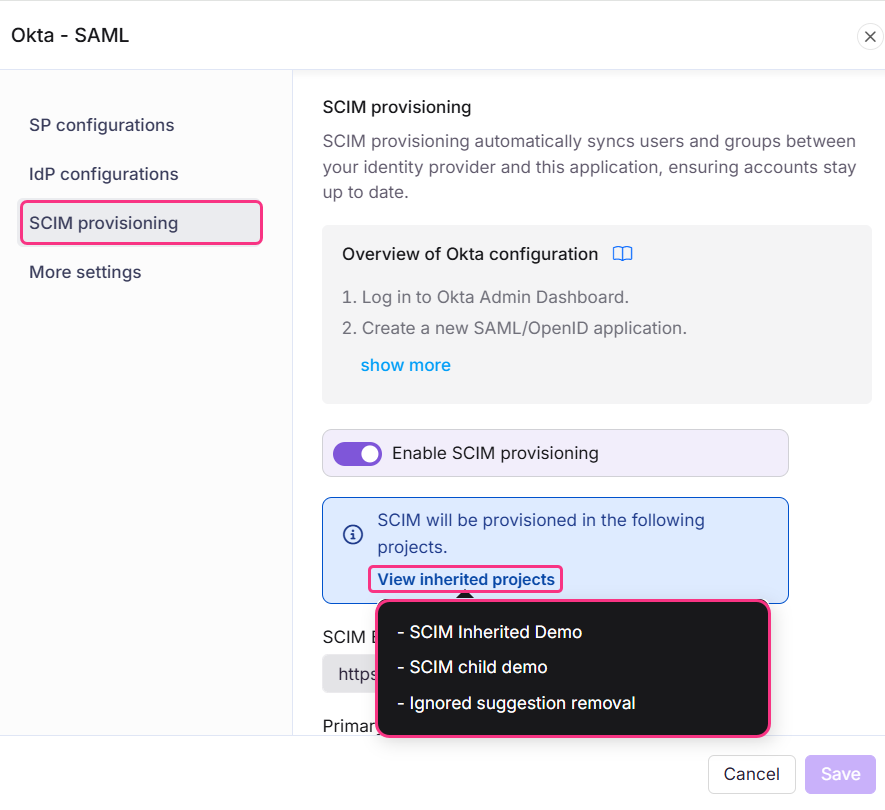
Parent inherited SSO configuration
The parent application will display a list of all projects that have inherited its configuration. Any changes made to the parent application will automatically be reflected in the child application.
- If SCIM is enabled in the parent project after child projects have already inherited it, the users and groups will be automatically provisioned to all child projects in the background.
- Enabling inheritance makes it easier to manage multiple SSO configurations with SCIM enabled, as all settings are controlled from one parent application. This saves time and reduces the effort required to manage each configuration individually.
Managing Document360 with OneLogin
Once you have successfully set up the SAML application with SCIM in Document360 using OneLogin, you can manage readers directly from OneLogin, with all changes automatically reflected in Document360.
Add a reader
- In the OneLogin top menu, expand the Users dropdown and select Users.
- Click New User, enter the required user details, and click Save.
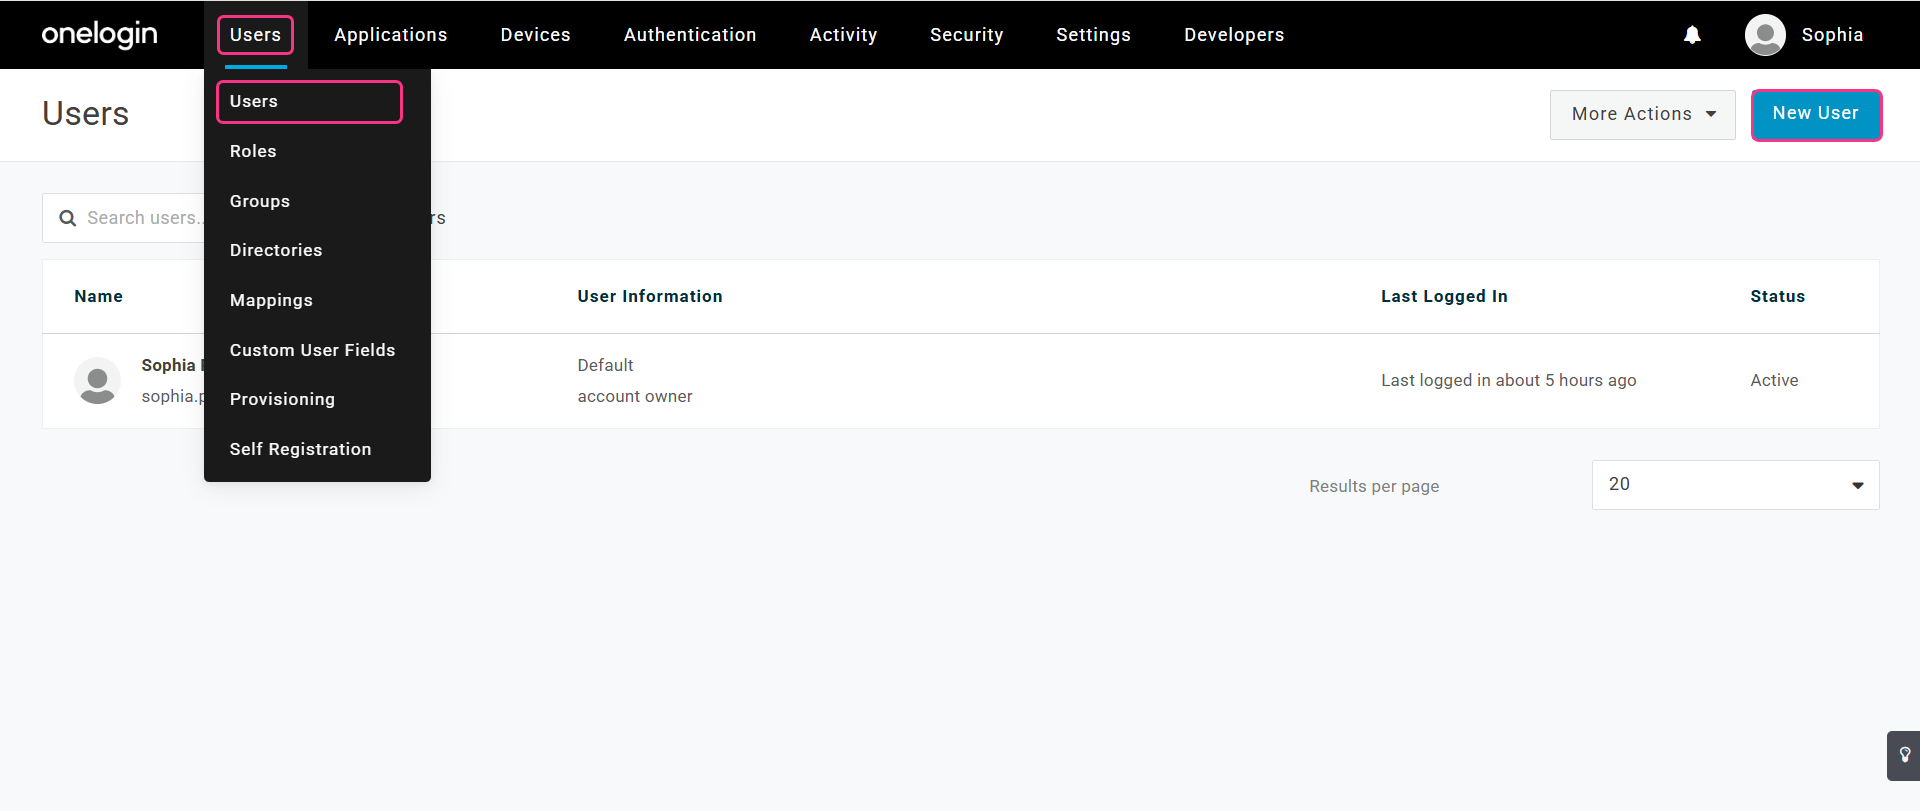
A new user is now successfully created.
Assign application to the user
- After creating the user, go to Application in the left menu.
- Click the + icon in the top-right corner to add an application.
- Select the application with SCIM provisioned SAML enabled and click Continue.
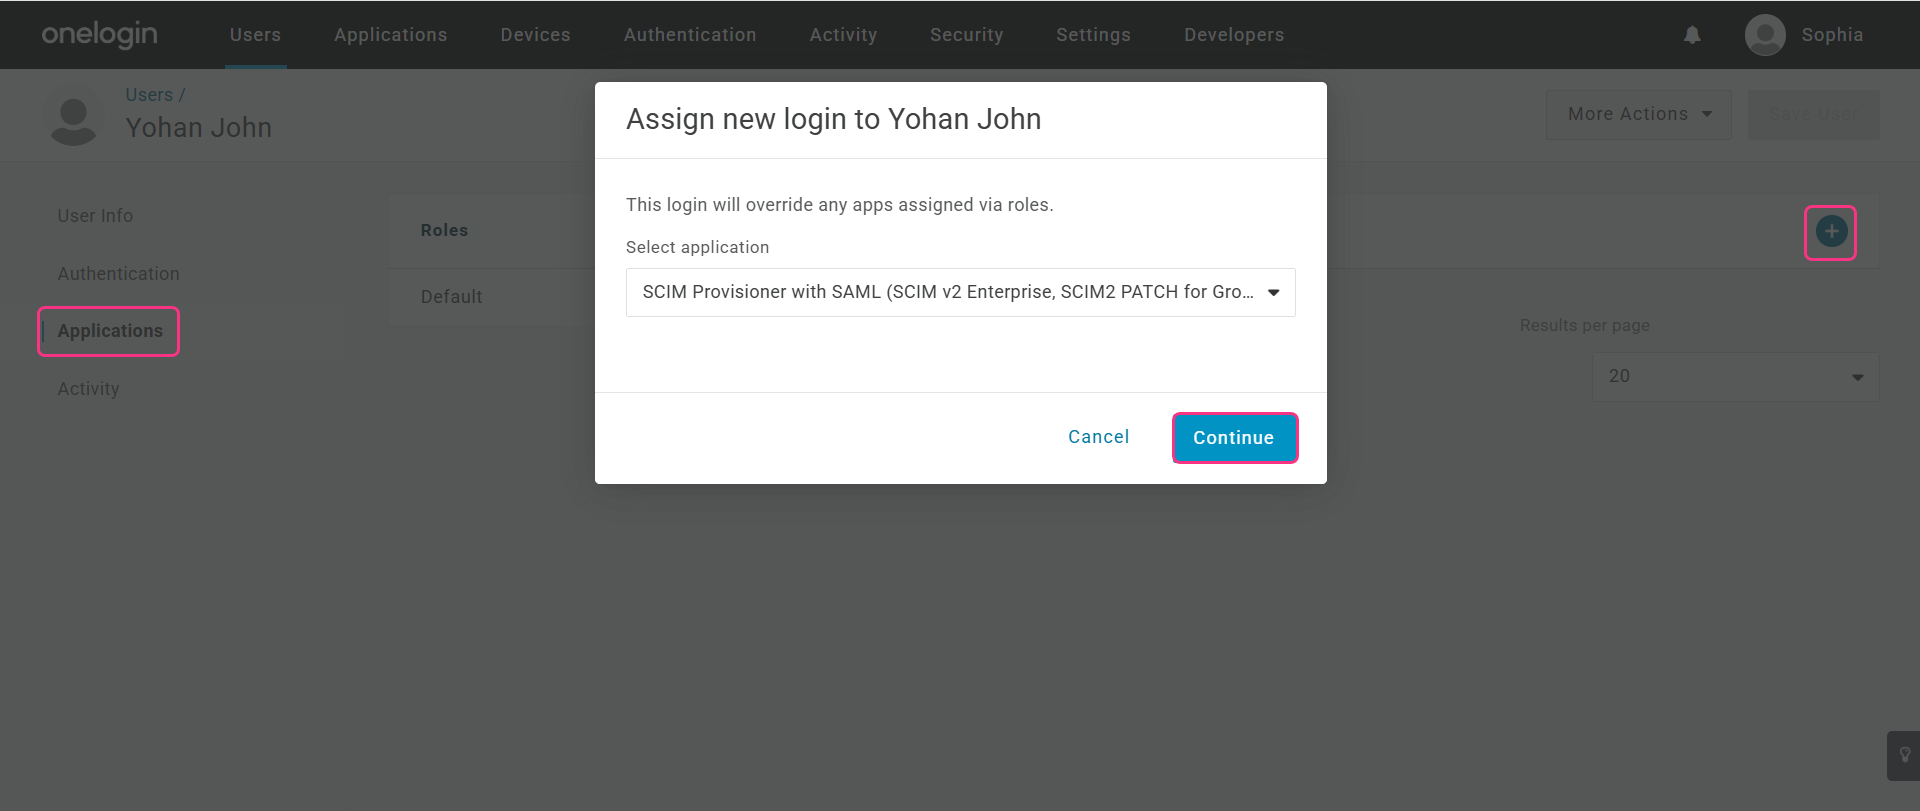
- Enter the user's email address in the SCIM username field and click Save.
The user is now successfully assigned to the application.
Approve user status
- In the OneLogin top menu, click Applications and select Applications.
- Choose the SCIM-provisioned SAML application and open the Users tab.
- Click the user's status, which shows as Pending, then select Approve in the confirmation dialog.
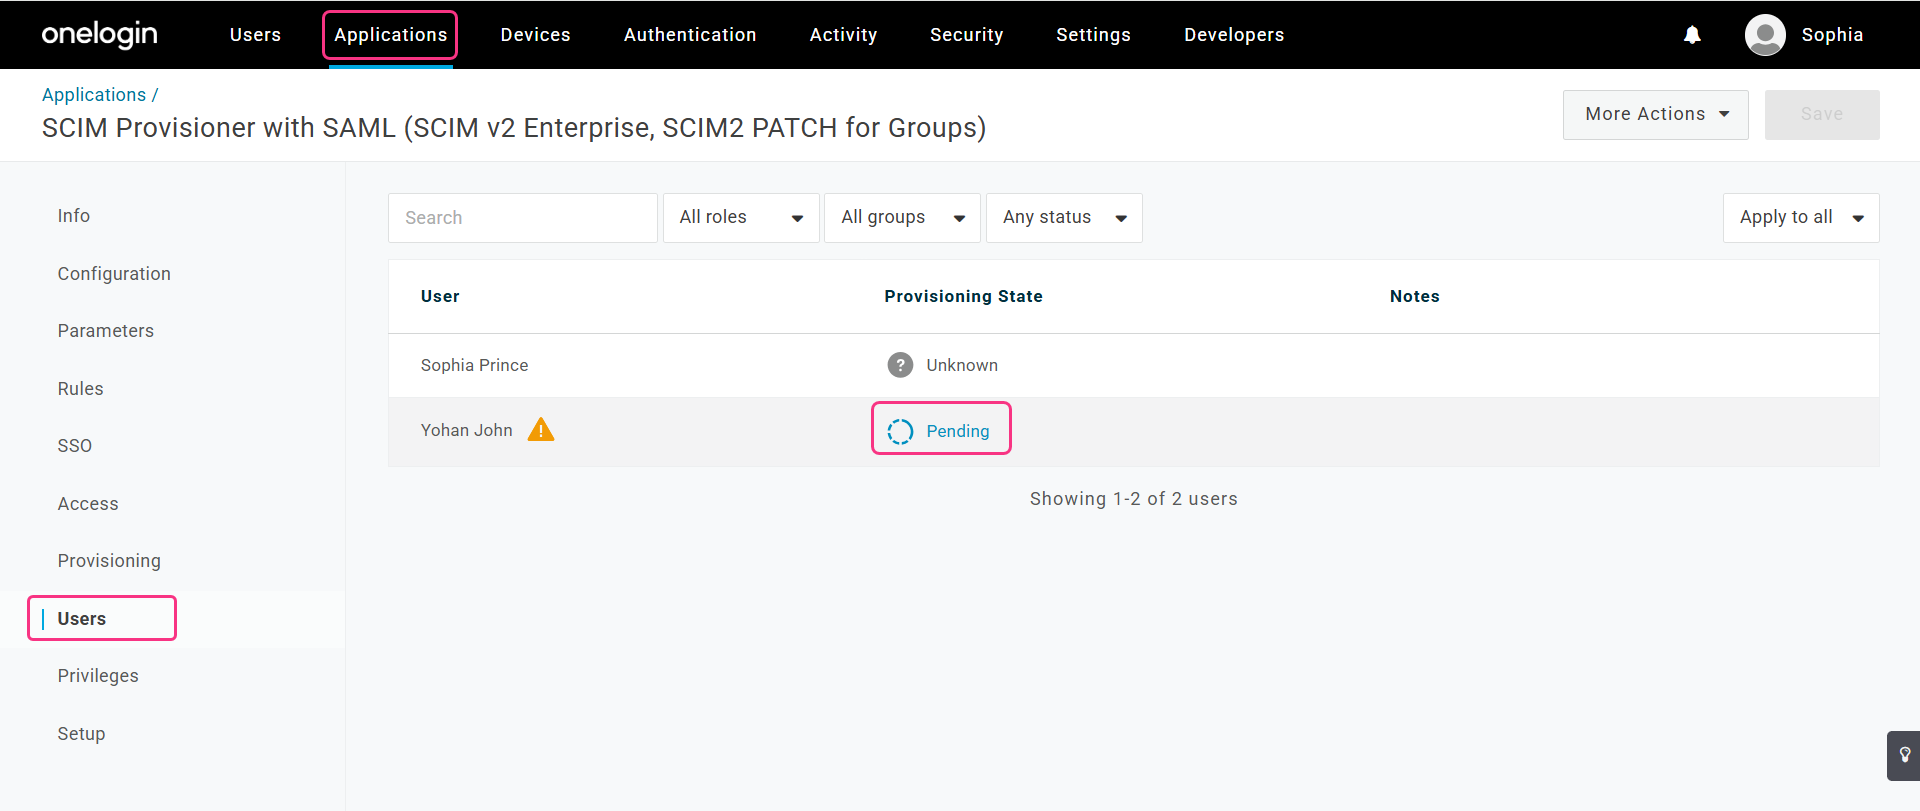
The user is now approved and successfully added to Document360.
Verify in Document360
To verify the user has been added successfully to Document360:
- In Document360, navigate to Settings () > Users & permissions > Readers & groups.
.png)
The reader is automatically added in Document360. The SSO-SCIM badge next to their name indicates that SCIM is enabled.
User attributes and group mapping are not supported in OneLogin. You can only manage readers via SCIM. Users and groups cannot be added from OneLogin.
Manage users in Document360
When SCIM is enabled, editing a user's name or deleting a user directly in Document360 is disabled. These actions must be managed through your IdP to keep both platforms in sync.
.png)
However, you can still manage content access within Document360.
Manage content access
- In Document360, navigate to Settings () > Users & permissions > Readers & groups.
- Select the desired user and click Manage content access.
- Assign the Content access level from the dropdown and click Update.
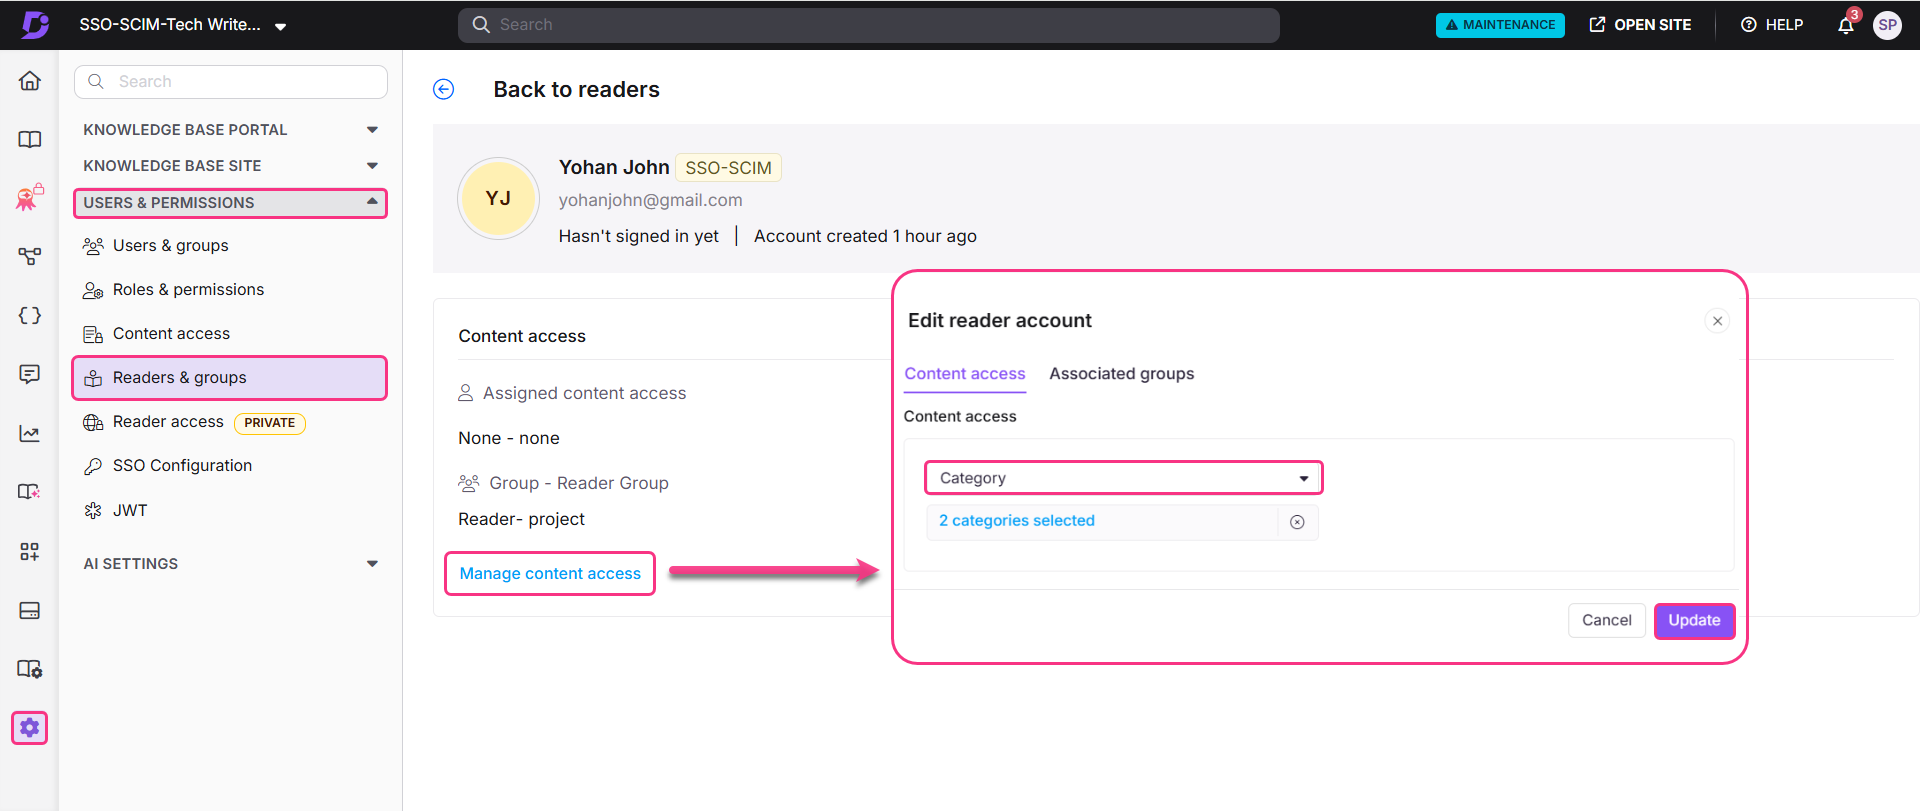
Content access is now assigned to the user successfully.
Delete a user
- In the OneLogin top menu, click Users and select the user you want to delete.
- Expand the More Actions dropdown and click Delete.
.png)
- In the confirmation dialog, click Delete again.
The user is successfully deleted and will no longer appear in OneLogin.
When you delete a user in OneLogin, the user will not be removed from Document360. Instead, the user's status will change from Active to Inactive.
Best practices
- Use the correct SCIM app in OneLogin. Search for and select SCIM Provisioner with SAML (SCIM v2 Enterprise, SCIM2 PATCH for Groups) specifically. Using a different app will not work with Document360.
- Manage only readers through OneLogin SCIM. User attributes and group mapping are not supported. Plan your user management workflow accordingly.
- Approve provisioned users promptly. Users added in OneLogin appear in Document360 with a Pending status. Approve them in OneLogin to activate access.
- Do not delete users in Document360 when SCIM is enabled. Deleting a user directly in Document360 is disabled when SCIM is active. Manage deletions from OneLogin. Note that deleted users in OneLogin become Inactive in Document360, not deleted.
- Use inheritance for multi-project setups. If you have multiple Document360 projects that share the same SSO configuration, use parent-child inheritance to manage all settings from one place.
FAQ
Why can't I add users and groups from OneLogin?
User attributes and group mapping are not supported in OneLogin's SCIM integration with Document360. Only reader accounts can be provisioned via SCIM from OneLogin. If you need to manage users and groups via SCIM, consider using Okta or Microsoft Entra as your identity provider.
What happens when I delete a user in OneLogin?
When you delete a user in OneLogin, the user is not removed from Document360. Instead, their status changes from Active to Inactive in Document360.
Can I inherit SCIM settings from a parent project?
Yes. When creating a new SSO configuration in Document360, you can select an existing SCIM-enabled SSO configuration as the parent. The current project will inherit all relevant settings. Once created, the inherited SCIM settings cannot be modified in the child application.