Plans supporting this feature: Enterprise
Log in to your Document360 account and select the project for which you wish to configure Google SAML Single Sign-On with your Google Workspace account. Next, log in to your Google Workspace account. If you don’t have a Google Workspace account, you can create one at https://workspace.google.com/. Once you have logged in to your Google workplace account, navigate to the admin console using the Admin button at the top right. Please note that only users with Owner or Admin as Project role can configure SSO in Document360.
PRO TIP
It is recommended to open Document360 and Google Workspace in two separate tabs/browser windows, since configuring SSO in Document360 will require you to switch between Okta and Document360 multiple times.
Adding a custom SAML app on Google
On the admin console home page, click on the Apps option and select the SAML apps option.
Click on Add app and in the dropdown, select Add custom SAML app.
In the App details, enter any name for your app and click on Continue.
Next, you will find the SSO URL, Entity ID details, and the Certificate.
Make a note of these details, since you will need them while accessing the Configure the Identity Provider (IdP) page on Document360.
In the Certificate section, click on the Download icon to save the certificate (.pem format) in your computer's local storage.
You will have to upload this certificate later in the Configure the Identity Provider (IdP) page in Document360.
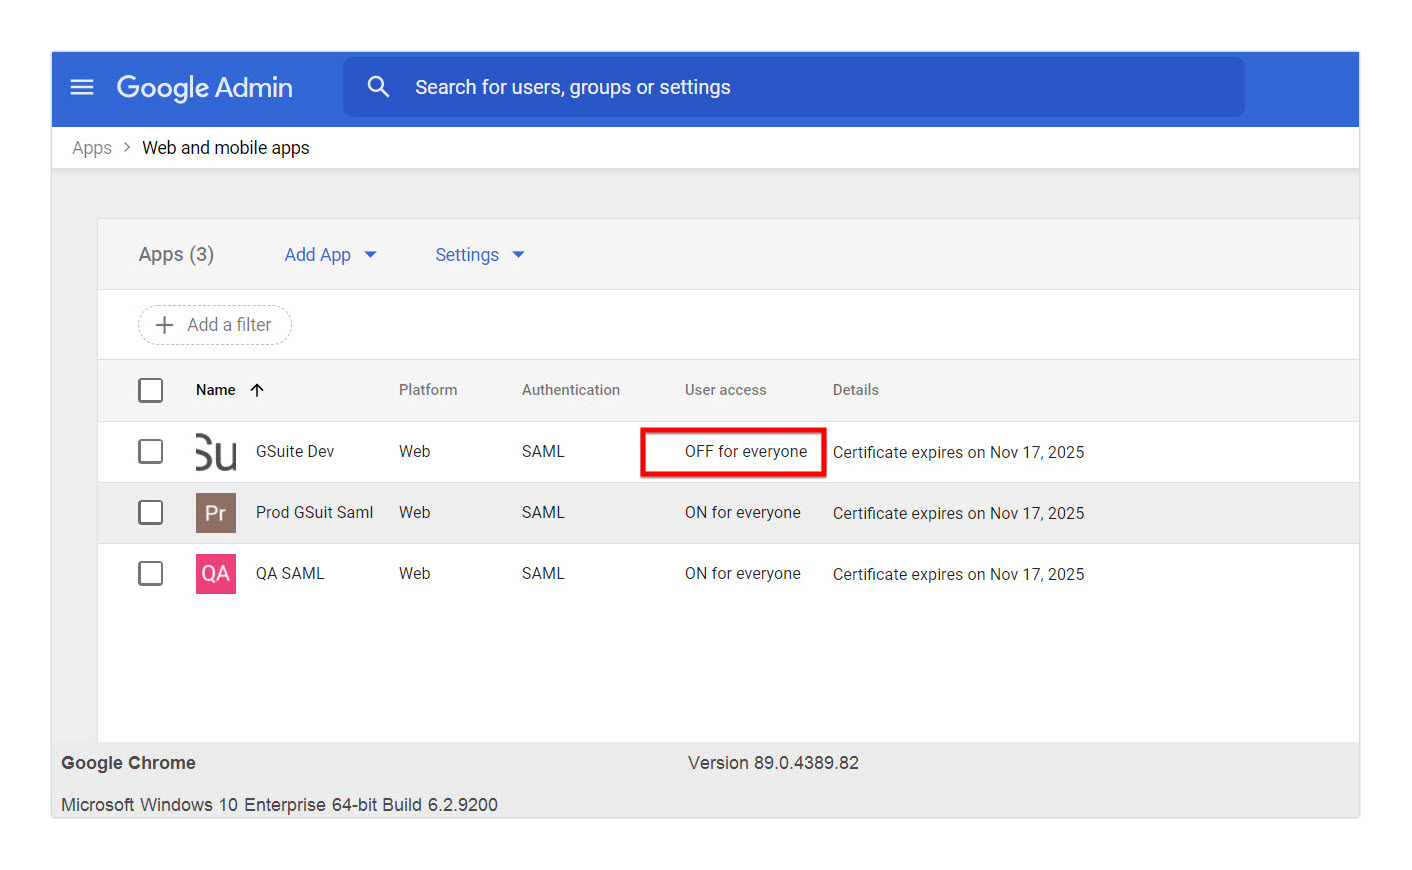
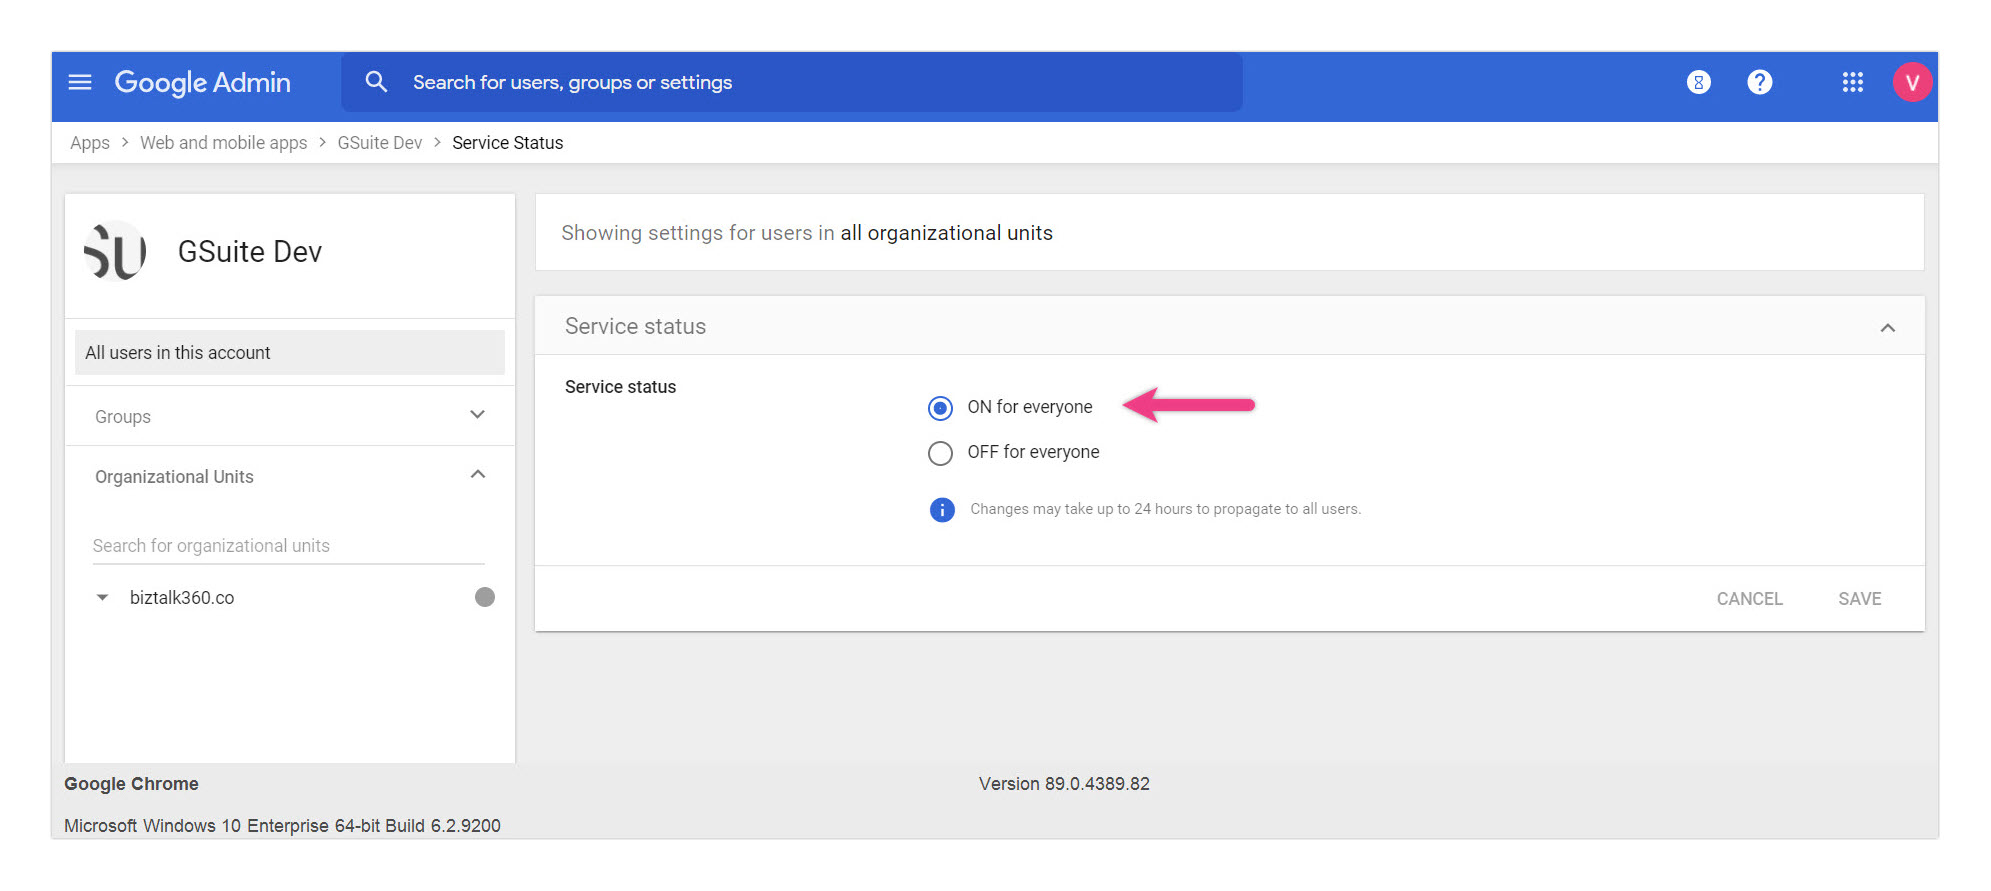
In User access, the Service status will by default be OFF for everyone. You must manually change it to ON for everyone to work.
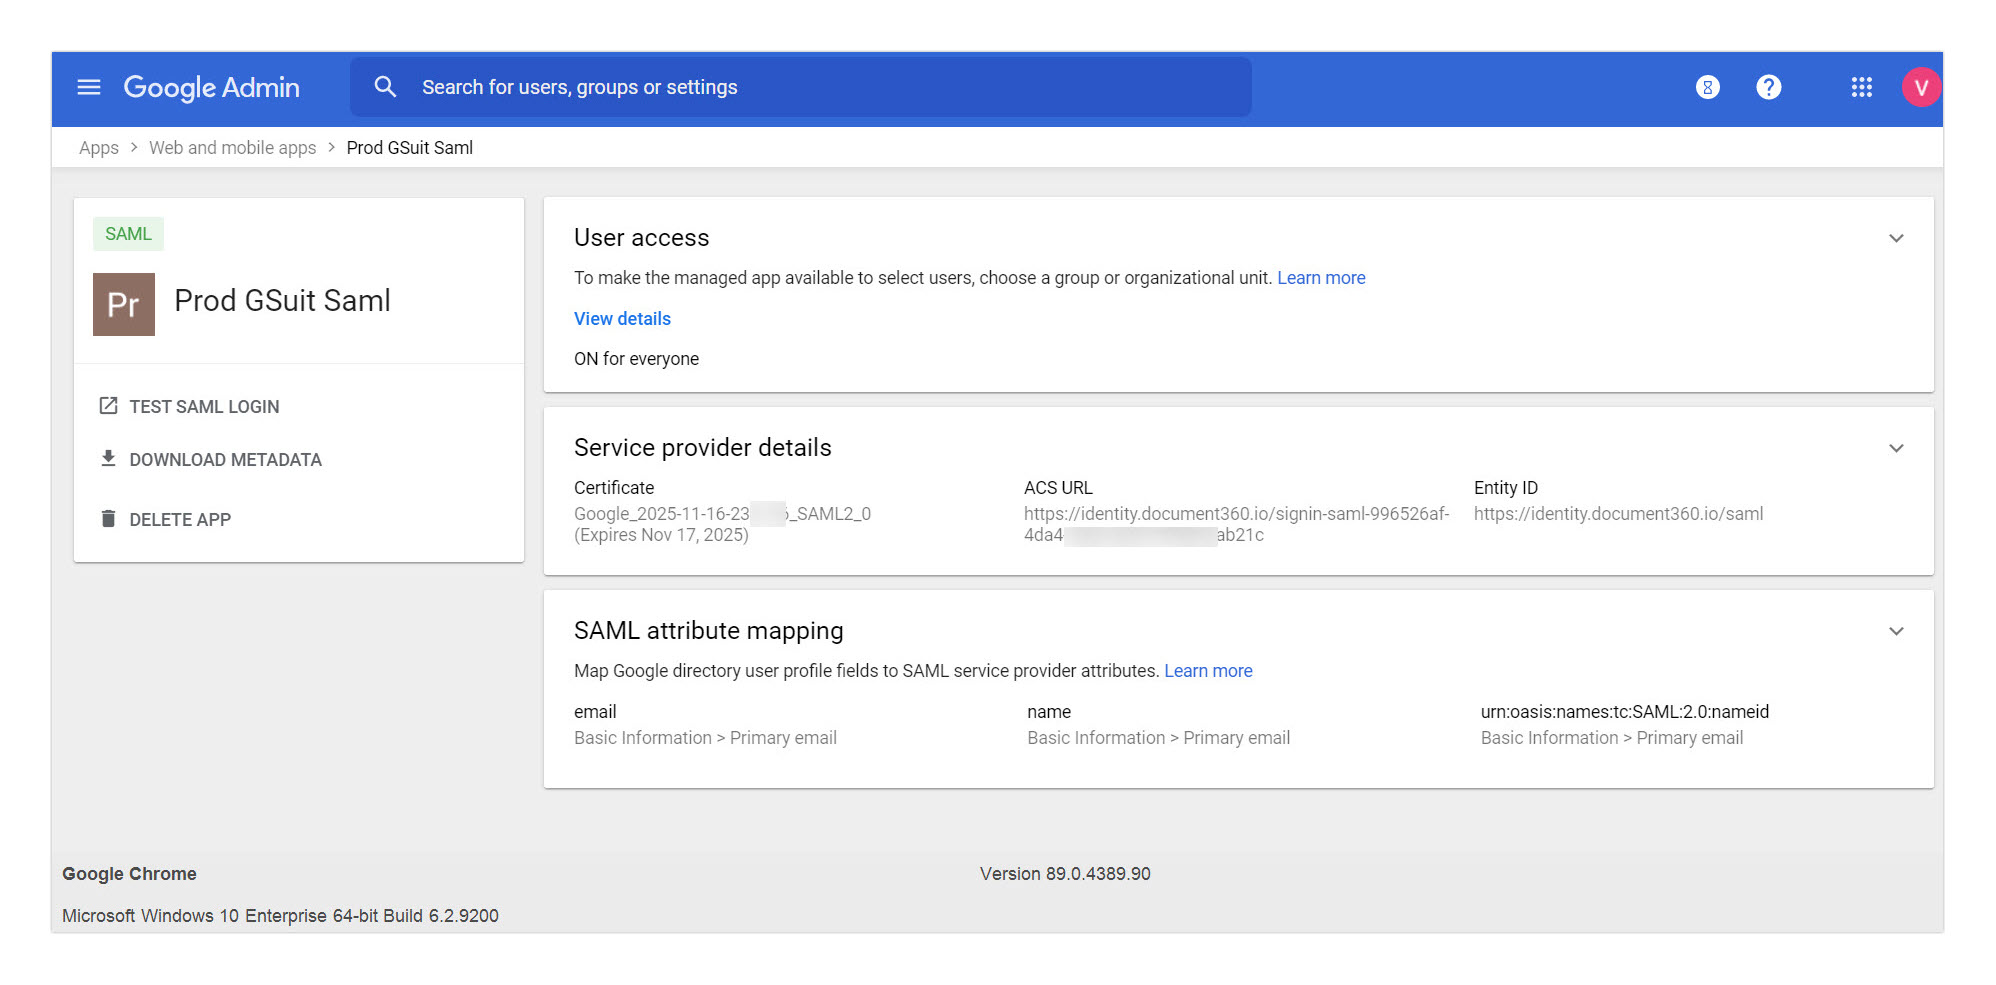
After configuring it on the Google side, here's how your SAML app would look.
Service Provider configuration
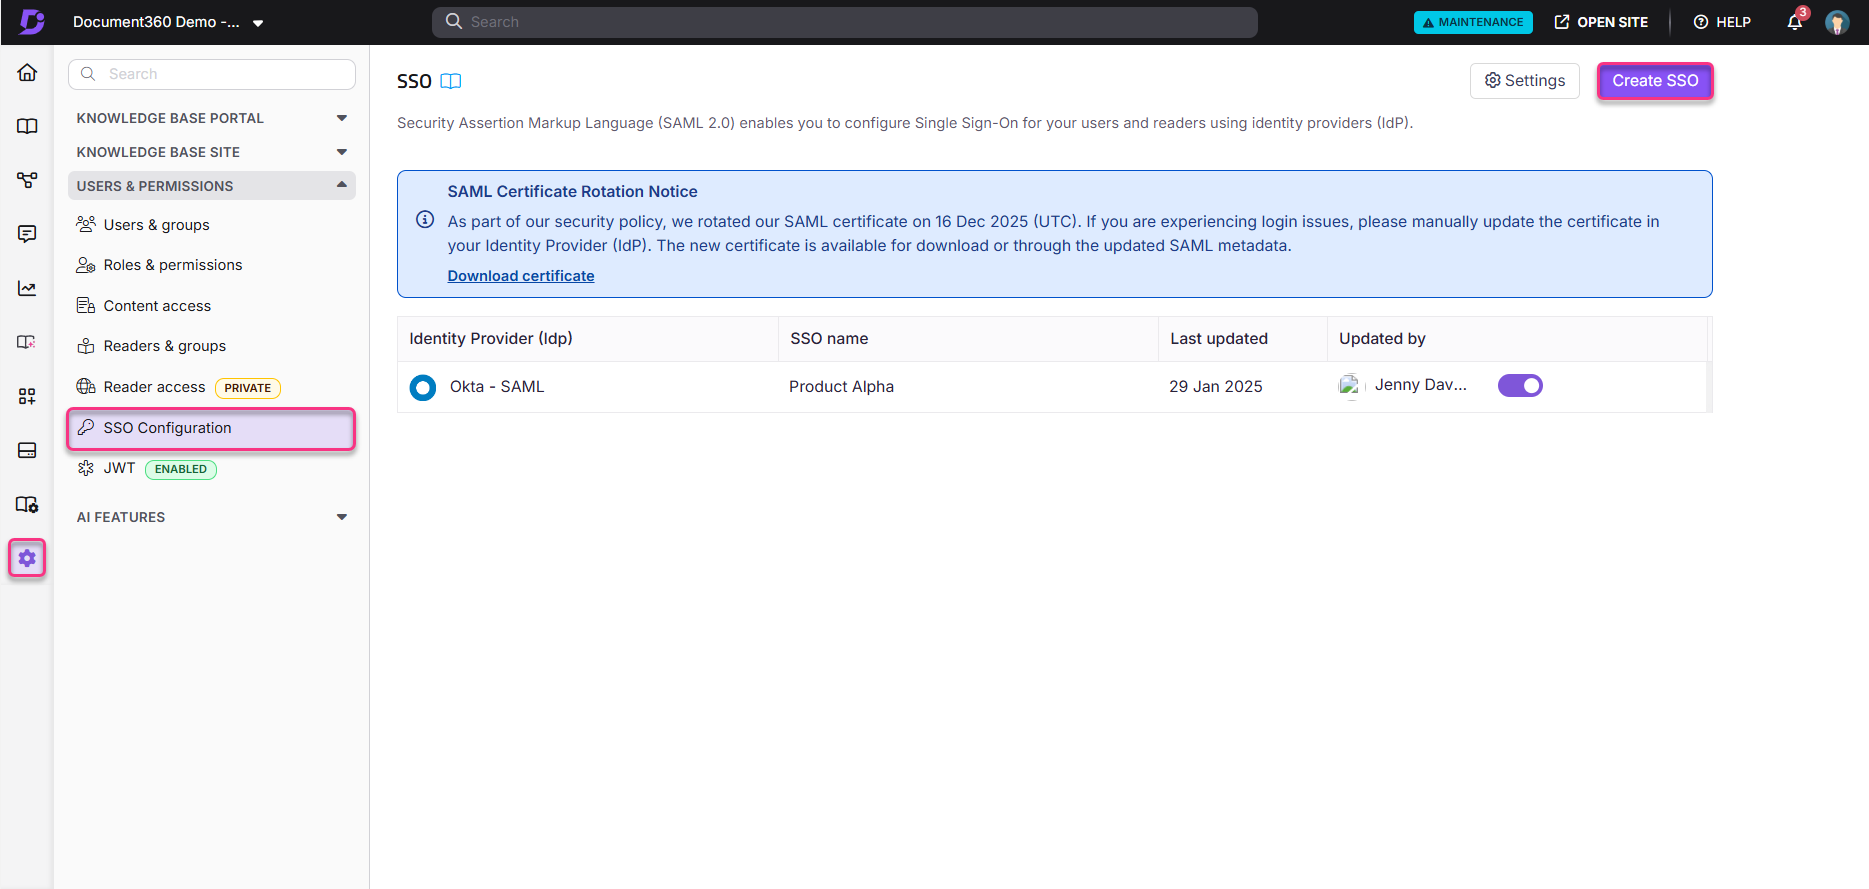
To configure Single Sign-On (SSO), you need Service Provider (SP) details such as ACS URL and entity ID. These details will be available in the Create SSO panel on Document360. To navigate to the Create SSO panel,
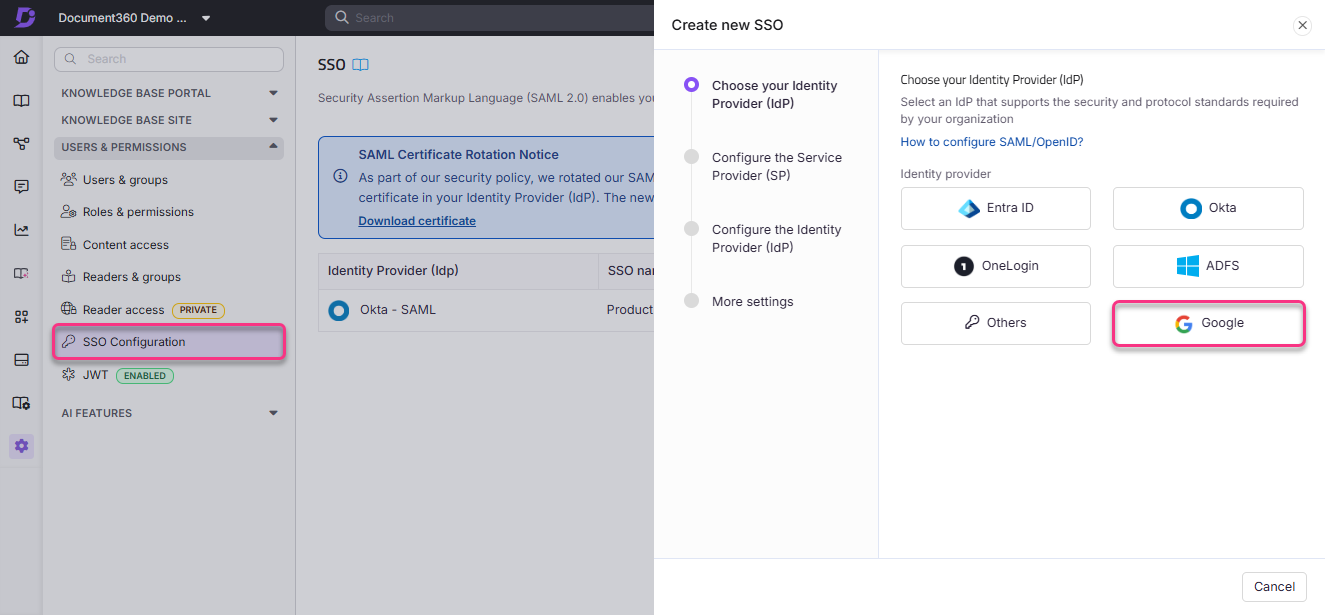
Go to Settings > Users & permissions > SSO Configuration.
Click the Create SSO button.
In the Choose your Identity Provider (IdP) page, select Google as the identity provider.
Next, from the Configure the Service Provider (SP) page, copy the following parameters.
Google custom SAML app | Document360 SSO SAML settings |
|---|---|
ACS URL | Callback path |
Entity ID | Service provider entity Id |
Start URL (optional) |
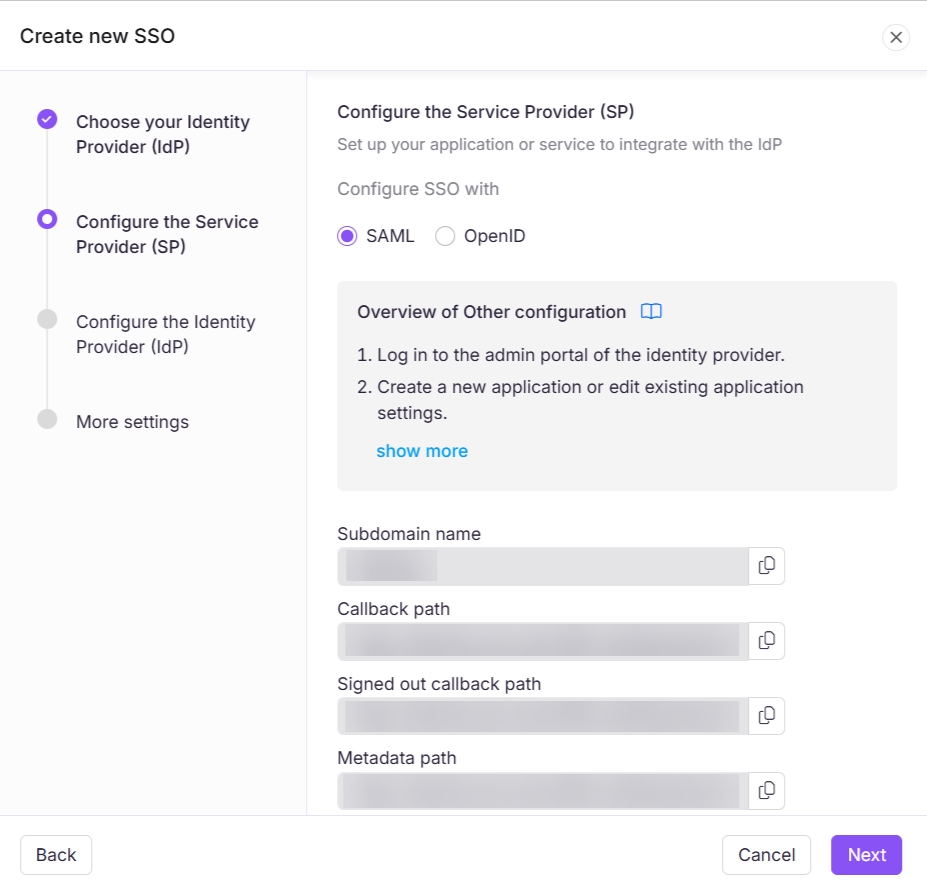
Switch to the Google workspace tab and paste the parameters onto the Google custom SAML app page.
In Name ID format select EMAIL from the dropdown
In Name ID select Basic Information > Primary email
Click on the Continue button
Attributes
Add and select user fields in Google Directory, then map them to service provider attributes. Add the following attributes.
Google Directory attributes | App attributes |
|---|---|
Primary email | name |
Primary email | |
Primary email | urn:oasis:names:tc:SAML:2.0:nameid |
Click on the Add Mapping button each time you add an attribute, and when you're done, click on the Finish button.
Identity Provider configuration
Switch back to the Document360 panel, to the Configure the Service Provider (SP) page, and click Next to navigate to the Configure the Identity Provider (IdP) page.
In the Configure the Identity Provider (IdP) page, add the information you had noted down earlier from the Google custom SAML app page.
Document360 SSO settings | Info from Google custom SAML app |
|---|---|
Sign on URL | SSO URL |
Entity id | Entity ID |
Sign Out URL (Optional) | NA |
SAML Certificate | Certificate (Upload the recent .pem file you downloaded from Google) |
Next, turn on/off the Allow IdP initiated sign in toggle as per your project requirements.
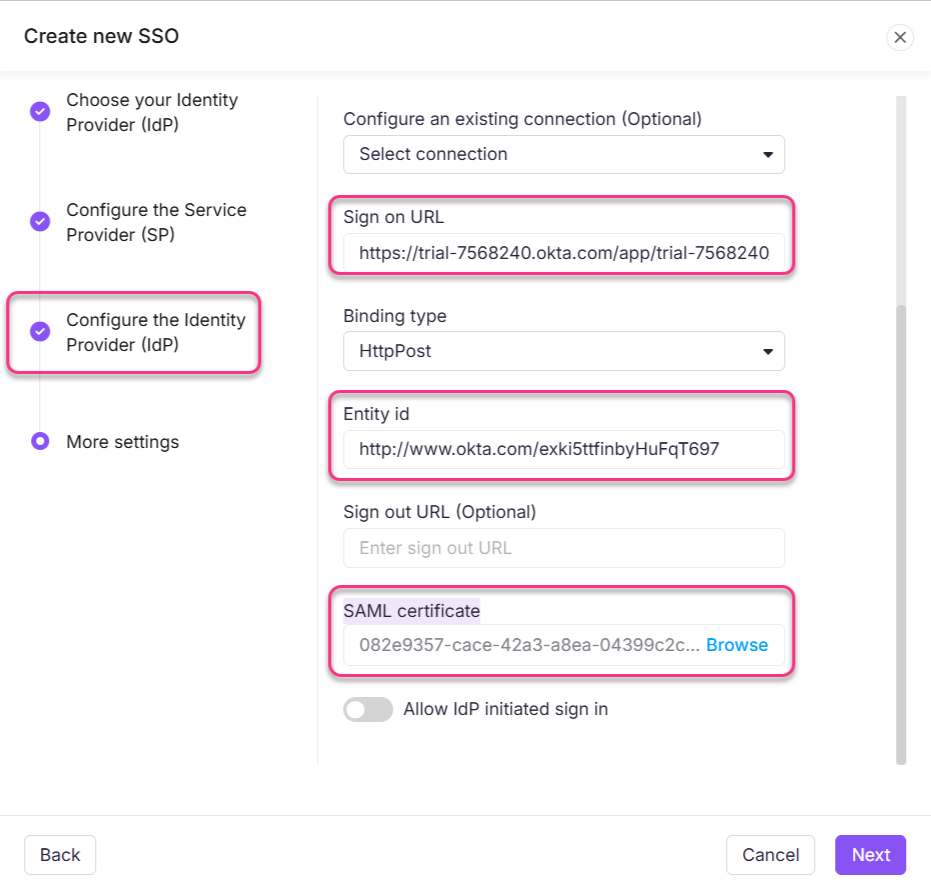
Once done, click the Next button to navigate to the More settings page.
In the More settings page, enter the desired name for the SSO configuration in the SSO name field.
Enter the text you would like to show users for the login button in the Customize login button text.
Toggle on/off the Auto assign reader group and Sign out idle SSO user toggles based on your requirements.
Invite all your users or selected users using the Convert existing user and reader accounts to SSO radio buttons.
Click Create to complete the SSO configuration setup.
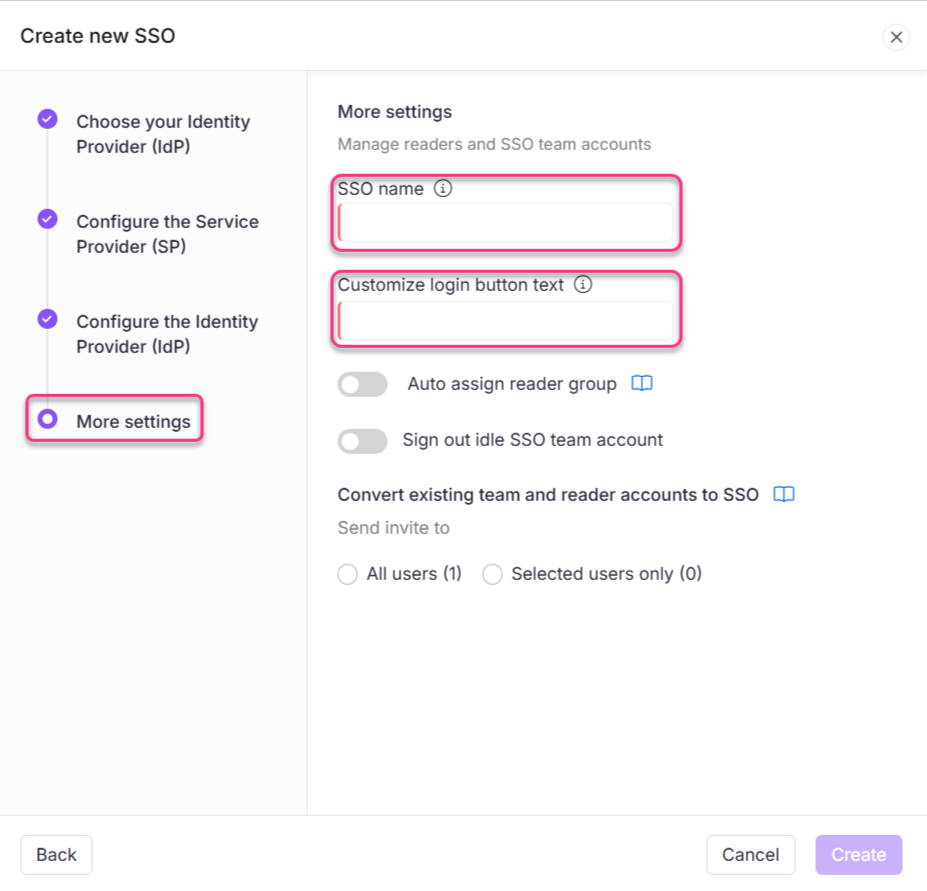
The SSO configuration based on the SAML protocol will be configured using Okta successfully.