Plans supporting this feature: Professional Business Enterprise
The Unauthorized page appears when a user without proper permissions attempts to access a restricted URL in your knowledge base. For example, this page will display if a user tries to access private content without the necessary access rights.
To improve user experience, you can customize the Unauthorized page by adding a descriptive message that explains the reason for restricted access and provides a solution, such as: “You don’t have permission to view this page. Contact your admin to request access.”
NOTE
Once you configure a custom unauthorized page, it cannot be reverted to the default version. We recommend creating a custom unauthorized page to enhance the user experience.
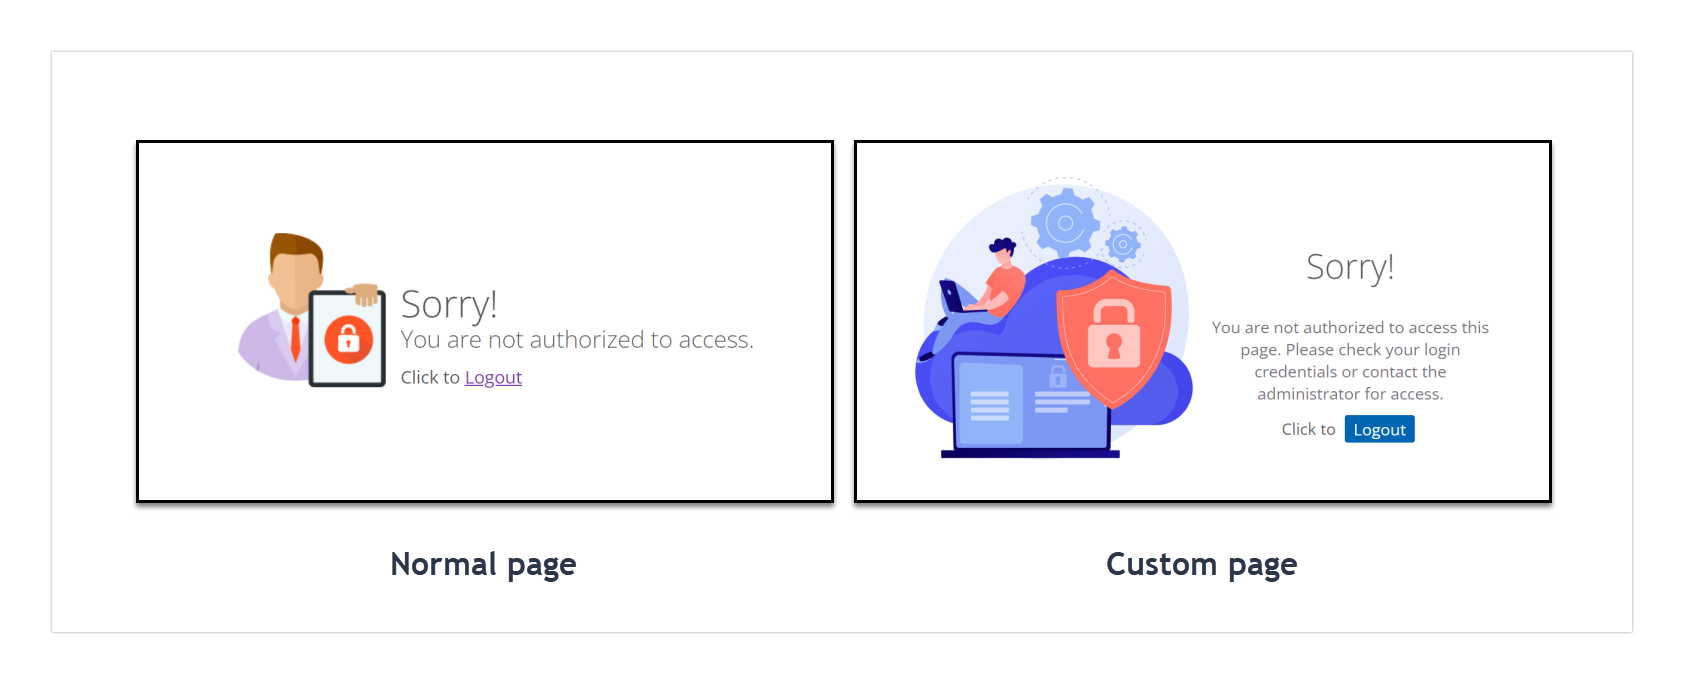
Customizing the Unauthorized page
Follow these steps to customize the Unauthorized page:
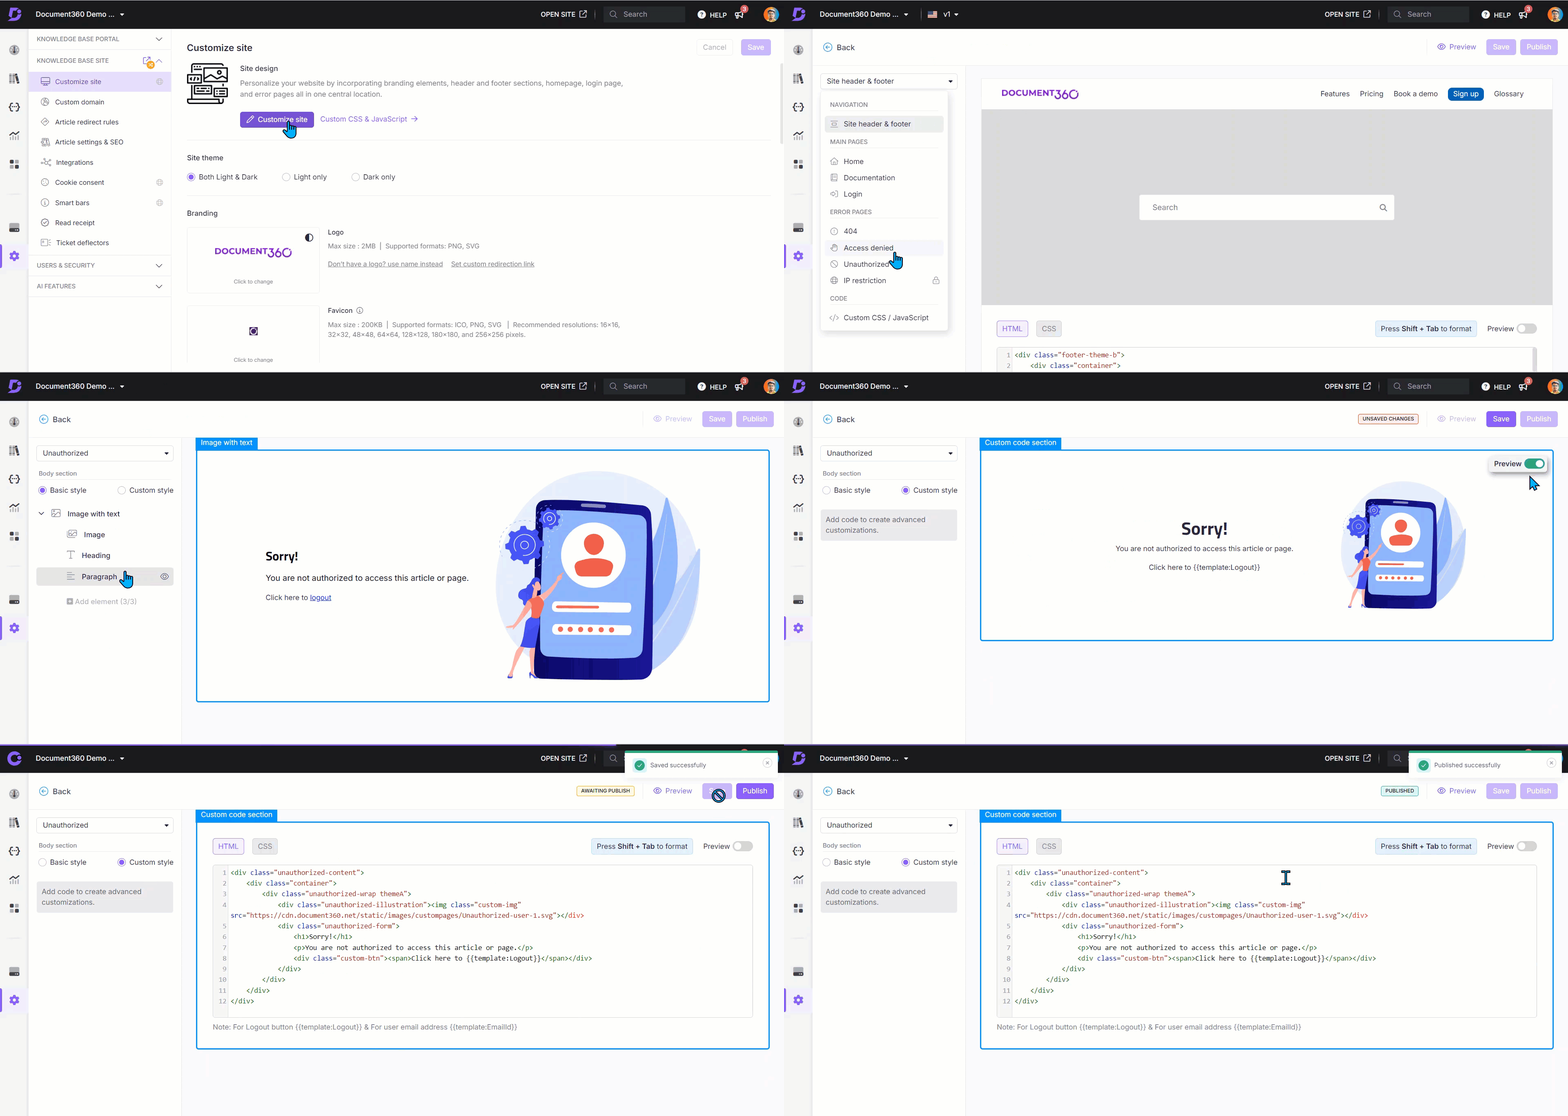
Navigate to Settings () in the left navigation bar in the Knowledge base portal.
In the left navigation pane, navigate to Knowledge base site > Customize site.
The Customize site page contains all the basic site design configurations.
Click Customize site.
From the left dropdown menu, select Unauthorized page.
Customize the page using one of two options:
Basic style: Customize the default image and text.
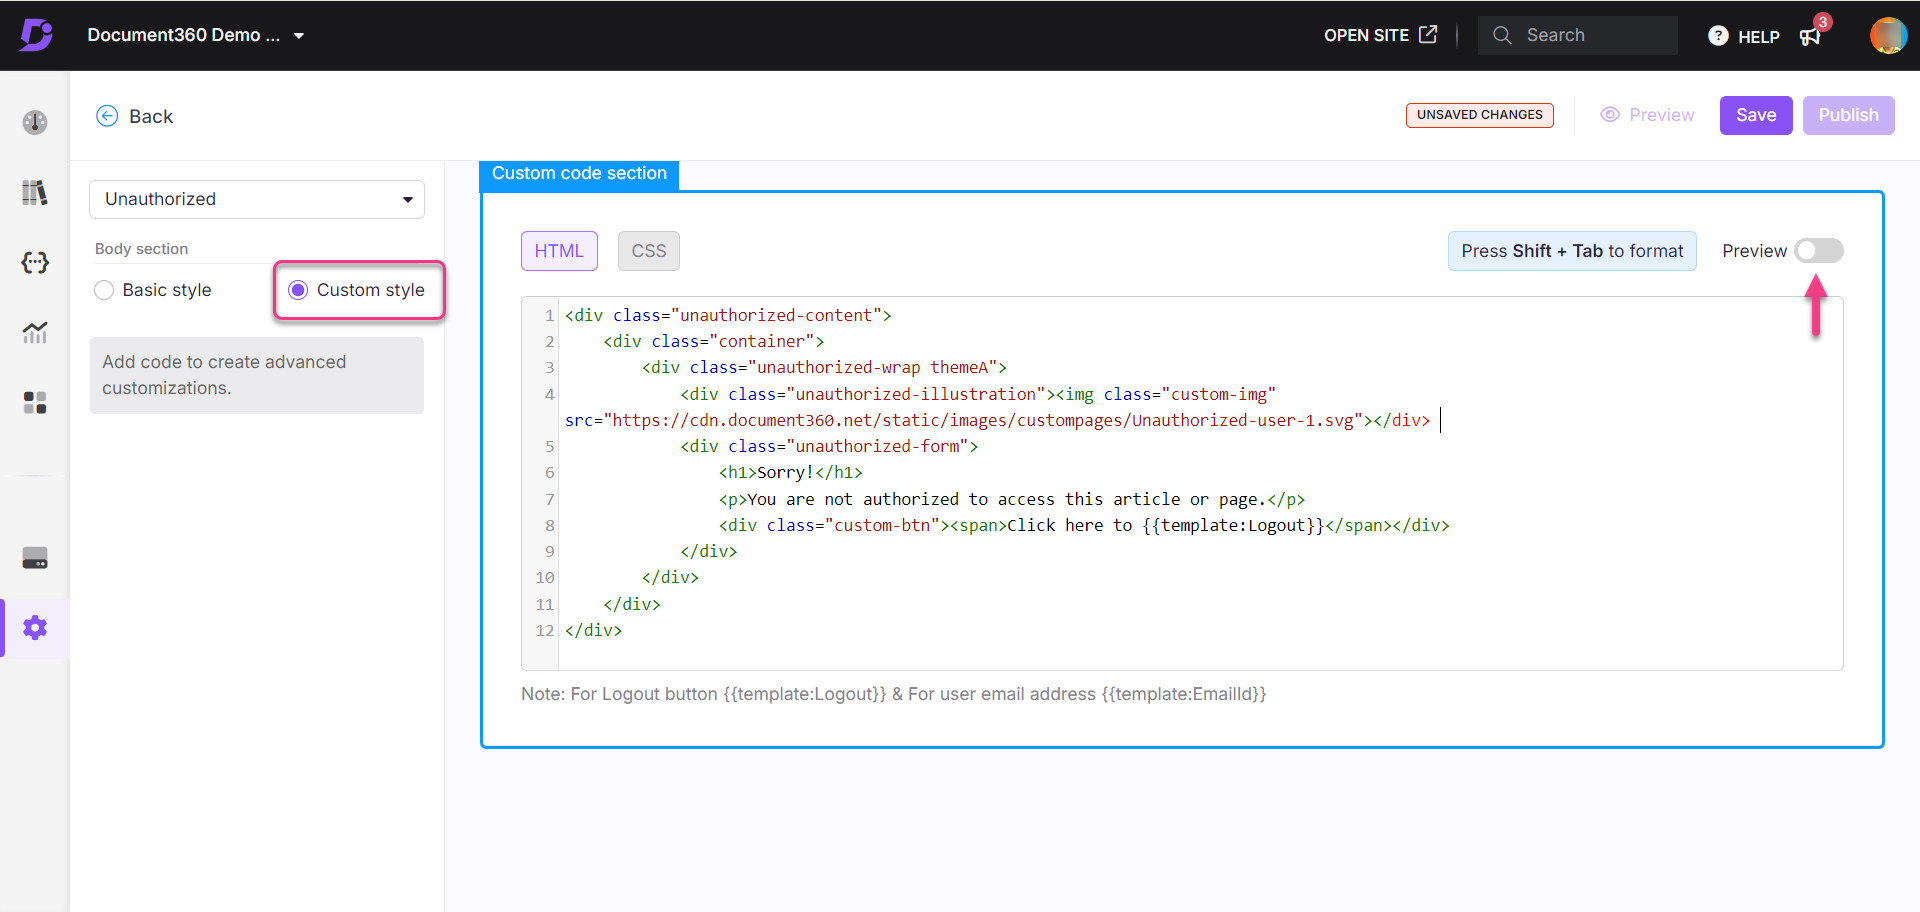
Custom style: Add your own HTML and CSS for a fully personalized page. Use the Preview toggle to switch between code view and rendered view.
Click Save to save your changes without applying them immediately.
Click Preview to see how your changes will appear on the knowledge base site.
Click Publish to make your recent changes visible to readers.
Click the More () icon and select Reset to published version to discard all saved and unsaved customizations and revert to the last published version.
NOTE
The Reset to published version feature is available only for new Knowledge base site 2.0 projects created after March 29, 2025.
Basic style
Adding an image
To enhance the page visually, you can upload a relevant image.
Click Image.
The Image panel will appear.
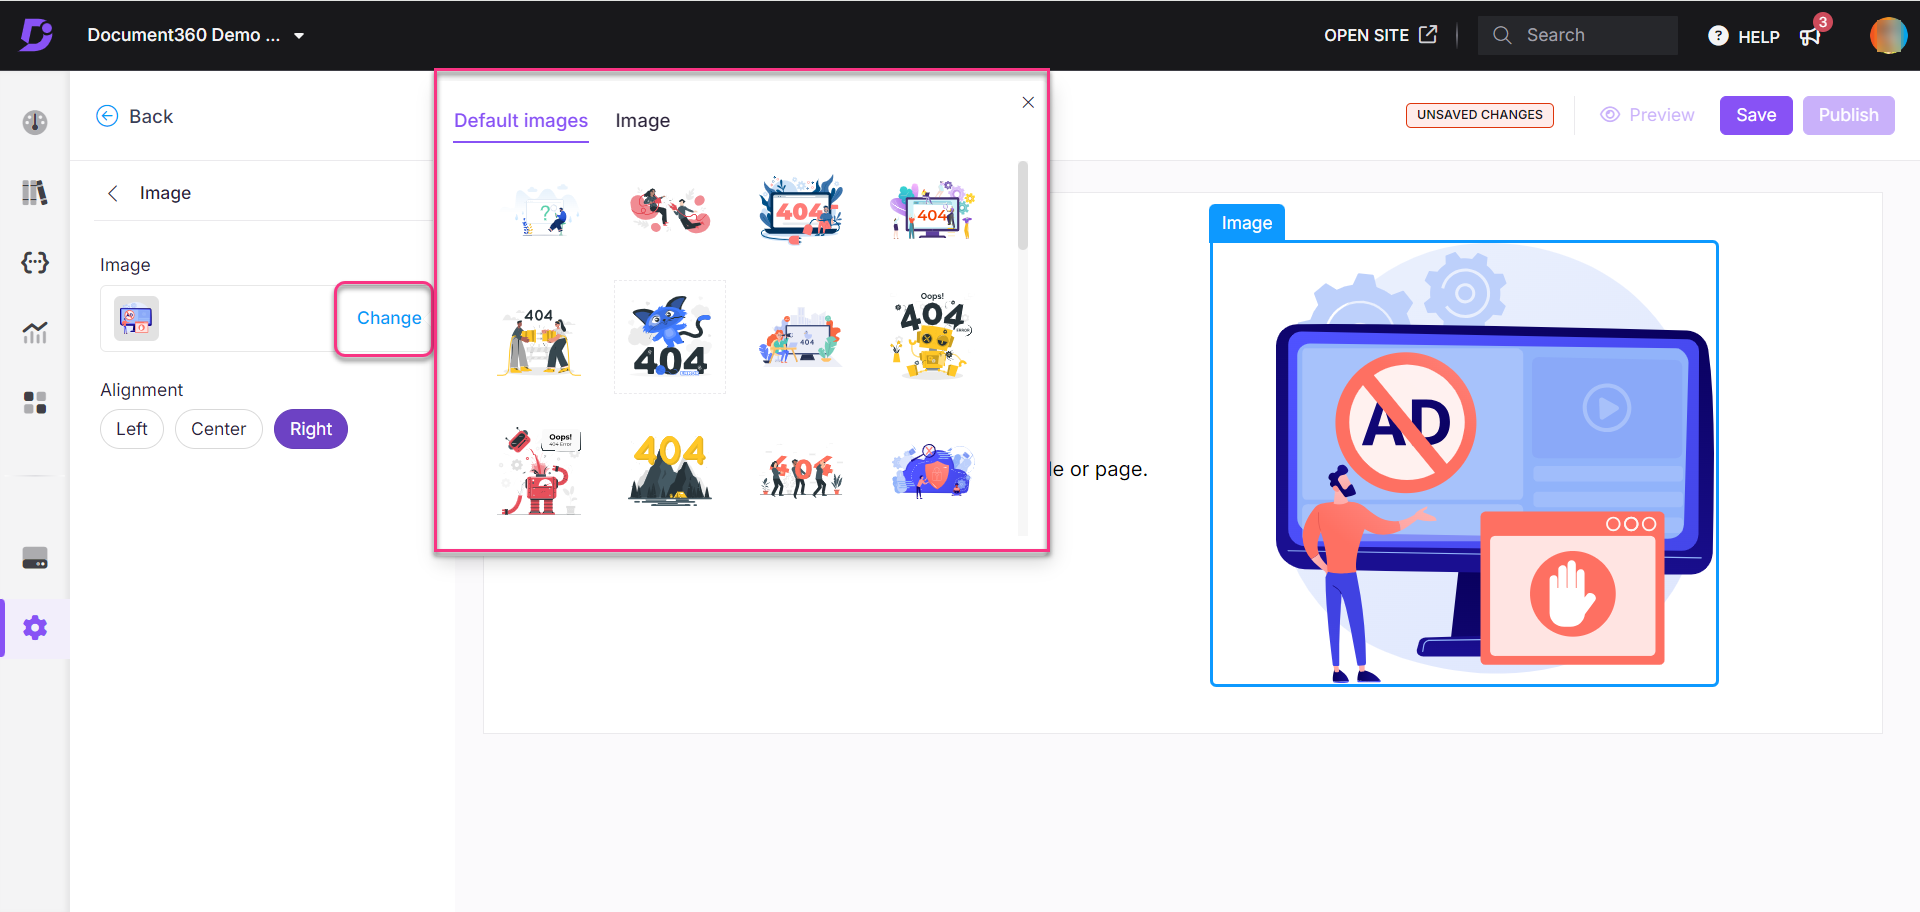
Click Change and choose between two options:
a. Default images: Select from the default images and click Save.
b. Image: Either provide a URL or upload an image from your drive.
To upload from URL: Enter the image URL in the URL field and click Save.
To upload from your drive: Click Upload an image, select the file, and click Save.
Set the image alignment (left, center, or right) as needed.
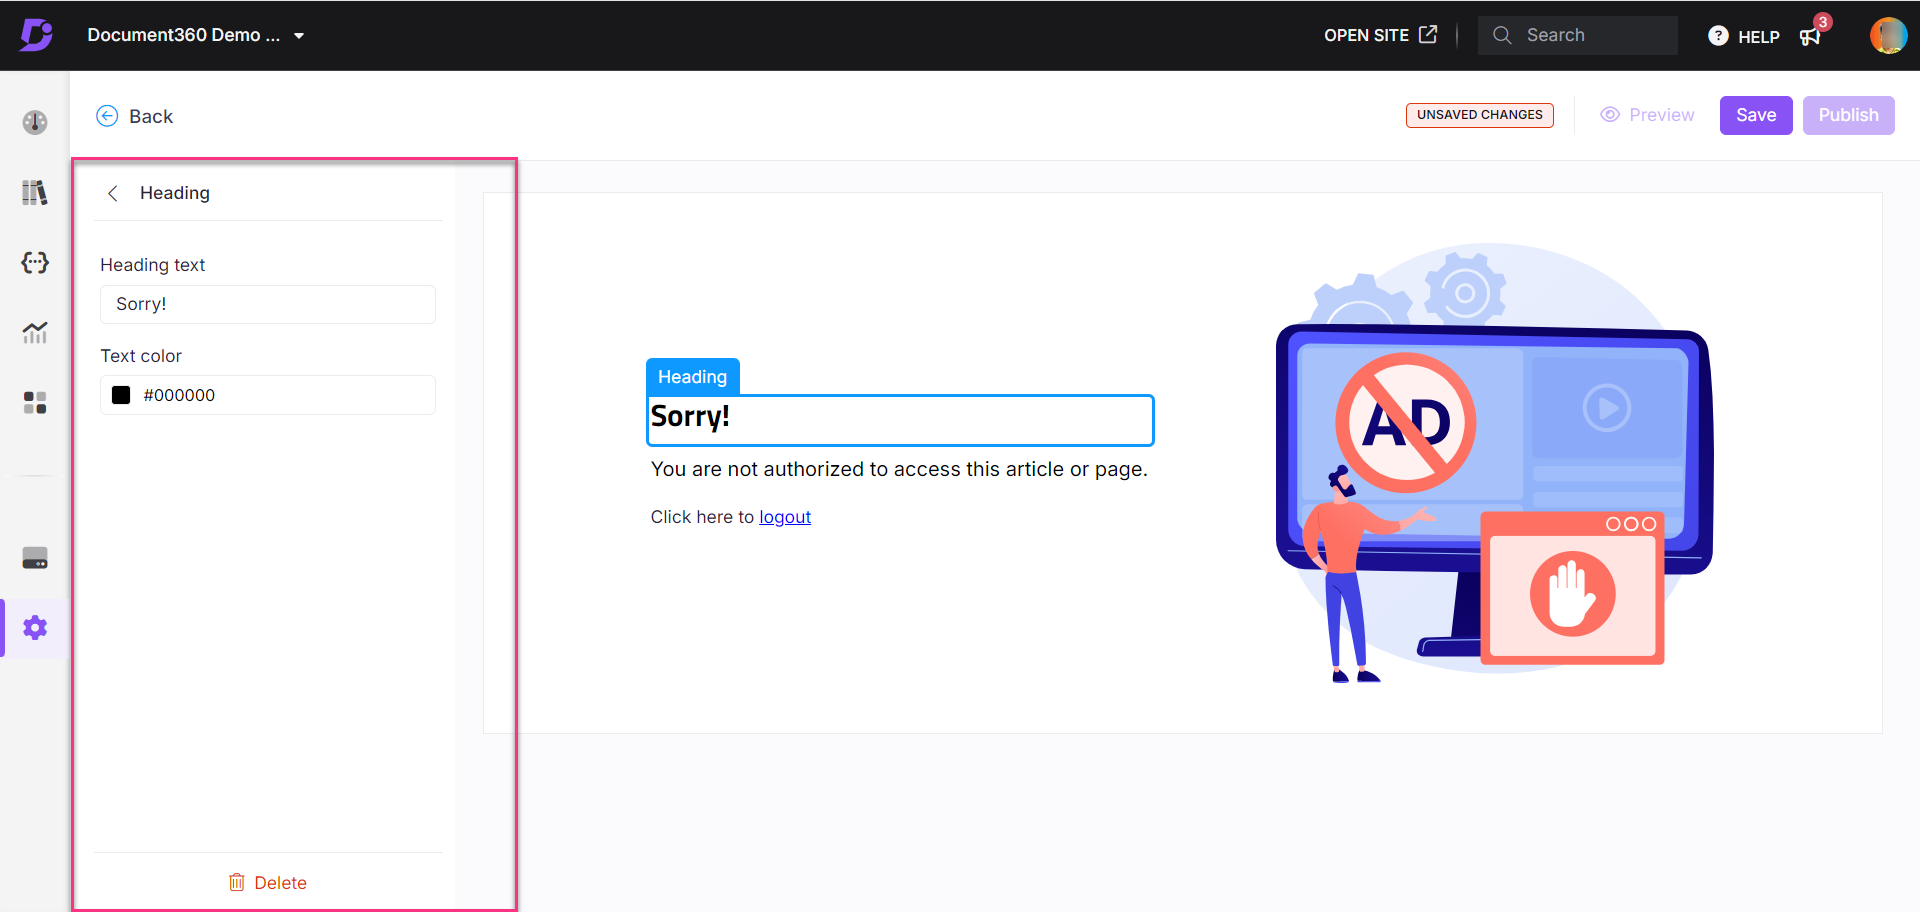
Updating the heading
Click Heading.
The Heading panel will appear.
Enter the desired heading text.
Select a color from the text color palette.
The default heading will be "Sorry!".
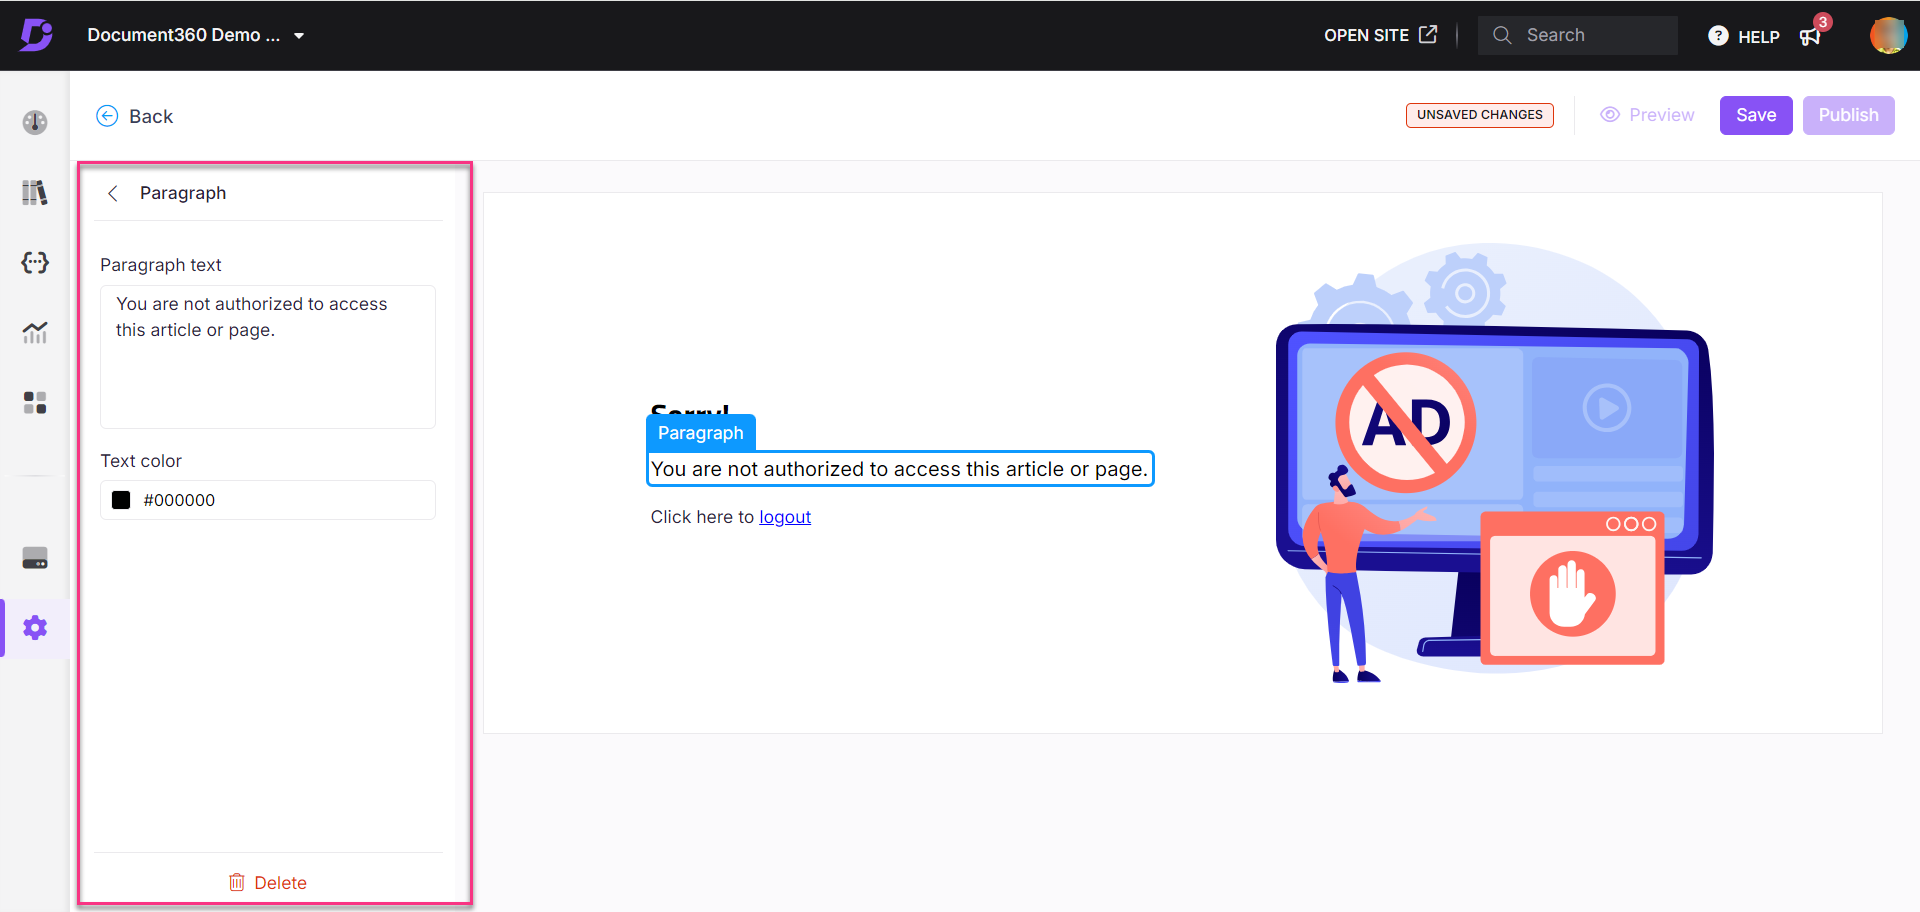
Updating the paragraph
Click Paragraph.
The Paragraph panel will appear.Enter a description for the page. This will help readers understand the context.
Select a color from the text color palette.
The default paragraph will be “You are not authorized to access this article or page.”
Custom style
Customize the Unauthorized page with HTML or CSS section.
Select Custom style and switch between the HTML and CSS sections.
Update the code as required in each section.
Turn on the Preview toggle to view the updated page.
Once done, click Save and Publish.
Click Save to save your changes without applying them immediately.
Click the More () icon and select Reset to published version to discard all saved and unsaved customizations and revert to the last published version.
NOTE
The Reset to published version feature is available only for new Knowledge base site 2.0 projects created after March 29, 2025.
