When you create a new Document360 project, a default workspace named v1 is automatically created for you. As your documentation grows, you can add more workspaces to separate content by product, version, or audience.
When do you need a new workspace?
The default v1 workspace is sufficient for many teams. You need an additional workspace when your documentation has grown to a point where a single workspace no longer serves all your audiences or content areas cleanly. Here are the most common scenarios:
- Multiple product versions: Maintain separate workspaces for v1, v2, and v3 of your product so readers always access the documentation that matches their version.
- Different audiences: Create one workspace for end users and another for administrators or developers, keeping each audience's content focused and uncluttered.
- Multiple products: If you manage documentation for more than one product within the same organization, separate workspaces keep each product's content independent.
- Internal vs. external documentation: Use one workspace for customer-facing content and another for internal team documentation, each with its own access settings.
- Staging or beta content: Set up a Beta workspace to draft and review upcoming documentation before it goes live, without affecting your published content.
Create a new workspace
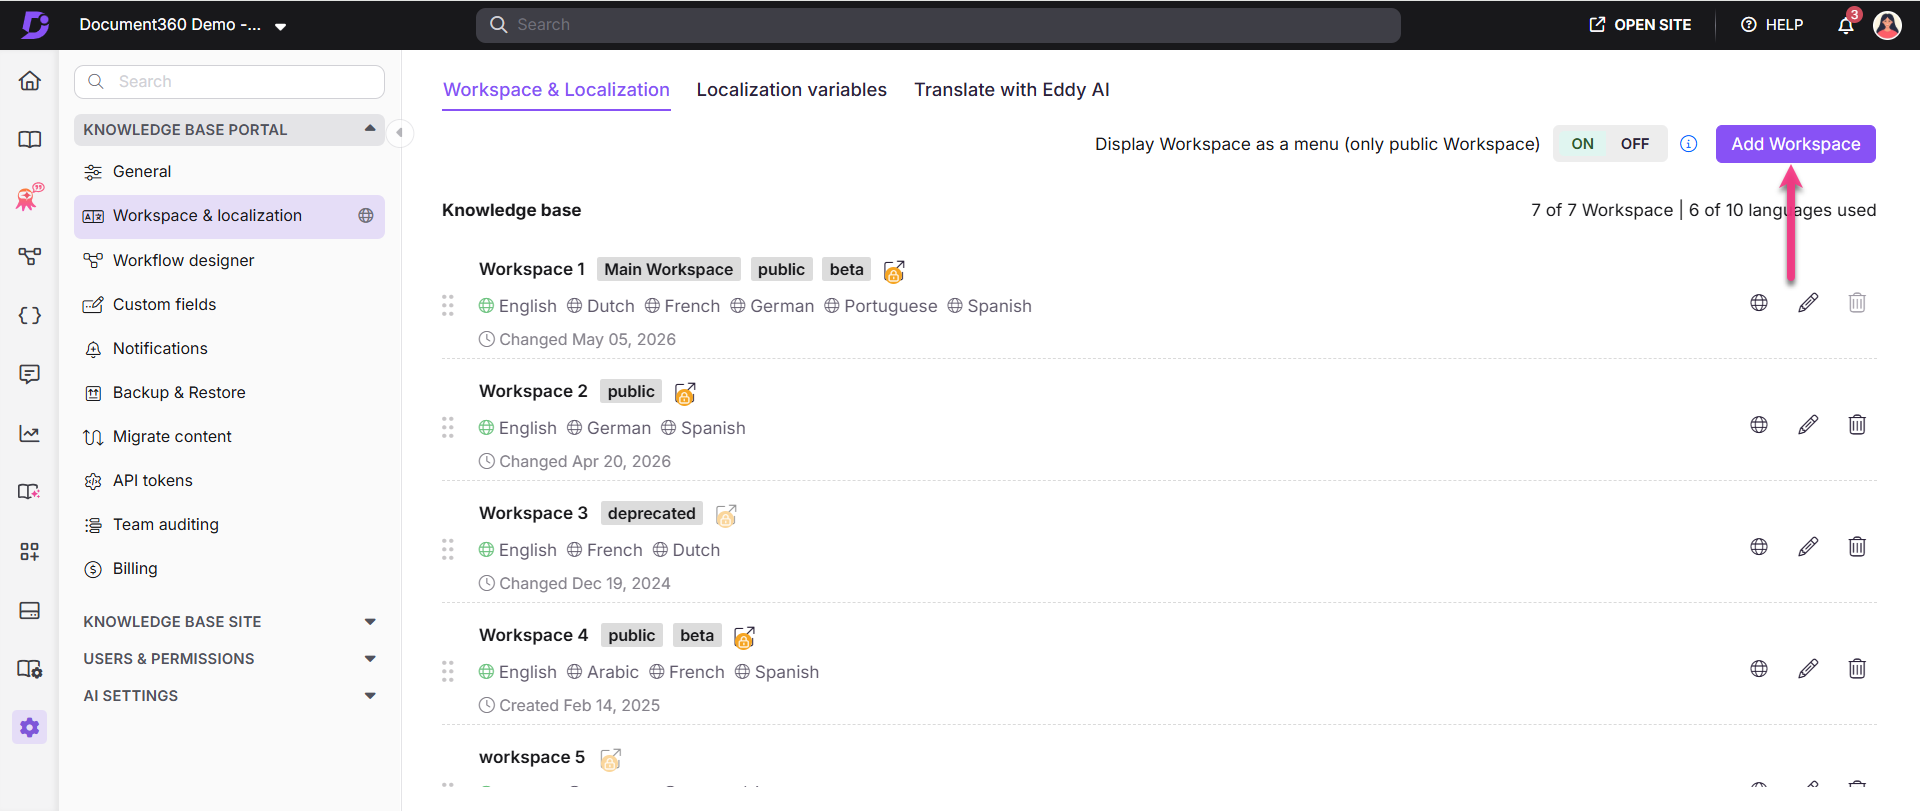
- Navigate to Settings () > Knowledge base portal in the left navigation bar.
- In the left navigation pane, select Workspace & localization ().
- Under the Workspace & Localization tab, click Add workspace.
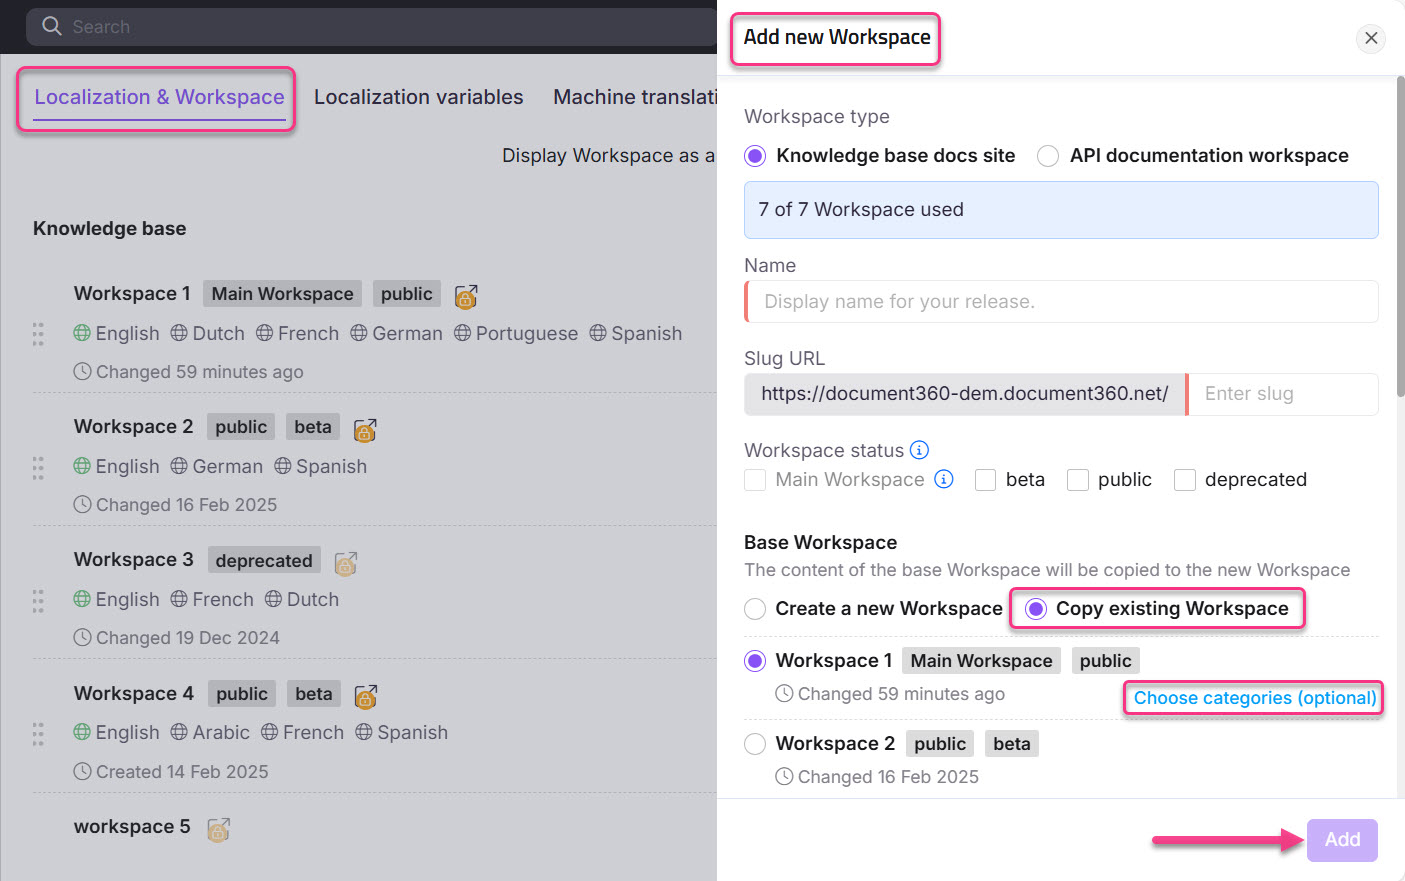
- In the Add new workspace dialog, select your workspace type:
Knowledge base docs site
For standard documentation articles, guides, and knowledge base content for any audience.
Learn more →API documentation workspace
For API references and specifications, with a structure optimized for API documentation.
Learn more →Knowledge base docs site
Select Knowledge base docs site to create a workspace for standard articles, guides, and knowledge base content.
Name and URL
Enter a name in the Name field — maximum 30 characters, alphanumeric characters and hyphens only. The Slug URL is auto-populated from the name and can be customized.
Workspace status
| Status | When to use |
|---|---|
| Main | The default workspace readers land on. Must be set to Public. Cannot be Deprecated. |
| Public | Ready and visible to readers on the Knowledge base site. |
| Beta | Still in progress — not yet ready to go live. |
| Deprecated | Outdated content retained for reference only. |
The Main workspace must be set to Public. You cannot set a Deprecated workspace as the Main workspace.
Base workspace
Choose whether to start from scratch or copy an existing workspace:
-
Create a new workspace — Starts with a completely empty workspace. No categories, articles, or content are carried over. Use this when building a new documentation set from the ground up.
-
Copy existing workspace — Duplicates the content and structure of an existing workspace. Use this when creating a new product version and you want to start from the same foundation.
If you select Copy existing workspace:
- Select the workspace to copy from the list.
- Click Choose categories (optional) to copy only specific categories.
- Under Internal links, select how copied articles should handle links:
- New — Links point to the articles created in the new workspace.
- Existing — Links continue to point to the original articles in the source workspace.
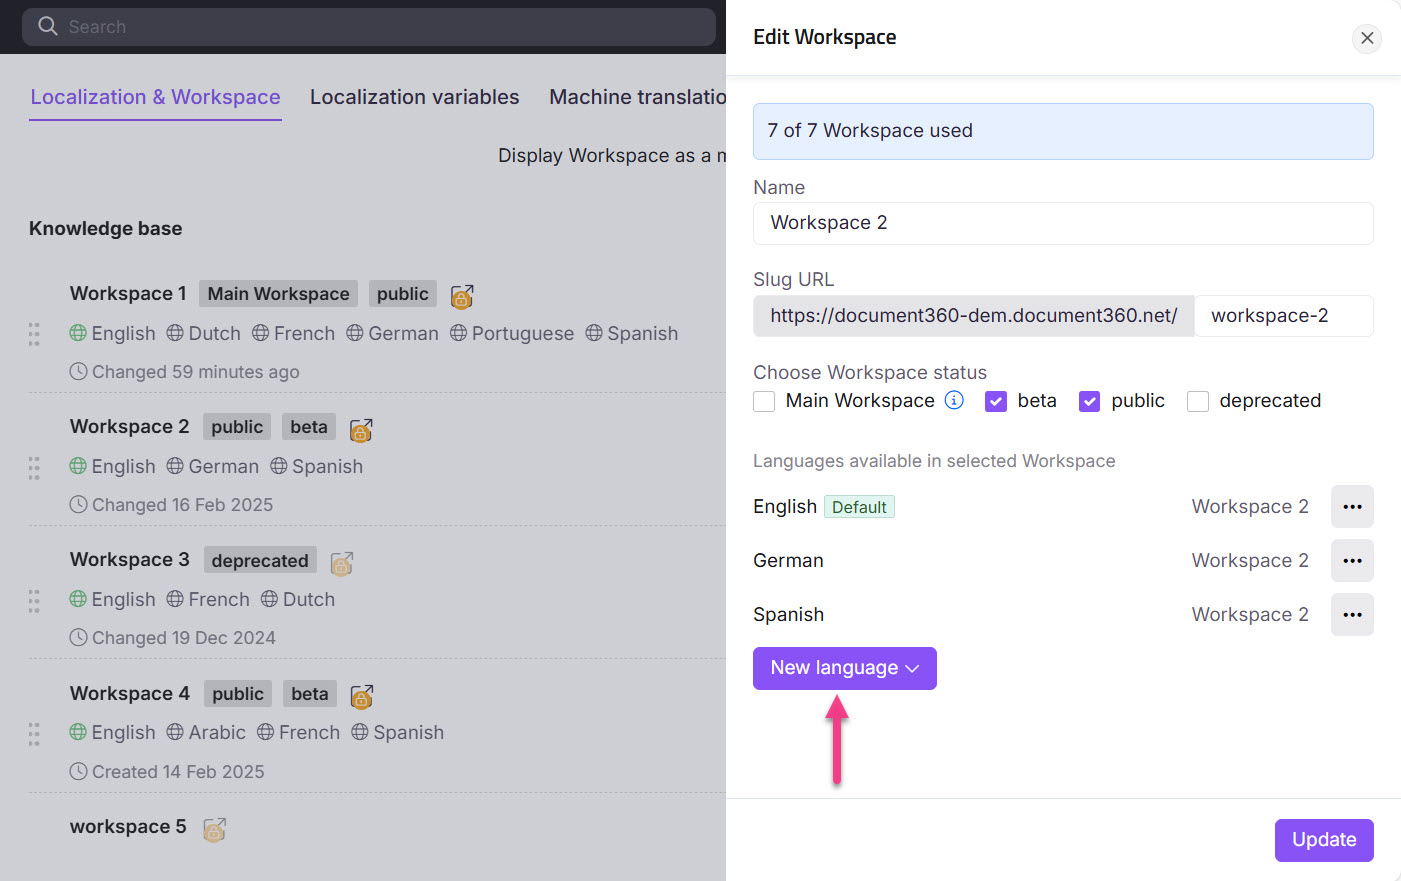
Languages
Your project's default language is automatically assigned. To add more languages, click the New language dropdown and select the languages you want.
For each language, click the More options () icon to configure:
| Option | Description |
|---|---|
| Set as default | Sets this language as the default on the Knowledge base site. |
| Edit display name | Updates the display name shown to readers. |
| Right to left | Enables right-to-left text direction for languages like Arabic and Hebrew. |
| Hide | Hides the language from the Knowledge base site. Hidden languages appear with a strikethrough in the portal. |
| Remove | Removes the language from the workspace. |
Click Add to create the workspace.
API documentation workspace
- Select API documentation workspace to create a workspace for API references and specifications.
- Enter a Name maximum 30 characters, alphanumeric and hyphens only. The Slug URL is auto-populated and can be customized.
Workspace status
| Status | When to use |
|---|---|
| Main | The default workspace readers land on. Must be set to Public. Cannot be Deprecated. |
| Public | Ready and visible to readers. |
| Beta | Still in progress — not yet ready to go live. |
| Deprecated | Outdated content retained for reference only. |
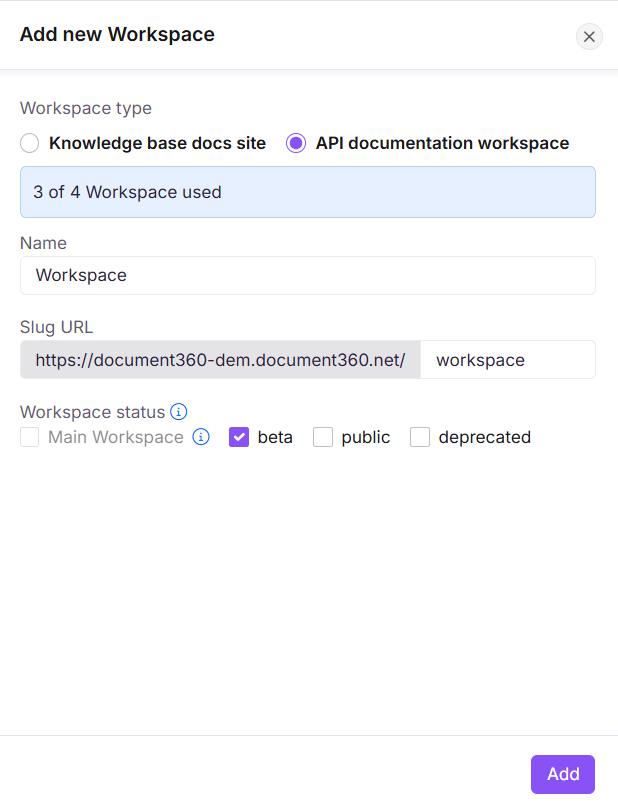
- Click Add to create the workspace.
Best practices
- Use descriptive workspace names that clearly reflect the product, version, or audience — for example,
v2-enterpriseoradmin-docs. This makes it easier for your team to navigate across workspaces. - Set new workspaces to Beta while you are building content so they do not appear to readers before they are ready.
- Copy an existing workspace when creating a new version instead of starting from scratch. It preserves your category structure and saves setup time.
- Choose Internal links carefully when copying a workspace. Select New if you want the new workspace to be fully independent; select Existing if you want to keep references pointing to the source workspace.
FAQ
I'm trying to set a workspace as the Main workspace, but the checkbox is inactive. What do I do?
The Main workspace must also be set to Public. Select the Public checkbox first — this automatically enables the Main workspace checkbox.
How do I reorder workspaces?
On the Workspace & localization page, hold and drag the Reorder () handle next to the workspace name and move it to the desired position.
How do I recover a deleted workspace?
You can restore a deleted workspace using the Backup & Restore feature:
- Navigate to Settings () > Knowledge base portal > Backup & Restore.
- Find the desired backup, click the Restore options dropdown, and select Documentation.
- In the Restore documentation panel, select the workspace you want to restore and click Restore.
I'm getting a 404 error when navigating to a secondary workspace. How do I fix it?
This is usually caused by one of the following reasons:
- The workspace is not set to Public. Navigate to Settings () > Knowledge base portal > Workspace & localization, click the Edit () icon on the workspace, and set the status to Public.

- No articles are published in the workspace.
- All articles in the workspace are hidden.
Ensure at least one article is published and visible on the Knowledge base site.