Many organizations use wikis as a central hub for storing and managing project-related information. Confluence Server is a popular, secure wiki platform that enables teams to collaborate effectively by organizing and sharing work in dedicated team workspaces. Users can create pages or blogs to capture, structure, and collaborate on ideas and projects, ensuring every team member has access to the knowledge and resources they need.
Integrating Confluence Server with Document360
Using Document360 as your knowledge base platform, you can maintain a log of all articles in Confluence Server. Each time a new article is added to Document360, an entry must also be made in Confluence. While Confluence helps with tracking, manually updating each addition can be time-consuming.
By connecting Document360 and Confluence Server on Zapier, you can easily automate the content flow between Document360 and Confluence. To establish a connection between Confluence Server and Document360, follow the below steps:
Ensure that you have logged into your Zapier account.
From the left navigation menu, click Create and then click Zaps from the options available.
Zap will be created with Trigger and Action flow.

Connecting Confluence Server and Document360 in Zapier
To establish a connection between Confluence Server and Document360, follow the below steps:
Step 1: Connecting Confluence Server
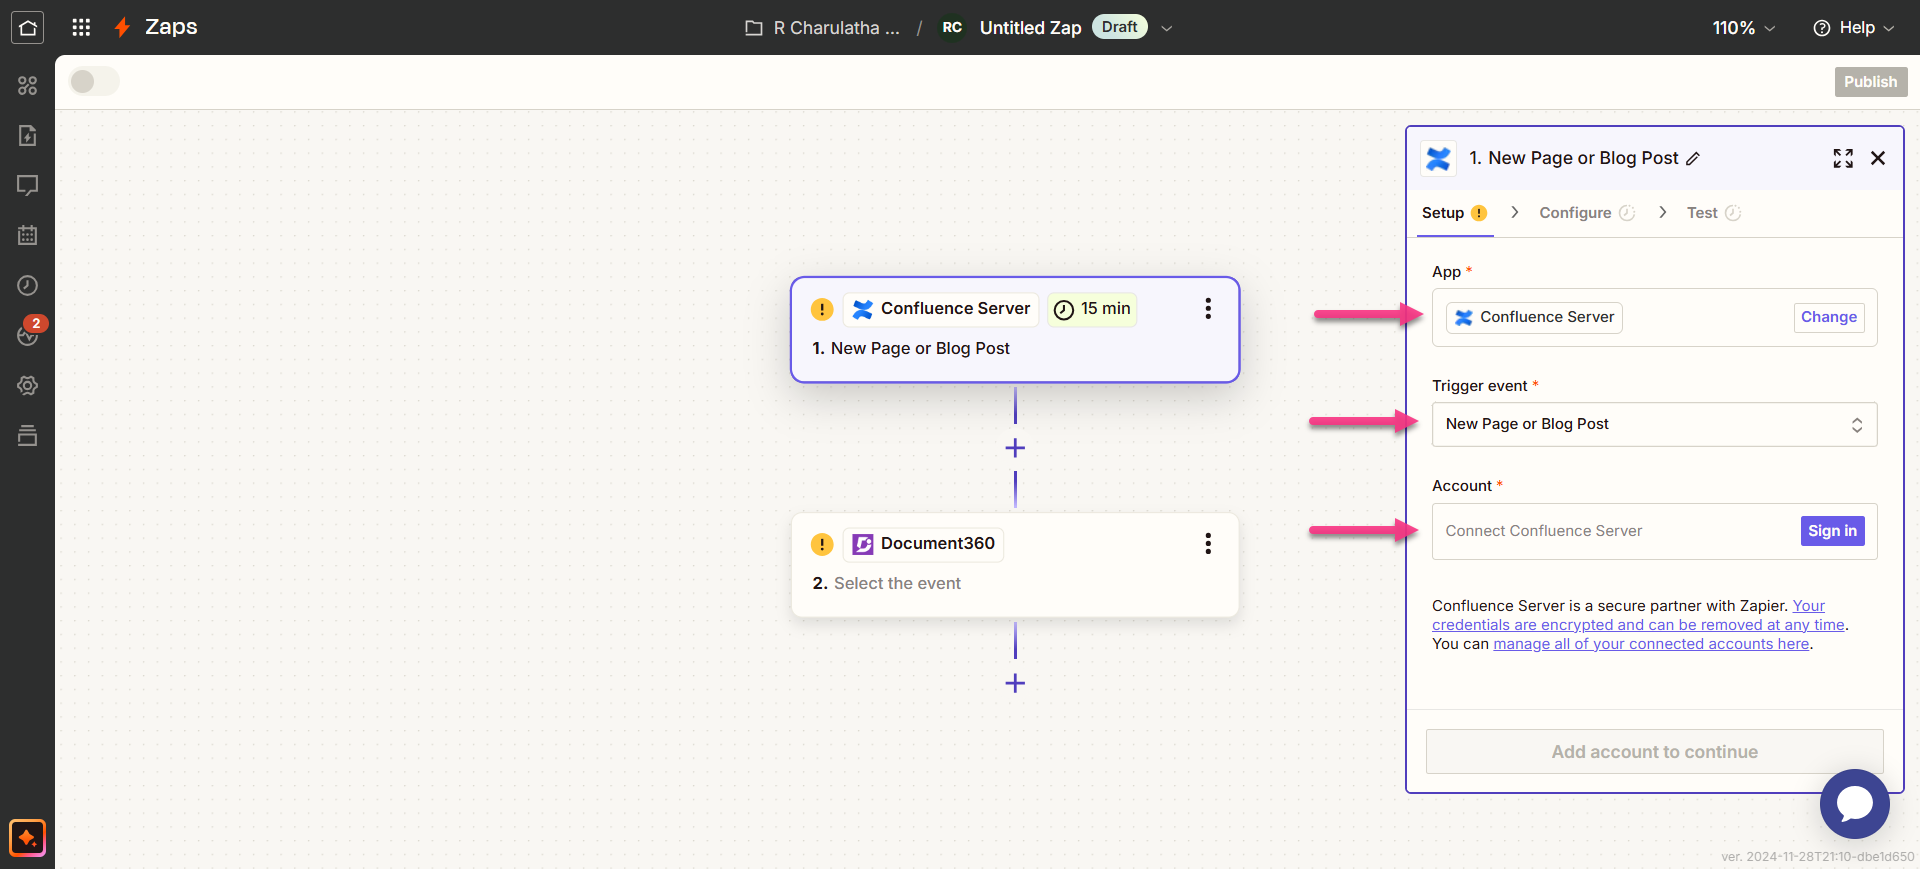
In the Trigger field, choose Confluence Server.
In the Trigger event field, select New Page or Blog Post to trigger in the Confluence Server.
If you wish to configure a different app later, you can do that by clicking on Change.
Click the Account field, and a Sign-in panel will appear.
Enter your sign-in credentials and click Yes, Continue to Confluence Server.
Click Continue.
Zapier runs a test to make sure the trigger is correctly configured.
Step 2: Connecting Document360
In the Action field, choose Document360.
On the Setup panel that appears on the right, select a desired event in the Event field.
Click the Account field and a Sign-in panel appears.
Enter your sign-in credentials and click Allow.
To generate the API token from the Document360 portal,
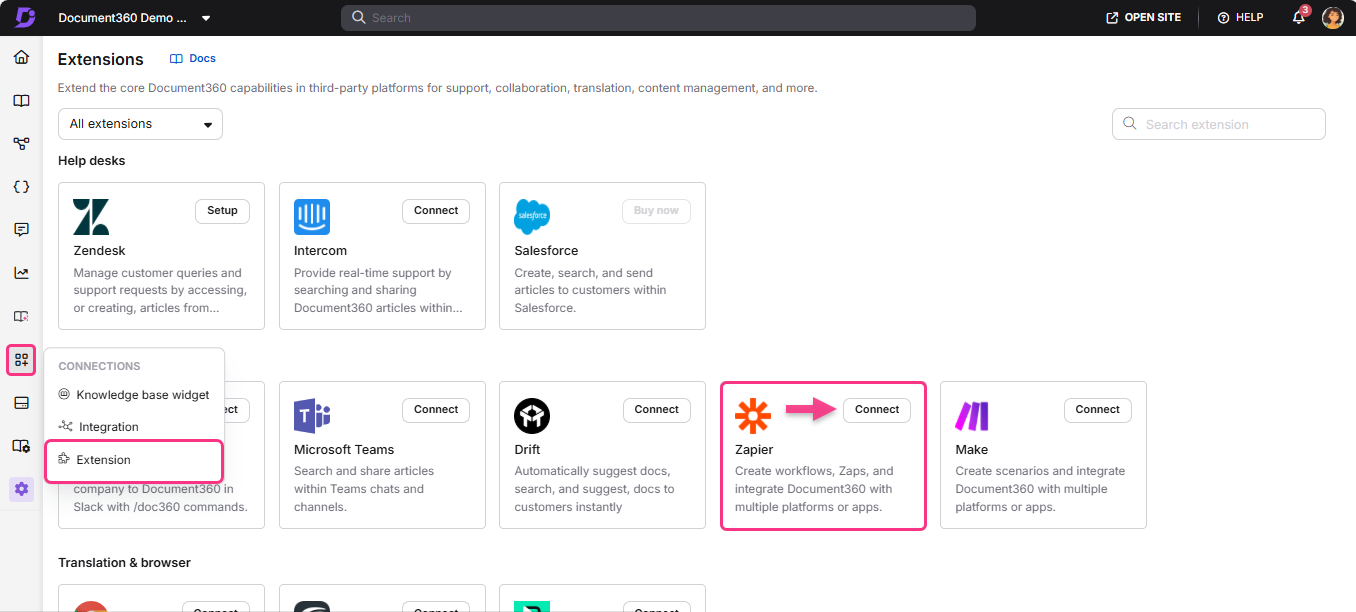
Navigate to Connections () > Extensions in the left navigation bar in the Knowledge base portal.
On the Zapier extension tile, click Connect.
Click the Copy () icon to copy the token.
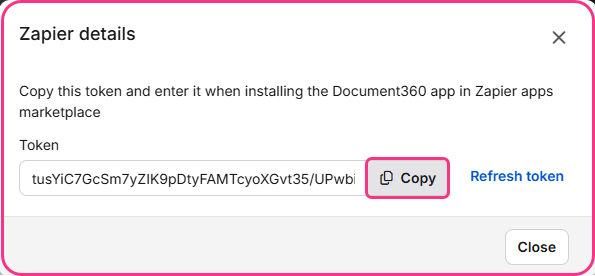
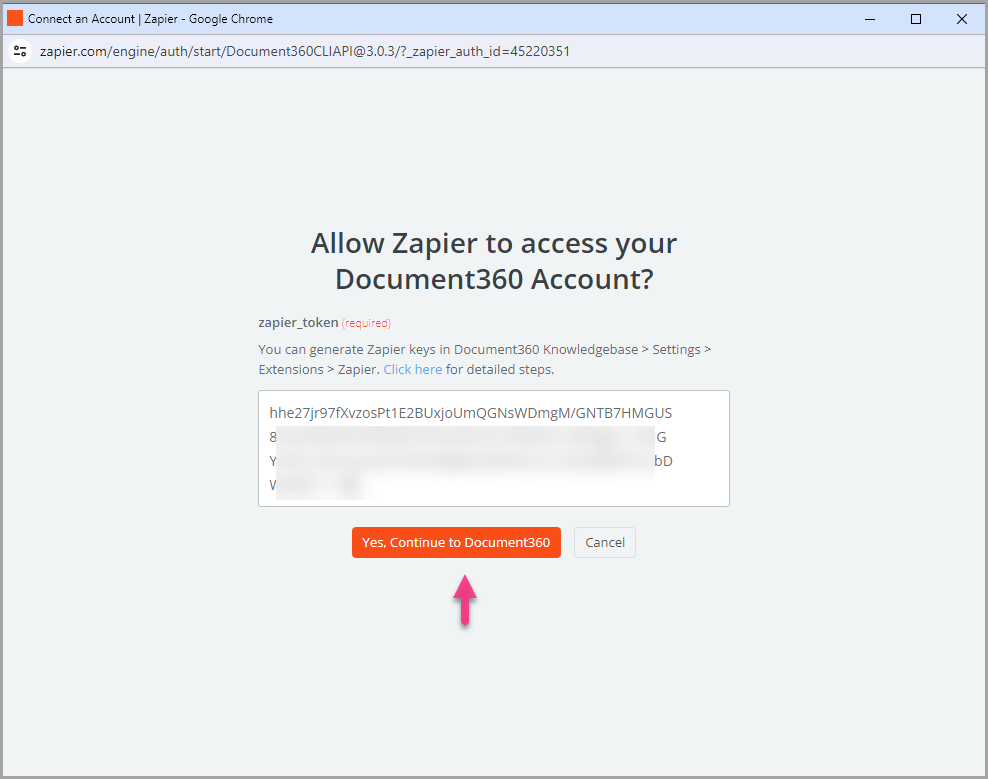
Head back to the Zapier panel and paste the API token in the field.
Click Yes, Continue to Document360.
You can find the connected Document360 project on the Connect Document360 account page.
If you wish to configure a different account later, you can do that by clicking on Change.
Click Continue.
Step 3: Customize Zap
Map all the required fields:
Version: Select the workspace in your knowledge base project where the article should be created.
Language: Choose the language for the article within the selected workspace.
Category: Select the category under the chosen language where the article will be created.
Publish: Set to True to publish the article immediately or False to save it as a draft.
Once done, click Continue. The button enables only when all the fields are filled.
Step 4: Test Zap
In the test section, click Test step.
If it is successful, you will get the message ‘A Document was sent to Document360’.
In your Document360 Knowledge base portal, you'll find the article named ‘Title of your Page / Blog post’, located in the folder you previously selected.
Head back to the Zapier setup panel and click Next.
Once done, click Publish.
Turn on Zap
To turn on a Zap once it is tested and published, follow the below steps:
After testing the Zap, review or edit the settings before turning on the Zap.
You can edit the settings configured on the Confluence Server trigger and the corresponding action of the new article in Document360.
You would get a success message stating Your Zap is on. You can click on the Manage your Zap button to go to your Zap overview page.
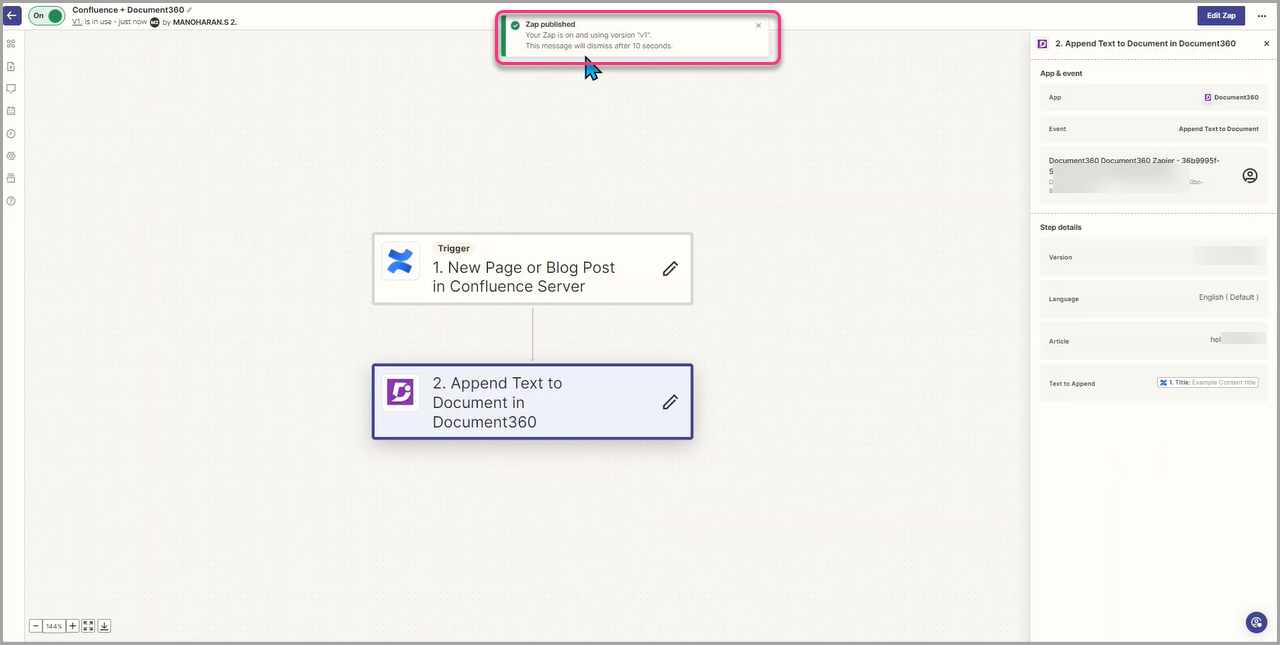
Zap overview
Create articles in Document360 from the new Confluence Server Page
You can view and edit the information about the Zaps created on the Zap overview page.
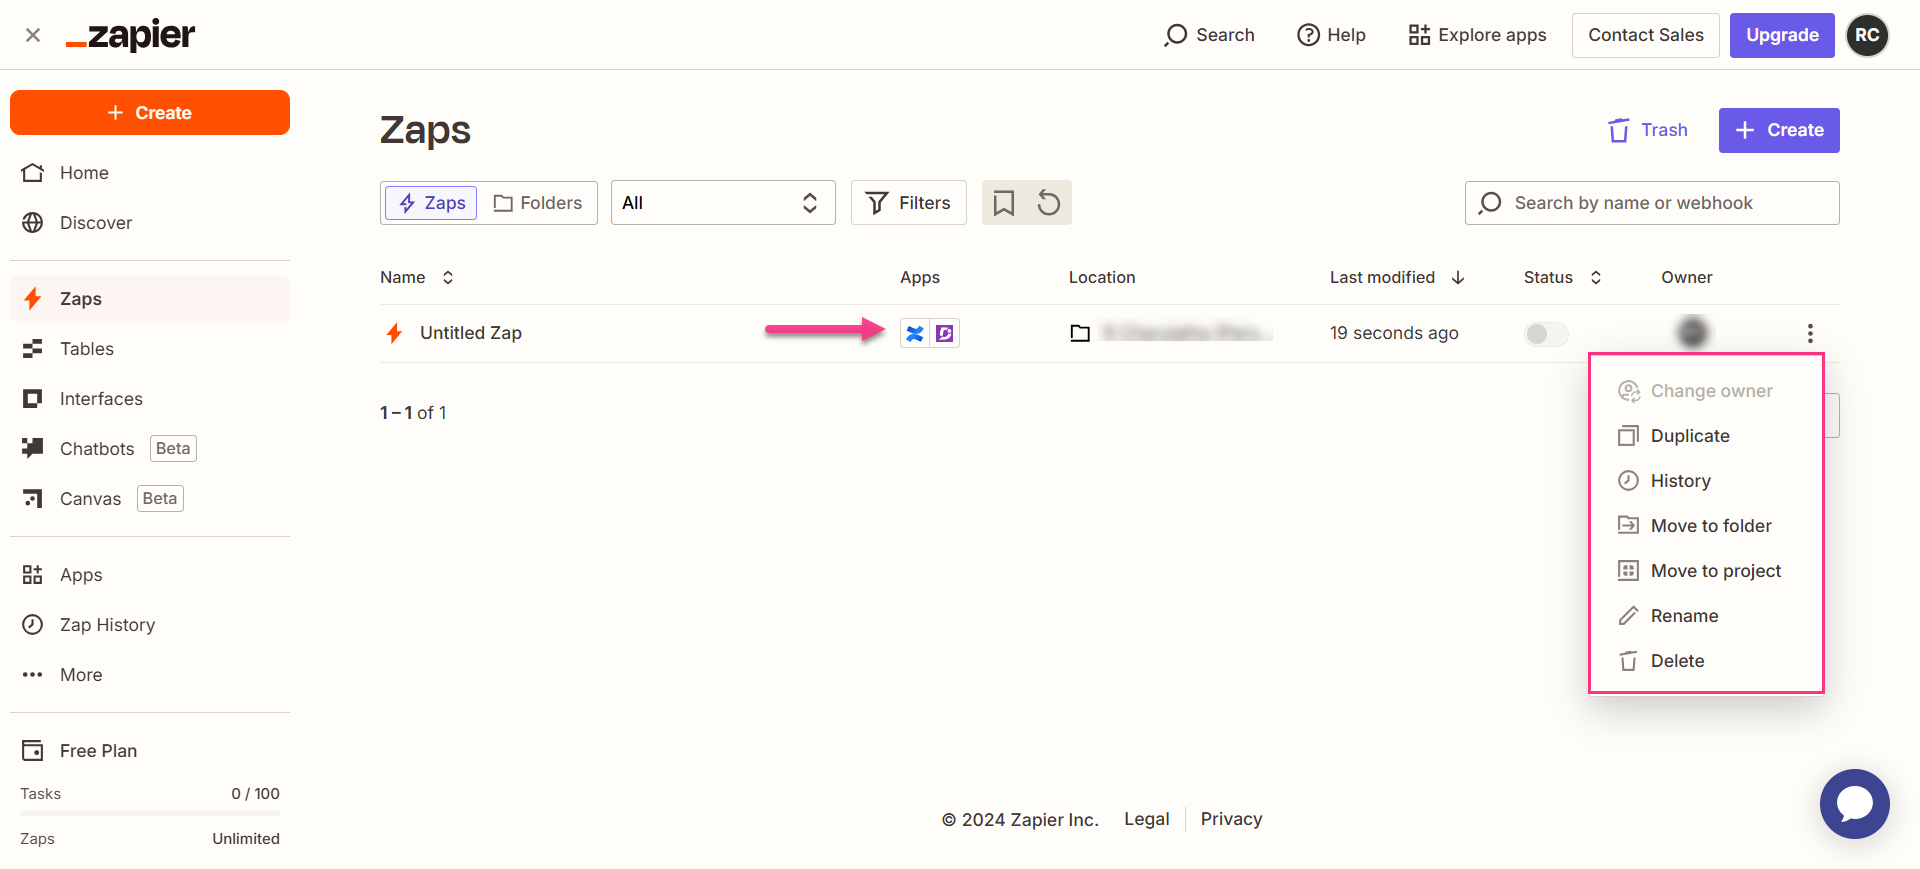
Deleting a Zap
To delete a Zap that you have created,
Navigate to the Zapier dashboard. On the overview page, a list of all existing Zaps will be displayed.
Click the Zap actions () icon to the right of the desired Zap and click Delete.
The selected Zap will be deleted.