


Plans supporting integration of Zapier extensions with Document360
| Professional | Business | Enterprise |
|---|---|---|
Gmail is a widely used email service developed by Google that provides users with a simple and efficient platform for sending, receiving, and organizing emails. Known for its user-friendly interface, Gmail offers features like powerful search capabilities, spam filtering, and integration with other Google services such as Google Drive and Calendar. Gmail is a versatile tool for communication and collaboration.
Integrating Gmail with Document360
While using Document360 as your knowledge base platform and Gmail as your communication tool, you may encounter a need to keep external vendors or stakeholders informed about updates to your knowledge base. The Document360-Gmail integration simplifies this process by automatically sending custom emails via Gmail whenever a new article is published in your Document360 knowledge base. This ensures seamless communication, reduces manual effort, and keeps all stakeholders effortlessly updated.
To establish a connection between Gmail and Document360, follow the below steps:
Ensure that you have logged into your Zapier account.
From the left navigation menu, click Create and then click Zaps from the options available.
Zap will be created with Trigger and Action flow.

Connecting Gmail and Document360 in Zapier
To establish a connection between Gmail and Document360, follow the below steps:
Step 1: Setting up trigger: Connecting Document360
In the Trigger field, choose Document360.
On the Setup panel that appears on the right, select a desired event in the Event field.
Click the Account field, and a Sign-in panel will appear.
Enter your sign-in credentials and click Allow.
To generate the API token from the Document360 portal,
Navigate to Settings() > Knowledge base portal > Extensions > Team collaboration.
On the Zapier extension tile, click Connect.
Click the Copy () icon to copy the token.
Head back to the Zapier panel and paste the API token in the field.
Click Yes, Continue to Document360.
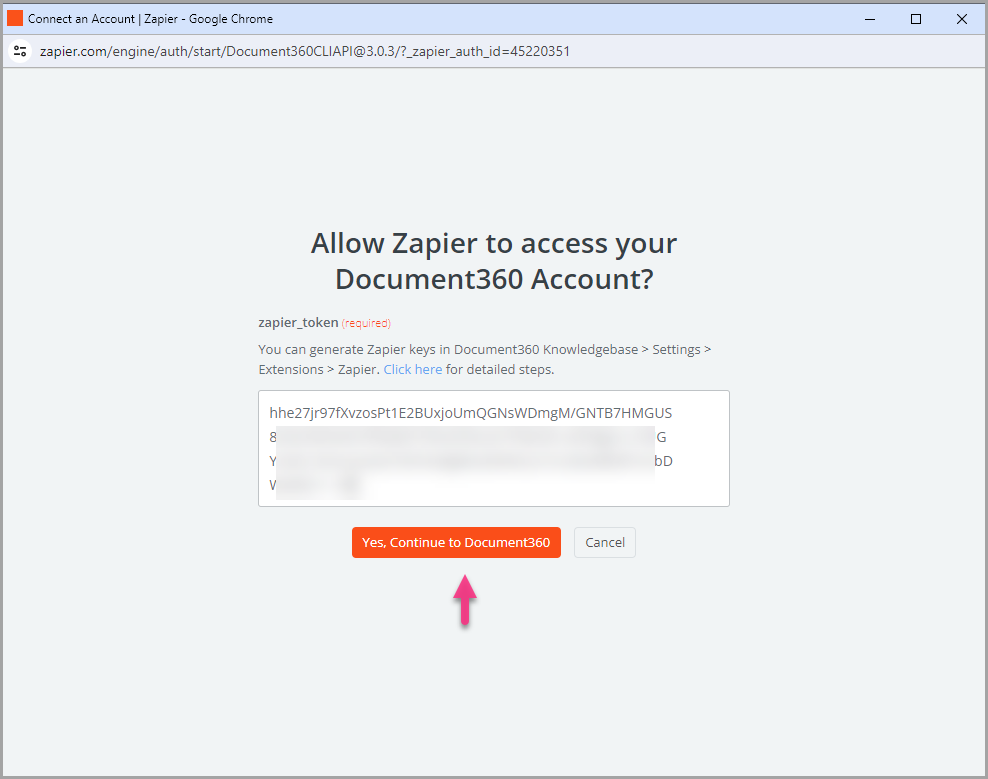
You can find the connected Document360 project on the Connect Document360 account page.
If you wish to configure a different account later, you can do that by clicking on Change.
Click Continue.
Test trigger
To test the Document360 trigger,
Click Test trigger to confirm that the correct account is connected, and the trigger setup is correct.
If no error is found, click Continue.
The Document360 account has been successfully linked, and the trigger is set up.
Step 2: Setting up action: Connecting Gmail
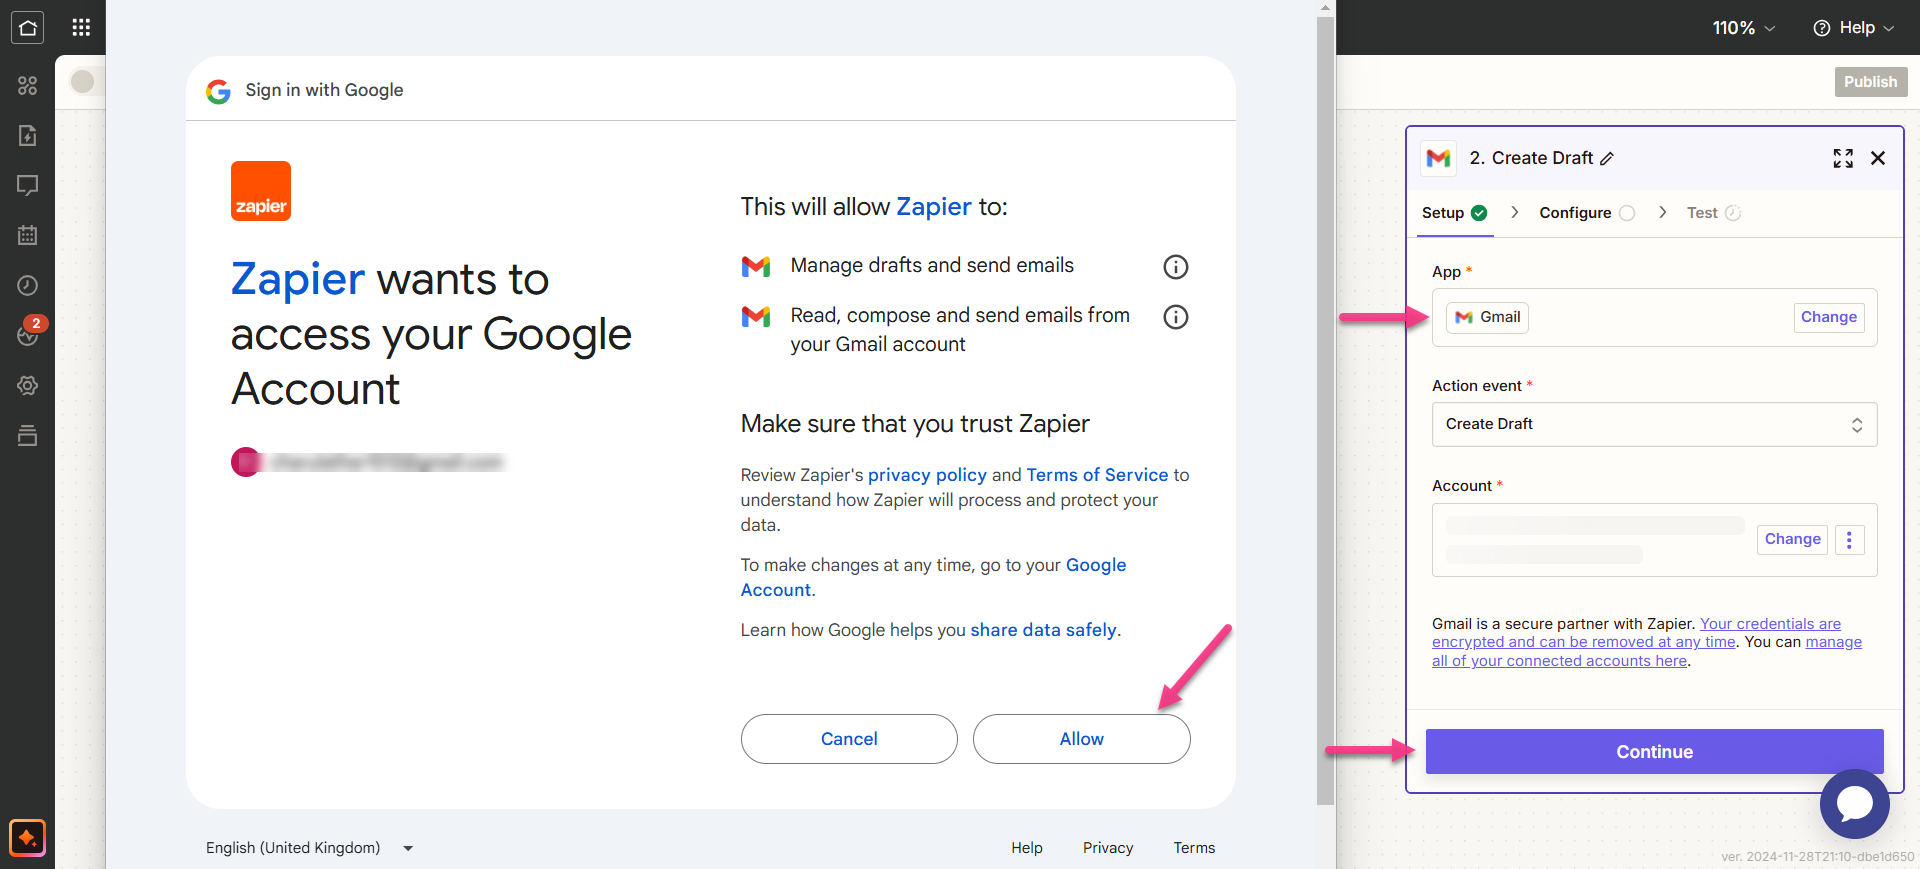
In the Action field, choose Gmail.
On the Setup panel that appears on the right, select the desired event in the Event field.
Click the Account field and a Sign-in panel appears.
Enter your sign-in credentials and click Allow.
Click Continue.
Step 3: Customize Zap
Map all the required fields:
To: Enter the recipient's email address. Multiple addresses can be added individually or as a comma-separated list.
Cc: Add email addresses to copy recipients on this email. Multiple addresses can also be added individually or as a comma-separated list.
Bcc: Enter email addresses to blind-copy recipients on this email. Multiple addresses can be added similarly.
Subject: Enter the subject line for the email.
From: Choose an email address or alias linked to your Gmail account.
From Name: Enter the sender's name (must be associated with the connected email address).
Body type: Select the email format as either Plain Text or HTML.
Body: Write the main content of the email.
Add signature default: Optionally, include a default signature in the email.
Label or mailbox: Select a value for label or mailbox.
Attachments: Attach files by selecting an actual file or providing a public URL to download and attach the file.
NOTE
Fields marked as required (*) must be filled in.
Once done, click Continue. The button enables only when all the fields are filled.
Step 4: Test Zap
In the test section, click Test step.
If it is successful, you will get the message ‘A Draft was sent to Gmail.’
In your Document360 Knowledge base portal, you'll find the article located in the category you have previously selected.
Head back to the Zapier setup panel and click Next.
Once done, click Publish.
Turn on Zap
To turn on a Zap once it is tested and published, follow the below steps:
After testing the Zap, review or edit the settings before turning on the Zap.
You can edit the settings configured on the Gmail trigger and the corresponding action of the new article in Document360.
You will get a success message stating Your Zap is on. You can click on the Manage your Zap button to go to your Zap overview page.
Zap overview
Send emails via Gmail with new articles in Document360
You can view and edit the information about the Zaps created on the Zap overview page.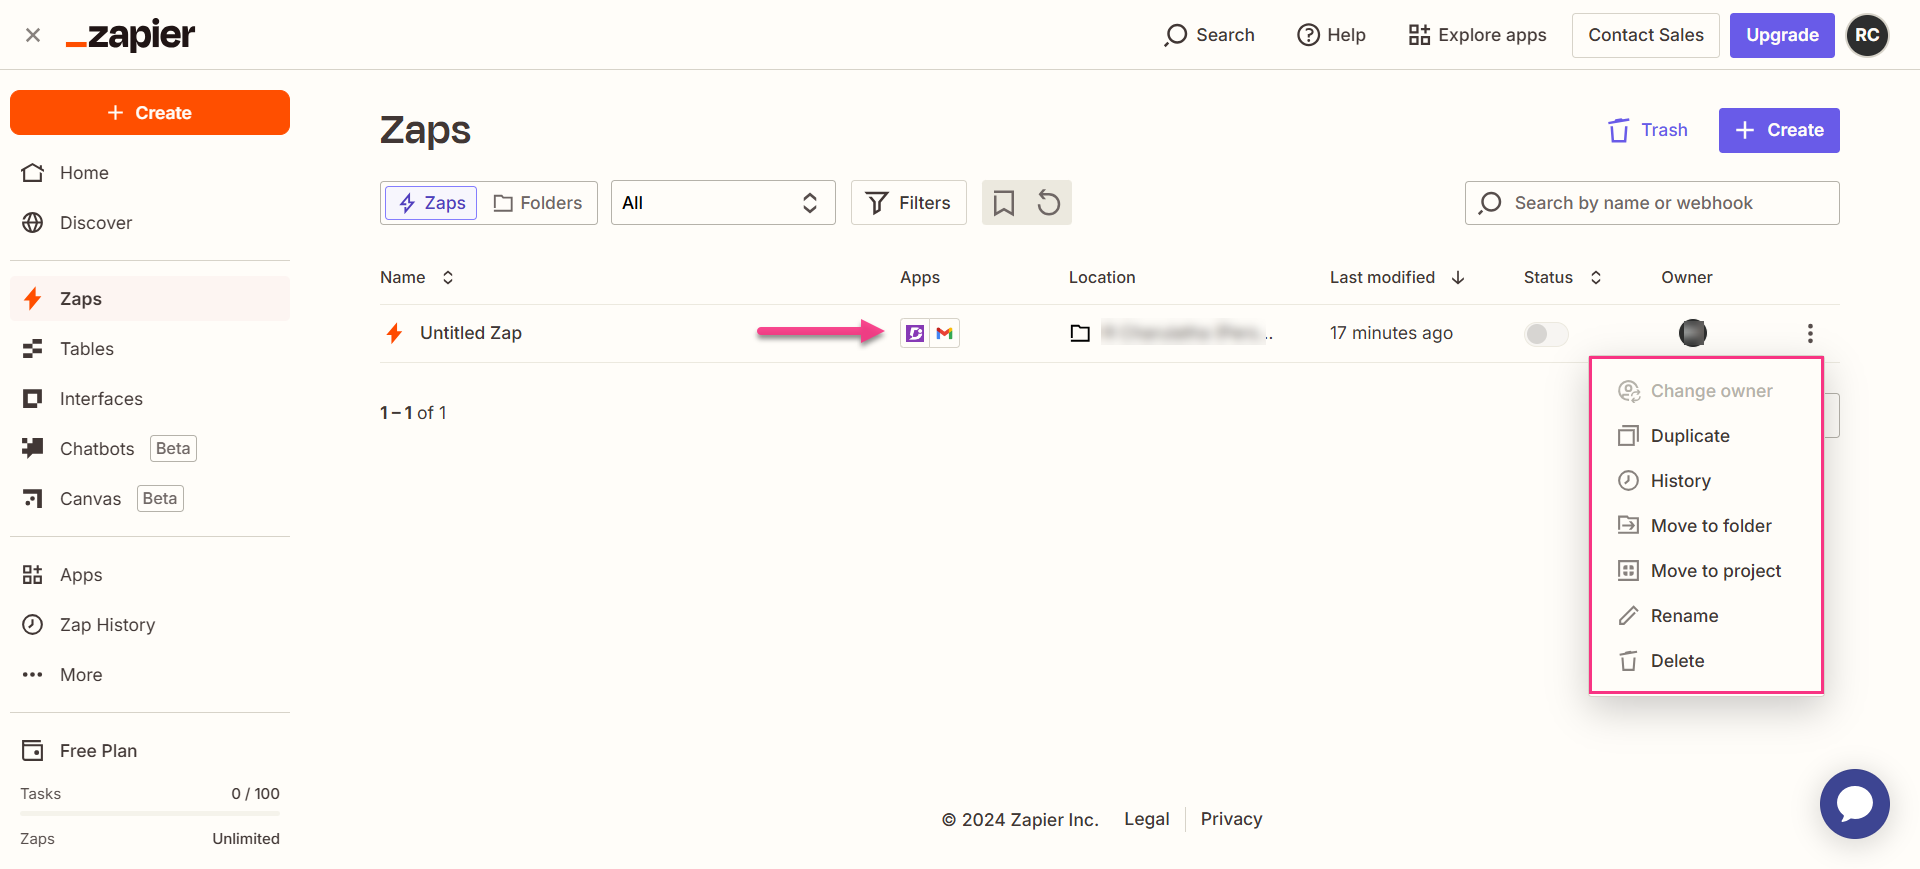
Deleting a Zap
To delete a Zap that you have created,
Navigate to the Zapier dashboard. On the overview page, a list of all existing Zaps will be displayed.
Click the Zap actions () icon to the right of the desired Zap and click Delete.
The selected Zap will be deleted.