Plans supporting this feature: Professional Business Enterprise
Supporting files can clarify and expand on the article’s content, making complex topics easier to understand. In Document360, there are two ways to add files to the articles and category pages:
Adding files
Attaching files
Adding files to articles
Adding a file to an article means embedding it directly into the body of the article rather than as an attachment for download. To do this, the file must first be uploaded to the Drive.
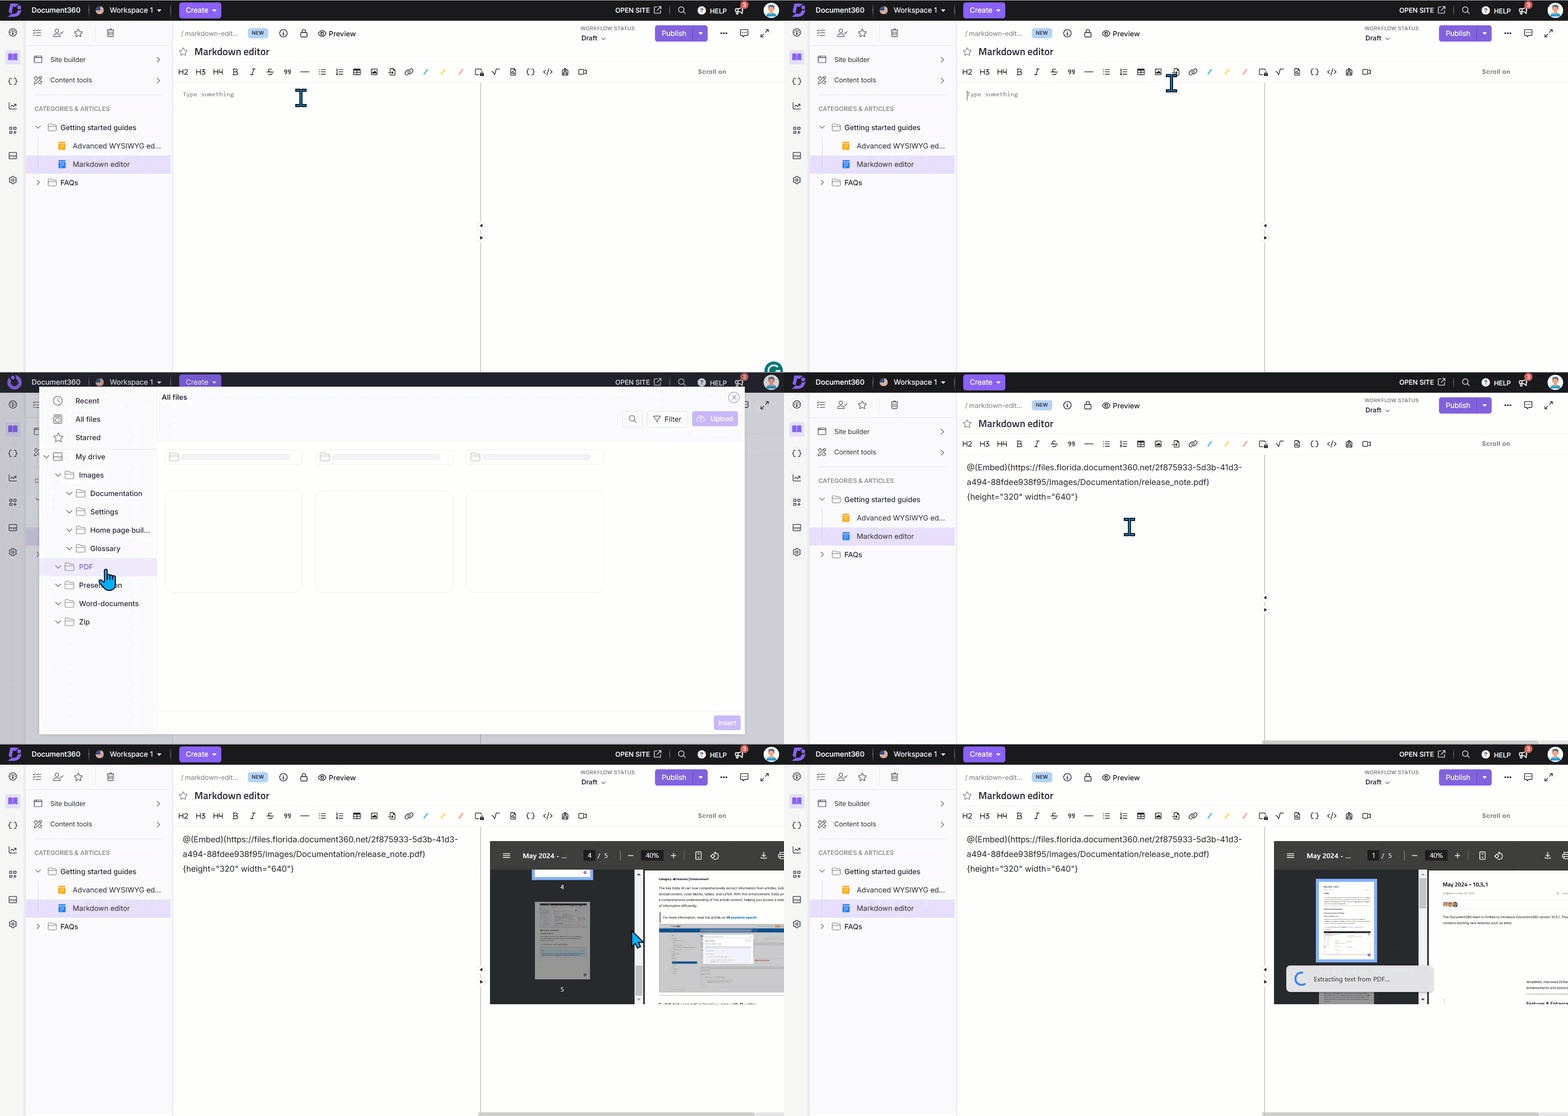
Adding files in Markdown editor
To add files in the Markdown editor:
Navigate to the desired article in the Markdown editor.
Select the Insert file () icon.
Choose the file from the Drive that you wish to add.
Click Insert.
NOTE
In the Drive, you can filter () files by:
Uploaded: Filter by All, 7 days, 30 days, 3 months, 1 year, or even a custom date.
Uploaded by: Select the desired contributors from the list.
Type: Choose the file type, such as PDF, JPEG, etc.
Tags: Sort files based on the tags.

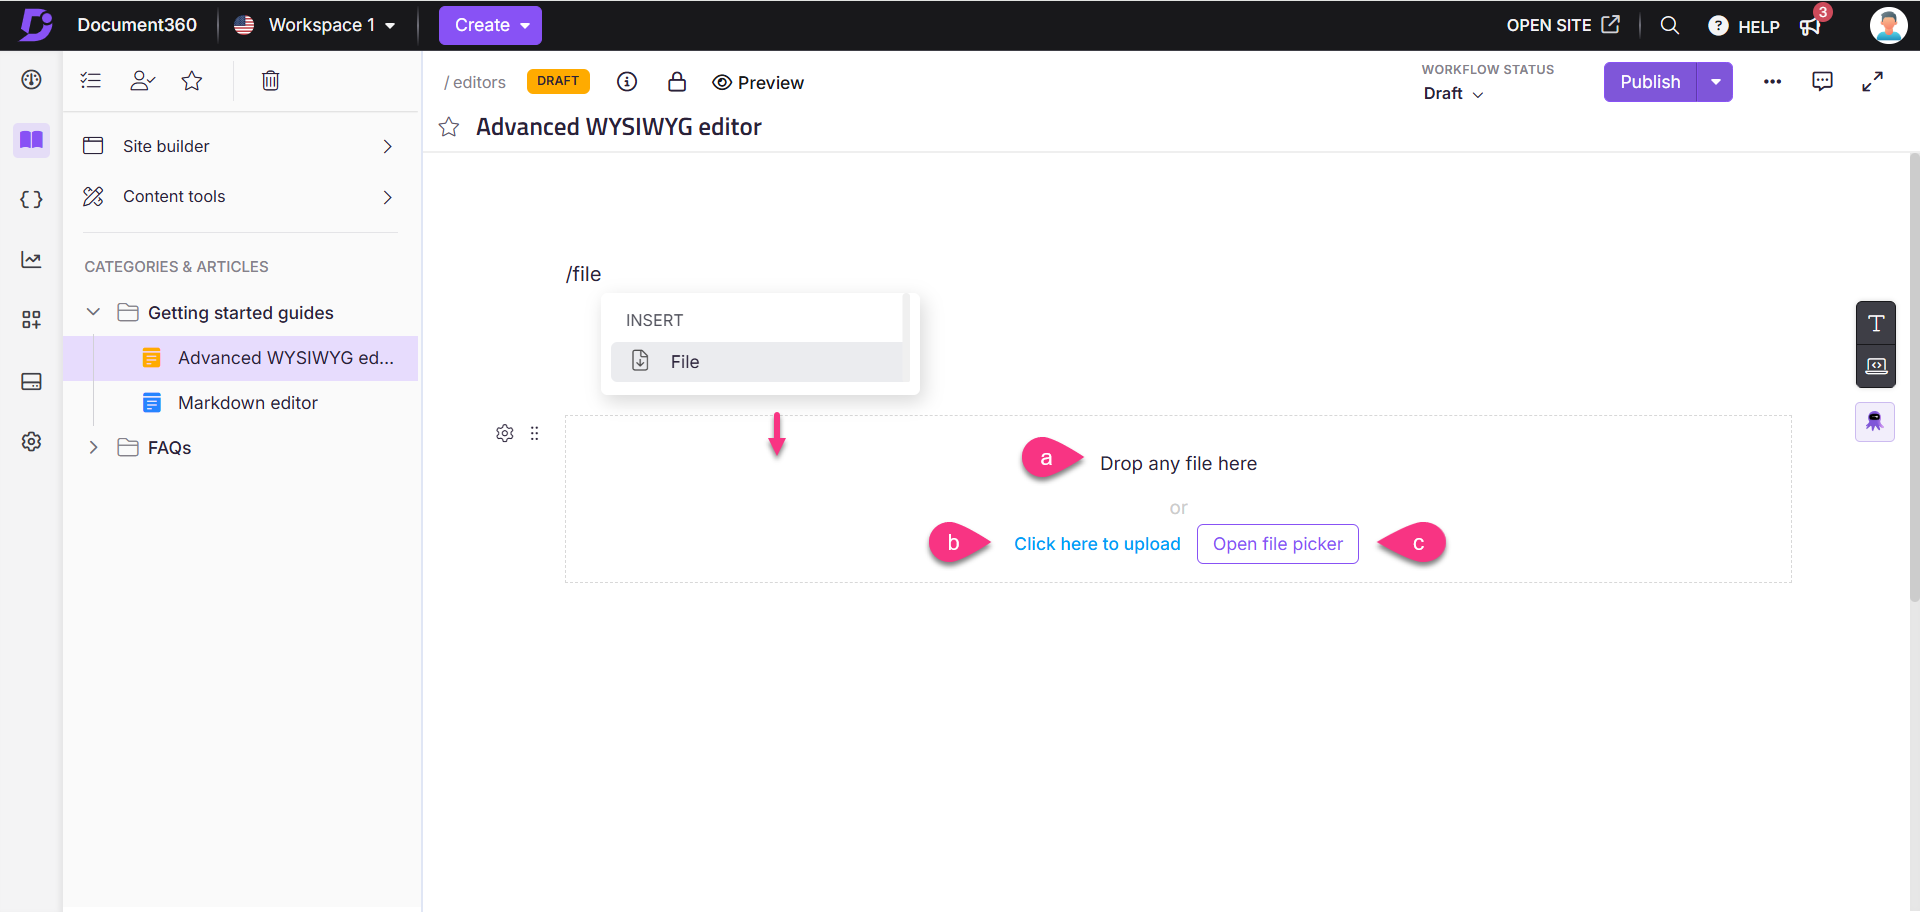
Adding files in the Advanced WYSIWYG editor
Navigate to the desired article in the Advanced WYSIWYG editor.
To insert a file, use the slash command
/file.The Insert file panel will appear in the editor.
You can insert the file in three ways:
Drag and drop the file into the panel.
Click on the Click here to upload text and select the desired file from your local storage.
Click Open file picker and choose a file from the drive.
Use the movable block () icon to rearrange and delete the insert file panel.
NOTE
After adding file in the article, click Download () to download the file in the Knowledge base site.

Attaching files to articles
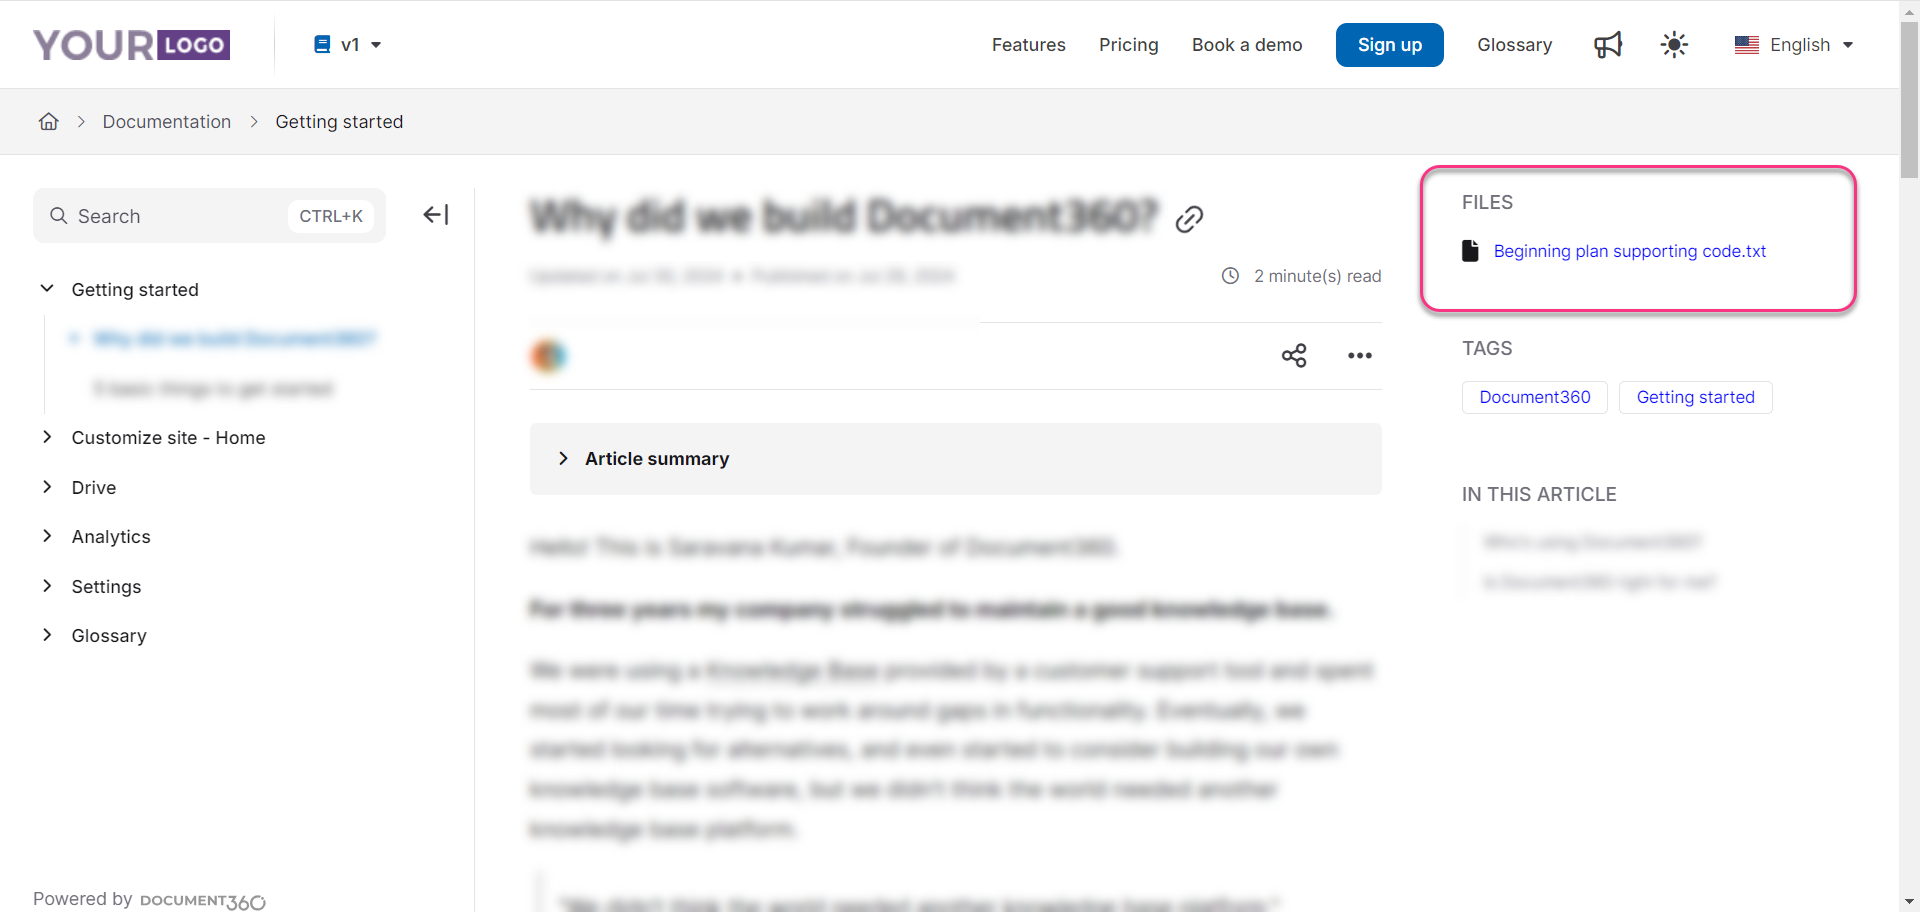
Attaching a file to an article allows it to appear as a downloadable link rather than embedding it directly into the article body. In the Knowledge base site, the attached files are aligned above the tags and Table of Contents on the right side of the page.
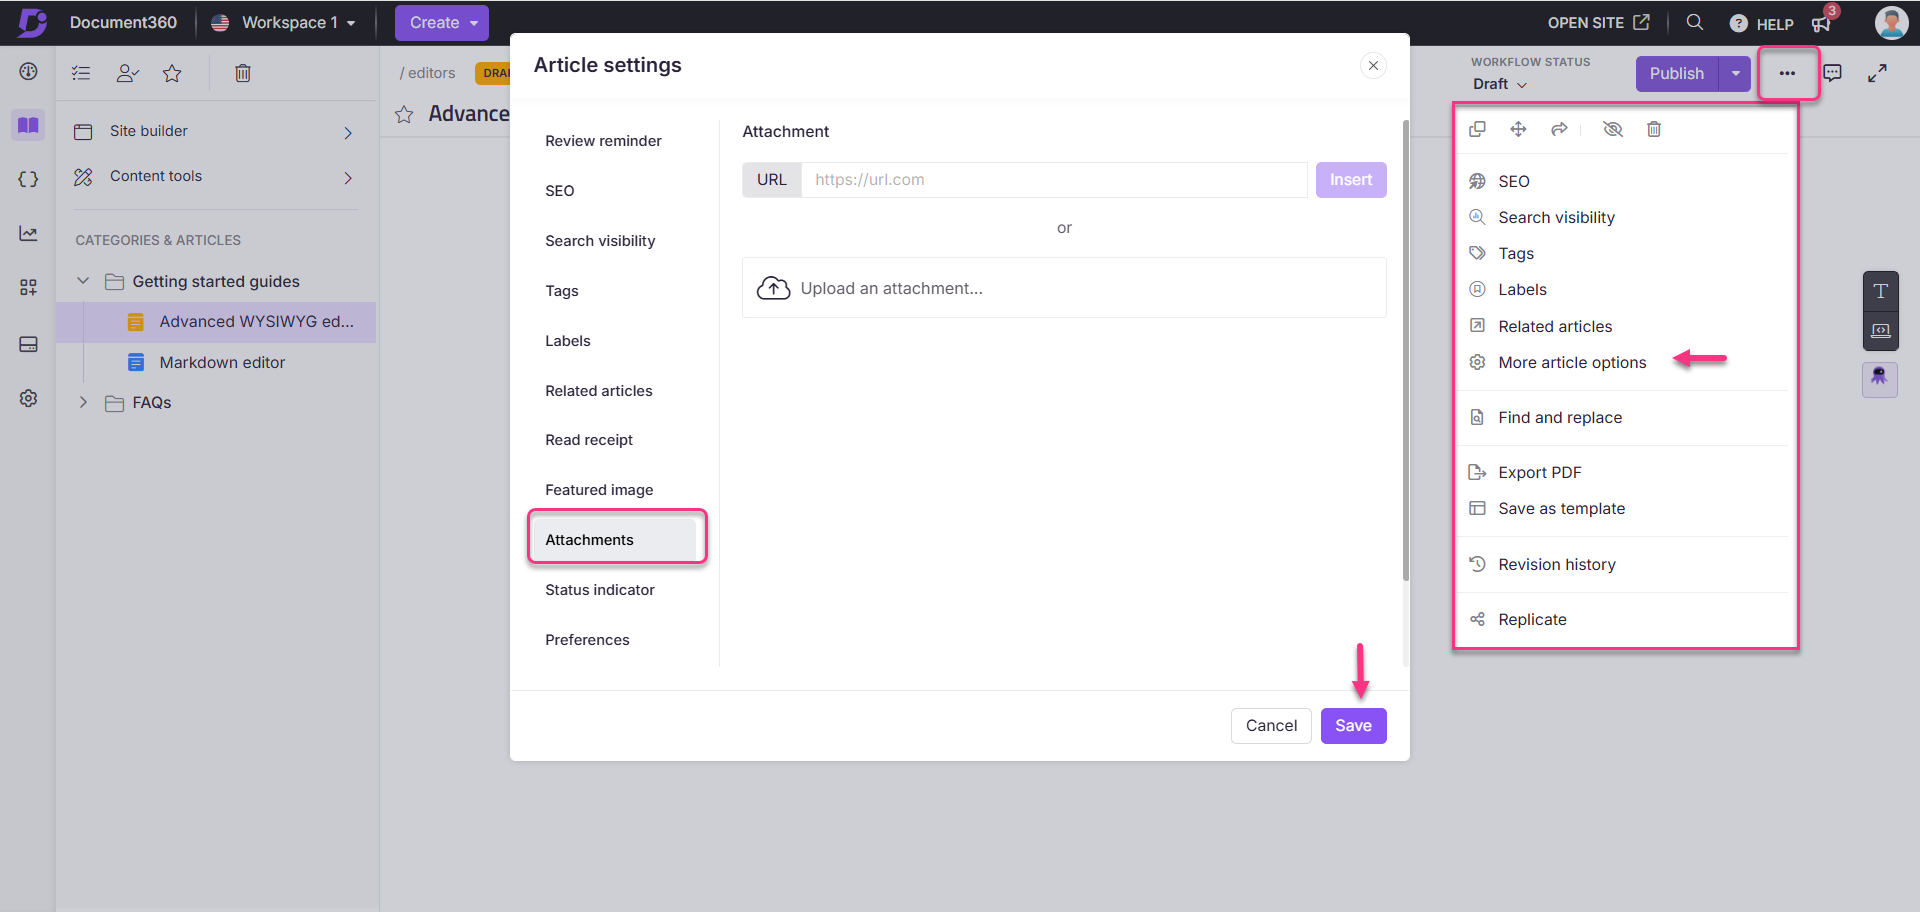
From the desired article, click the More () icon on the top right side.
Click on the More article options.
In the Attachments tab, attach your file in one of two ways:
URL: Enter the URL and click Insert.
Upload an attachment: Choose your desired file and click Upload.
Once done, click Save.
NOTE
If you attach more than one file to an article, you can arrange the display order by dragging and dropping the file names in the menu.

Knowledge base site view

NOTE
When you click on a file, it will be downloaded directly, retaining the same name and format as it appears on the knowledge base site.
FAQs
What is the difference between adding and attaching files?
Adding files embeds them directly into the article body, while attached files are aligned above the tags and Table of Contents on the right side of the page.
Can I filter files in the Drive when adding them to an article?
Yes, you can filter files by upload date, contributor, file type, and tags.
What should I do if my attached file is not visible in the Knowledge base site?
If the attached file is not visible in the desired article, follow these steps to enable article files on the Knowledge base site:
Navigate to Settings () in the left navigation bar in the Knowledge base portal.
In the left navigation pane, navigate to Knowledge base site > Article settings & SEO.
In the Article settings tab, expand the Article right accordion.
Turn on the Show article files toggle if it is turned off.