Plans supporting this feature: Professional Business Enterprise
Document360 article templates are pre-designed article structures that you or any team member can use while writing articles for your knowledge base. These templates provide design consistency and style for your brand, whether you're creating a User guide, FAQ, Release notes, or any custom document.
In Document360, you can create new articles from any basic system templates or create a new article template that you can reuse any number of times in your project.
Creating an article from an existing template
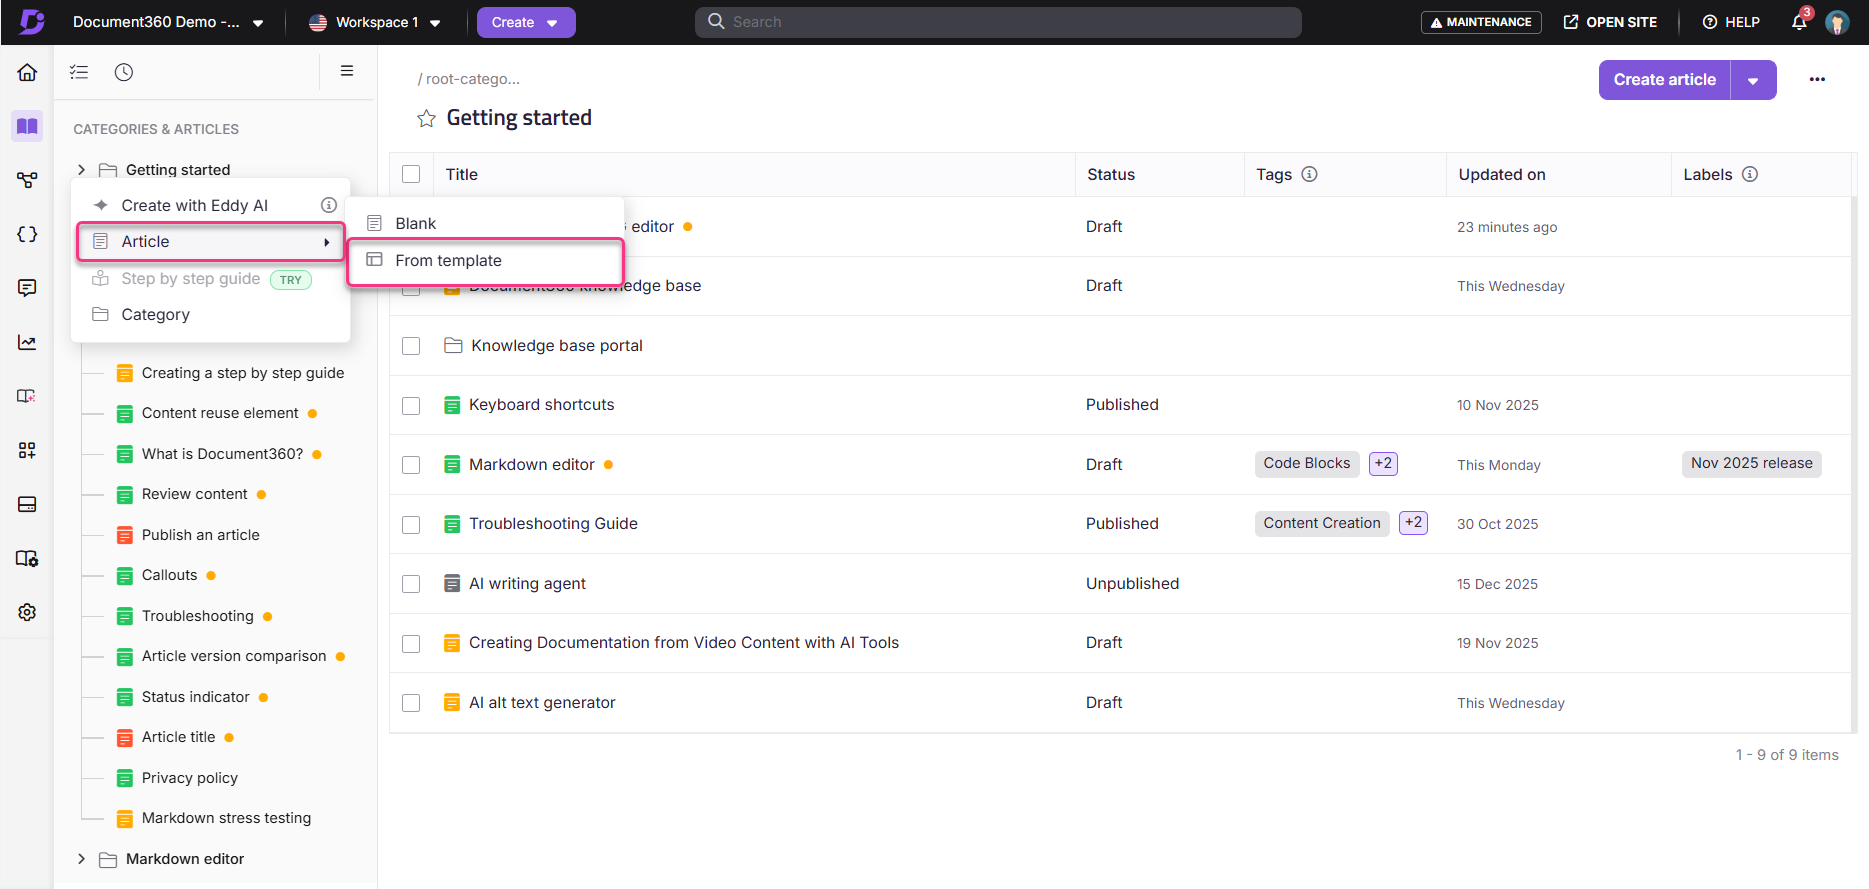
From the left navigation pane, hover over the desired category and click on the () icon.
Click Article from template and enter the article name in the Name field.
Choose the category location from the Nest category under dropdown.
Select one of the available templates.
A preview will be available in the right frame.
Once done, click Create.
If you don’t find a suitable template in the preloaded list, click Manage templates next to the Template name.

Creating a new template
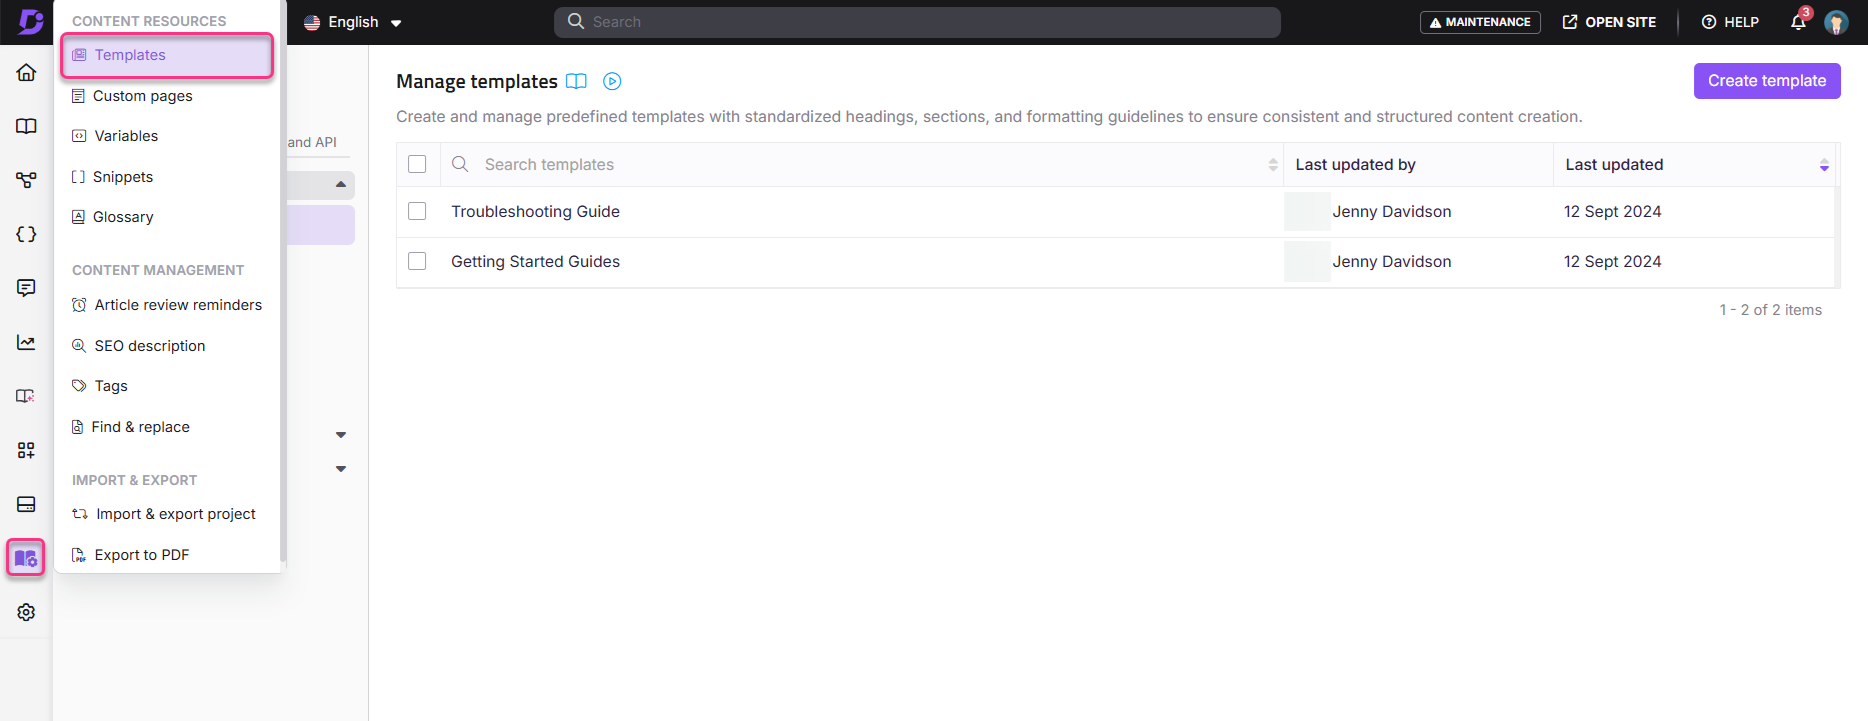
Hover on Content tools in the left navigation bar and select Content resources > Templates. The Manage templates overview page will appear.
You can view the system templates and the templates you have previously added.
NOTE
Default templates will be created automatically based on your onboarding use case selection. These templates can be edited and copied per your requirements. These can not be deleted.
Click Create template on the top right of the page.
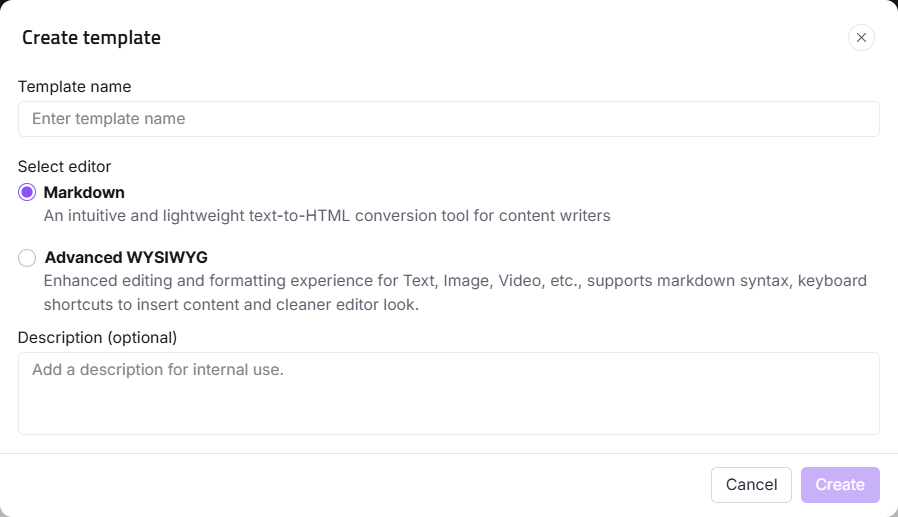
The Create template panel will appear.

Enter the desired template name.
Select the editor type for the template.
Enter the description of the templates.
Click Create.
A new template is created, and you can start making the necessary changes.
Once done, click Save or Save & close from the Save dropdown.
Your new template will be added to the list of templates.

Editing a template
Hover over the desired template and click the Edit () icon.
The selected template will appear.
On the top, next to the template name, click the icon.
A dialog will appear.
Update the name and the description of the template in their respective fields.
Note that the character limit for the description is 250 characters (including space).
Once done, click Save.

Saving an existing article as a template
You can add an existing article as a template regardless of its status (Published, Draft, New, Review, Hidden).
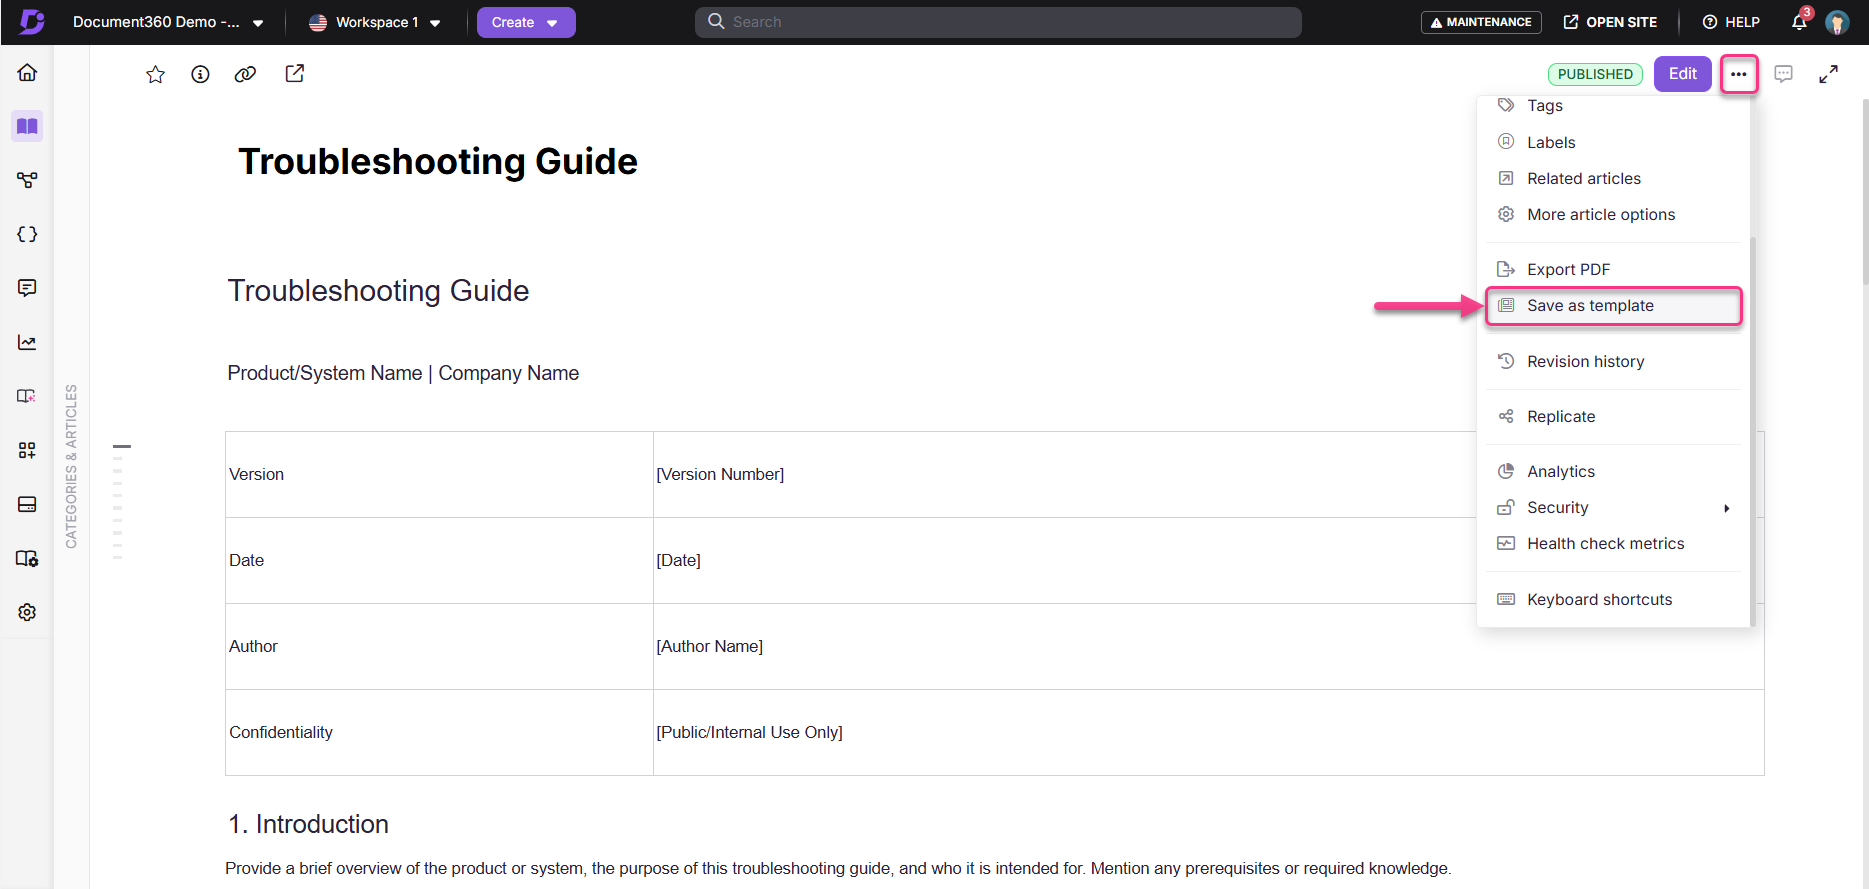
In the Documentation editor, click the More () icon in the article header.
Select Save as template and click Yes in the Save confirmation prompt.
You can also find the Save as template option under the More () icon.
A template has been added, which you can use when creating new articles from a template.
Go to the Manage templates page to view, edit, and delete the saved template.

FAQ
Can I clone templates and use them to create a new template?
On the Templates page, you can clone templates to create new ones by hovering over the template and clicking on the Clone () icon. This saves time by allowing you to derive aspects from existing templates.
What happens if I delete a template that I no longer need?
Deleting a template removes it from the library but doesn't affect articles already created using that template. Your existing content remains unaffected.
Is the template I create available for other team members to use?
Once you create or save an article as a template, other team members can view and use the template in the Template library.
Does updating a template affect the article created from it?
Updating a template does not affect articles that were created from that template. When you create an article from a template, a local copy of the content is saved in the article. It is isolated from the template content.
Can I clone templates used in articles to other languages?
No, templates cannot be cloned to different languages in Document360. Currently, templates can only be cloned within the same language.
If you need to use a template in a different language:
Manually recreate the template in the desired language by copying its structure and content.
Translate the content into the desired language.
Save the new template in the respective language workspace.
