Crisp is a shared inbox platform that centralizes all your customer conversations, providing a seamless solution for instant online communication. It enables your team to handle multiple customer interactions simultaneously while maintaining high customer satisfaction.
Key features of Crisp include:
- Cost efficiency: a single agent can manage multiple conversations at the same time, reducing operational costs.
- Predefined answers: set automated responses to common customer queries to save time and improve consistency.
- Enhanced communication tools: add images, buttons, and GIFs to messages to enrich customer interactions.
Integrating Crisp with Document360 embeds a live chat widget on your knowledge base site, giving readers a direct way to reach your team. Crisp also includes in-built email campaigns and a mobile application for managing conversations on the go.
Before you begin
- You need a Crisp account.
- You need your Crisp Website ID. See How to find your Crisp Website ID below.
Access your Crisp Website ID
The Crisp Website ID is a unique code obtained from the Crisp application. It is required to connect Crisp with Document360.
Existing Crisp user
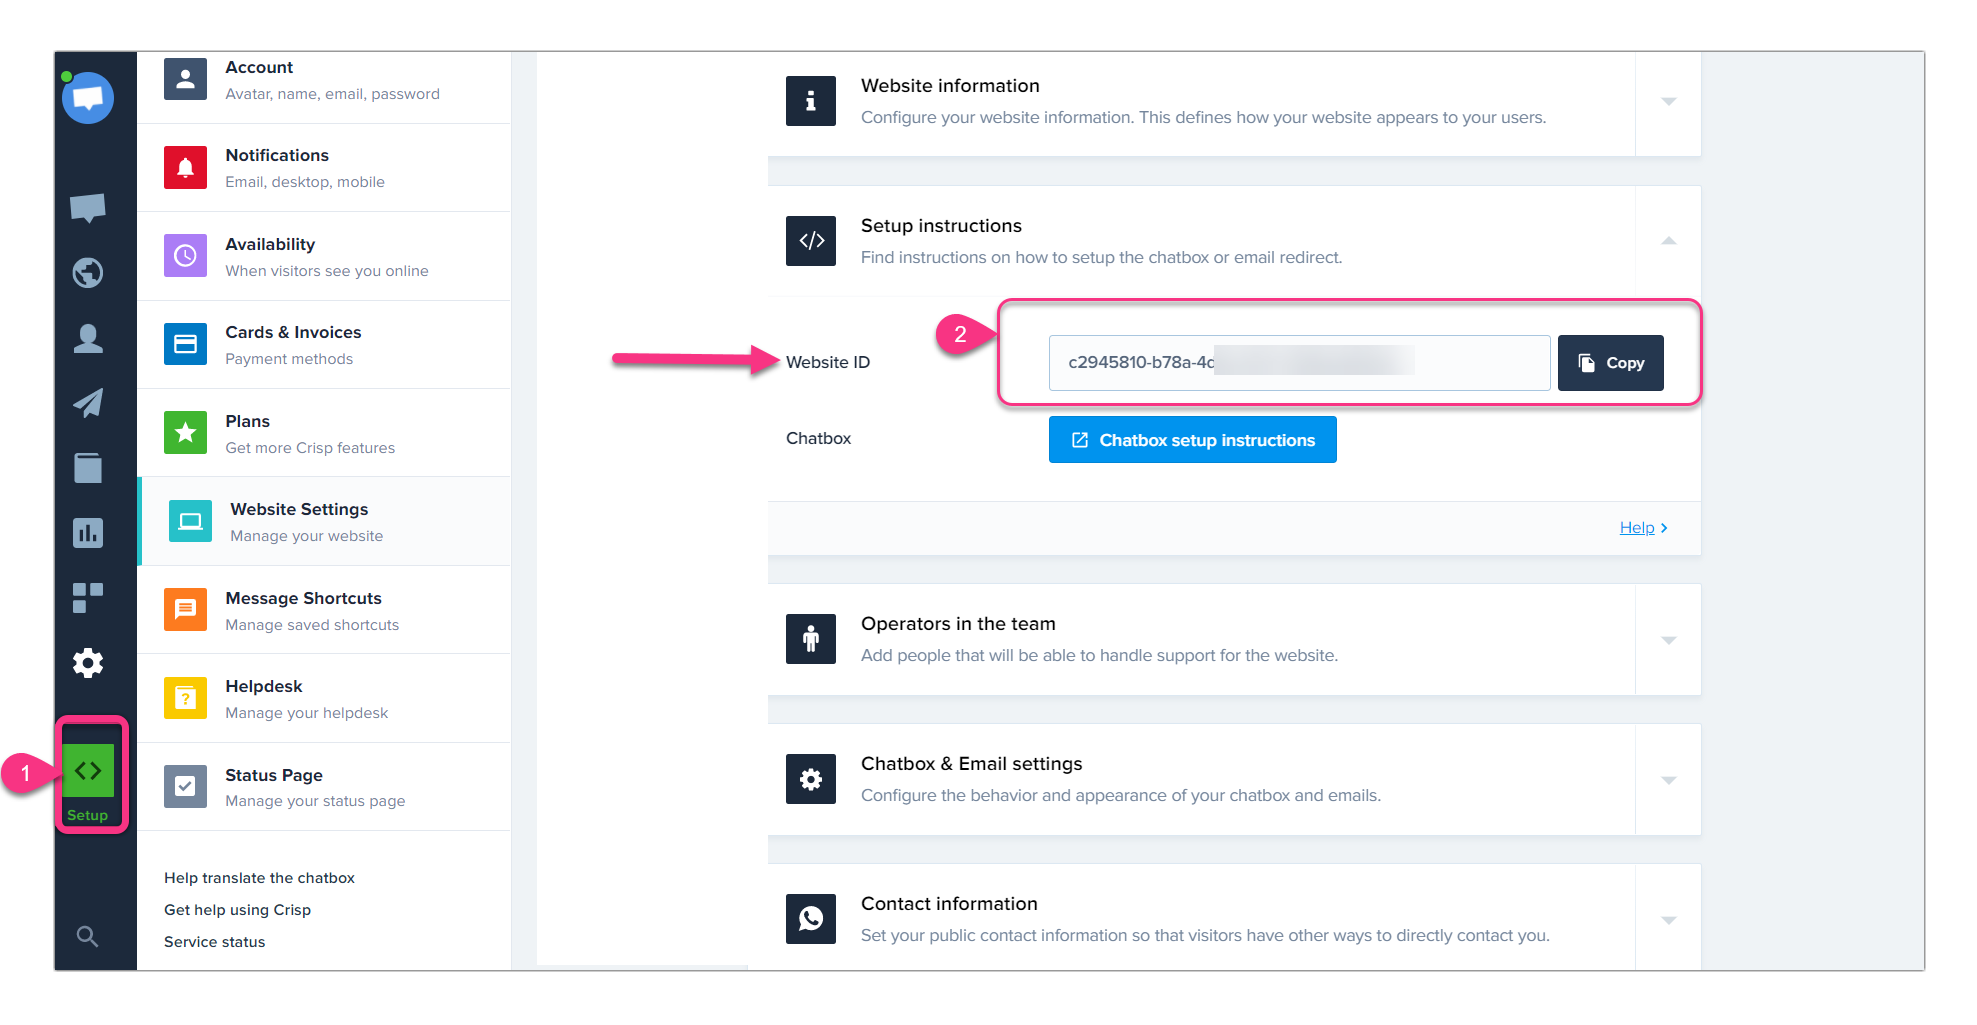
- Open your Crisp dashboard.
- Click Settings > Website Settings.
- Copy the Website ID from the Setup Instructions section.
New Crisp user
Your Crisp Website ID is provided during the Crisp account installation process. Keep it ready before completing the integration steps in Document360.
Integrate Crisp with Document360
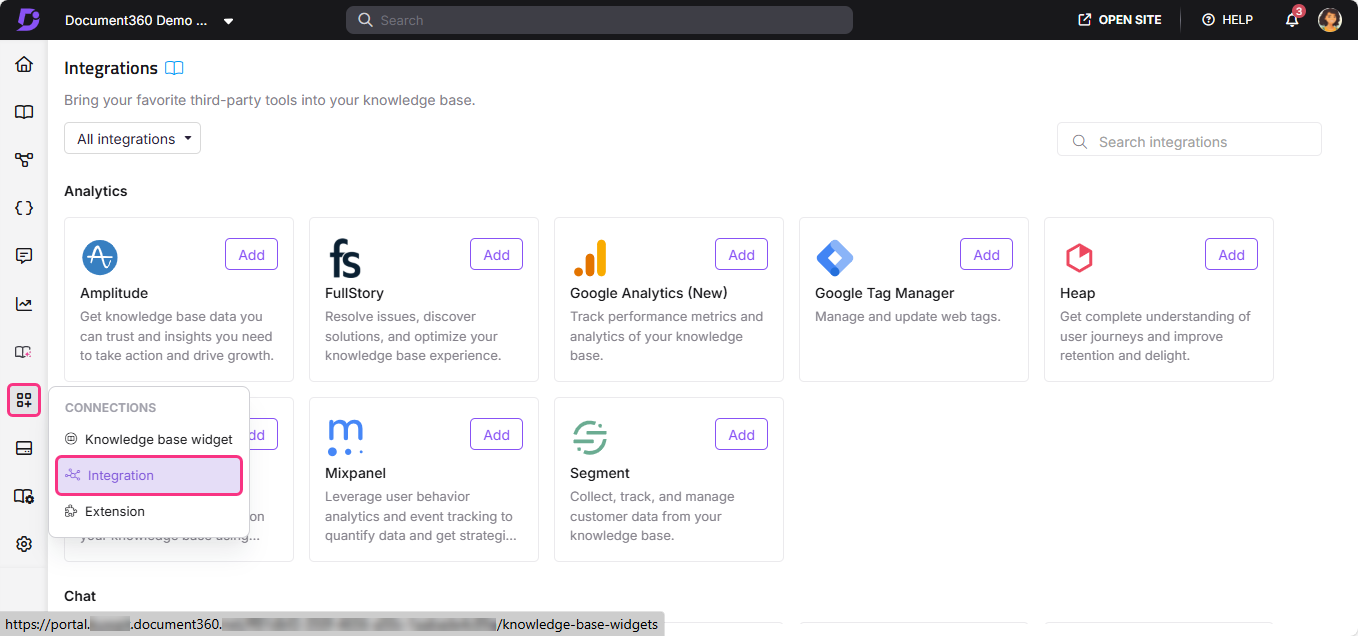
- In the Document360 portal, navigate to Connections () > Integrations () in the left navigation bar.
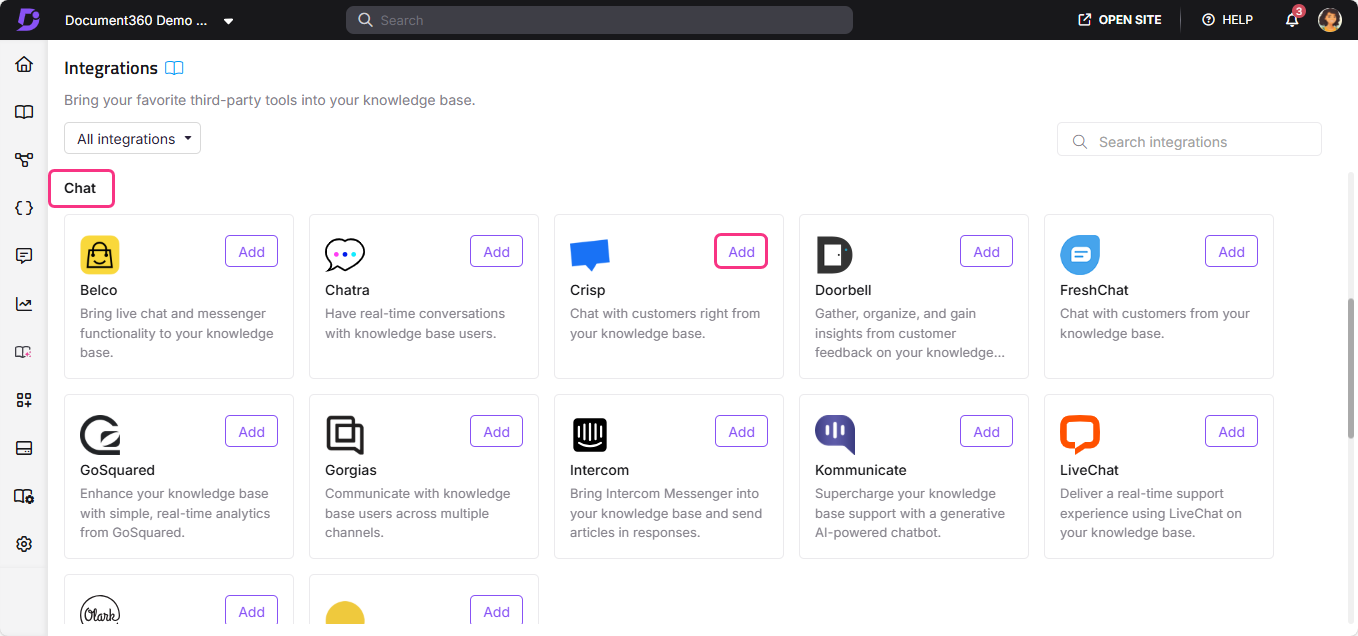
- Select Crisp from the list of integrations and click Add. The Add new integration panel appears.
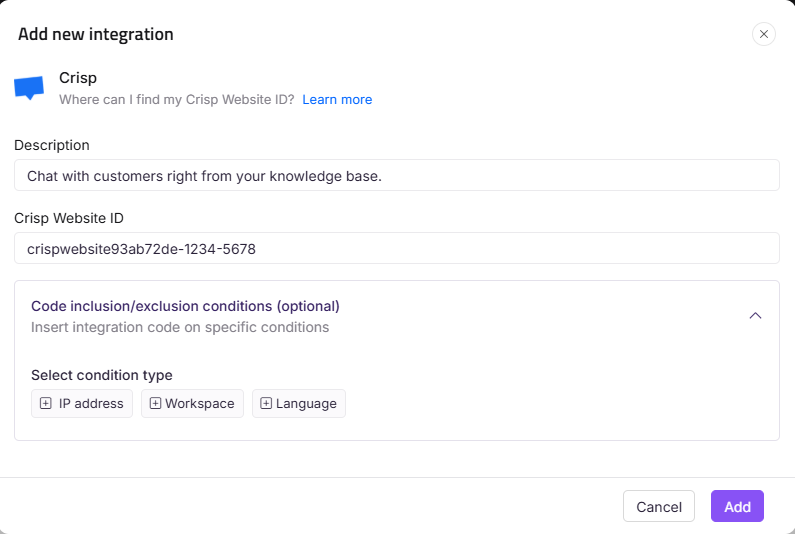
- Add a Description and enter your Crisp Website ID.
The Crisp Website ID is a unique code obtained from the Crisp application. It is required to connect Crisp and Document360 in the knowledge base portal.
- Optionally, expand Code inclusion/exclusion conditions to control when the integration runs based on IP address, Workspace, or Language.
- Click Add.
After setup, open your Crisp account to view and respond to chats from your knowledge base visitors.
Best practices
- Use predefined answers for common support queries. Set up automated responses in Crisp for questions that come up repeatedly, so readers get an instant answer even when no agent is available.
- Use enhanced communication tools to improve clarity. Add images, buttons, and GIFs to chat messages when text alone is not enough to explain a process or guide a reader to the right article.
- Use Code inclusion/exclusion conditions to limit where the chat widget appears. If the Crisp widget is only relevant on certain workspaces or for certain languages, configure conditions to limit where it runs.
- Review chat transcripts to identify documentation gaps. Common questions in Crisp that don't have a good article to point to are signals that new content is needed in your knowledge base.
FAQ
What is the Crisp Website ID?
The Crisp Website ID is a unique identifier obtained from the Crisp application. It is required to connect Crisp with Document360. Existing users can find it in the Crisp dashboard under Settings > Website Settings > Setup Instructions. New users receive it during the initial Crisp account installation process.
Why should I integrate Crisp with Document360?
Crisp adds a live chat widget to your knowledge base site so visitors can reach your support team directly. It also includes in-built email campaigns and a mobile application for managing conversations. Features like predefined answers and multi-conversation handling help your team respond faster and more consistently.
Can a single agent handle multiple conversations at once in Crisp?
Yes. Crisp's shared inbox lets a single agent manage multiple customer conversations simultaneously, which helps reduce operational costs and keeps response times low even during busy periods.
Can I limit which workspaces or languages the Crisp widget appears on?
Yes. When adding or editing the Crisp integration, expand Code inclusion/exclusion conditions and add conditions based on IP address, Workspace, or Language. See Code inclusion and exclusion conditions for full details.
What can I do after completing the Crisp integration?
After setup, open your Crisp account to view and respond to chats from your knowledge base visitors. You can use predefined answers to automate common responses, and enhanced communication tools like images and buttons to improve the quality of your interactions.