Managing interactive decision trees in Document360 lets you edit, organize, and maintain them so your content stays accurate and effective. This article covers how to edit, clone, delete, and organize decision trees, as well as how to make them visible to readers on your knowledge base site.
To configure SEO, tags, visibility, security, versioning, and more, see Settings for interactive decision trees.
Editing a step in a decision tree
Edit a step when you need to update its content, media, or interactive actions.
- Navigate to Interactive decision trees in the left navigation bar of the Knowledge base portal.
- Locate the decision tree in the Categories & Interactive decision trees pane.
- Click the step you want to edit, then click Edit from the floating menu.
- Make your changes:
- Steps — Add, remove, or rearrange steps using drag-and-drop.
- Media — Update images or videos to reflect the latest information.
- Actions — Modify or add buttons, dropdowns, or other interactive elements.
- Click Save to apply your changes.
Use the Preview option to review the decision tree before publishing to make sure everything works as intended.
Cloning a step in a decision tree
Cloning creates an exact duplicate of a step — including its content and actions — so you can modify it independently without affecting the original.
- Navigate to Interactive decision trees in the left navigation bar.
- Locate the decision tree in the Categories & Interactive decision trees pane.
- Click the step you want to clone.
- Click Clone from the floating menu.
The cloned step appears with the same content and actions as the source step and can be edited freely.
Deleting a step in a decision tree
Remove steps that are no longer relevant to keep your decision trees clean and accurate.
- Navigate to Interactive decision trees in the left navigation bar.
- Locate the decision tree in the Categories & Interactive decision trees pane.
- Click the step you want to delete.
- Select the Delete icon from the floating menu.
- Click Delete Step in the confirmation dialog.
.png)
Deleting a step is permanent. Ensure you no longer need the step or have created a backup before proceeding.
Organizing decision trees
Good organization makes decision trees easy to find and manage as your knowledge base grows.
Creating a category
Categories help you group related decision trees together.
- Navigate to Interactive decision trees in the left navigation bar.
- Click Create in the header menu and select Category.
- Enter a name and location for the category in the Create a new category dialog.
- Click Create.
Assigning a category to a decision tree
You can assign a category in two ways:
- During creation — Select the desired category from the dropdown in the Create a new interactive decision tree dialog.
- While editing — Open the decision tree, navigate to the category field, and select a new category from the dropdown.
Reordering decision trees
- Navigate to Interactive decision trees in the left navigation bar.
- In the Categories & Interactive decision trees pane, use the drag handles to drag and drop decision trees into the desired order.
Making decision trees visible on the knowledge base site
Before readers can access your decision trees, you need to add them to the site's primary navigation header.
- Log in to the Knowledge base portal and select your project.
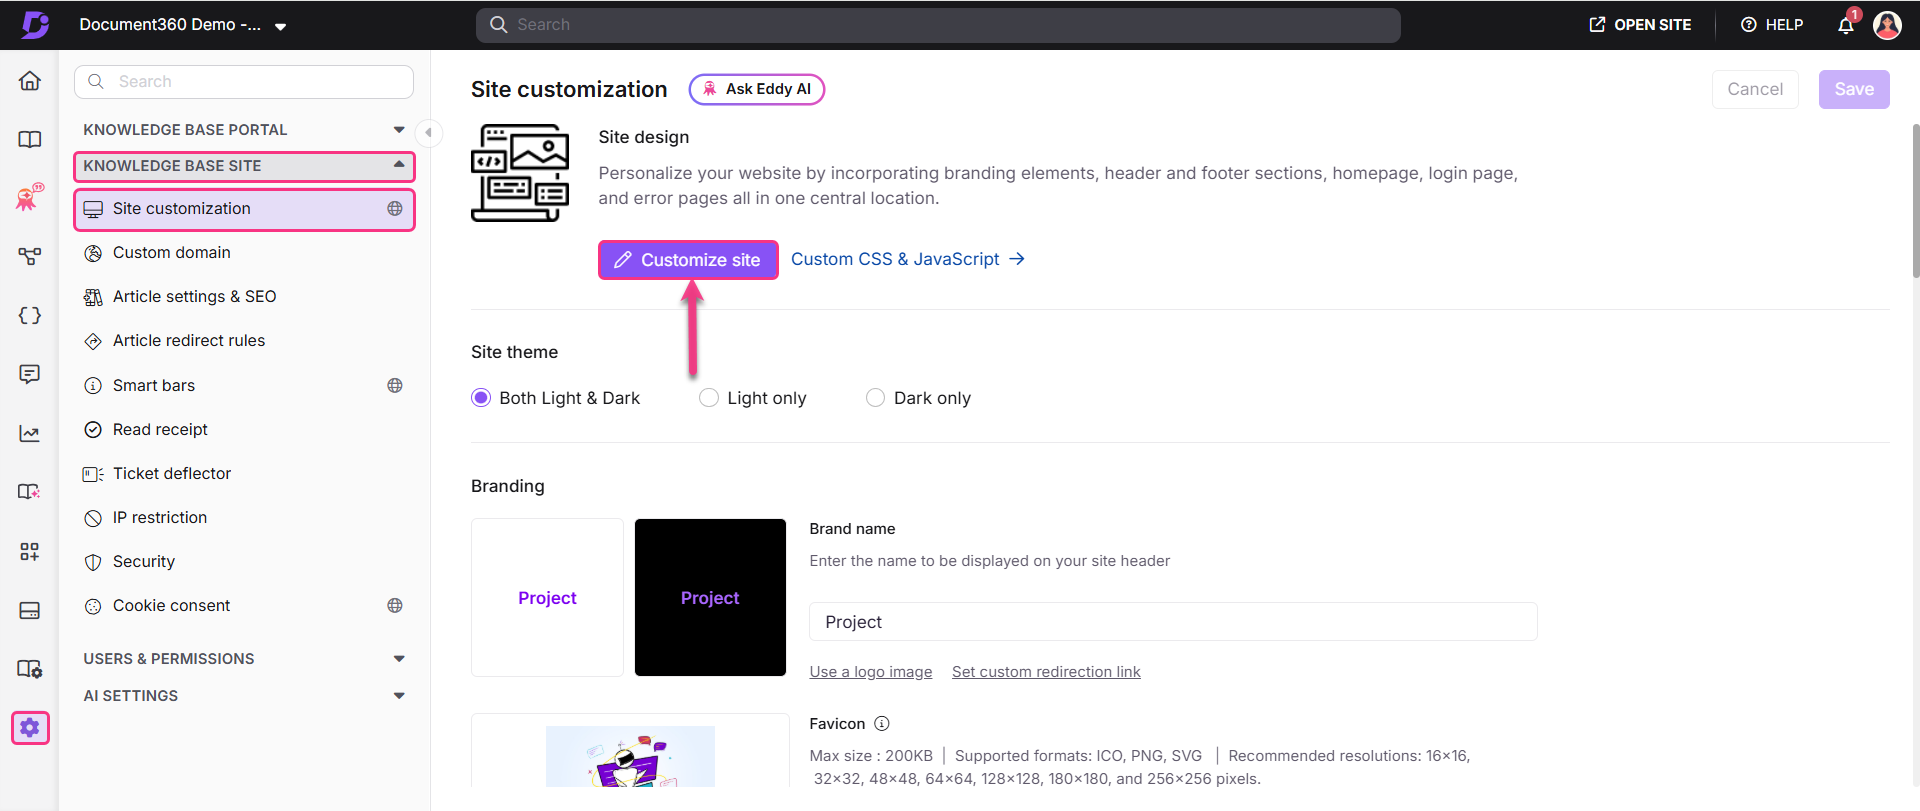
- Navigate to Settings > Knowledge base site > Site customization.
- Click Customize site.
- The Site header & footer navigation option will be selected by default. Expand the Header option and select Primary navigation.
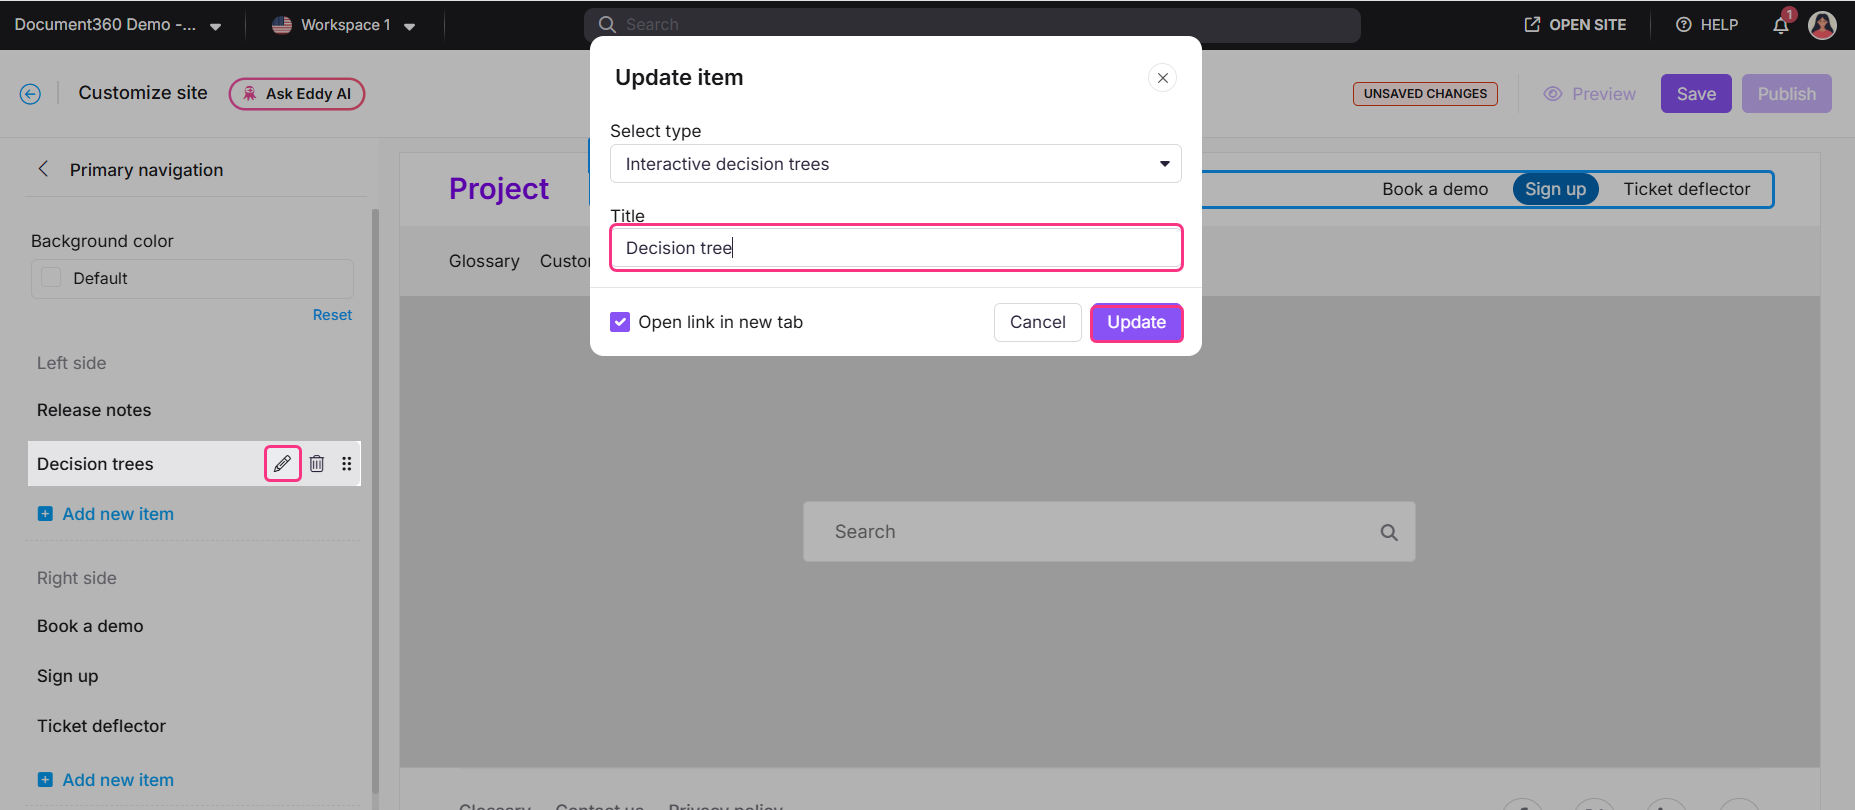
- Click Add new item, then select Interactive decision trees from the dropdown.
- To add a custom title, click the Edit icon next to the newly added item and enter your desired name in the Title field.
- Click Update.
A link to your decision trees is now visible in the site header. To learn about viewing decision trees in the knowledge base site, read the article on Viewing interactive decision trees in the knowledge base site.
FAQs
Can I recover a deleted decision tree?
No. Deleted decision trees cannot be recovered. Clone a decision tree before deleting it if you may need it later.
How do I preview changes before publishing?
While editing, click the Preview button to see how the decision tree will appear to readers before you publish.
Can multiple team members collaborate on the same decision tree?
Decision trees can be accessed by users with the appropriate roles and permissions. However, only one user can edit a decision tree at a time to avoid version conflicts.
Can I clone decision trees within a workspace or across workspaces?
Yes, you can clone decision trees both within the same workspace and across different workspaces. This allows you to reuse existing structures and content without having to recreate them from scratch.
Are there any current limitations?
Yes, interactive decision trees are currently in beta. Known limitations include:
- Steps and nodes cannot be copied to a different decision tree.
- Step-level analytics (views, traversal paths) are not yet supported.
- Bulk operations (delete, move, publish) are not available.
- Videos cannot be added to decision tree steps.
- There is no recycle bin — deleted trees cannot be restored.
- Import and export are not supported.
- Conditional content and team auditing are not yet available.
We are actively working on expanding the feature set based on user feedback.