File dependencies show you how many times a file has been used across your knowledge base — in articles, homepage customization, and content reuse tools. Knowing where a file is used helps you make informed decisions before renaming, replacing, or removing it.
Why view file dependencies
- Prevent broken content — Before removing or replacing a file, check its dependencies to avoid breaking articles or pages that reference it.
- Audit your media library — Identify files with no dependencies to clean up unused assets from Drive.
- Track file usage — Understand the full scope of where a file appears across articles, homepage customization, and content reuse (variables, snippets, and glossary).
Before you begin
- Dependencies are tracked for all file types, not just images.
- A file with no dependencies is shown with a – in the Dependencies column.
- Dependencies are tracked across three areas: Articles, KB Customization (homepage), and Content Reuse (variables, snippets, and glossary).
View file dependencies
There are two ways to view file dependencies:
- From the drive list view
- From the file details panel
From the drive list view
-
Navigate to the Drive () icon in the Knowledge base portal.
-
Browse through the folders to locate the intended file.
-
In the Dependencies column, click on the number (e.g., 6) displayed next to the file. This number represents the count of related areas with dependencies.
- Files with Dependencies: If a file has dependencies, the Dependencies field will show the number of dependencies.
- Files without Dependencies: If a file has no dependencies, the Dependencies field will be indicated by a '-'.
Be cautious when handling folders, as they may contain files with dependencies. Always review individual file dependencies before making changes to a folder.
-
Upon clicking the number, the File dependencies dialog will appear. This panel provides information about the file's associations in various areas, such as Articles, KB Customization, and Content reuse.
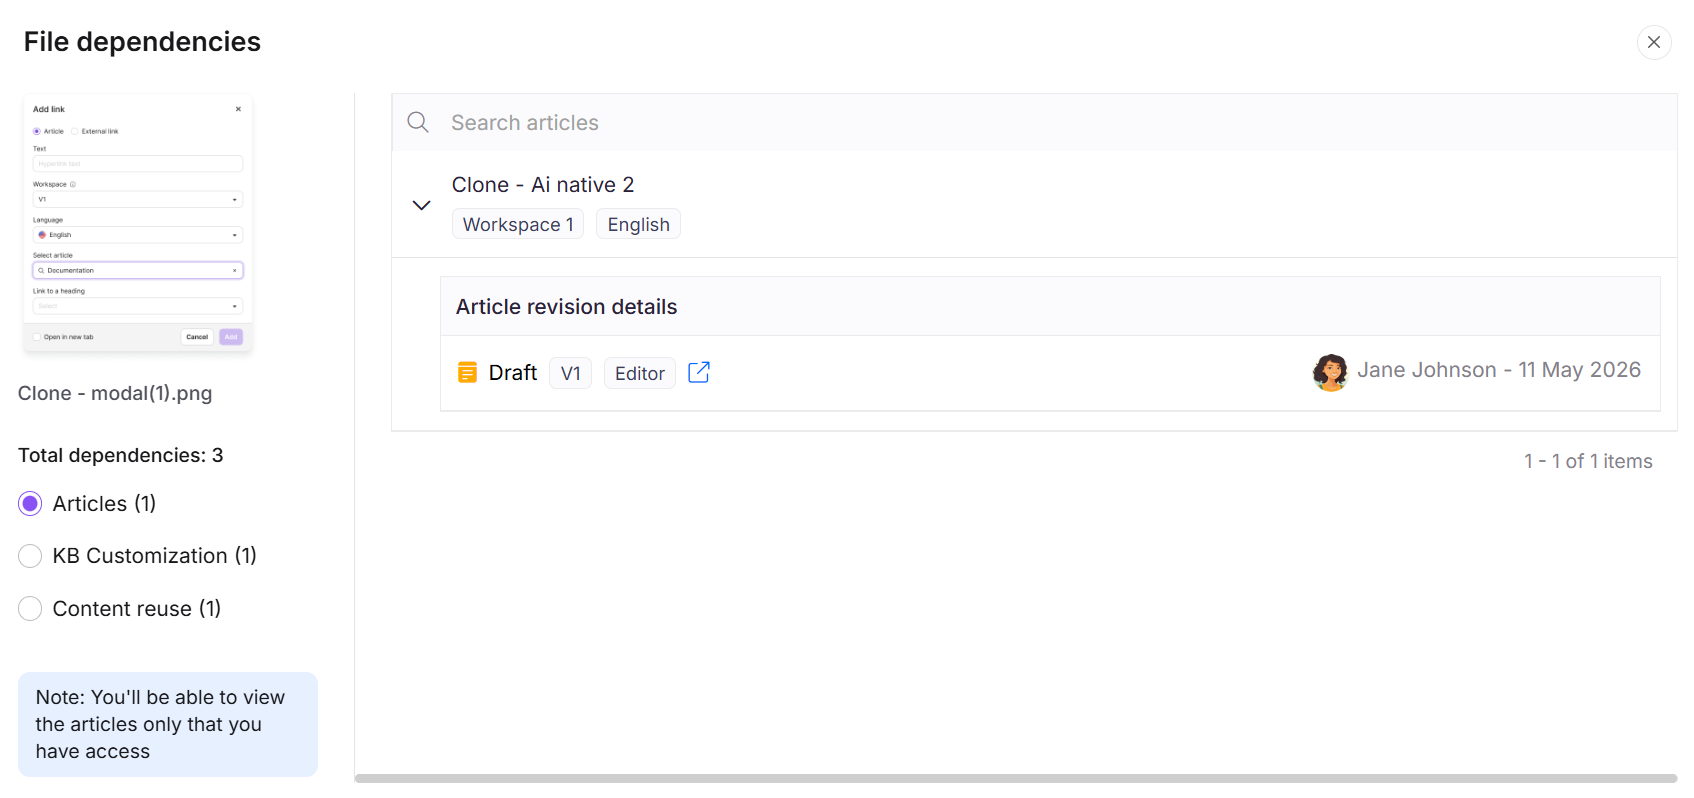
Understanding the file dependencies panel
The panel organizes dependencies into three sections:
Articles
Expand any listed article to view:
- Article status
- Article version
- The user associated with the article
- The date
- An Open site (↗) icon to navigate directly to the article
KB customization
Lists any homepage where the file is used.
Content reuse
Expand any content reuse tool to view the snippet name and the language it is used in. Content reuse covers variables, snippets, and glossary entries.
Any file used in articles, homepage customization, or content reuse tools (variables, snippets, glossary) is listed under file dependencies in Drive.
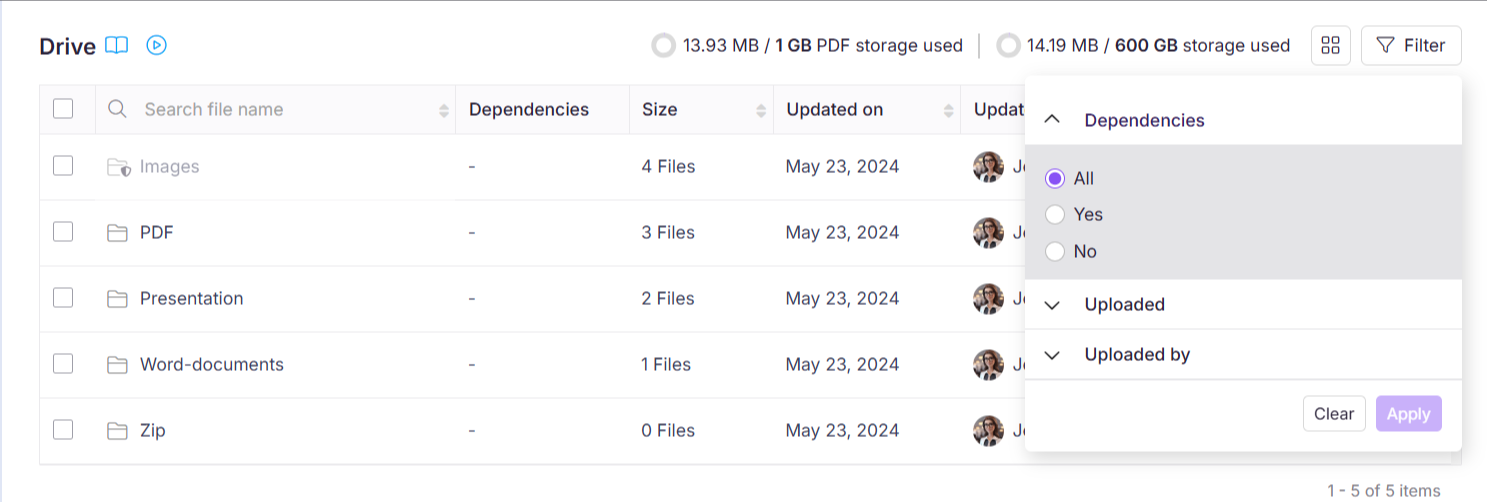
Filter files by dependencies
Use the filter to quickly identify files with or without dependencies across your Drive.
- Click the Filter () in the top right corner.
- Expand the Dependencies tab and choose the necessary option (All, Yes or No) to filter the files based on filtering options.
- Click Apply to view your desired results.
This will help to keep the drive free from outdated images or files with no dependencies.
Best practices
- Always check dependencies before removing a file — A file showing a dependency count is actively used. Removing it will break any article or page that references it.
- Use "Without dependencies" filter regularly — Periodically filtering for files with no dependencies helps you identify and clean up unused assets, keeping Drive lean and manageable.
- Review folder-level dependencies carefully — Folders do not show a combined dependency count. Always review individual file dependencies before making bulk changes to a folder's contents.
- Navigate directly from dependencies — Use the Open site icon in the Articles section to jump straight to the article and verify how the file is being used in context before making changes.