Accessing 'All articles' filters
To manage filters in the All articles feature, follow the steps below:
Navigate to Documentation () in the left navigation bar.
In the left navigation pane, navigate to All articles ().
The All articles page will appear.Navigate to your project's different workspaces and languages using the dropdown in the top navigation bar.
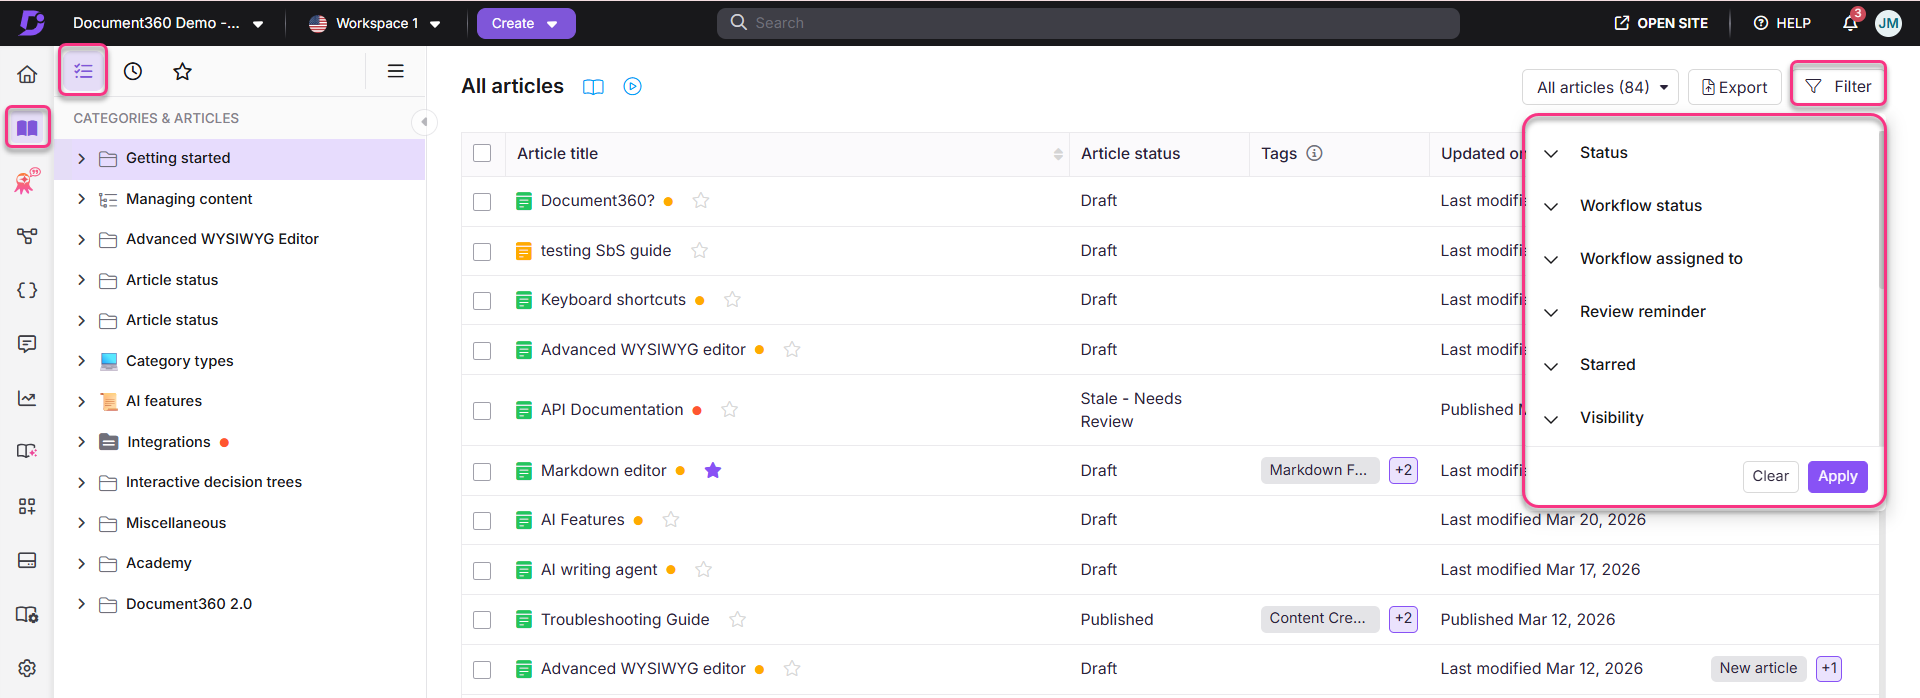
Click the All articles dropdown to filter articles by status.
Use the basic filters or custom filters to narrow down the results.
The filters applied can be viewed at the top of the panel, and they include the following:
Status
Workflow status
Workflow assigned to
Review reminder
Starred
Visibility
Read receipt
Contributor
Category
Date
Tags
Labels
a. Status
All: All articles, irrespective of the status.
Published: Articles with Published status.
Unpublished: Articles with Unpublished status.
Scheduled: Articles that are scheduled for publishing.
Draft: Articles with Draft status.
New article: Articles with New article status.
Broken links: Articles that have broken links based on the recent Link validation.
Deprecated: Articles marked as Deprecated in the Knowledge base site.
b. Workflow status
All: Displays all articles, irrespective of workflow status.
Other workflow statuses: Articles that are currently in the selected workflow status (for example, Draft, review, Peer review, SME review, etc.). The available options reflect the workflow statuses configured in the Workflow Designer for your project.
c. Workflow assigned to
All: Displays all articles, irrespective of workflow status.
Unassigned: Displays articles that do not have any assigned users or user groups.
All users: Selects all team members in the project and displays articles assigned to any of them.
Specific users: Select one or more team members to view articles currently assigned to them.
d. Review reminder
All: All articles, irrespective of the review status.
Fresh: Articles without the Needs review status.
Stale: Articles with the Needs review status.
This filter is available only on Private projects.
e. Starred
All: All articles, irrespective of the starred status.
Starred: Articles with Starred status.
Not starred: Articles without Starred status.
f. Visibility
All - All the articles, irrespective of visibility status.
Visible - All articles in the selected workspace/language except for hidden articles.
Hidden - Hidden articles are marked with a strikethrough, meaning they are not visible on the Knowledge base site but still exist in your project.
g. Read receipt
All: All articles, irrespective of read receipt status.
Enabled: Articles with Read receipt enabled.
Disabled: Articles with Read receipt disabled.
NOTE
Read receipt feature is available only for Private and Mixed projects in KB site 2.0. For more information, read the article on Read receipt.
h. Contributor
You can search for individual contributors using the search bar and select one or more contributors from the list. The contributors are all Team accounts in the project. The default selection is All.
i. Category
You can filter articles by category or subcategory (visible when you expand the root-level category). You can choose one or more categories using this filter.
NOTE
Selecting a category will show only articles under that category. To select articles under a subcategory, pick them manually.
j. Date
You can filter articles based on their last Updated date. All articles in Published, New, Draft, and Deprecated status will appear.
You can select from the preset time intervals or add custom dates. Once you choose the date, the specified time period (For example, Jun 28, 2022 to Jun 28, 2023) will appear next to the selection.
All
7 days
30 days
3 months
1 year
Custom date
k. Tags
You can search for individual tags using the search bar and select one or more tags from the list. The default selection is All tags and None (articles with no tag association).
l. Labels
You can search for individual labels using the search bar and select one or more labels from the list. The default selection is All labels and None (articles with no label association).
Custom filter
You can save a custom filter in All articles that you can reuse.
For example, you can create a custom filter for your documentation team members with a specific date range and status indicator.
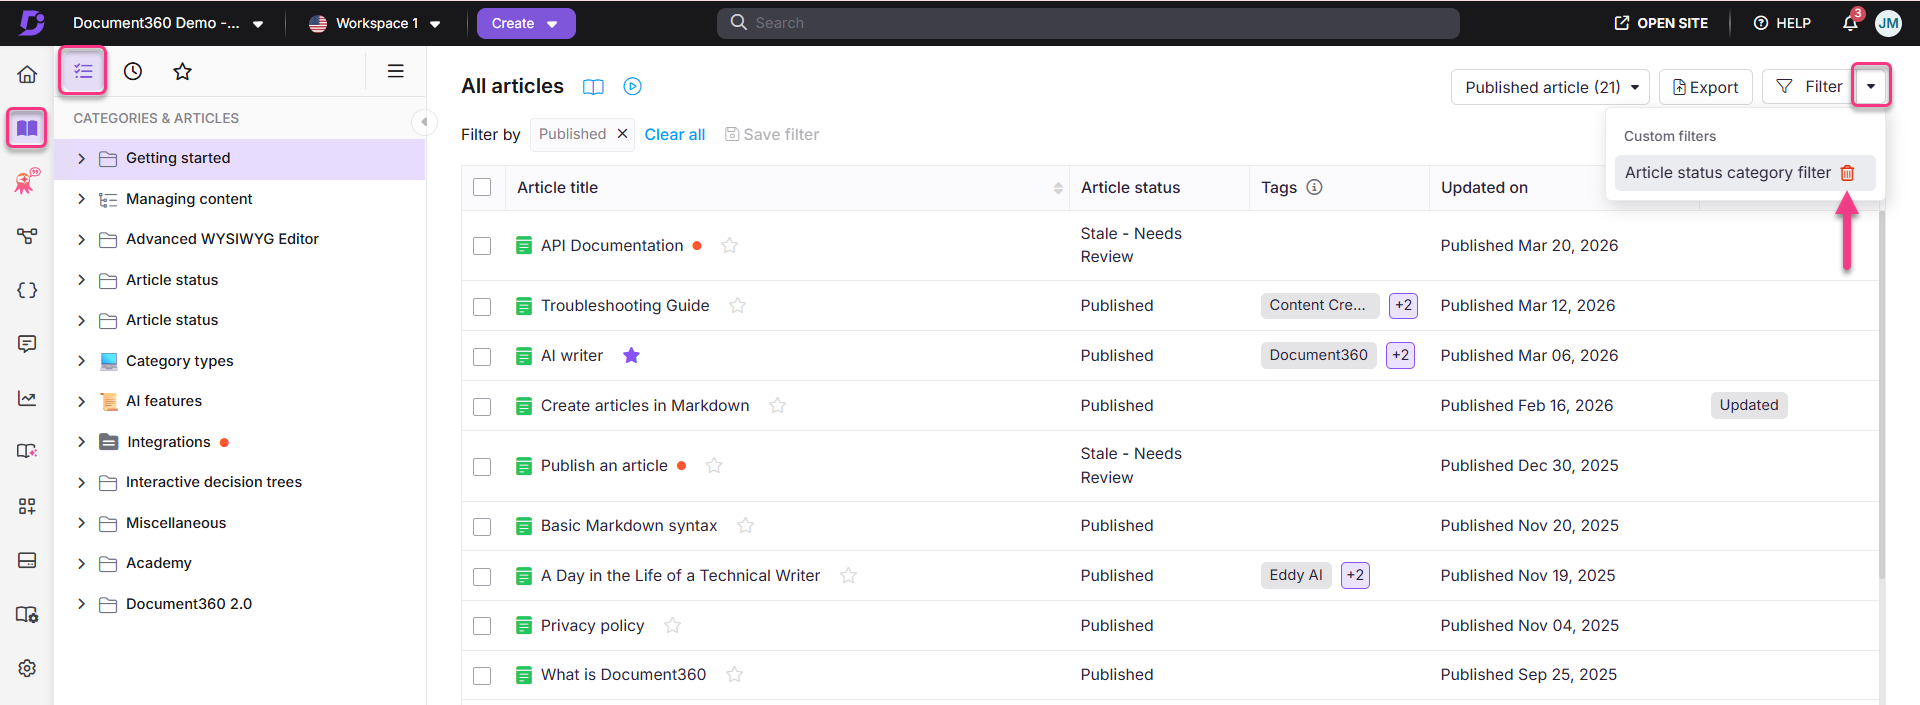
Saved custom filters can be accessed using the expand arrow to the right of the Filter button.
Saving a custom filter
Navigate to Documentation () in the left navigation bar.
In the left navigation pane, navigate to All articles ().
The All articles page will appear.Click the Filter dropdown, choose the desired filter, and click Apply.
The applied filters are visible at the top of the list.
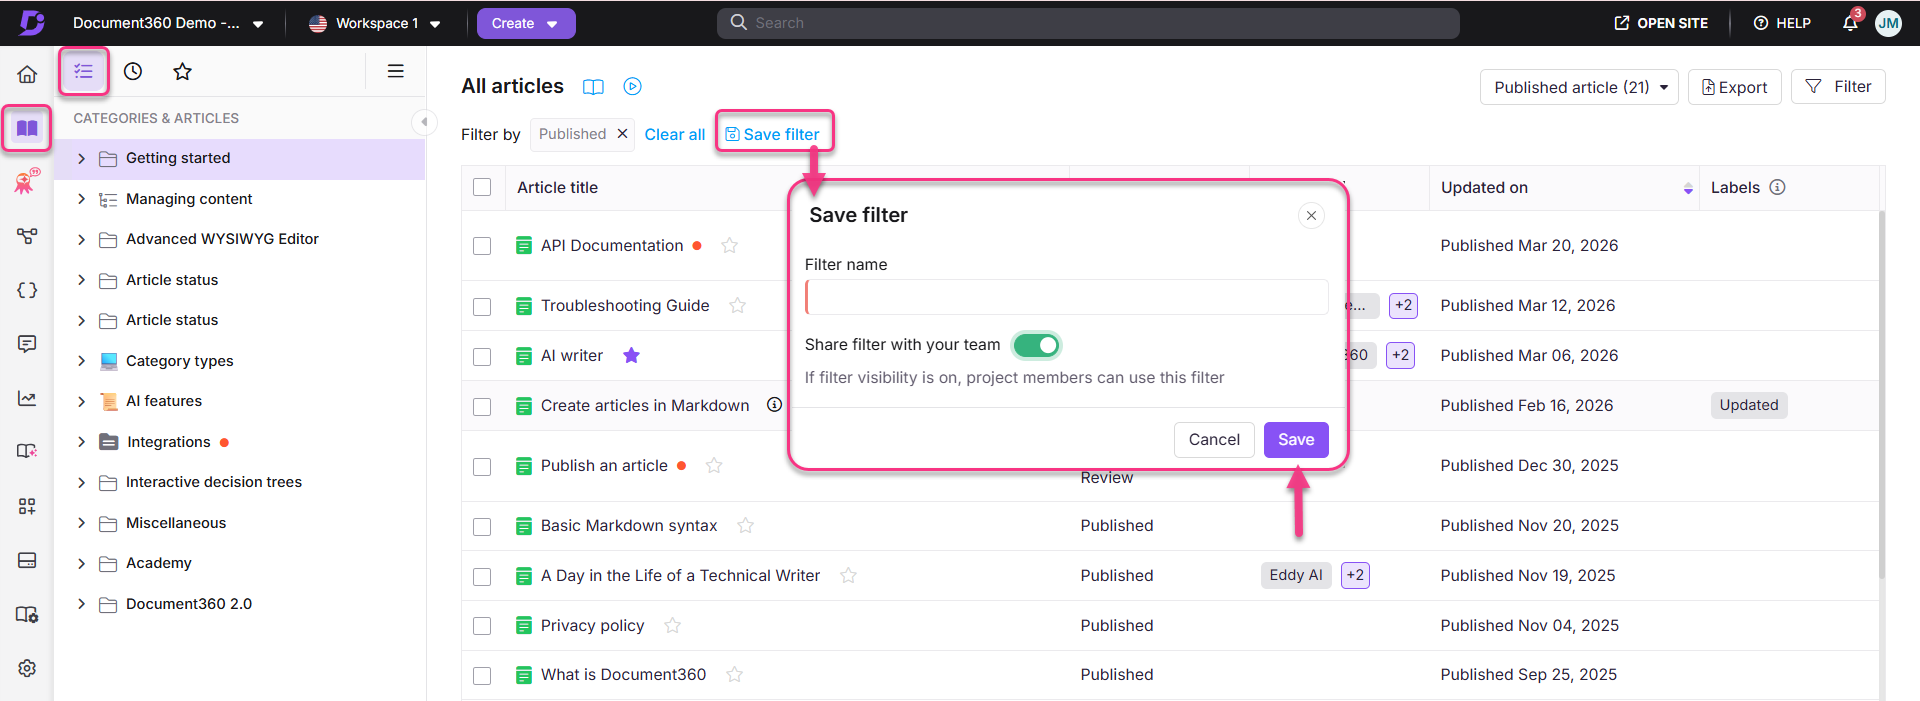
Click Save filter.
The Save filter panel will appear.
Type the intended Filter name (up to 30 characters).
Turn on the Share filter with team members toggle if you want the filter to be available to other team accounts. (If the toggle is not enabled, the custom filter can only be used by you).
Once done, click Save.
Deleting a custom filter
Click the expand arrow () icon near the Filter button.
Hover over the desired custom filter and click the Delete () icon.
Click Yes in the confirmation prompt.
NOTE
Once a custom filter is saved, you cannot edit it. After deleting a custom filter, you cannot revert back.
Only the user that created the custom filter can delete it, even if the filter is shared with others using the Share filter with your team toggle.
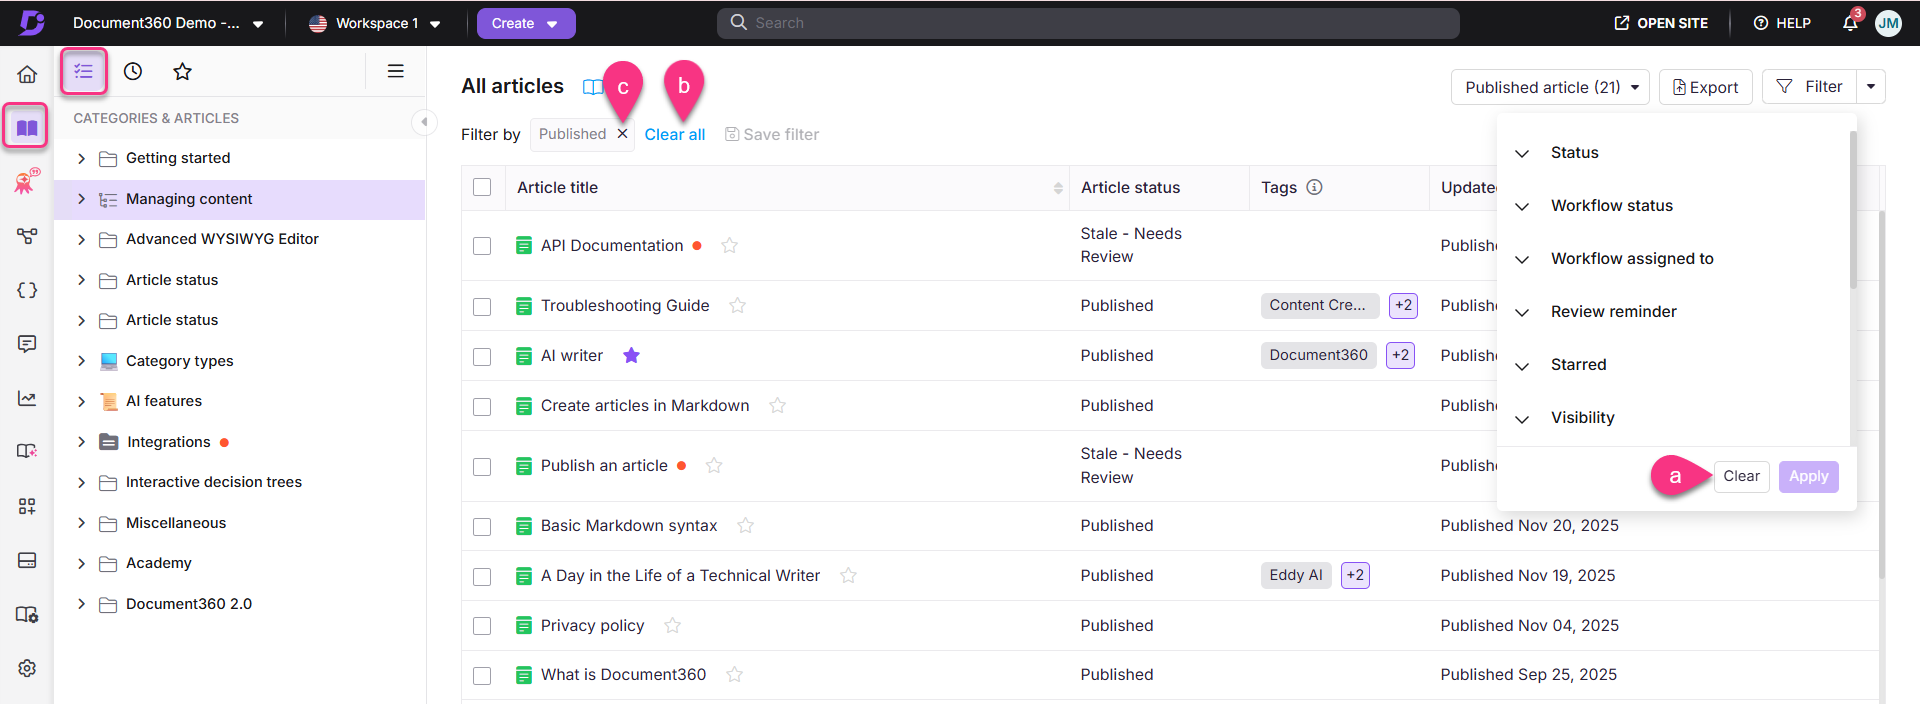
Clear filters
You can clear the applied filter in three ways:
Click Clear all at the top of the panel.
Navigate to the Filter dropdown and click Clear.
To remove an individual filter, click the X next to the applied filter visible above the articles list section.
FAQ
What filters can I apply to narrow down the articles?
In the All articles section, you can apply filters such as Status, Review reminder, Starred, Visibility, Read receipt, Contributor, Category, Date, and Tags.
Can I save a custom filter for future use?
Yes, you can save a custom filter in All articles that you can reuse later.
What should I do if I want to clear all applied filters?
You can clear all applied filters by clicking Clear all at the top of the panel or using the Filter dropdown.
Why is the Read receipt feature not available in my project?
The Read receipt feature is available only for Private and Mixed projects in KB site 2.0.