Plans supporting this feature: Business Enterprise
Many organizations worldwide use Git to manage code repositories, with GitHub being one of the most popular platforms. GitHub enables developers to showcase their work and collaborate globally.
Developers use Git commands to commit new features and bug fixes to their project repositories. GitHub also offers an intuitive graphical interface for managing these repositories efficiently.
Integrating GitHub with Document360
Using Document360 as your Knowledge base platform, you can integrate it with GitHub to streamline content management. For example, when developers commit new code or updates to a GitHub repository, corresponding changes may need to be reflected in your knowledge base. Manually updating Document360 for every change can be time-consuming and prone to errors.
By connecting Document360 and GitHub via Zapier, you can automate this process, ensuring seamless synchronization between your code repository and knowledge base. To establish a connection between GitHub and Document360, follow the below steps:
Ensure that you have logged into your Zapier account.
From the left navigation menu, click Create and then click Zaps from the options available.
Zap will be created with Trigger and Action flow.

Connecting GitHub and Document360 in Zapier
Follow the below steps to establish a connection between GitHub and Document360:
Step 1: Connecting GitHub
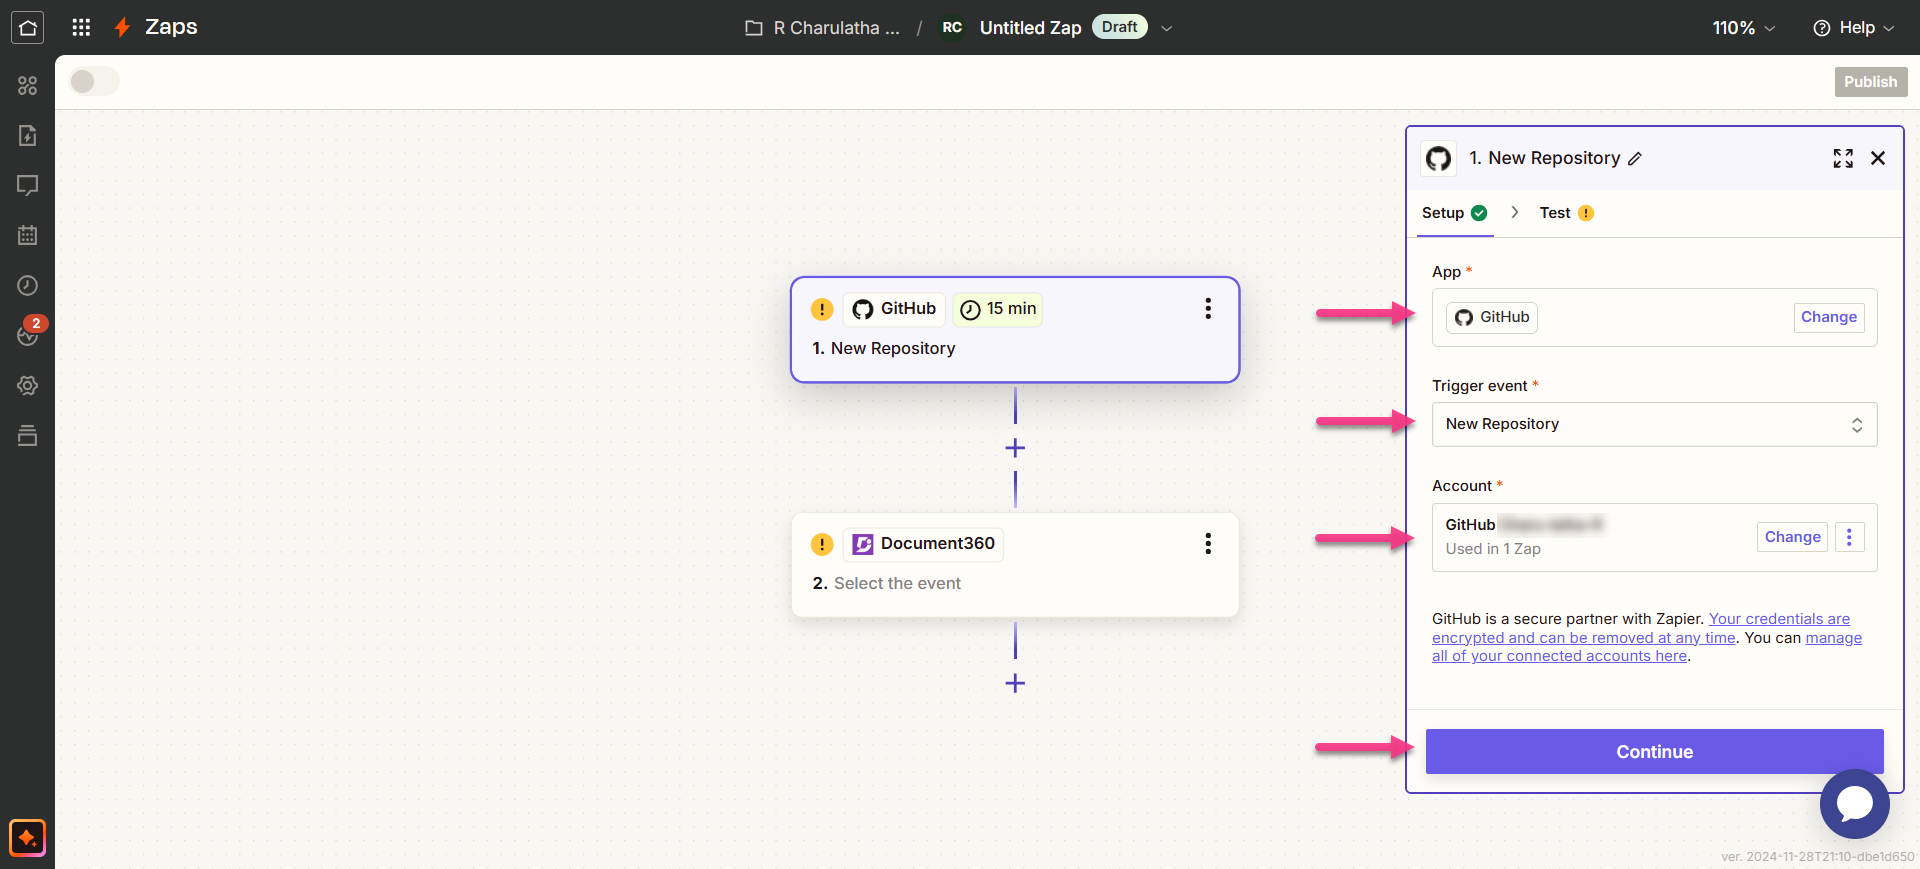
In the Trigger field, choose GitHub.
In the Trigger event field, select the required Event to trigger in the GitHub.
If you wish to configure a different app later, you can do that by clicking on Change.
Click the Account field, and a Sign-in panel will appear.
Enter your sign-in credentials and click Authorize Zapier.
Choose the desired folder and click Continue.
Zapier runs a test to make sure the trigger is correctly configured.
Step 2: Connecting Document360
In the Action field, choose Document360.
On the Setup panel that appears on the right, select a desired event in the Event field.
Click the Account field and a Sign-in panel appears.
Enter your sign-in credentials and click Allow.
To generate the API token from the Document360 portal,Navigate to Settings () in the left navigation bar in the Knowledge base portal.
In the left navigation pane, navigate to Knowledge base portal > Extensions > Team collaboration.
On the Zapier extension tile, click Connect.
Click the Copy () icon to copy the token.
Head back to the Zapier panel and paste the API token in the field.
Click Yes, Continue to Document360.
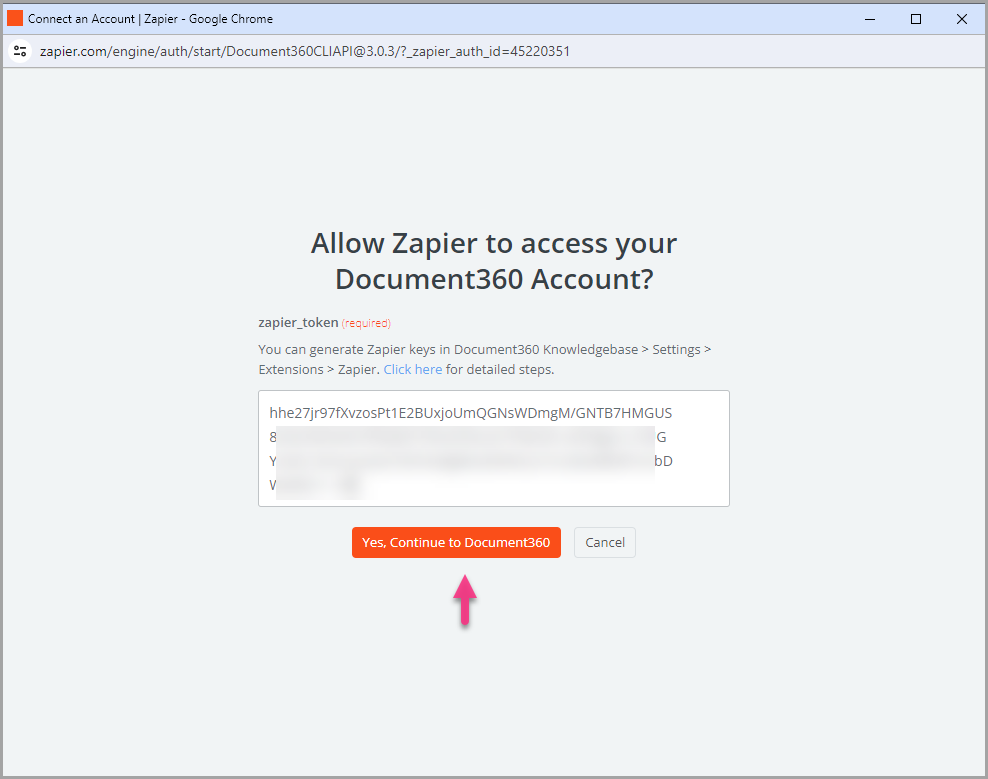
You can find the connected Document360 project on the Connect Document360 account page.
If you wish to configure a different account later, you can do that by clicking on Change.
Click Continue.
Step 3: Customize Zap
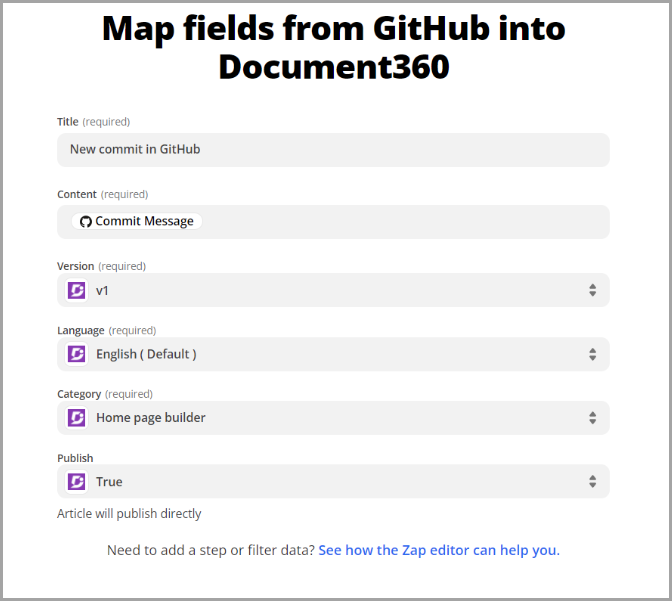
Map all the required fields:
Title: The default selection is New Commit in GitHub. However, you can choose from various options based on your business requirements.
Content: The default selection is Commit Message, but you can select other options depending on your needs.
Version: Select the workspace in your knowledge base project where the article should be created.
Language: Choose the language for the article within the selected workspace.
Category: Select the category under the chosen language where the article will be created.
Publish: Set to True to publish the article immediately or False to save it as a draft.
Once done, click Continue. The button enables only when all the fields are filled.
Step 4: Test Zap
In the test section, click Send Test.
If it is successful, you will get the message ‘Test Article sent! Check your Document360 account to view it’.
In your Document360 Knowledge base portal, you'll find the article titled ‘New commit in GitHub’, located in the folder you previously selected.
Head back to the Zapier setup panel and click Next.
Once done, click Publish.
Turn on Zap
To turn on a Zap once it is tested and published, follow the below steps:
After testing the Zap, review or edit the settings before turning on the Zap.
You can edit the settings configured on the GitHub trigger and the corresponding action of the new article in Document360.
You will get a success message stating Your Zap is on. You can click on the Manage your Zap button to go to your Zap overview page.
Zap overview
Create articles in Document360 from new GitHub commits
You can view and edit the information about the Zaps created on the Zap overview page.
Deleting a Zap
To delete a Zap that you have created,
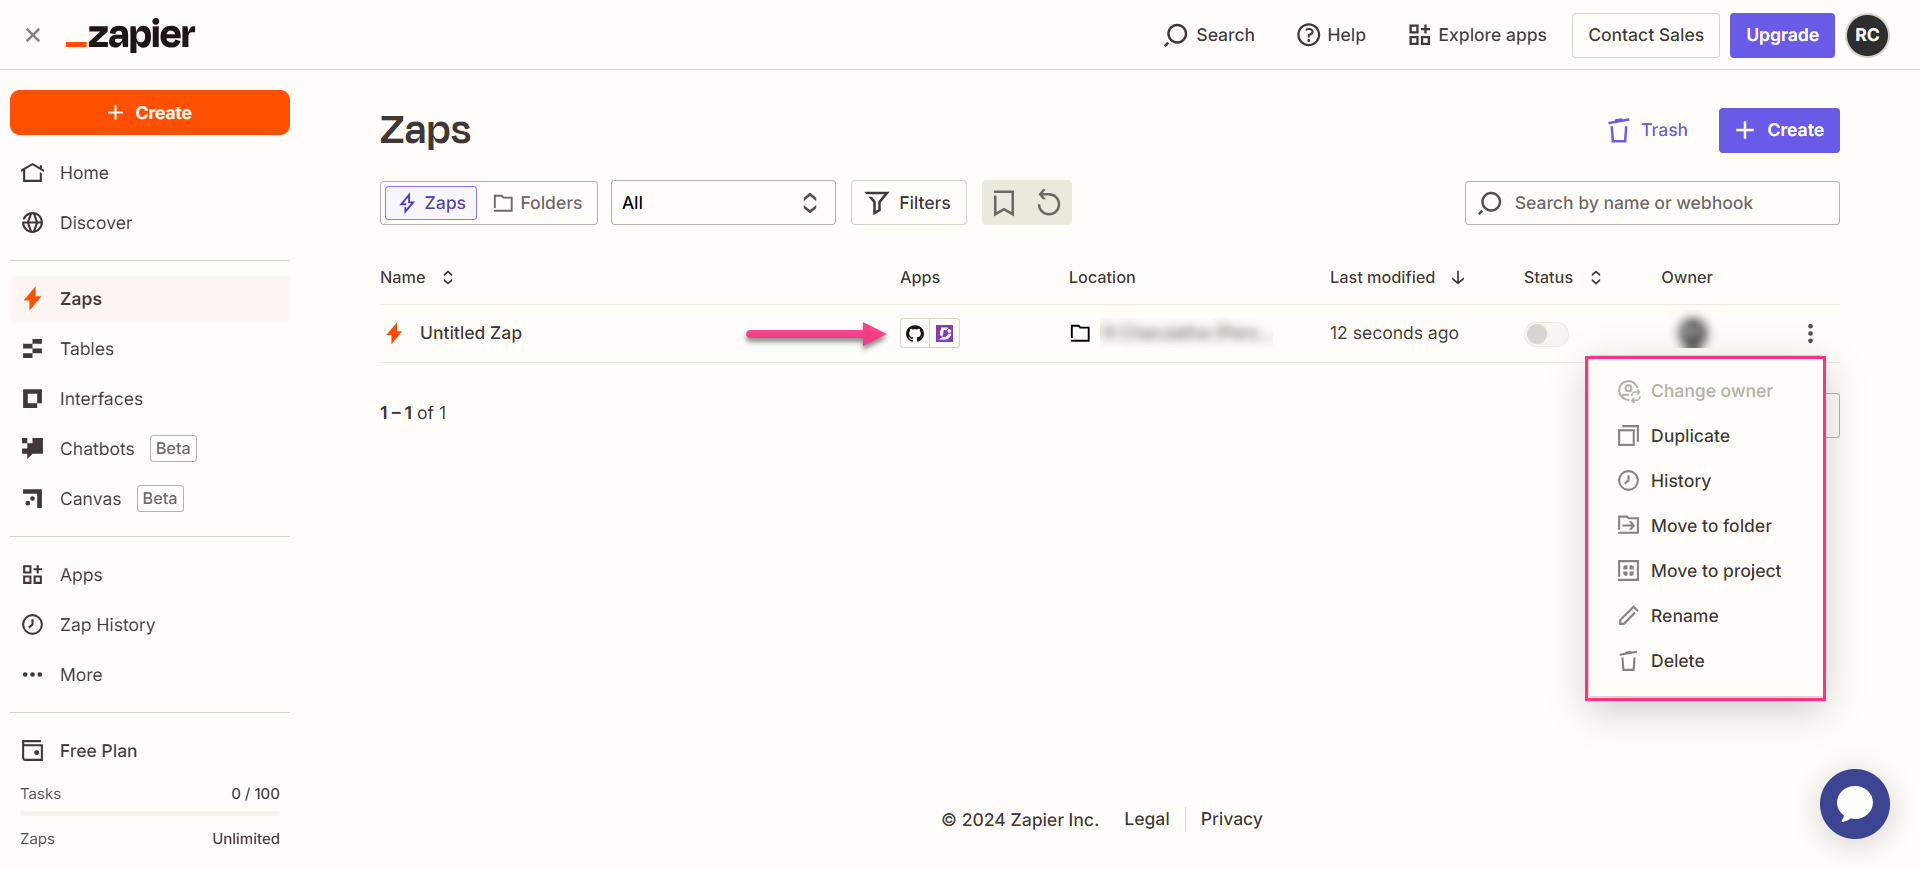
Navigate to the Zapier dashboard. On the overview page, a list of all existing Zaps will be displayed.
Click the Zap actions () icon to the right of the desired Zap and click Delete.
The selected Zap will be deleted.