Het vervangen van een bestand in Document360 Drive overschrijft de inhoud met een nieuwe versie, terwijl dezelfde bestandsnaam en CDN-URL behouden blijven. Elk artikel of elke pagina die naar het bestand verwijst, weerspiegelt automatisch de bijgewerkte inhoud zonder dat er links hoeven te worden gewijzigd.
Waarom bestanden vervangen
Je moet mogelijk een bestand vervangen wanneer:
- Verouderde visuals bijwerken — Een screenshot, diagram of afbeelding moet een UI- of productwijziging weergeven.
- Fout corrigeren — Het verkeerde bestand is geüpload en moet worden vervangen zonder opnieuw te linken tussen artikelen.
- Hergebruikte assets verversen — Een bestand dat over meerdere artikelen of pagina's wordt gebruikt, heeft één update nodig die overal waar het verschijnt wordt verspreid.
Voordat je begint
- Het vervangende bestand moet hetzelfde bestandstype hebben als het origineel (bijvoorbeeld een PNG kan alleen worden vervangen door een PNG).
- Er kan maar één bestand tegelijk worden vervangen.
- Een bestand vervangen is onomkeerbaar. De originele inhoud wordt permanent overschreven en kan niet worden hersteld tenzij je een offline back-up hebt. In tegenstelling tot verwijderde bestanden zijn overschreven bestanden niet beschikbaar in de Schijfprullenbak.
- Na vervanging kan het bijgewerkte bestand tot 20 minuten duren voordat het op alle artikelen en pagina's waarop het wordt gebruikt wordt weerspiegeld.
Hoe vervang je een bestand
Er zijn twee manieren om een bestand in Drive te vervangen:
- Vervang een bestand uit het contextmenu
- Vervang een bestand uit het paneel met bestandsdetails
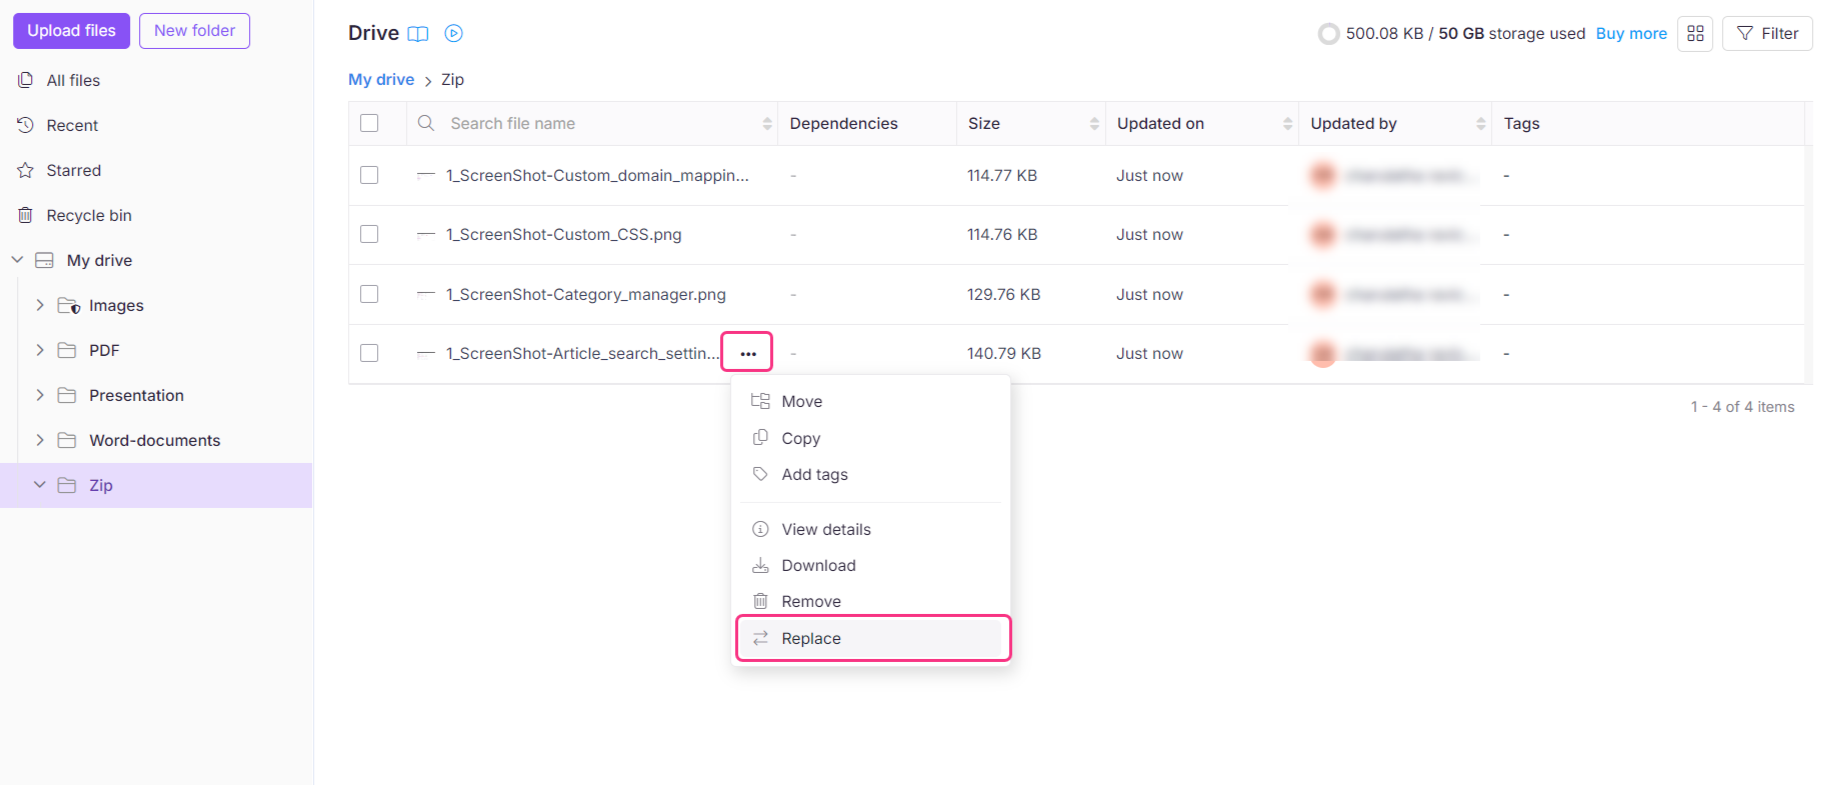
Vervang een bestand uit het contextmenu van het bestand.
-
Klik op het Drive () icoon in de linker navigatiebalk.
-
Navigeer naar de map waar het bestand dat je wilt vervangen zich bevindt.
-
Beweeg je muis over het gewenste bestand en klik op het More ()-icoon.
-
Klik op Vervangen.
Je lokale bestandsbeheerder zal openen.
-
Selecteer het nieuwe bestand om het bestaande bestand te vervangen en klik op Openen.
Het nieuwe bestand wordt bijgewerkt in de Drive.
Vervang een bestand uit het paneel met bestandsdetails
- Klik op het Drive () icoon in de linker navigatiebalk.
- Navigeer naar de map waar het bestand dat je wilt vervangen zich bevindt.
- Beweeg je muis over het gewenste bestand en klik op het More ()-icoon.
- Klik op Bekijk details.
- Aan de rechterkant van het paneel opent een paneel met bestandsdetails .
- Klik op het Vervangen ()-icoon.
- Klik in het venster Bestand Vervangen op Bestand Vervangen.
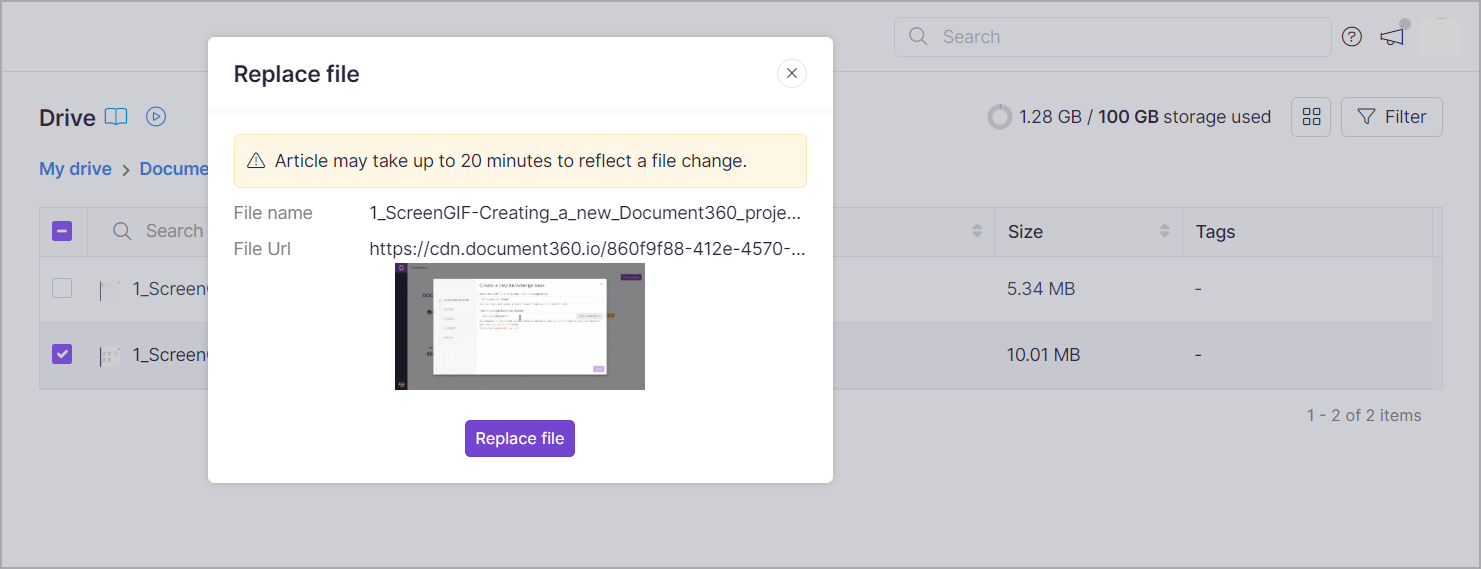
Je lokale bestandsbeheerder zal openen.
-
Selecteer het nieuwe bestand om het bestaande bestand te vervangen en klik op Openen.
Het nieuwe bestand wordt bijgewerkt in de Drive.
Het vervangen van een bestand overschrijft permanent de inhoud. Het origineel kan niet worden teruggehaald uit de Schijfprullenbak of ergens anders in Document360 — alleen een offline back-up kan het herstellen. Zorg dat je een lokale kopie hebt voordat je verder gaat.
Het vervangen bestand behoudt zijn oorspronkelijke bestandsnaam en CDN-URL. Updates kunnen tot 20 minuten duren voordat ze verschijnen in alle artikelen en pagina's waarop het bestand wordt gebruikt.
Best practices
- Maak een back-up voordat je vervangt — Download het originele bestand voordat je het vervangt, vooral als het over meerdere artikelen wordt gebruikt. Dit is je enige hersteloptie als de vervanging per ongeluk is gedaan.
- Controleer het bestandstype voordat je het uploadt — De vervanging moet overeenkomen met het originele bestandstype. Proberen een ander type te uploaden werkt niet.
- Plan voor de vertraging in de verspreiding — Wijzigingen duren tot 20 minuten om overal zichtbaar te worden. Vermijd het vervangen van een bestand direct voor een geplande publicatie of review, omdat beoordelaars de oude versie dan nog steeds kunnen zien.
- Gebruik vervang in plaats van opnieuw uploaden — Als een bestand al gelinkt is in artikelen, is vervangen altijd beter dan het uploaden van een nieuw bestand en opnieuw linken, omdat de URL hetzelfde blijft.
FAQ
Is er een manier om de geschiedenis of eerdere versies van het bestand te zien voordat je het vervangt?
Momenteel geeft Document360 geen versiegeschiedenis van bestanden in de Drive. Het wordt aanbevolen om back-ups van belangrijke bestanden te maken voordat je ze vervangt.
Wat gebeurt er met het oude bestand nadat ik het heb vervangen?
De inhoud van het oude bestand is permanent overschreven en kan niet worden hersteld. Zorg ervoor dat je belangrijke bestanden back-uppt voordat je ze vervangt.
Kan ik bestanden in bulk vervangen in de Drive?
Je kunt geen bulk-vervanging van Drive-bestanden maken. Vervanging kan alleen worden uitgevoerd aan individuele bestanden. De bulkbewerkingen die beschikbaar zijn wanneer je de selectievakjes van meerdere bestanden selecteert zijn Verplaatsen, Kopiëren, Tags toevoegen, Downloaden en Verwijderen.