You can control access to your knowledge base content at the project, workspace, or language level. users and groups can have access enabled or restricted at each workspace or language level based on your requirements.
Managing content role & access
To manage content role and access,
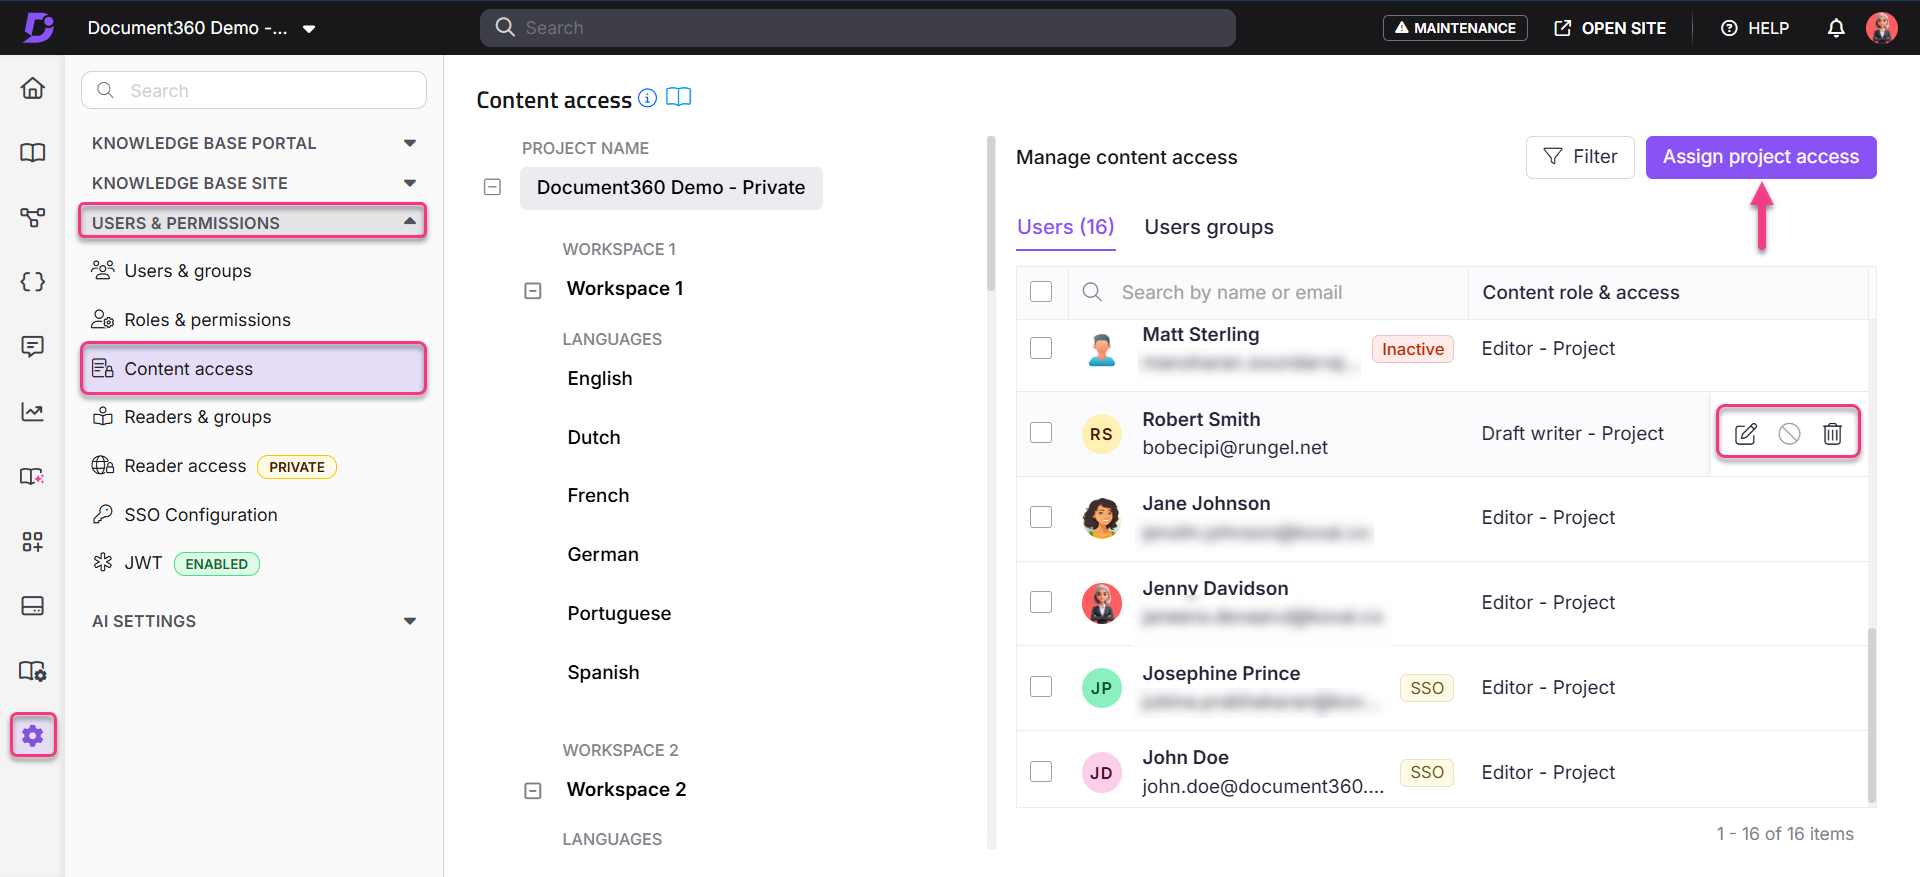
Navigate to Settings () > Users & permissions in the left navigation bar in the Knowledge base portal.
In the left navigation pane, navigate to Content access.
You can view all the workspaces and languages available in the project.
The Manage content access section is located on the right side of the screen. It displays the existing content access settings for your project's users and user groups. From here, you can review and manage access permissions to ensure the right users have the appropriate level of access.
In the Manage content access section, hover over the users or groups, and three icons appear:
Edit (): Modify the content access for a user and click the Save () icon to apply changes or Cancel () to go back.
Deny (): Restrict access to specific content for the user.
Remove (): Delete the user from the access list.
Select the checkboxes next to users to apply bulk actions such as edit, deny, or remove.
Click the required icon to perform the respective function.
You can filter the user data available on this page by Project, Workspace, and Language using the Filter option at the top right, or by clicking the tree-view workspace and language selection on the left.
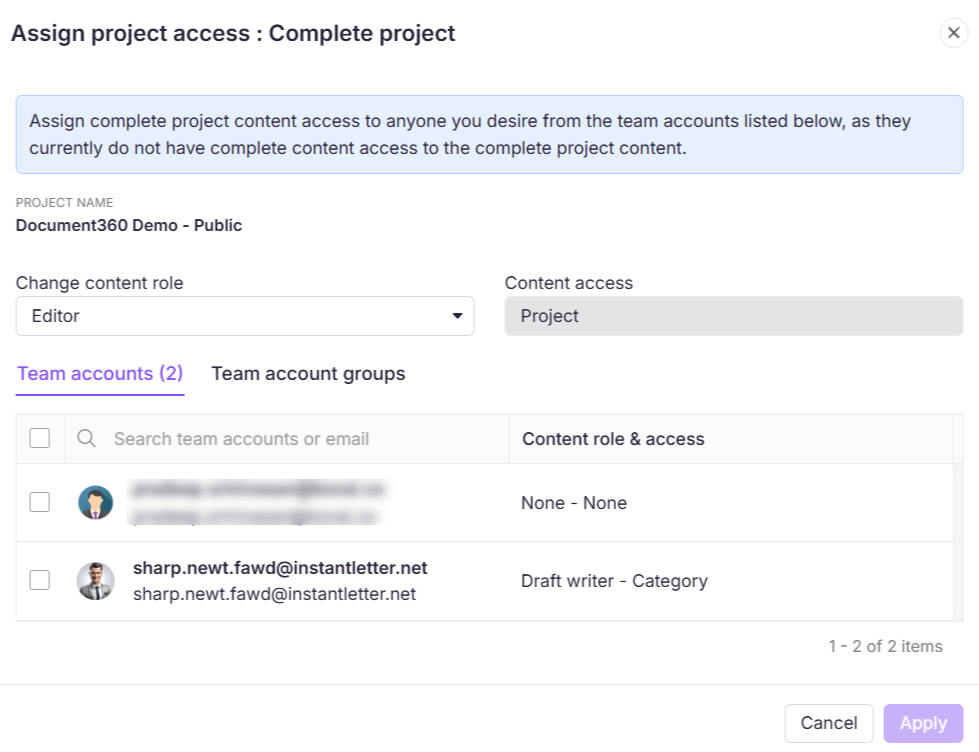
Click the Assign project access button to assign complete project-level content access to any existing users and user groups.
The Assign project access: Complete project dialog appears.
Click the Change content role dropdown to choose one of the content roles: Editor, Draft writer, and Reviewer.
The Content access field will be set to the Project level by default.
NOTE
If a user belongs to multiple reader groups with access to the same content, and one of those groups has restrictions, the restriction will take precedence. This means the user will be denied access to the content, regardless of the permissions granted by other reader groups.
Block inherited accounts
The Block Inherited Accounts toggle becomes visible only when you select a specific workspace and language from the tree-view on the left.
When enabled, this toggle prevents all inherited and future users from accessing the selected workspace or language. However, your user will retain access since you performed the block inheritance.
For more information, read the article on Block inheritance.
Understanding permission precedence
Document360 determines a user’s effective content access by evaluating permissions across different hierarchy levels and sources (individual vs. group). The system applies a clear precedence model to ensure consistent and predictable outcomes.
Permission hierarchy
Permissions are inherited in this order (from the highest level to the lowest):
Project → Workspace → Language → Category → Article
Permissions set at a higher level automatically apply to all lower levels.
If you set a permission directly at a lower level, it overrides the inherited permission.
For example, if User A is given Editor permission at the Language level (English), that Editor access automatically applies to all Categories and Articles under English because permissions set at a higher level are inherited. However, suppose you later assign Read permission to User A at a specific Category level within the same English language. In that case, the Category-level permission will apply to that Category and all its Articles. This is because a lower-level permission always overrides any inherited permissions.
FAQ
If a reader has two accounts with the same email ID, one with the standard login and the other with SSO credentials, will their content access be collapsed or overridden?
No, if a reader has two accounts with the same email ID, one with the standard login and the other with SSO credentials, each account will maintain its own content access determined by the assigned roles and permissions.
Why is a newly created workspace not appearing in the content access settings for user groups?
If you've recently created a workspace and it's not appearing in the content access dropdown when assigning roles or permissions to user groups, it is likely because the workspace does not have any published articles yet.
Workspaces without published content are temporarily excluded from the content access list, as there is no content to assign access to.
To resolve this:
Publish at least one article in the new workspace.
Once published, the workspace will appear in the content access dropdown for assigning roles and permissions.
If the issue persists even after publishing an article, please contact the Document360 support team for further assistance.
If I grant access to a root category in the Knowledge base portal, will users automatically get access to its subcategories?
Yes, by default, access to a root category is inherited by all its subcategories. If you want to restrict access to specific subcategories, you must manually deny access by navigating to the subcategory, selecting More (⋯) > Security > Knowledge base portal (Access control), and updating the access settings accordingly.
Why is a user unable to access a category even though access is granted?
A user may belong to multiple groups with different access permissions. If any group assigned to the user has restricted access to a category, the restriction will take precedence. As a result, the user will not be able to view the content, even if access is granted through another group.