Available add-ons by plan
Document360 is designed to scale with your projects, offering a range of add-ons to enhance your documentation efforts. Across the Professional, Business, and Enterprise plans, you can purchase the following add-ons:
Workspaces
Languages
Translation credits (1 million characters)
Storage (1 unit = 50 GB)
Team accounts
Readers (1 unit = 5000 readers)
Limit for PDF export (1 unit = 2GB)
Floik AI Capture bundle
For Business plan users, optional add-ons include:
Crowdin extension
Phrase extension
Enterprise plan users can also purchase
Salesforce extension
Additional sandbox environment
These add-ons ensure enhanced flexibility and robustness in your knowledge base setup.
NOTE
To purchase add-ons, you must have a saved card on your Document360 account. To add a card, go to Settings () > Knowledge base portal > Billing, and select the Payment information tab.
Purchasing add-ons
To purchase add-ons,
Navigate to Settings () in the left navigation bar in the Knowledge base portal.
In the left navigation pane, navigate to Knowledge base portal > Billing, where the My plan tab is selected by default.
Click Purchase add-on.
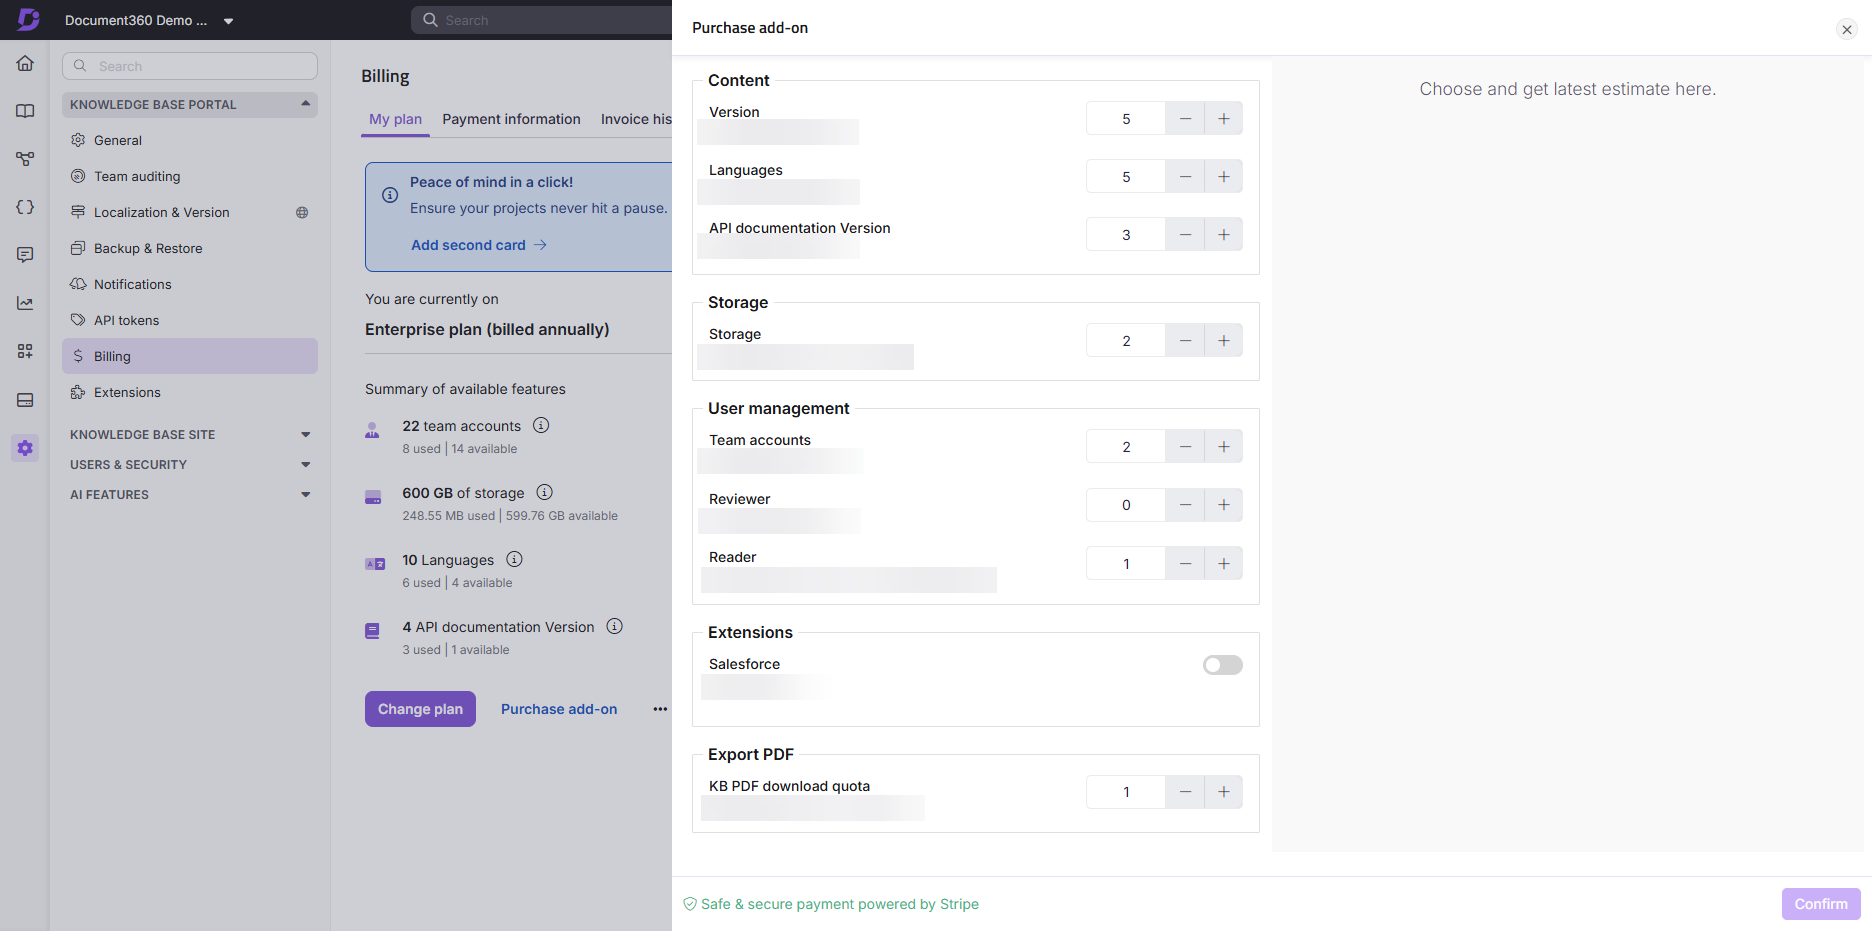
Select the required add-ons using the + and - buttons.
Click Confirm payment to make a payment.
NOTE
Customers on the legacy plan can only purchase the following add-ons: Projects, Workspaces, Languages, Translation Credits, Storage, Team Accounts, and Readers. This is available exclusively for online customers. Offline customers can contact our dedicated customer support team for further assistance.
Floik AI add-on
Floik AI is an optional add-on that gives your team advanced content creation tools for your knowledge base. With Floik AI, you can:
Pricing
Floik AI is available as an add-on across all plans. For the latest pricing details, contact the Document360 support team.
Trial access
You can try Floik AI before purchasing to evaluate its features and benefits.
Trial projects: If your project is currently on a Document360 trial, Floik AI is included as part of that trial. You will have full access to all Floik AI features for 14 days.
Paid projects: If you are already on a paid plan, you can activate a Floik AI trial separately. This gives you 7 days of unlimited access to all Floik AI features.
When the trial ends, your Floik AI content is preserved. However, some features are restricted until purchase. See the table below for details of the restrictions:
Floik AI feature | Availability on the knowledge base portal | Availability on the knowledge base site |
|---|---|---|
Step by step guide | Visible, not editable | Not visible |
Screen capture | Editable as an image | Visible |
Video capture | Visible, not editable | Not visible |
Interactive demos | Not interactive, not editable | Not visible |
Step-by-step guides remain visible, but they can no longer be edited.
Screen captures remain fully editable even after the trial ends.
Videos remain available for viewing only.
Interactive demos remain available for viewing only.
If you start a retrial, all of your Floik AI content becomes editable again for the duration of the retrial period.
NOTE
Floik AI features display badges such as New, Try, Buy, or Lock. These indicate whether a feature is newly available, currently in trial, requires purchase, or is restricted after the trial has ended.
Permissions
Access to Floik AI depends on your project role:
Project owners and admins with billing access can activate the Floik AI trial or request the add-on directly.
Contributors can start the Floik AI Capture trial and use its features if the add-on is active in the project, but they cannot request to purchase the add-on.
NOTE
Custom roles with billing access can also request to purchase the Floik AI Capture add-on.
This ensures that billing and purchase decisions remain with authorized team members, while contributors still benefit from using the features.
FAQ
Can I use only the AI search features without turning on all Eddy AI options?
If you are mainly looking to use features like AI assistive search, dynamic related article suggestions, AI summaries, and source control with the Manage sources module, these are available as part of the AI search suite. Depending on your current plan, there may be flexible options to help you access those features independently. Reach out to our support team to learn more.
What happens to my Floik AI content if I do not purchase the add-on after the trial?
Your content is preserved in your knowledge base portal, but it will not be visible in the knowledge base site. Editing is not available for step by step guides, videos, and interactive demos until you purchase Floik AI. Screen captures remain editable as images in the portal.